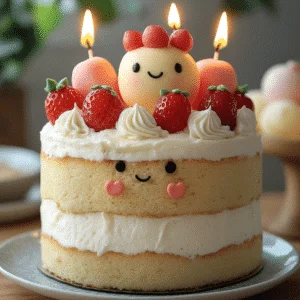
Jellycat Cake
A cute and cuddly Jellycat Cake, inspired by the soft and plush Jellycat toys! This cake is perfect for baby showers, birthdays, or any whimsical celebration. It features a soft sponge cake with fluffy buttercream and fondant decorations to bring a Jellycat plushie to life.
Equipment
- Mixing bowls –
- Electric mixer
- 6-inch or 8-inch round cake pans (two or three layers)
- Cooling rack
- Offset spatula
- Piping bags with star tips
- Fondant rolling pin
- Food-safe paintbrush
- Edible food colors (black, pink, brown)
Ingredients
For the Cake:
- 2 ½ cups all-purpose flour
- 2 teaspoons baking powder
- ½ teaspoon baking soda
- ½ teaspoon salt
- 1 cup unsalted butter softened
- 1 ¾ cups granulated sugar
- 4 large eggs
- 1 tablespoon vanilla extract
- 1 cup buttermilk
- Gel food coloring pastel pink, pastel blue, beige, or gray – depending on Jellycat theme
For the Buttercream Frosting:
- 1 ½ cups unsalted butter softened
- 4 cups powdered sugar
- 2 teaspoons vanilla extract
- 3-4 tablespoons heavy cream or milk
- Gel food coloring pastel shades to match Jellycat theme
For Decorations:
- 6 oz fondant white, black, and pastel color of choice
- Edible black paint or food marker for facial details
- Edible glitter optional
Instructions
Step 1: Bake the Cake
- Preheat oven to 350°F (175°C). Grease and line two or three 6-inch or 8-inch round cake pans.
- In a bowl, whisk together flour, baking powder, baking soda, and salt.
- In another bowl, beat butter and sugar until light and fluffy. Add eggs one at a time, mixing well.
- Stir in vanilla extract.
- Alternately add dry ingredients and buttermilk, mixing until smooth.
- Add a small amount of gel food coloring (pastel pink, blue, beige, or gray) to create a soft Jellycat color theme.
- Divide batter evenly into the cake pans.
- Bake for 30-35 minutes or until a toothpick inserted in the center comes out clean.
- Let cakes cool in pans for 10 minutes, then transfer to a cooling rack.
Step 2: Make the Frosting
- Beat butter until smooth and creamy.
- Gradually add powdered sugar, vanilla, and heavy cream, mixing until fluffy.
- Add pastel food coloring to match your Jellycat theme.
Step 3: Assemble the Cake
- Trim cake layers if necessary for even stacking.
- Spread a thin layer of frosting between each cake layer and stack them.
- Apply a crumb coat (thin frosting layer) and refrigerate for 15 minutes.
- Frost the cake smoothly with pastel-colored buttercream.
Step 4: Create the Jellycat Face & Details
- Ears & Paws: Roll fondant into small rounded ear and paw shapes and attach them to the cake.
- Eyes & Nose: Use black fondant or edible paint to create the signature Jellycat plushie eyes and nose.
- Fur Texture: Use a star piping tip to pipe fluffy buttercream fur around the cake.
- Final Touches: Add edible glitter or shimmer for an extra magical effect.
Step 5: Serve & Enjoy!
- Let the cake set for 10 minutes before slicing.
- Store leftovers in an airtight container in the fridge for up to 3 days.
Notes
- Flavor Variations: Try a chocolate, strawberry, or vanilla sponge to customize the cake.
- Best For: Baby showers, birthdays, plushie-themed parties.
- Storage: Keep in the fridge but allow it to come to room temperature before serving.