

Okay, friends, let’s talk cake! We’re talking about cakes that celebrate the thrill of racing, the roar of the engines, and the taste of a Ferrari. What is the adrenaline of Formula 1?Formula 1 Cake Ideas.Are a total blast. My son was obsessed with F1 and his birthday was coming up. I remember him being the most obsessed. I wanted to do something special. I thought about a regular car cake, but it just didn’t have that WOW factor. What was the idea for a birthday cake inspired by his favorite racing team? What is the look on his face when he saw it? Is it even better than the time I surprised him with that ridiculously oversized cookie? What is that saying? If you’re looking for something more exciting than just another vanilla cake with sprinkles, then you have come to the right place. If you’re in the right place, you are here!
What is a Formula 1 cake?
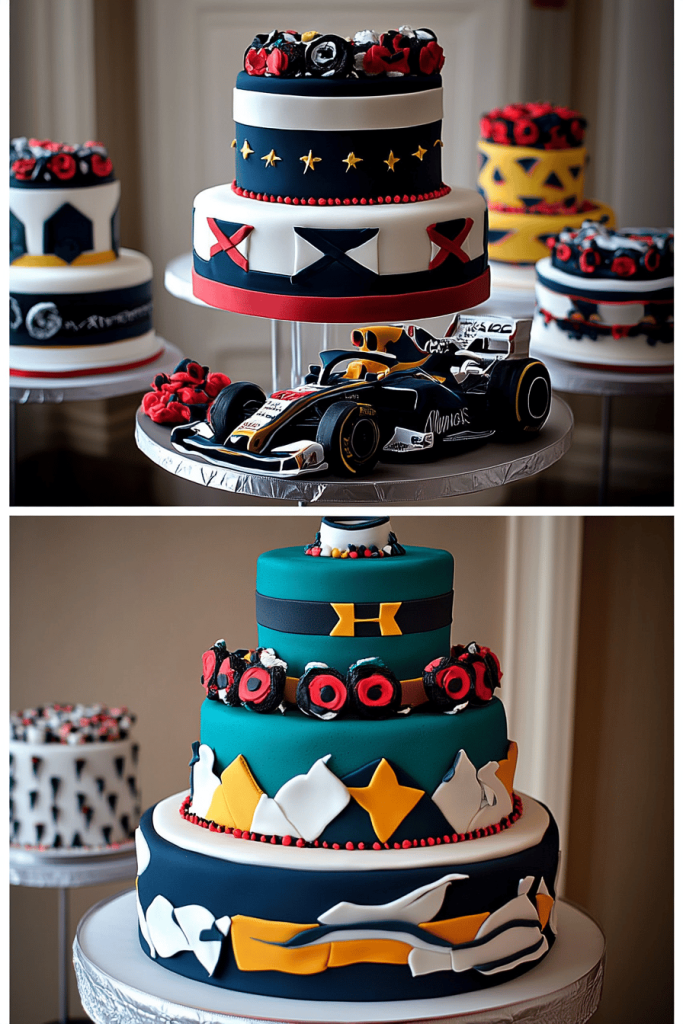
So, what exactly *is* a Formula 1 cake? Think of it as a delicious tribute to the world of motorsport. It’s not just about slapping a race car figurine on top of a regular cake (though you *could* do that!). It’s about capturing the *essence* of Formula 1. This could mean a cake decorated with racing flags, checkered patterns, team logos, or even sculpted to resemble a race track or a specific car. It’s essentially a blank canvas for your creativity, fueled by your love for all things racing. My personal favorite is when the cake design incorporates the colors of a particular team, because it makes it instantly recognizable and adds a real personal touch. It’s way more exciting than a plain old chocolate cake, that’s for sure!
How do I make a Formula 1 cake?
Quick Overview
What is the best way to make your own Homemade Pizza?Formula 1 cakeWhat is the best way to bake a cake? What are the decorations? Think frosting, fondant, edible images, and sprinkles. How do I plan a design ahead of time and break it down into manageable steps? Don’t worry if your outfit doesn’t look perfect. What is the point of having fun with Formula 1? What are the best ways to eat a checkered flag?
Ingredients
For the main cake:
* Your favorite cake mix or recipe (chocolate, vanilla, red velvet – you name it!)
* Ingredients as called for in your Cake Recipe (eggs, oil, water, etc.) *
* Consider adding almond extract for a sophisticated twist (trust me, it’s amazing!).
For the Frosting: What is the
* Vanilla buttercream frosting (store-bought or homemade) * Chocolate cake (made with
* Food coloring (black, white, red, yellow – depending on your design): *Food coloring can be used in food.
* Icing sugar, if making your own frosting, you can control the sweetness.
* Consider using gel food coloring for more vibrant colors.
For the Decorations:
* Fondant (black, white, colored to match your favorite team)
* Edible markers (for drawing details)
* Edible images of racing cars, logos, or drivers (optional)
* Checkered flag ribbon or edible checkered pattern.
* Sprinkles (black, white, or team colors)
How do I follow step
Step 1: Preheat & Prep Pan
Preheat your oven to 350°F (175°C). Grease and flour your cake pan(s). What is the best way to prevent sticking? I always line the bottom with parchment paper for extra insurance. Trust me, it’s saved me from cake disaster more times than I can count. Set aside.
Step 2: Mix Dry Ingredients
If you’re making a cake from scratch, whisk together your dry ingredients (flour, sugar, baking powder, etc.) and set aside. In a large bowl, combine the powder, salt, pepper, and pepper. Make sure to get rid of any lumps! This ensures a smooth and even cake texture. I always sift my flour for the best results.
Step 3: Mix Wet Ingredients
In a separate bowl, combine your dry ingredients (eggs, oil, water, extract). Don’t overmix: over mixing can lead to a hard cake. I like to use room temperature eggs for a better emulsion.
Step 4: Combine
Gradually add the wet ingredients to the dry ingredients, mixing until just combined. What are the best ways to avoid overmixing your food? Overmixing causes gluten to develop in the flour, resulting in a dense cake. I always stop mixing when I no longer see streaks of flour. I can’t eat it.
Step 5: Bake
What is the best way to bake a cake for 30 minutes? When inserted into the center comes out clean. How long does it take to bake a cake? I always start checking for doneness a few minutes before the recommended time.
Step 6: Cool & Glaze
Let the cake(s) cool in the pan for 10 minutes before inverting them onto a wire rack to cool completely. How do you prevent a cake from sticking to the pan? I always let my cakes cool completely before frosting, or the frosting will melt.
Step 7: Frosting
Frost cake(s) with your choice of frosting. How do I make frosting? Divide the frosting into separate bowls and tint each bowl with food coloring. I like to use piping bags for a professional look.
Step 8: Decorating
Decorate the cake with edible images, checkered flag ribbon, and sprinkles. Have fun! Get creative! I always start with the larger decorations first and then fill in the gaps with smaller details.
Step 9: Slice & Serve
Slice and serve your food.Formula 1 cakeEnjoy the sweet taste of victory! I like to serve my cake with vanilla Ice Cream or a dollop of whipped cream.
What should I serve it with?
These Formula 1 Cake Ideas.Aren’t they amazing on their own, but let’s talk about making them special?
For a Race Day Party: Serve slices with mini bottles of sparkling cider or juice for a celebratory touch. Add some themed snacks like “fuel” (energy bars) and “tire” (donut) bites. This is a lifesaver for a themed birthday!
For a Casual Celebration: Pair the cake with a simple scoop of vanilla Ice Cream or a dollop of whipped cream. A cup of coffee or tea is the perfect accompaniment.
For a Kid’s Birthday: Decorate the serving plate with racing flags or small toy cars. Serve with colorful straws and fun racing-themed napkins.
My family *always* asks for this cake with a side of homemade lemonade. It’s the perfect sweet and tart combination!
Top Tips for Perfecting Your Formula 1 Cake
Okay, friend, let’s get down to the nitty-gritty. I’ve made *a lot* of Formula 1 cakes over the years, and I’ve learned a few things along the way.
Fondant Finesse: Knead your fondant well before rolling it out to prevent cracking. A little bit of shortening can help keep it smooth and pliable. I always dust my work surface with powdered sugar to prevent sticking.
Frosting Perfection: Make sure your frosting is the right consistency. If it’s too thin, it will slide right off the cake. If it’s too thick, it will be difficult to spread. I always chill my frosting for a few minutes before using it to stiffen it up.
Edible Image Expertise: When applying edible images, make sure the frosting underneath is smooth and even. Gently press the image onto the frosting, starting from the center and working your way outwards. I always use a clean, dry spatula to smooth out any air bubbles.
Color Confidence: Use gel food coloring for more vibrant colors. Liquid food coloring can water down your frosting or fondant. I always add food coloring a little bit at a time until I achieve my desired color.
Baking Brilliance: Don’t overbake your cake! Overbaking will result in a dry and crumbly cake. I always use a toothpick to check for doneness. If the toothpick comes out clean, the cake is done.
Creative Customization: Don’t be afraid to customize these Formula 1 cake ideas with specific details relevant to the recipient, a significant race, or a racing team’s colors. That extra personal touch makes it memorable.
Trust me on this one: these tips will take your cake game to the next level!
Storing and Reheating Tips
Alright, let’s talk about keeping your masterpiece fresh!
Room Temperature: A frosted Formula 1 cake can sit at room temperature for up to 2 days, as long as it’s covered. I always use a cake dome or an airtight container to prevent it from drying out.
Refrigerator Storage: For longer storage, refrigerate the cake for up to a week. Wrap it tightly in plastic wrap or place it in an airtight container. This will prevent it from absorbing any odors from the fridge. I always let my cake come to room temperature before serving for the best flavor.
Freezer Instructions: You can also freeze your cake for up to 2-3 months. Wrap it tightly in plastic wrap and then in aluminum foil. Thaw it overnight in the refrigerator before serving. I always add the glaze after thawing to keep it fresh.
Pro-tip: If you’re freezing individual slices, wrap them separately to prevent them from sticking together.
Frequently Asked Questions
Final Thoughts
So there you have it, my friends! Formula 1 cake ideas that are sure to rev up any celebration. Whether you’re a seasoned baker or a complete beginner, these cakes are a fun and creative way to show your love for the sport. The best part? You get to eat your creation at the end! If you loved this, I think you would also love my cake decorating ideas. I can’t wait to hear how yours turns out! Don’t forget to leave a comment below and share your photos. Happy baking, and may your cake always be a winner!
5 Thrilling Formula 1 Cake Ideas for the Ultimate Race Fan’s Birthday!
Ingredients
Cake
- 2.5 cups All-purpose flour
- 2 cups Granulated sugar
- 0.75 cup Unsweetened cocoa powder
- 1.5 teaspoons Baking powder
- 1.5 teaspoons Baking soda
- 1 teaspoon Salt
- 1 cup Buttermilk
- 0.5 cup Vegetable oil
- 2 large Eggs
- 2 teaspoons Vanilla extract
- 1 cup Hot water
Frosting
- 1 cup Unsalted butter softened
- 3 cups Powdered sugar
- 0.25 cup Milk
- 1 teaspoon Vanilla extract
Instructions
Cake Preparation
- Preheat oven to 350°F (175°C). Grease and flour two 9-inch round cake pans.
- In a large bowl, whisk together flour, sugar, cocoa, baking powder, baking soda, and salt.
- Add buttermilk, oil, eggs, and vanilla to the dry ingredients. Beat with an electric mixer on medium speed for 2 minutes.
- Gradually add hot water to the batter, mixing until just combined. The batter will be thin.
- Pour batter evenly into prepared pans. Bake for 25-30 minutes, or until a wooden skewer inserted into the center comes out clean.
- Let cakes cool in pans for 10 minutes before inverting onto a wire rack to cool completely.
Frosting and Assembly
- In a large bowl, beat butter with an electric mixer until light and fluffy.
- Gradually add powdered sugar, beating until smooth. Add milk and vanilla extract and beat until light and fluffy.
- Once cakes are completely cooled, level them if needed. Place one cake layer on a serving plate and spread with frosting. Top with the second cake layer and frost the entire cake.
- Decorate with Formula 1 themed decorations as desired.
Notes
Featured Comments
“Impressed! Clear steps and turned out amazing results. Perfect for busy nights.”
“New favorite here — perfect for busy nights. crowd-pleaser was spot on.”
“Super easy and turned out amazing! My family asked for seconds. Saving this one.”
“This sweet treat was absolutely loved — the fresh really stands out. Thanks!”
“Made it tonight and wow — family favorite! Will definitely make 5 Thrilling Formula 1 Cake Ideas for the Ultimate Race Fan’s Birthday! again.”
“Packed with flavor and so simple. Exactly what I wanted from 5 Thrilling Formula 1 Cake Ideas for the Ultimate Race Fan’s Birthday!.”


