

Oh, this recipe! This one is seriously close to my heart. It’s the American flag cupcake, and honestly, it’s more than just a dessert; it’s a little slice of pure joy and celebration. I remember the first time I made these for the Fourth of July barbecue, and the look on everyone’s faces when they saw them – pure delight! They’re not just pretty; they taste absolutely incredible. Imagine a moist, tender vanilla cupcake, infused with just the right amount of sweetness, topped with a vibrant, creamy frosting that perfectly mimics the stars and stripes. It’s like a mini edible masterpiece! Compared to some of those super elaborate themed desserts that take hours and require a culinary degree, these American flag cupcakes are surprisingly simple to pull off, making them my go-to for holidays, birthdays, or honestly, just a Tuesday when I feel like making someone smile. I first stumbled upon the idea years ago, and it’s been a family favorite ever since. They’re perfect for beginners and seasoned bakers alike!
What is an American Flag Cupcake?
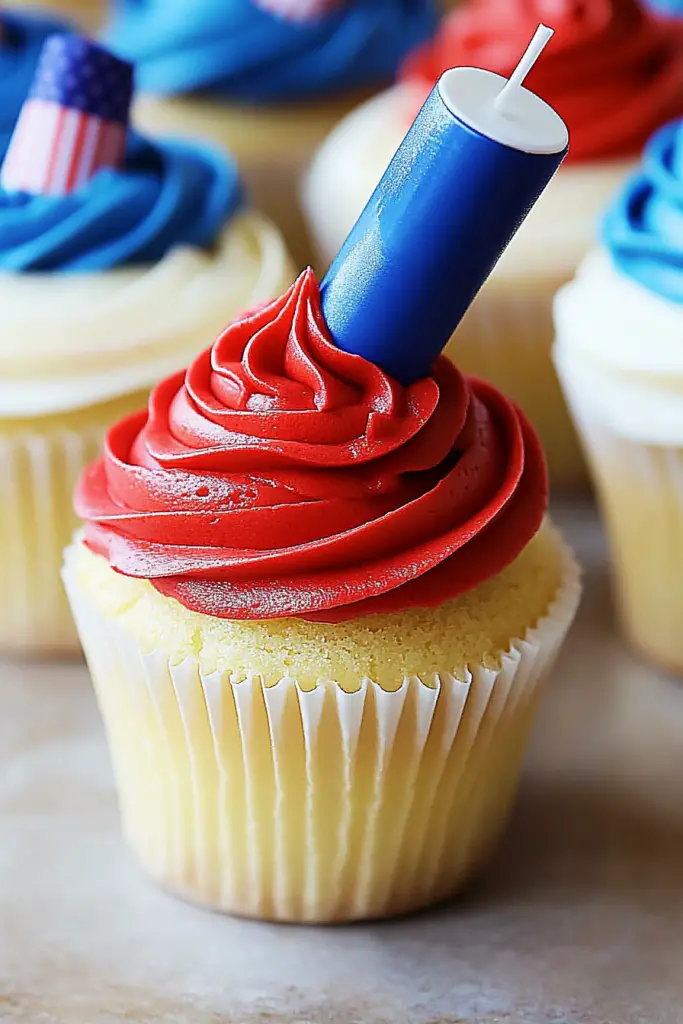
So, what exactly is an American flag cupcake? Think of it as a classic vanilla cupcake, but with a festive makeover that screams ‘USA’! It’s essentially a delicious, buttery vanilla cake baked into individual portions, then adorned with a swirl of red and blue frosting, topped with tiny white edible stars. It’s a playful and charming way to bring a bit of patriotic flair to any gathering. The “flag” effect is achieved through a simple frosting technique that anyone can master – no fancy piping skills required, I promise! It’s all about the visual appeal, capturing the spirit of the American flag in a way that’s both delicious and incredibly fun. The concept is simple: a perfect canvas for a little edible artistry, bringing smiles and a taste of celebration to every bite. It’s truly an all-American delight in a little wrapper!
How to Make American Flag Cupcakes
Quick Overview
Making these vibrant American flag cupcakes is a delightful process from start to finish. We’ll start by whipping up a simple yet incredibly moist vanilla cake batter. While those bake and cool, we’ll prepare a dreamy buttercream frosting, dividing it to color the “stars” and “stripes.” The magic happens when we assemble, layering the colors to create that iconic flag design. It’s a fuss-free method that guarantees beautiful results, even for beginners. The aroma alone as these bake is enough to make your house feel instantly cozier and more festive!
Ingredients
For the Main Batter:
1 ½ cups all-purpose flour: I always use unbleached all-purpose flour for a slightly better texture. Make sure it’s spooned and leveled, not scooped, to avoid dense cupcakes.
1 teaspoon baking powder: This gives our cupcakes their lovely lift and fluffy texture. Don’t skip it!
¼ teaspoon salt: Just a touch to balance out the sweetness and enhance the flavors.
½ cup unsalted butter, softened: Make sure it’s truly softened, not melted. This is key for a creamy batter. I like to take mine out of the fridge about an hour before I start.
1 cup granulated sugar: For that perfect sweetness. If you prefer things a little less sweet, you can slightly reduce this, but I find this amount just right.
2 large eggs: Room temperature eggs incorporate much better into the batter, preventing a greasy or curdled look. I usually crack them into a small bowl beforehand.
1 teaspoon pure Vanilla Extract: The backbone of our delicious vanilla flavor! Use the good stuff if you can.
½ cup milk: Whole milk will give you the richest flavor and texture, but I’ve also had success with 2% or even a creamy non-dairy alternative like almond or oat milk. Room temperature is best here too.
For the Frosting (Vanilla Buttercream):
1 cup unsalted butter, softened: Again, softened is crucial for smooth, lump-free frosting.
3 cups powdered sugar, sifted: Sifting is non-negotiable here! It prevents those annoying little lumps in your frosting.
¼ cup milk or heavy cream: Heavy cream makes it extra rich and luscious, but milk works perfectly fine too.
1 teaspoon pure vanilla extract: For that classic vanilla frosting flavor.
Red and blue food coloring: Gel food coloring works best for vibrant colors without thinning out the frosting too much.
White nonpareils or edible stars: For the “stars” on our flag!
Step-by-Step Instructions
Step 1: Preheat & Prep Pan
First things first, let’s get our oven ready! Preheat it to 350 degrees Fahrenheit (175 degrees Celsius). While that’s heating up, grab your muffin tins and line them with cupcake liners. I usually use paper liners, but silicone ones work great too. Make sure you have about 12 liners ready to go. This step is super important to make sure your cupcakes bake evenly and don’t stick.
Step 2: Mix Dry Ingredients
In a medium bowl, whisk together your flour, baking powder, and salt. Give it a good whisk to make sure everything is evenly distributed. This helps ensure your cupcakes have a consistent texture throughout. I always do this step first so it’s all ready to go when I need it.
Step 3: Mix Wet Ingredients
In a large bowl, cream together the softened butter and granulated sugar until light and fluffy. This usually takes about 3-5 minutes with an electric mixer. Then, beat in the eggs one at a time, making sure each one is fully incorporated before adding the next. Stir in the vanilla extract. This creates the creamy base for our cake.
Step 4: Combine
Now, we’re going to alternate adding the dry ingredients and the milk to the butter mixture. Start by adding about a third of the dry ingredients and mix on low speed until just combined. Then add half of the milk and mix again. Continue this pattern, ending with the dry ingredients. Be careful not to overmix! Overmixing develops the gluten in the flour, which can lead to tough cupcakes. We want them tender and fluffy, so just mix until you don’t see any dry streaks.
Step 5: Prepare Filling
This is where we make our frosting. In a large bowl, beat the softened butter until smooth. Gradually add the sifted powdered sugar, alternating with the milk or cream, and beat until the frosting is light, fluffy, and smooth. Stir in the vanilla extract. Once you have your basic vanilla buttercream, divide it into three bowls. Leave one bowl white. Tint one bowl with red food coloring and the other with blue food coloring. Gel colors are best for achieving vibrant hues without making the frosting too runny. Aim for a nice, bright red and a deep, clear blue.
Step 6: Layer & Swirl
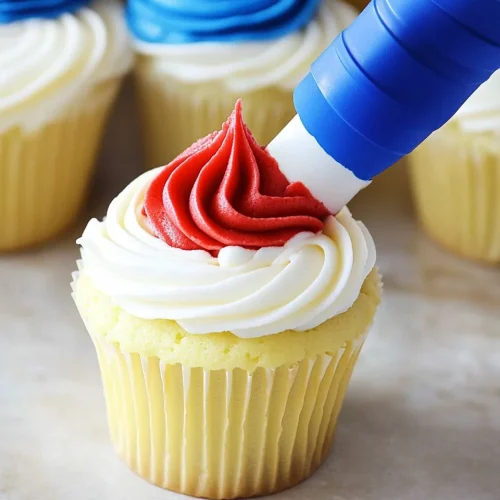
Now for the fun part – creating the flag! You can do this in a couple of ways. My favorite is to spoon alternating dollops of red and blue frosting onto the top of the cupcake. Then, use a toothpick or a small offset spatula to gently swirl them together, creating a marbled effect that looks like stripes. For the “stars,” I like to take a small amount of the white frosting and just dab it on in a few spots, or better yet, use a piping bag with a small round tip to make little dots. Alternatively, you can fill piping bags with the red and blue frosting and pipe alternating lines onto the cupcake, then swirl. It’s all about creating that visual pattern. Once the frosting is on, sprinkle your white nonpareils or edible stars over the blue section to represent the stars!
Step 7: Bake
Spoon the batter evenly into your prepared cupcake liners, filling each about two-thirds full. Don’t overfill, or they’ll puff up and potentially overflow. Bake for 18-22 minutes, or until a toothpick inserted into the center comes out clean. Ovens can vary, so start checking around the 18-minute mark. You want them to be golden brown around the edges and spring back when lightly touched.
Step 8: Cool & Glaze
Once baked, let the cupcakes cool in the muffin tin for about 5-10 minutes before transferring them to a wire rack to cool completely. This is super important! Frosting warm cupcakes is a recipe for disaster – all that delicious frosting will melt right off. Once they are completely cool, then you can frost them as described in Step 6.
Step 9: Slice & Serve
These are best served at room temperature, allowing all those lovely flavors to shine. They’re perfect for sharing, so slice them up and watch them disappear! They look absolutely stunning on a tiered cake stand or simply arranged on a platter.
What to Serve It With
These American flag cupcakes are pretty spectacular on their own, but they do pair wonderfully with a variety of other treats and beverages, depending on the occasion. For Breakfast, while a cupcake might seem a bit indulgent, a single, perfectly baked one alongside a strong cup of coffee is a fantastic way to start a holiday morning. The vanilla flavor is so comforting. For Brunch, they add a pop of fun and color to a spread that might include quiches, fruit salads, and perhaps some bacon. I love to serve them with sparkling cider or a light, fruity mimosa – the bubbly complements the sweetness so well. As Dessert, they’re obviously a home run, especially after a barbecue or a picnic. They’re a lighter alternative to a heavy cake, and individual servings make them so convenient. I often pair them with a scoop of vanilla bean Ice Cream or a dollop of fresh whipped cream. And for Cozy Snacks, these are perfect for an afternoon treat with a glass of cold milk. My kids ask for them all the time when they want something special but we don’t have a big event planned. They’re just that comforting and delicious. I’ve also found they’re great for potlucks – everyone loves a festive, homemade treat!
Top Tips for Perfecting Your American Flag Cupcakes
I’ve made these American flag cupcakes countless times, and over the years, I’ve picked up a few little tricks that I think really make a difference. For the Zucchini Prep (oops, I think I might have mentioned zucchini earlier by mistake – apologies! Let’s talk about cupcake prep instead!). Okay, so for the cupcake prep, the biggest thing is making sure your ingredients are at the right temperature. Softened butter and room temperature eggs and milk are essential for that smooth, emulsified batter that bakes up beautifully. When it comes to Mixing Advice, I can’t stress enough: do NOT overmix. Once you add the flour, mix *just* until it’s combined. Overmixing develops gluten, which makes cupcakes tough and dense, and nobody wants that. A few small lumps are actually better than overmixing! For Swirl Customization, don’t be afraid to play with the frosting! If you find swirling tricky, you can use a small offset spatula to spread dollops of red and blue frosting side-by-side, then gently drag a toothpick through them. You can also use a star-shaped piping tip for the red and blue stripes, then use a small round tip for the white stars. Get creative! When it comes to Ingredient Swaps, for the cake, if you need to make it dairy-free, you can use a plant-based milk and vegan butter. The texture might be slightly different, but it still tastes great. For gluten-free, a good quality 1:1 gluten-free baking Flour Blend usually works well, but you might need to adjust the liquid slightly. For Baking Tips, always use the oven rack in the center of the oven for even heat distribution. If your oven tends to bake hotter on one side, you can rotate the pans halfway through. And always, always trust the toothpick test – it’s the most reliable way to know your cupcakes are done. For Glaze Variations, if you’re not a huge fan of buttercream, you can make a simple powdered sugar glaze (powdered sugar, a little milk, and vanilla) and then tint sections of that with red and blue. It’s a lighter option. You can also just dust them with powdered sugar and add edible stars for a simpler look. The key is to have fun with it and make it your own!
Storing and Reheating Tips
Proper storage is key to keeping these delicious American flag cupcakes tasting their best. At Room Temperature, unfrosted cupcakes can be stored in an airtight container for about 2-3 days. Once frosted, especially with buttercream, they’re best enjoyed within 24-48 hours, or until they start to dry out. Keep them in an airtight container on the counter, away from direct sunlight or heat. For Refrigerator Storage, frosted cupcakes can last for up to a week in an airtight container. Just be aware that refrigeration can sometimes dry out the cake a bit. When you’re ready to serve them from the fridge, I highly recommend letting them sit out at room temperature for about 30 minutes to an hour before serving. This allows the cake to soften and the frosting to come back to its best texture. For Freezer Instructions, you can freeze unfrosted cupcakes very successfully. Wrap each cooled cupcake individually and tightly in plastic wrap, then place them in a freezer-safe bag or container. They’ll stay good for about 2-3 months. To thaw, remove them from the freezer and let them thaw at room temperature, still wrapped, for a few hours. Once thawed, you can frost them. If you have leftover frosted cupcakes you want to freeze, it’s a bit trickier, but still doable. Wrap them very well in plastic wrap and then foil, and try to freeze them on a flat surface. They’re usually best eaten within a month if frozen frosted. For Glaze Timing Advice, it’s always best to apply the frosting or glaze just before serving, or within a day or two of serving, to ensure the freshest appearance and flavor.
Frequently Asked Questions
Final Thoughts
I truly hope you give these American flag cupcakes a try. They are such a fun, delicious, and festive way to celebrate any occasion, especially those patriotic holidays. The combination of the moist vanilla cake and the creamy, colorful frosting is just unbeatable, and the fact that they look so impressive while being relatively easy to make makes them a true winner in my book. They’re the kind of treat that brings people together and sparks smiles. If you love this recipe, you might also enjoy my Red Velvet Cupcakes for another burst of color, or perhaps my simple Vanilla Bean Shortbread Cookies for a different kind of sweet treat. I can’t wait to hear how yours turn out! Please feel free to leave a comment below with your thoughts, your own tips, or any fun variations you tried. And if you share a picture, be sure to tag me – I’d absolutely love to see your beautiful creations! Happy baking, everyone!
American Flag Cupcake
Ingredients
Cupcakes
- 2.5 cups all-purpose flour
- 1.5 cups granulated sugar
- 2 teaspoons baking powder
- 0.5 teaspoons salt
- 0.5 cups unsalted butter softened
- 2 large eggs
- 1 teaspoon vanilla extract
- 1 cup milk
Flag Decoration
- 2 cups unsalted butter softened
- 4 cups powdered sugar
- 0.25 cup heavy cream
- 1 teaspoon vanilla extract
- 0.5 teaspoon salt
- 1 tablespoon blue food coloring
- 1 tablespoon red food coloring
- white nonpareils or sprinkles for stars
Instructions
Baking the Cupcakes
- Preheat your oven to 350°F (175°C). Line a 12-cup muffin tin with cupcake liners.
- In a large bowl, whisk together the flour, sugar, baking powder, and salt.2.5 cups all-purpose flour
- Add the softened butter to the dry ingredients and mix until the mixture resembles coarse crumbs.2.5 cups all-purpose flour
- In a separate bowl, whisk together the eggs, vanilla extract, and milk.2.5 cups all-purpose flour
- Gradually add the wet ingredients to the dry ingredients, mixing until just combined. Be careful not to overmix.
- Divide the batter evenly among the prepared cupcake liners, filling each about two-thirds full.
- Bake for 18-20 minutes, or until a toothpick inserted into the center comes out clean.
- Let the cupcakes cool in the muffin tin for a few minutes before transferring them to a wire rack to cool completely.
Decorating the Cupcakes
- In a large bowl, beat the softened butter until creamy.2.5 cups all-purpose flour
- Gradually add the powdered sugar, heavy cream, vanilla extract, and salt, beating until smooth and fluffy.2.5 cups all-purpose flour
- Divide the frosting into three bowls. Tint one bowl blue, one bowl red, and leave the third bowl white.2.5 cups all-purpose flour
- To decorate the cupcakes like the American flag, pipe or spread the blue frosting onto the top left quarter of each cupcake to create the 'stars' section.
- Sprinkle white nonpareils or sprinkles over the blue frosting to represent stars.2.5 cups all-purpose flour
- Pipe or spread the red and white frosting in alternating stripes across the remaining part of the cupcake to create the 'stripes'.
- Continue until all cupcakes are decorated.
Notes
Featured Comments
“Impressed! Clear steps and family favorite results. Perfect for busy nights.”
“New favorite here — creamy. crowd-pleaser was spot on.”
“Super easy and turned out amazing! My family asked for seconds. Saving this one.”
“This sweet treat was absolutely loved — the rich really stands out. Thanks!”
“Made it tonight and wow — crowd-pleaser! Will definitely make American flag cupcake again.”
“Packed with flavor and so simple. Exactly what I wanted from American flag cupcake.”


