

You know those nights? The ones where the fridge is looking a little sparse, everyone’s a bit hangry, and the thought of a complicated meal feels like climbing Mount Everest in flip-flops? Yeah, I know those nights intimately. And on those nights, my secret weapon, my absolute go-to, is these incredible baked wings. Forget the greasy takeout or the soggy oven-baked attempts you might have tried before. This recipe is a game-changer. I’m talking impossibly crispy skin, juicy meat that practically falls off the bone, and a flavor that makes everyone at the table go silent for a moment of pure bliss. My kids ask for these baked wings at least once a week, and honestly, I’m not even mad about it. They’re so much better than just about any other chicken wing recipe I’ve tried, and trust me, I’ve tried my fair share!
What are some of the best baked wings?
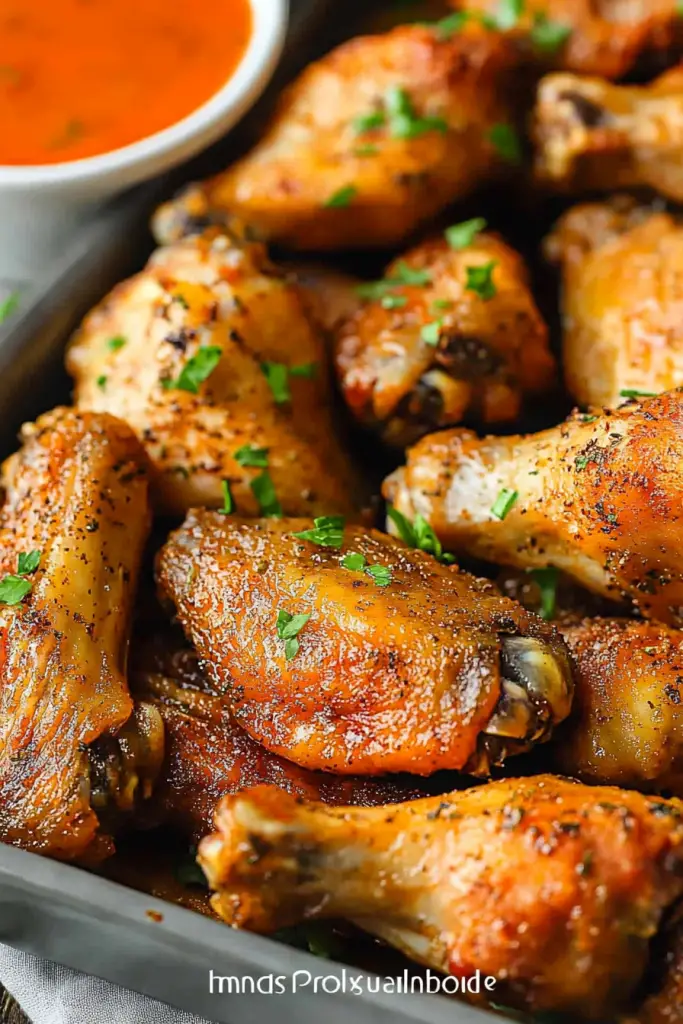
So, what exactly makes these baked wings so special? Think of them as your ultimate crowd-pleaser, elevated. They’re not fried, but they achieve that glorious crispiness you’d expect from deep-frying, all thanks to a simple, yet brilliant, technique involving baking powder. Don’t worry, your wings won’t taste like anything but Delicious Chicken! It’s essentially a magic trick that draws out moisture from the skin, allowing it to get super, super crispy in the oven. The inside stays incredibly moist and tender. We then toss them in a simple yet addictive seasoning blend, and bake them to perfection. It’s the kind of dish that feels fancy enough for guests but is so easy you can whip it up on a Tuesday. It’s the humble chicken wing, reborn and ready to impress!
How to Make Crispy Baked Wings
Quick Overview
The secret to these amazing baked wings is all in the prep. We’ll toss the wings with a bit of baking powder and our chosen spice blend, then spread them out on a wire rack set inside a baking sheet. This allows air to circulate all around the wings, ensuring maximum crispiness. Then, it’s a simple matter of baking them until they’re golden brown and irresistible. It’s an incredibly straightforward process that yields restaurant-quality results right in your own oven. You’ll be amazed at how easy it is to achieve that perfect crunch!
Ingredients
For the Crispy Wings:
2 lbs chicken wings, separated into flats and drumettes (tips can be saved for stock or discarded)
1 tablespoon baking powder (NOT baking soda – this is important!)
1 teaspoon kosher salt
1/2 teaspoon Black Pepper
1/2 teaspoon garlic powder
1/2 teaspoon onion powder
1/4 teaspoon paprika (smoked or sweet, your preference!)
Pinch of cayenne pepper (optional, for a little kick)
For a Simple Garlic Parmesan Glaze (Optional but Highly Recommended!):
2 tablespoons unsalted butter, melted
1 clove garlic, minced
1 tablespoon grated Parmesan cheese
1 teaspoon fresh parsley, finely chopped
Step-by-Step Instructions
Step 1: Preheat & Prep Pan
First things first, let’s get that oven hot. You’ll want to preheat it to a nice, toasty 400°F (200°C). Now, grab a large rimmed baking sheet. The key to getting that crispy skin is air circulation, so we’re going to place a wire rack inside the baking sheet. This elevates the wings, allowing heat to get all around them. If you don’t have a wire rack that fits, don’t fret! You can also just place the wings directly on a parchment-lined baking sheet, but flipping them halfway through is crucial for even crisping.
Step 2: Mix Dry Ingredients
In a large bowl, we’re going to combine all our dry seasonings. This is where the magic starts! Add the baking powder, kosher salt, black pepper, garlic powder, onion powder, paprika, and that optional pinch of cayenne. Give it all a good whisk to make sure everything is evenly distributed. The baking powder is your best friend here; it helps to dry out the skin and create that amazing crunch. Make sure you’re using baking powder and NOT baking soda, as they have different chemical properties and baking soda can leave a metallic taste!
Step 3: Mix Wet Ingredients
Pat your chicken wings completely dry with paper towels. This is another non-negotiable step for achieving super crispy baked wings! Moisture is the enemy of crispiness. Once they’re thoroughly dried, add them to the bowl with your dry seasoning mix. You can also add a tablespoon of olive oil at this stage if you like, though it’s not strictly necessary. The baking powder will adhere to the chicken itself.
Step 4: Combine
Now, get your hands in there (or use tongs if you’re feeling less hands-on) and toss the wings until they are completely and evenly coated with the seasoning mixture. You want to make sure every single piece has a nice, even dusting. No one likes a naked wing! This step is super simple but essential for ensuring consistent flavor and texture across all your baked wings.
Step 5: Prepare Filling
This step is for the optional glaze! If you’re going the glaze route, now’s the time to prep. In a small bowl, combine the melted butter, minced garlic, grated Parmesan cheese, and chopped fresh parsley. Stir it all together until it’s well combined. This glaze is super simple but adds a fantastic layer of garlicky, cheesy goodness right at the end.
Step 6: Layer & Swirl
Arrange the seasoned chicken wings in a single layer on the prepared wire rack (or parchment-lined baking sheet). Make sure they’re not overcrowding each other. If they’re piled up, they’ll steam instead of bake and crisp. Give them a little breathing room. This separation is key for that perfect, even crispiness all around. No overlapping, please!
Step 7: Bake
Pop that baking sheet into your preheated oven. Bake for about 20-25 minutes. Then, carefully flip each wing. Continue baking for another 20-25 minutes, or until the wings are golden brown, crispy, and cooked through. The exact time will depend on your oven and the size of your wings. You’re looking for that beautiful, toasted, almost crackly skin. If you’re using a thermometer, the internal temperature should reach 165°F (74°C).
Step 8: Cool & Glaze
Once they’re perfectly baked and crispy, remove the wings from the oven. If you’re using the glaze, now is the time to brush it over the hot wings. Toss them gently in the bowl with the melted butter mixture if you prefer them more thoroughly coated. The residual heat will melt the butter and help the Parmesan and garlic cling beautifully. Let them sit for just a minute or two to let the glaze set slightly.
Step 9: Slice & Serve
Transfer your glorious baked wings to a serving platter. Garnish with a little extra parsley if you like. They are best served immediately while they’re piping hot and the skin is at its absolute crispiest. I like to serve them with a side of ranch or blue cheese dip, but honestly, they’re so flavorful on their own, you might not even need it!
What to Serve It With
These baked wings are incredibly versatile and can be dressed up or down for any occasion. For a classic game day spread, you can’t go wrong with a big bowl of these, alongside some celery and carrot sticks, and your favorite dips like ranch, blue cheese, or even a spicy aioli. If you’re having them for a casual weeknight dinner, I love pairing them with some simple roasted vegetables, like broccoli or Brussels sprouts, and maybe some garlic bread. For something a little more substantial, they’re fantastic served over a bed of fluffy rice or with some creamy mashed potatoes. My kids also adore them in wraps with some shredded lettuce and a drizzle of their favorite sauce. For a more elegant appetizer, you could serve them with a light cucumber salad or a vibrant salsa. They’re honestly just good with everything!
Top Tips for Perfecting Your Baked Wings
I’ve made these baked wings more times than I can count, and over the years, I’ve picked up a few tricks that I think make all the difference. First, when it comes to Zucchini Prep (wait, wrong recipe!), I mean Wing Prep: drying them thoroughly is paramount. I can’t stress this enough! Use paper towels and get them as dry as humanly possible. For Mixing Advice, don’t overmix the baking powder and spices into the wings; just a good, even coating is all you need. Over-tossing can actually start to break down the meat. When it comes to Swirl Customization (again, thinking of another recipe!), for these wings, I just stick to the simple seasoning. However, you could totally experiment with different spice blends! Think a smoky chipotle, a Korean-inspired gochujang, or even a lemon pepper. For Ingredient Swaps, if you can’t find baking powder, you’re out of luck for the super crispiness, but a bit of cornstarch can help achieve a decent crust if you’re in a pinch, though it’s not quite the same. For Baking Tips, always use a wire rack if you can; it’s a game-changer for crispiness. If your oven has hot spots, you might need to rotate the pan halfway through. For Glaze Variations, instead of garlic Parmesan, try a simple mix of honey and sriracha for a sweet and spicy kick, or a teriyaki glaze. The possibilities are truly endless, and experimenting is part of the fun!
Storing and Reheating Tips
One of the best things about these baked wings is that they’re still delicious leftover! If you happen to have any (which is rare in my house!), let them cool completely on a wire rack or a plate. For Room Temperature storage, it’s best to refrigerate them within two hours of cooking. They’ll keep for about 3-4 days in the refrigerator. Store them in an airtight container or a resealable bag. When it comes to Refrigerator Storage, make sure they’re fully cooled before sealing them up. This prevents condensation from making them soggy. For Freezer Instructions, you can freeze them too! Lay them flat on a baking sheet until frozen, then transfer them to a freezer-safe bag or container. They’ll last up to 2-3 months in the freezer. To reheat, the oven is your best friend. Spread them on a baking sheet and reheat at around 375°F (190°C) for about 10-15 minutes, or until heated through and crispy again. Microwaving will make them soft, so I try to avoid that if crispiness is still a priority. For Glaze Timing Advice, if you’re planning to store them, it’s often best to add the glaze *after* reheating to maintain maximum crispiness. However, the garlic Parmesan glaze is fairly forgiving.
Frequently Asked Questions
Final Thoughts
So there you have it! My absolute favorite way to make baked wings that are guaranteed to be a hit. It’s one of those recipes that’s become a staple in my kitchen because it delivers so much flavor and texture with such minimal fuss. The crispiness is truly something else, and the aroma that fills the house while they’re baking is just intoxicating. If you love flavorful, crispy chicken, you absolutely have to give this recipe a try. I truly believe it will become a regular in your rotation too. If you make these, please, please let me know how they turn out in the comments below! I’d love to hear your favorite variations or any fun dipping sauces you paired them with. And if you enjoyed this recipe, you might also like my recipe for {Link to another chicken recipe} or my guide to {Link to another cooking technique}!

Crispy Baked Chicken Wings
Ingredients
Main Ingredients
- 2 pounds chicken wings split at the joint and tips removed
- 1 teaspoon baking powder aluminum-free
- 1 teaspoon salt
- 0.5 teaspoon black pepper
Instructions
Preparation Steps
- Preheat your oven to 425°F (220°C). Line a baking sheet with parchment paper or foil for easy cleanup.
- Pat the chicken wings thoroughly dry with paper towels. This is a crucial step for achieving crispy skin.
- In a large bowl, combine the dried chicken wings with baking powder, salt, and black pepper. Toss well to ensure each wing is evenly coated.
- Arrange the seasoned wings in a single layer on the prepared baking sheet, ensuring they are not overcrowded. This allows for better air circulation and crisping.
- Bake for 40-45 minutes, flipping the wings halfway through, until they are golden brown and crispy. The exact time may vary depending on your oven and the size of the wings.
- Remove from oven and let rest for a few minutes before serving. Toss with your favorite wing sauce if desired.
Notes
Featured Comments
“Impressed! Clear steps and so flavorful results. Perfect for busy nights.”
“New favorite here — turned out amazing. crowd-pleaser was spot on.”
“Super easy and turned out amazing! My family asked for seconds. Saving this one.”
“This sweet treat was absolutely loved — the balanced really stands out. Thanks!”
“Made it tonight and wow — turned out amazing! Will definitely make baked wings again.”
“Packed with flavor and so simple. Exactly what I wanted from baked wings.”


