

Oh, you guys are going to LOVE this one. Seriously. I was rummaging through some old recipe cards the other day, the kind that are a little splattered and have faded ink, and I stumbled upon a variation of something my grandma used to make. She called them “Sausage Swirls,” and they were always a hit at family gatherings. I got to thinking, what if we took that comforting, swirly goodness and infused it with the ultimate flavor combination? Yep, you guessed it: cheeseburgers! I know, it sounds a little out there, but trust me. These Cheeseburger Onion Ring Rolls are a game-changer. They’re like your favorite comfort food got a delicious, handheld makeover. Imagine tender, fluffy dough wrapped around a savory filling of seasoned Ground Beef, caramelized onions, and melty cheese, all baked to golden perfection. They’re surprisingly easy, incredibly satisfying, and frankly, they’re addictive. If you’re a fan of those onion rings you get at diners, you’ll get the “roll” part, but the inside is pure, unadulterated cheeseburger bliss. This is the kind of recipe that makes the whole house smell amazing and disappears in about five minutes flat.
What are cheeseburger onion rings?
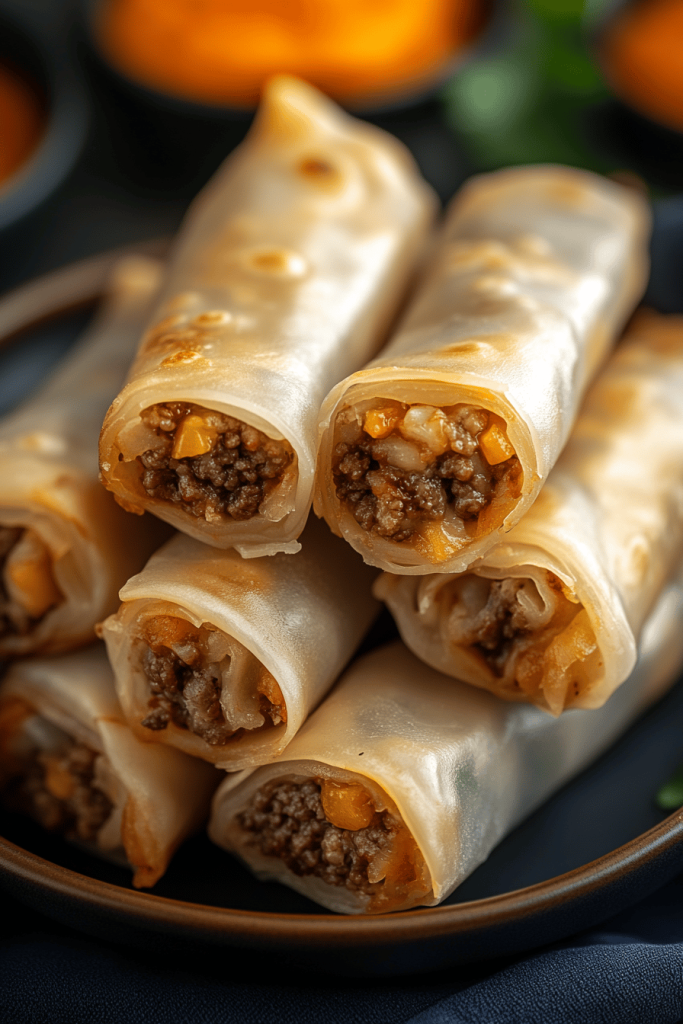
So, what exactly are these magical little things? Think of them as a delightful mashup of a few of my favorite things. At their core, they’re a type of savory roll, similar in concept to a Cinnamon Roll but with a completely different flavor profile. Instead of sweet spices, we’re talking about the robust, savory goodness of a classic cheeseburger. The “onion ring” part comes from the way the dough is rolled up, creating beautiful concentric circles when sliced, much like the rings of an onion. But inside those swirls, you’ll find a mixture of seasoned ground beef, sweet, slow-cooked onions that have been caramelized to perfection, and a generous amount of melty cheese – usually a sharp cheddar or a gooey Monterey Jack. It’s all wrapped up in a soft, slightly chewy yeast dough that’s just the right balance of tender and sturdy. They’re not fried like traditional onion rings, but baked, which makes them a bit healthier and, dare I say, even more delicious for snacking or as a light meal. They’re essentially little pockets of joy, packed with all the flavors you crave in a juicy cheeseburger, but in a perfectly portioned, fun-to-eat roll.
How do you make cheeseburger onion rings?
Quick Overview
Making these delicious rolls is a three-part process: preparing a simple yeast dough, cooking a flavorful cheeseburger filling, and then assembling and baking. You’ll start by making a basic, soft dough that needs a little time to rise. While that’s happening, you’ll sauté your ground beef and onions until they’re perfectly cooked and slightly caramelized. Once the dough has puffed up nicely, you’ll roll it out, spread that savory filling over it, sprinkle on your cheese, and then roll it all up snugly. After a quick second rise, they go into the oven until they’re golden brown and the cheese is bubbly. It sounds like a lot, but each step is straightforward and very manageable, even for beginner bakers. The end result is so worth it!
Ingredients
For the Dough:
1 cup warm milk (about 105-115°F)
2 ¼ teaspoons active dry yeast (one standard packet)
1 tablespoon granulated sugar
3 ½ cups all-purpose flour, plus more for dusting
1 teaspoon salt
2 tablespoons unsalted butter, melted and slightly cooled
For the Filling:
1 pound lean ground beef
1 large yellow onion, thinly sliced
1 tablespoon olive oil
1 teaspoon Worcestershire sauce
½ teaspoon garlic powder
½ teaspoon onion powder
Salt and freshly ground Black Pepper to taste
1 ½ cups shredded sharp cheddar cheese (or a mix of cheddar and Monterey Jack)
For the Glaze (Optional, but highly recommended!):
1 tablespoon unsalted butter, melted
½ teaspoon poppy seeds (for that classic burger bun look!)
Step-by-Step Instructions
Step 1: Preheat & Prep Pan
Start by getting your baking pan ready. I like to use a 9×13 inch baking dish. Lightly grease it with butter or cooking spray. If you’re feeling fancy, you can line it with parchment paper for super easy cleanup, but make sure the parchment doesn’t go all the way up the sides, or it might burn. Set it aside while you work on the dough and filling.
Step 2: Mix Dry Ingredients
In a large mixing bowl, whisk together the flour and salt. This ensures the salt is evenly distributed, so you don’t get pockets of salty dough. I always use a whisk for this step; it just makes everything feel more thorough. Make sure your flour is fresh for the best results!
Step 3: Mix Wet Ingredients
In a separate, smaller bowl or a measuring cup, combine the warm milk, yeast, and sugar. Give it a gentle stir and let it sit for about 5-10 minutes. You want to see it get nice and foamy – that means your yeast is alive and ready to go! If it doesn’t foam, your yeast might be old, or the milk was too hot or too cold, and you’ll need to start over with new yeast.
Step 4: Combine
Pour the foamy yeast mixture and the melted butter into the bowl with the dry ingredients. Stir everything together with a wooden spoon or a spatula until a shaggy dough forms. Then, turn the dough out onto a lightly floured surface. Knead it for about 5-7 minutes, or until it’s smooth and elastic. It should feel soft and slightly tacky, but not stick to your hands. If it’s too sticky, add a tiny bit more flour, a tablespoon at a time. Place the dough in a lightly oiled bowl, turn it to coat, cover it with plastic wrap or a clean kitchen towel, and let it rise in a warm place for about 1 hour, or until it has doubled in size.
Step 5: Prepare Filling
While the dough is rising, let’s make that yummy filling. Heat the olive oil in a large skillet over medium heat. Add the thinly sliced onions and cook, stirring occasionally, for about 10-15 minutes, until they’re softened and starting to turn golden. This slow cooking is key to getting that sweet, caramelized flavor. Next, add the ground beef to the skillet. Break it up with your spoon and cook until it’s browned. Drain off any excess grease. Stir in the Worcestershire sauce, garlic powder, onion powder, salt, and pepper. Cook for another minute, just to let the flavors meld. Remove the skillet from the heat and let the filling cool slightly.
Step 6: Layer & Swirl
Once the dough has risen, punch it down gently to release the air. Turn it out onto a lightly floured surface and roll it into a large rectangle, about 12×18 inches. Spread the slightly cooled ground beef and onion mixture evenly over the dough, leaving about a ½-inch border along one of the long edges. Sprinkle the shredded cheese evenly over the meat mixture. Starting from the long edge *opposite* the one with no border, tightly roll up the dough, like you would for cinnamon rolls. Pinch the seam to seal it well. Using a sharp knife or dental floss (which I find gives cleaner cuts!), slice the roll into 12 equal pieces, about 1 ½ inches thick.
Step 7: Bake
Place the sliced rolls, cut-side up, into your prepared baking dish. Cover the dish loosely with plastic wrap or a kitchen towel and let the rolls rise again in a warm spot for about 30 minutes. While they’re rising, preheat your oven to 375°F (190°C). Once they’ve puffed up, remove the cover and bake for 20-25 minutes, or until the tops are golden brown and the cheese is melted and bubbly. If the tops start to brown too quickly, you can loosely tent them with foil.
Step 8: Cool & Glaze
Once they’re out of the oven, let the rolls cool in the pan for about 5-10 minutes. This is the perfect time to mix up your optional glaze. In a small bowl, whisk together the melted butter and poppy seeds. While the rolls are still warm, brush this mixture lightly over the tops. This gives them a lovely sheen and a touch of that classic burger bun flavor. They’re best served warm!
Step 9: Slice & Serve
Carefully serve the Cheeseburger Onion Ring Rolls warm from the baking dish. You can use a spatula to lift them out. They’re amazing on their own, but you can also serve them with a side of ketchup or your favorite burger sauce for dipping. Enjoy the incredible aroma and the burst of flavor with every bite!
What to Serve It With
These Cheeseburger Onion Ring Rolls are surprisingly versatile and can be enjoyed at pretty much any meal! For breakfast, they’re a fantastic alternative to a traditional breakfast sandwich. Serve them warm with a side of scrambled eggs and a mug of hot coffee – the savory flavors really wake you up! On a weekend brunch spread, they’re a guaranteed showstopper. Arrange them beautifully on a platter, perhaps with some fresh fruit salad, a simple green salad, and some mimosas or a Bloody Mary. They add a hearty, comforting element that everyone will love. As a fun dessert, which might sound a little unusual but trust me, it works if you have a sweet tooth for savory things, you could serve them with a drizzle of a slightly sweet barbecue sauce or even a touch of honey mustard. They satisfy that craving for something indulgent without being overly sweet. For cozy, casual snacks, these are perfect. They’re fantastic for movie nights, game days, or just when you need a pick-me-up. Serve them with a side of pickles or some crispy potato chips. My kids also love them as a quick and easy dinner on busy weeknights, especially with a side of tater tots or some steamed broccoli. Honestly, they’re so good, they don’t even *need* a side dish, but pairing them with something fresh or crunchy just elevates the whole experience.
Top Tips for Perfecting Your Cheeseburger Onion Ring Rolls
I’ve made these rolls countless times, and over the years, I’ve picked up a few tricks that I think make a big difference. When it comes to the onions for the filling, don’t rush the caramelization process. Low and slow is the way to go. If you try to speed it up with high heat, they’ll burn before they sweeten. Patience here is key; it’s what gives them that deep, rich flavor. For the dough, the biggest tip I can give is to not overwork it once you add the wet ingredients. Mix just until it comes together, then knead until it’s smooth. Overmixing can lead to tough rolls, and we want them to be tender and fluffy. Also, make sure your yeast is fresh; I always check the expiration date. For the swirl customization, really focus on rolling that dough up tightly but not so tight that the filling squeezes out. When you slice them, a sharp knife is your best friend. If you don’t have a serrated knife or dental floss, sometimes just running your knife under hot water can help create a cleaner cut. I’ve learned this trick from making fancy bread! For ingredient swaps, if you don’t have ground beef, you could try ground turkey or even a mixture of beef and pork. For the cheese, a good quality sharp cheddar is fantastic, but I’ve also used a mix of cheddar and mozzarella for extra stretchiness, or even a little bit of pepper jack for a kick. The key is using cheese that melts well. When it comes to baking, ovens can be so different! Keep an eye on them during the last 10 minutes. If you see they’re getting too dark on top before the inside is cooked through, just loosely tent the pan with aluminum foil. This protects the crust while allowing the center to finish baking. For the glaze, while poppy seeds are fun, you could also add a pinch of sesame seeds or even a tiny sprinkle of smoked paprika for a different flavor profile. The melted butter is primarily for shine and a little richness, so don’t skip that part!
Storing and Reheating Tips
These Cheeseburger Onion Ring Rolls are honestly best when they’re fresh out of the oven, but they store surprisingly well, which is great if you’re meal prepping or have leftovers (though that’s rare in my house!). At room temperature, I’ve found they stay perfectly good for up to two days. Make sure they’re completely cooled before you store them, and keep them in an airtight container or covered tightly with plastic wrap. This prevents them from drying out. If you need to store them for longer, the refrigerator is your best bet. They’ll keep well in the fridge for about 4-5 days. Again, make sure they’re completely cool before sealing them in an airtight container. The glaze will hold up fine in the fridge. For freezing, these are fantastic make-ahead candidates. Once they’re completely cooled, wrap each roll individually and tightly in plastic wrap, then place them in a freezer-safe bag or container. They should last in the freezer for up to 2-3 months. When you’re ready to eat them from the fridge or freezer, reheating is super easy. For a single roll, the microwave is the quickest option; just heat for about 20-30 seconds until warmed through. For a batch, the oven is ideal. Place them in a baking dish and reheat at 300°F (150°C) for about 10-15 minutes, or until heated through. If you froze them, let them thaw in the refrigerator overnight before reheating in the oven for best results. I usually don’t add the glaze until after they’ve been reheated, especially if I’m reheating a larger batch, just to keep the poppy seeds looking nice and fresh. You can also brush with a little extra melted butter after reheating if you like!
Frequently Asked Questions
Final Thoughts
I really hope you give these Cheeseburger Onion Ring Rolls a try! They’ve become such a go-to in my kitchen for good reason. They’re the perfect blend of comfort food nostalgia and exciting new flavors, and they manage to be both incredibly satisfying and surprisingly easy to make. Whether you’re looking for a fun weekend baking project, a new appetizer for your next gathering, or just a way to make dinner a little more exciting, these rolls deliver. They bring people together, filling your home with a wonderful aroma and your bellies with pure deliciousness. If you love these, you might also enjoy my recipe for Cheesy Garlic Bread Twists or my incredibly popular Sloppy Joe Casserole – they have a similar comforting, family-friendly vibe. I can’t wait to hear what you think of these rolls! Please leave a comment below and let me know how yours turned out, or if you tried any fun variations. Happy baking, everyone!
cheeseburger onion ring rolls
Ingredients
Onion Ring Rolls
- 2 large white onions sliced 1/4 inch thick rounds
- 7 oz shredded parmesan cheese
- 0.5 tbs olive oil
- salt, garlic powder + paprika to taste
Ground Meat Filling
- 1 tsp olive oil
- 1 lb ground meat
- 0.5 tsp salt
- 0.5 tsp garlic powder
- 0.5 tsp onion powder
- 0.5 tsp paprika
- 0.5 tsp chili powder
- 0.25 cup low sodium chicken broth
Assembly
- 6 slices American cheese
- 6 slices ham
- 0.33 cup pickles sliced
Instructions
Preparation Steps
- Preheat oven to 400°F. Line a 12x17 inch rimmed baking sheet with parchment paper.
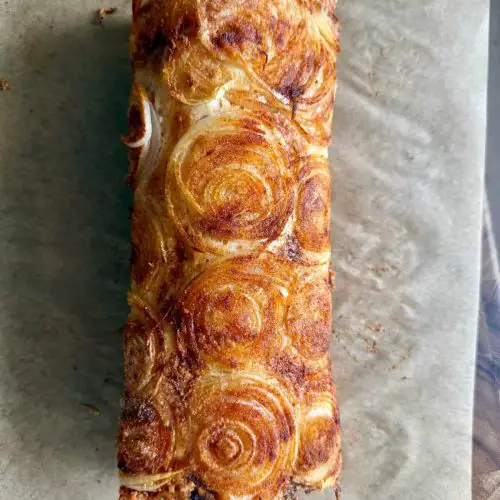
- Sprinkle the baking sheet with cheese to create a thin, even layer. Arrange the onion ring slices on top, close together but not overlapping. Lightly brush the tops of the onion rings with olive oil (or spray). Season generously with salt, garlic powder, and paprika. Bake for 18-20 minutes, rotating the pan halfway through, until golden brown and crispy.
- While the onion rings are baking, heat 1 tsp olive oil in a skillet over medium-high heat. Add the ground meat and break it up with a wooden spoon. Stir in the seasonings. Add the chicken broth, cover, and cook for 10 minutes. Uncover, stir, remove from heat, and keep covered.
- Once the onion rings are done, let them cool for two minutes. Flip the onion sheet over. Layer evenly with ham slices and cheese slices. Spread the ground beef evenly over the cheese, and finally, place the pickles on top. Tightly roll from one short side towards the other. Reposition the roll on the baking sheet with the seam side down. Bake for 7-10 minutes. Slice and serve warm.
Notes
Featured Comments
“Impressed! Clear steps and perfect for busy nights results. Perfect for busy nights.”
“New favorite here — absolutely loved. crowd-pleaser was spot on.”
“Super easy and turned out amazing! My family asked for seconds. Saving this one.”
“This sweet treat was absolutely loved — the bright really stands out. Thanks!”
“Made it tonight and wow — comforting! Will definitely make Cheeseburger Onion Ring Rolls a Viral Sensation again.”
“Packed with flavor and so simple. Exactly what I wanted from Cheeseburger Onion Ring Rolls a Viral Sensation.”


