

Oh, chicken piccata. Just saying the words out loud makes me feel a little bit fancy, doesn’t it? It’s one of those dishes that sounds like it belongs in a dimly lit Italian trattoria, not something you whip up after a long day at work. But trust me, my friends, it is SO achievable! This isn’t your grandma’s Sunday roast, but it has that same comforting, impressive feel. I remember the first time I tried making it myself, I was convinced I was going to mess it up, but it turned out to be ridiculously easy and tasted like I’d spent hours in the kitchen. It’s definitely a contender for the Best Chicken piccata recipe I’ve ever perfected. It’s got that perfect balance of bright, zesty, and savory, all wrapped up in a tender chicken cutlet. Honestly, it’s become my secret weapon for when I need to impress without stressing.
What is chicken piccata?
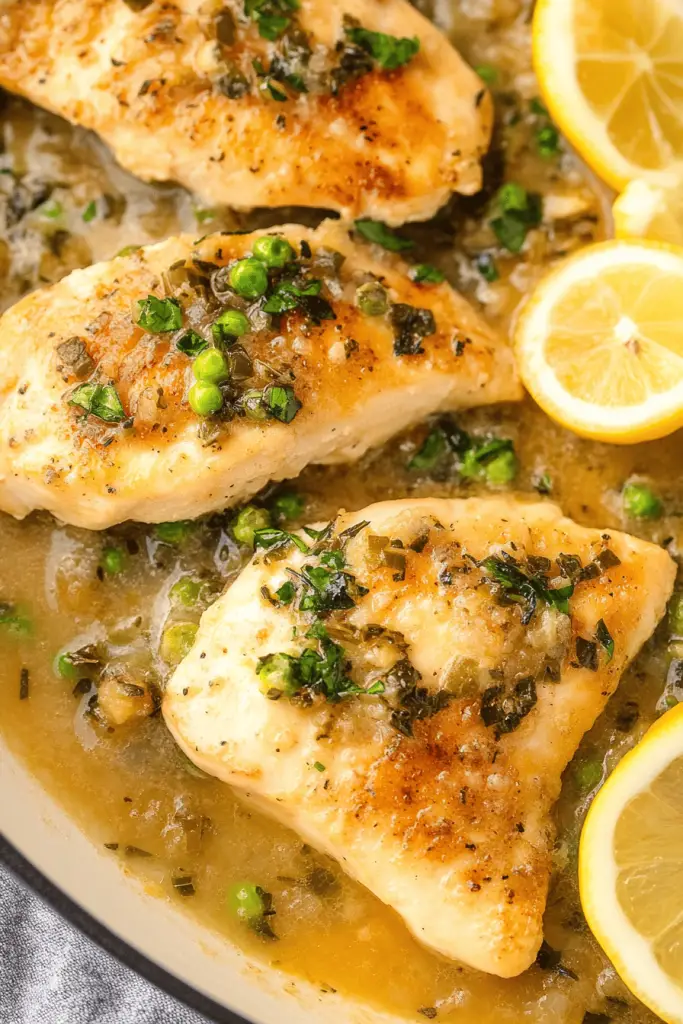
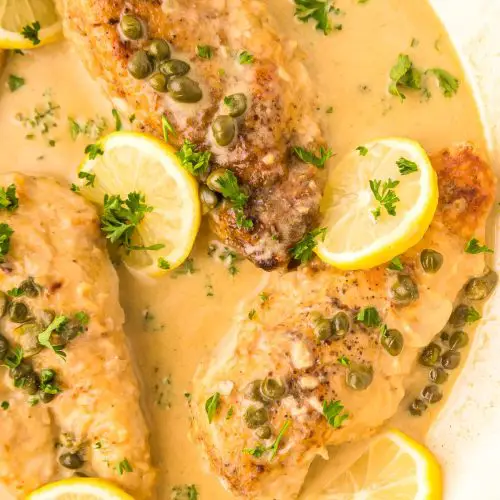
So, what exactly *is* Chicken Piccata? At its heart, it’s a classic Italian-American dish that’s all about simplicity and bright, bold flavors. Think of it as a really elegant way to prepare chicken breasts. We’re talking thin, tender chicken cutlets that are lightly dredged in flour, pan-fried until golden and slightly crispy, and then bathed in a luscious sauce made from lemon juice, butter, white wine, and capers. The name “piccata” itself refers to a way of preparing meat by pounding it thin and then sautéing it, and in this case, it really lets the chicken cook quickly and evenly. It’s essentially a celebration of tangy, buttery goodness with little bursts of briny capers. It’s not complicated, but the combination of those simple ingredients creates something truly magical.
How do I make chicken piccata?
Quick Overview
This chicken piccata is all about getting those thin chicken cutlets perfectly golden and then whisking together a vibrant, lemony sauce in the same pan. You’ll pan-fry the chicken until it’s cooked through and beautiful, then set it aside. In that same pan, we’ll deglaze with some white wine and chicken broth, add lemon juice, capers, and butter to create a quick, luscious sauce. It’s a one-pan wonder that tastes like it came from a gourmet kitchen, but it’s totally achievable at home. The beauty is in the simplicity and the speed – you get maximum flavor with minimum fuss. This method ensures all those delicious pan drippings get incorporated into the sauce, making it extra rich and flavorful.
Ingredients
For the Main Batter:
2 boneless, skinless chicken breasts (about 1.5 lbs total)
1/2 cup all-purpose flour
1/4 teaspoon salt
1/4 teaspoon Black Pepper
2 tablespoons olive oil
2 tablespoons unsalted butter
For the Filling:
1/2 cup dry white wine (like Pinot Grigio or Sauvignon Blanc – don’t use anything too sweet!)
1/2 cup low-sodium chicken broth
1/4 cup fresh lemon juice (from about 1-2 lemons, depending on size)
2 tablespoons capers, drained
2 tablespoons unsalted butter, cut into cubes, cold
Fresh parsley, chopped, for garnish
For the Glaze:
(This is actually part of the sauce creation!)
We’ll be creating a beautiful glaze-like sauce right in the pan.
Step-by-Step Instructions
Step 1: Preheat & Prep Pan
First things first, let’s get our chicken ready. I like to butterfly the chicken breasts if they’re really thick, or just slice them horizontally to get two thinner cutlets from each breast. This helps them cook super fast and evenly. Then, I put them between two pieces of plastic wrap or in a Ziploc bag and gently pound them with a meat mallet or even the bottom of a heavy pan. You want them about 1/4-inch thick. This is key for tenderness! Set up a shallow dish with your flour, salt, and pepper. Dredge each chicken cutlet lightly, shaking off any excess. This thin coating is what gives us that perfect golden crust. Get a large skillet (cast iron is my favorite for this) over medium-high heat and add your olive oil and 2 tablespoons of butter. You want it hot enough that the butter is shimmering but not burning.
Step 2: Mix Dry Ingredients
This is super simple. In a shallow dish or pie plate, whisk together your all-purpose flour, salt, and freshly ground black pepper. Make sure it’s well combined. This seasoned flour is what’s going to give our chicken a lovely golden crust when it hits the hot pan. Don’t skip the salt and pepper here; it’s the foundation of flavor for the chicken itself. The texture you’re looking for is just a uniform powdery mixture. I usually do this right before I start prepping the chicken so it’s ready to go.
Step 3: Mix Wet Ingredients
The “wet” ingredients for the sauce are actually added later, right into the hot pan. But to be prepared, I usually have my white wine, chicken broth, and fresh lemon juice measured out and ready to go nearby. I find that having everything prepped makes the cooking process so much smoother, especially when you’re working with a hot pan. You don’t want to be fumbling for ingredients when you need to deglaze! Also, make sure your capers are drained and your extra butter cubes are ready to go for the sauce.
Step 4: Combine
Now for the magic to happen! Once your skillet is hot and the butter is melted and shimmering, carefully place your floured chicken cutlets into the pan. Don’t overcrowd the pan; you might need to cook in batches. Cook for about 3-4 minutes per side, until golden brown and cooked through. They should have a beautiful, light crust. Once cooked, remove the chicken to a plate and tent it loosely with foil to keep it warm. Don’t wipe out the pan! Those browned bits on the bottom are pure flavor gold.
Step 5: Prepare Filling
This is where we build that glorious sauce! With the skillet still over medium-high heat (you might need to turn it down slightly if it looks like it’s burning), pour in your white wine. Scrape up all those browned bits from the bottom of the pan with a wooden spoon – that’s called deglazing, and it’s where so much flavor lives. Let the wine bubble and reduce by about half, which should take a minute or two. Then, add the chicken broth and lemon juice. Bring it to a simmer and let it cook for another minute or two. Stir in your drained capers.
Step 6: Layer & Swirl
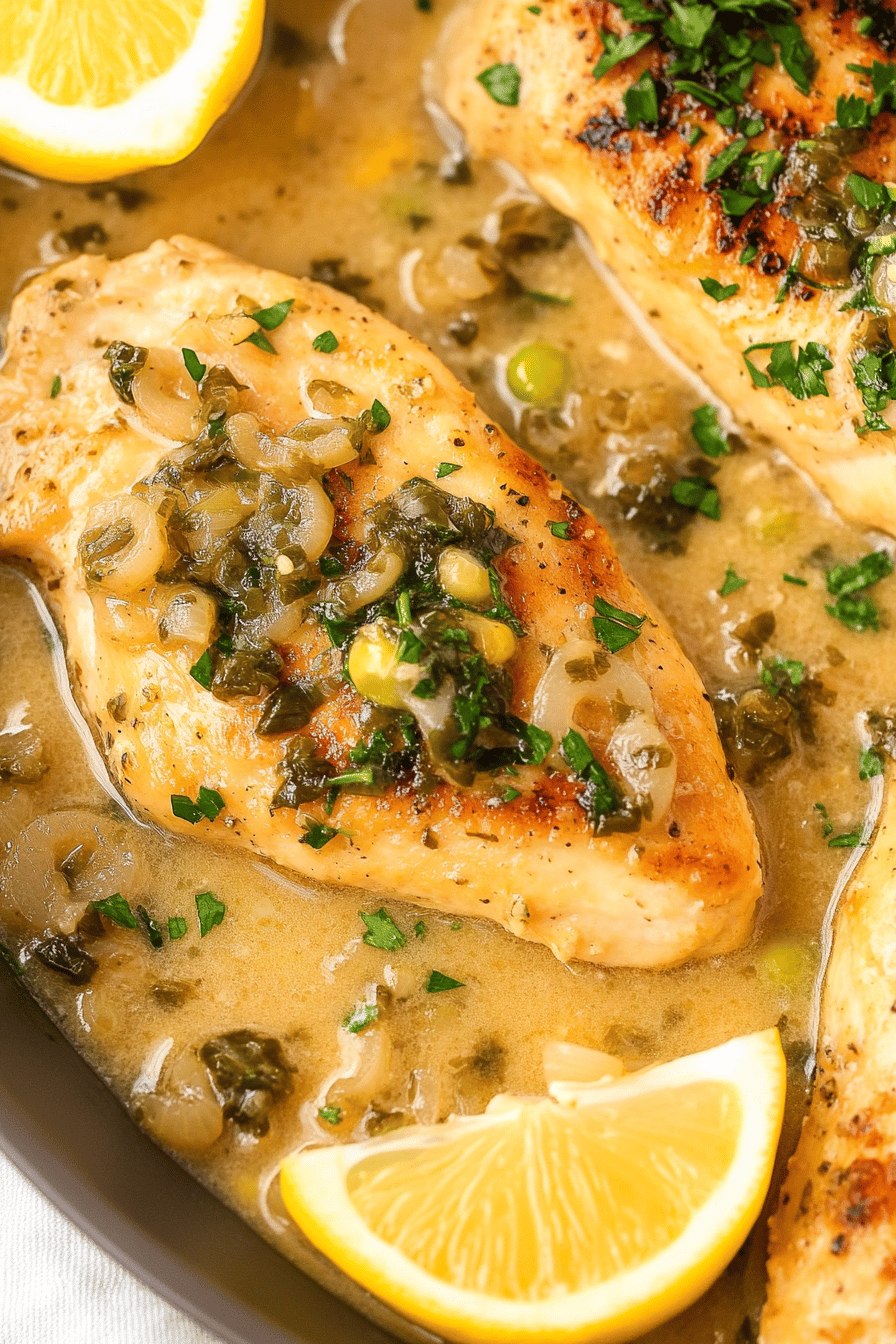
This step is all about emulsifying the sauce and making it rich and creamy. Once your sauce is simmering and has reduced slightly, reduce the heat to low. Now, add your cold butter cubes, one or two at a time, whisking constantly. This is called “mounting” the sauce with butter, and it makes it wonderfully glossy and thick without needing any flour or cream. Keep whisking until the butter is fully incorporated and the sauce is smooth and slightly thickened. You’re looking for a beautiful, emulsified glaze that coats the back of a spoon. Add the cooked chicken back into the pan and spoon some of the sauce over it. Let it heat through for just a minute or two, allowing the chicken to soak up those amazing flavors.
Step 7: Bake
We’re not actually baking this chicken piccata in the oven! The whole dish comes together beautifully right on the stovetop. The “baking” is more in the sense of letting the flavors meld and the sauce thicken. So, once the chicken is back in the pan and coated in that gorgeous sauce, just let it simmer gently for a minute or two on low heat. This allows the chicken to absorb the sauce and ensures everything is heated through perfectly. The sauce should be just right – not too thin, not too thick, with a lovely glossy sheen.
Step 8: Cool & Glaze
This dish is best served immediately, so there’s no real cooling or glazing step needed here in the traditional sense. The “glaze” is the delicious sauce we just created in the pan. Once the chicken has heated through in the sauce, it’s ready to go! You can spoon some extra sauce over the chicken right before serving for an extra boost of flavor and shine. Garnish with fresh chopped parsley for a pop of color and freshness, which is always a good idea!
Step 9: Slice & Serve
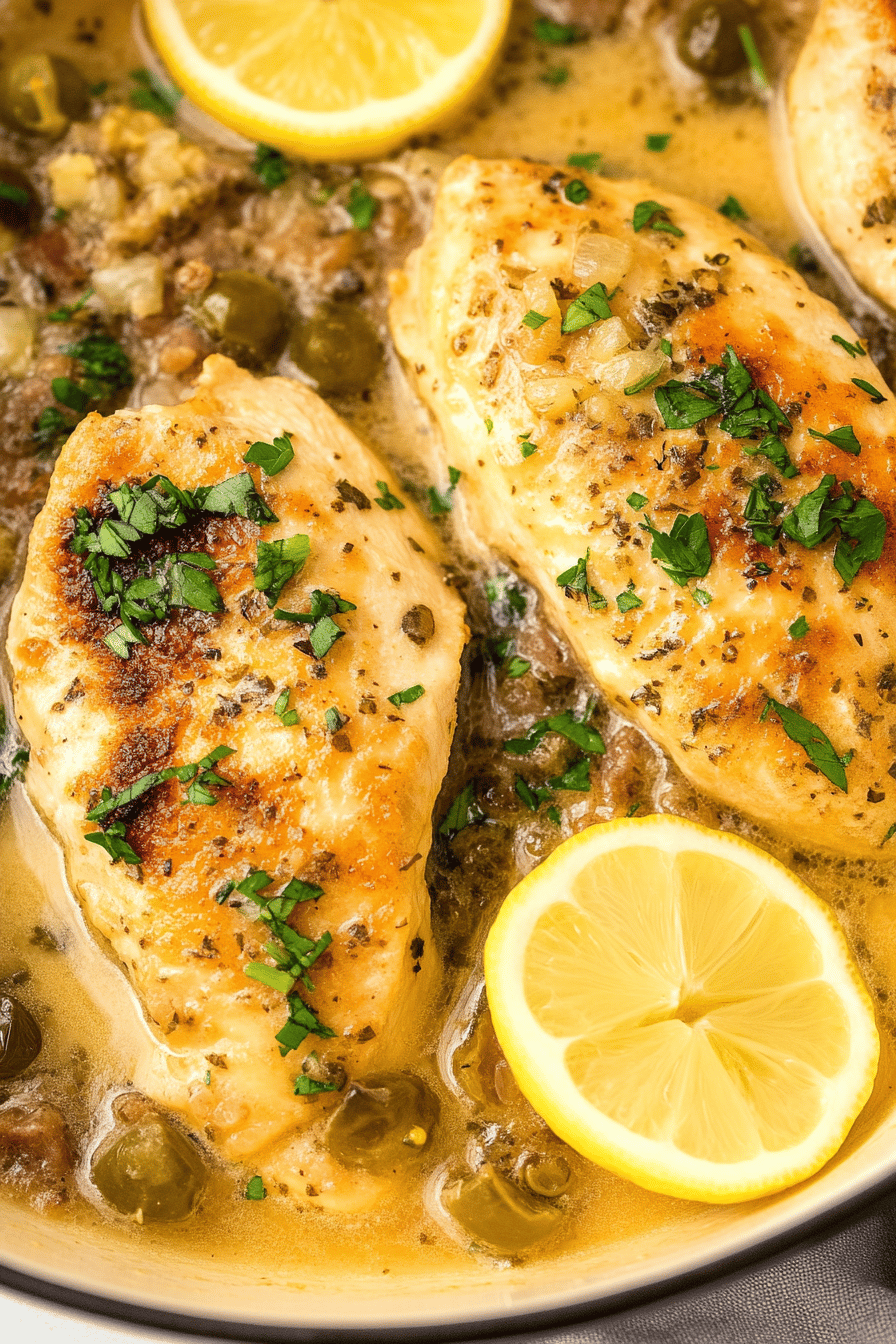
To serve, I like to arrange the chicken cutlets on a plate and generously spoon the lemon-caper sauce over the top. Sprinkle with that fresh chopped parsley for a beautiful finish. It’s so satisfying to see that golden chicken topped with the glistening sauce. The aroma alone is enough to make your mouth water! It looks elegant, tastes divine, and it’s incredibly satisfying. I always make sure to get plenty of that sauce onto the plate, as it’s just as important as the chicken itself.
What to Serve It With
This chicken piccata is so versatile, it’s like the little black dress of main courses – it goes with everything! For breakfast, though I haven’t personally tried it (the idea is a bit unusual for me!), I imagine a small, thinly sliced piece could be interesting with a side of something eggy and perhaps a slice of toast. For brunch, it’s absolutely divine. I love plating it alongside some fluffy scrambled eggs, a crisp green salad with a light vinaigrette, and maybe even some roasted potatoes. A chilled glass of Prosecco or a mimosa would be perfect here. As a dessert, well, it’s not exactly dessert material, but if you’re having a light, late lunch and want something savory and satisfying, it fits the bill. For cozy snacks, I don’t usually think of piccata as a snack, but leftovers are fantastic! Perhaps a small portion served with some crusty bread for dipping into any leftover sauce. My family absolutely adores it served over a bed of Angel Hair Pasta, which is perfect for soaking up all that tangy sauce. Another favorite is with creamy polenta – the richness of the polenta is a wonderful contrast to the bright lemon in the piccata. And for a lighter option, a side of steamed or roasted green beans or asparagus is always a winner. Seriously, you can’t go wrong!
Top Tips for Perfecting Your Chicken Piccata
Okay, let’s talk about really nailing this dish. I’ve made this chicken piccata more times than I can count, and over the years, I’ve picked up a few tricks that make all the difference. First, regarding the chicken itself: pound it thin and even! I know I mentioned it, but it’s *crucial*. If you have thick and thin parts, the thin parts will cook too quickly and dry out while the thick parts are still raw. Aim for about 1/4 inch. For the flour dredge, a light coating is best. You don’t want thick, pasty chicken. Just a gentle shake is enough to give it a nice crisp. When it comes to the pan – make sure it’s hot enough before adding the chicken. That sizzle is what you want for that perfect golden crust. If the pan isn’t hot, the chicken will steam instead of fry, and nobody wants soggy piccata! For the sauce, the wine reduction is important. Let that wine bubble and reduce by half; it cooks off the harsh alcohol flavor and concentrates the wine’s deliciousness. And please, for the love of all things delicious, use cold butter for the sauce! Adding cold butter cubes and whisking them in slowly is what creates that beautiful, glossy, emulsified sauce. If your butter is warm, it will just make the sauce greasy. Don’t be afraid of the capers! They add that essential briny, tangy pop that makes piccata, well, piccata. If you find them too strong, you can rinse them briefly, but I love their punch. If you can’t find capers, you could try a tiny bit of chopped green olives, but it’s not quite the same. Lastly, fresh lemon juice is non-negotiable. Bottled just doesn’t have that vibrant, fresh flavor. Squeeze your own lemons!
Storing and Reheating Tips
One of the great things about this chicken piccata is that it reheats surprisingly well, which makes it perfect for leftovers! If you’ve got any (which is rare in my house!), store it in an airtight container in the refrigerator for up to 3 days. I usually separate the chicken from any extra sauce if possible, as the chicken can get a little softer when it sits in sauce for too long. When you’re ready to reheat, I highly recommend doing it gently on the stovetop. Place the chicken in a skillet over low heat with a tablespoon or two of water or extra broth, and let it warm through slowly. This will help keep the chicken moist. You can also add the sauce back in at this point to reheat it. If you’re in a real pinch, you can microwave it, but be careful not to overcook it – just a minute or two at 50% power should do the trick. For freezer instructions, it’s generally best to freeze the chicken *without* the sauce. Once cooled, wrap the chicken portions tightly in plastic wrap, then in foil, and freeze for up to 2-3 months. Thaw in the refrigerator overnight. Then, you can prepare a fresh batch of sauce when you’re ready to serve it. I usually don’t recommend freezing the sauce itself, as the butter-based emulsion can sometimes break upon thawing.
Frequently Asked Questions
Final Thoughts
Honestly, making this chicken piccata is one of those kitchen triumphs that just makes you feel good. It’s proof that you don’t need a Michelin star to create something truly delicious and impressive. The bright lemon, the briny capers, the tender chicken – it’s a symphony of flavors that never gets old. It’s a recipe that looks fancy, tastes divine, but is surprisingly easy to pull off, making it a true weeknight champion. I really hope you give this chicken piccata a try. I’m so excited for you to experience that moment when you taste that perfect bite. If you love bright, zesty flavors and a quick, satisfying meal, this is for you. I can’t wait to hear how yours turns out! Please leave a comment below and let me know what you think, or if you have any special twists you like to add. And don’t forget to share your creations with me on social media! Happy cooking!
Chicken Piccata
Ingredients
Chicken
- 1.5 pounds boneless, skinless chicken breasts cut into 0.5-inch thick cutlets
- 0.5 cup all-purpose flour
- 0.5 teaspoon salt
- 0.25 teaspoon black pepper
Sauce
- 3 tablespoons butter
- 2 tablespoons olive oil
- 1 small shallot minced
- 0.5 cup chicken broth
- 0.5 cup dry white wine
- 0.33 cup capers drained
- 0.25 cup fresh lemon juice
- 1 tablespoon fresh parsley chopped, for garnish
Instructions
Preparation Steps
- Pound the chicken cutlets to an even 0.5-inch thickness. In a shallow dish, combine flour, salt, and pepper.
- Dredge each chicken cutlet in the flour mixture, shaking off any excess. Set aside.
- In a large skillet, melt 2 tablespoons of butter with 2 tablespoons of olive oil over medium-high heat. Add chicken cutlets and cook for 3-4 minutes per side, until golden brown and cooked through. Remove chicken from skillet and set aside.
- Add the remaining 1 tablespoon of butter and 1 tablespoon of olive oil to the same skillet. Add minced shallot and cook until softened, about 2 minutes. Deglaze the pan with white wine, scraping up any browned bits. Let it simmer for 1 minute.
- Stir in chicken broth, capers, and lemon juice. Bring to a simmer and cook for 3-5 minutes, or until the sauce has slightly thickened.
- Return the chicken to the skillet and spoon the sauce over it. Simmer for 1-2 minutes to heat through. Garnish with fresh parsley.
Notes
Featured Comments
“Impressed! Clear steps and family favorite results. Perfect for busy nights.”
“New favorite here — crowd-pleaser. crowd-pleaser was spot on.”
“Super easy and turned out amazing! My family asked for seconds. Saving this one.”
“This sweet treat was absolutely loved — the light really stands out. Thanks!”
“Made it tonight and wow — creamy! Will definitely make chicken piccata again.”
“Packed with flavor and so simple. Exactly what I wanted from chicken piccata.”


