

Okay, so picture this: it’s a chilly Tuesday evening, you’ve had one of *those* days, and the last thing you want to do is face a complicated meal. You’re craving comfort, something warm, familiar, and downright delicious. But you also don’t want to spend hours in the kitchen. Sound familiar? Well, my friend, let me introduce you to my absolute lifesaver: Chicken Pot Pie Pasta. Forget everything you *think* you know about comfort food. This dish takes all the nostalgic, soul-soothing flavors of classic chicken pot pie – the creamy filling, the tender chicken, the savory vegetables – and reimagines it in the most delightful, pasta-fueled way. It’s the hug in a bowl you didn’t know you desperately needed, and honestly, it’s become my go-to when I need a win. It’s like Chicken Noodle Soup met its richer, more sophisticated cousin, and they decided to throw a party in a pasta dish. Trust me, this is about to become your new obsession.
What is chicken pot pie pasta?
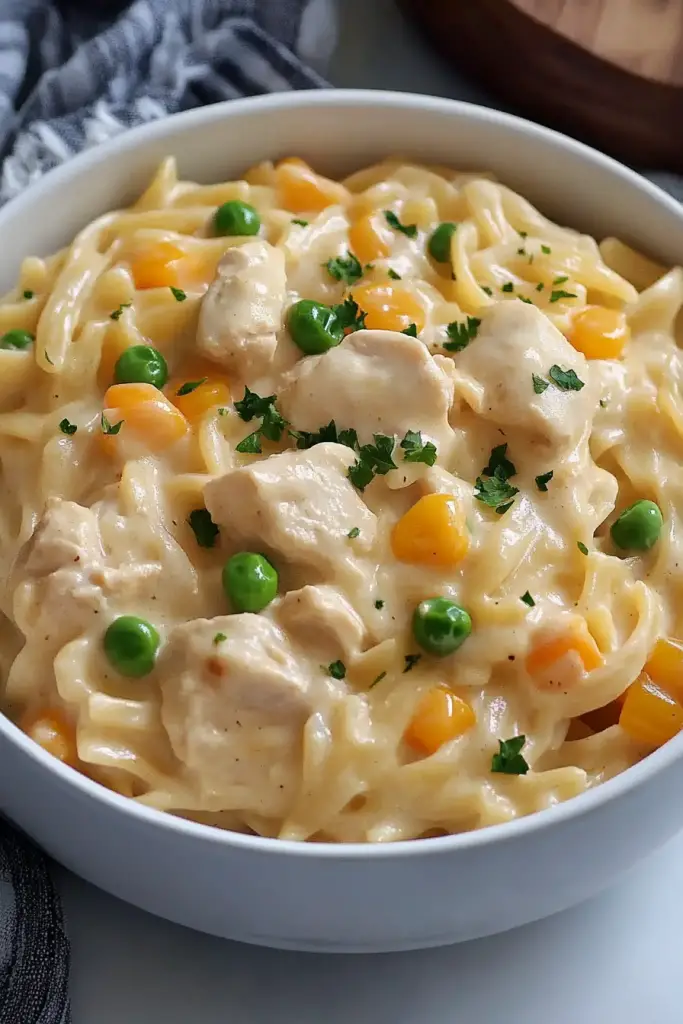
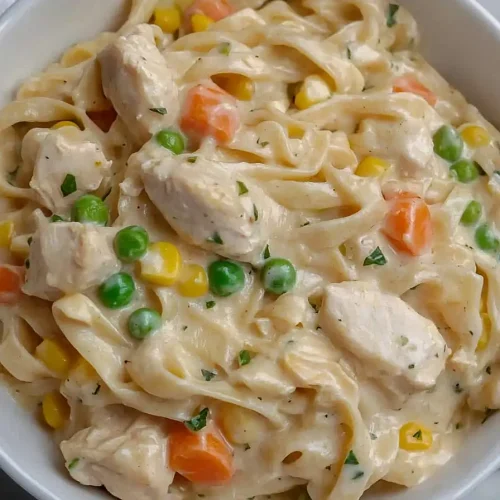
So, what exactly *is* this magical concoction I keep raving about? Think of it as the most comforting elements of a traditional Chicken Pot Pie, deconstructed and then reassembled into a glorious pasta dish. Instead of a flaky crust, we’ve got perfectly cooked pasta soaking up all that incredible, savory goodness. The heart of this dish is a lusciously creamy sauce, loaded with tender chunks of chicken and a medley of classic pot pie veggies like peas, carrots, and celery. It’s essentially chicken pot pie filling tossed with your favorite pasta. No more fiddling with dough or worrying about a soggy bottom crust; this is pure, unadulterated comfort in every single bite. It’s familiar enough to feel like home, but with a delightful twist that makes it exciting and wonderfully easy to whip up. It’s the kind of meal that makes you want to curl up on the couch with a good book and just savor every moment.
How do I make chicken pot pie Pasta?
Quick Overview
This recipe is all about building maximum flavor with minimum fuss. We’ll start by sautéing some aromatics, creating a rich, creamy sauce base, folding in tender chicken and vibrant veggies, then tossing it all with pasta and baking it until bubbly and golden. It’s straightforward, forgiving, and delivers that classic Chicken pot pie comfort in a fraction of the time. The magic happens in that oven, where all the flavors meld into pure deliciousness.
Ingredients
For the Main Dish:
1 tablespoon olive oil
1 pound boneless, skinless chicken breasts or thighs, cut into bite-sized pieces
1 cup chopped yellow onion (about 1 medium)
2 carrots, peeled and diced (about 1 cup)
2 celery stalks, diced (about 1 cup)
2 cloves garlic, minced
4 tablespoons unsalted butter
1/2 cup all-purpose flour
3 cups chicken broth (low sodium is great)
1 cup milk (whole milk or 2% works best for creaminess)
1 teaspoon dried thyme
1/2 teaspoon salt, or to taste
1/4 teaspoon black pepper, or to taste
1 1/2 cups frozen peas
12 ounces pasta, such as penne, rotini, or elbow macaroni (cooked according to package directions until al dente)
For the Optional Topping (if you want a little crunch!):
1/2 cup panko breadcrumbs
1 tablespoon melted butter
Step-by-Step Instructions
Step 1: Preheat & Prep
First things first, get your oven preheated to 375°F (190°C). Grab a large oven-safe skillet or a 9×13 inch baking dish. If you’re using a baking dish, you might want to give it a quick spray with cooking spray or a light brush of olive oil, just to be safe. If you’re using a skillet that can go from stovetop to oven, even better!
Step 2: Cook the Chicken & Veggies
Heat the olive oil in your oven-safe skillet over medium-high heat. Add the chicken pieces and cook until they’re nicely browned on all sides and cooked through. Don’t worry about cooking them completely through at this stage, as they’ll finish cooking in the oven. Remove the chicken from the skillet and set it aside on a plate.
In the same skillet (no need to wipe it out!), add the butter. Once melted, toss in your chopped onion, carrots, and celery. Sauté them for about 5-7 minutes, stirring occasionally, until they’ve started to soften. Add the minced garlic and cook for another minute until fragrant. Oh, the smell alone is starting to make me hungry!
Step 3: Make the Creamy Sauce
Sprinkle the flour over the softened vegetables in the skillet. Stir it around and cook for about 1-2 minutes. This is like making a roux, and it helps thicken our sauce beautifully. Gradually whisk in the chicken broth, making sure to scrape up any browned bits from the bottom of the skillet – that’s where so much flavor is hiding! Then, slowly whisk in the milk. Bring the mixture to a simmer, stirring constantly, until the sauce begins to thicken. This usually takes about 5-8 minutes.
Step 4: Combine & Season
Once your sauce has thickened to a nice, creamy consistency, stir in the cooked chicken, dried thyme, salt, and pepper. Taste and adjust the seasoning as needed. Remember, pasta will absorb some of the salt, so don’t be shy, but also don’t go overboard just yet. Finally, stir in the frozen peas. Give everything a good mix.
Step 5: Add the Pasta
If you haven’t already, make sure your pasta is cooked al dente according to the package directions. Drain it well, and then add it directly to the skillet with the creamy chicken and vegetable mixture. Gently fold everything together until the pasta is well coated in that luscious sauce. If you’re not using an oven-safe skillet, now’s the time to transfer this glorious mixture to your prepared baking dish.
Step 6: Bake to Golden Perfection
If you want a little crunchy topping, this is where you’d mix your panko breadcrumbs with the melted butter and sprinkle it evenly over the top. If not, no worries at all, it’s delicious either way! Place the skillet or baking dish into your preheated oven. Bake for 20-25 minutes, or until the sauce is bubbly and the top is lightly golden brown (especially if you added the breadcrumbs!).
Step 7: Rest & Serve
This is arguably the hardest part: letting it rest! Once it comes out of the oven, let it sit for about 5-10 minutes. This allows the sauce to set up a bit more and prevents you from burning your tongue – as tempting as it is to dive right in! Then, serve hot and enjoy every comforting spoonful.
What to Serve It With
This Chicken Pot Pie Pasta is practically a meal in itself, a hearty and complete dish that satisfies on so many levels. But if you’re looking to round out the meal or give it a little something extra, I’ve got some ideas! For a truly cozy experience, a simple side salad with a light vinaigrette is fantastic. It offers a nice fresh contrast to the richness of the pasta. Think crisp lettuce, some cherry tomatoes, maybe a few cucumber slices – nothing too heavy.
If you’re feeling a bit more festive or want to lean into the comfort food vibe, some crusty bread is always a winner. Think a good sourdough or a baguette for dipping into any leftover sauce. Oh, and my kids absolutely love having some steamed green beans or broccoli on the side. It adds a pop of color and extra nutrients, and they always eat them up when they come with this dish!
For a slightly more elevated feel, a dollop of sour cream or a sprinkle of fresh parsley or chives right before serving can make it look extra special. Honestly, though, the beauty of this dish is its self-sufficiency. It’s a complete, comforting meal that stands tall on its own. You really don’t *need* much else, which is perfect for those nights when you just want to keep things simple and delicious.
Top Tips for Perfecting Your Chicken Pot Pie Pasta
I’ve made this chicken pot pie pasta more times than I can count, and through all those batches, I’ve picked up a few little tricks that I think really elevate it from good to absolutely phenomenal. First off, when it comes to the chicken, I sometimes like to use rotisserie chicken. It’s already cooked and super flavorful, saving you a step and adding a depth of flavor that’s hard to beat. Just shred it and toss it in with the veggies during Step 4. It’s a total game-changer on busy nights!
For the sauce, don’t be afraid to taste and adjust. Salt and pepper are key, but sometimes a tiny pinch of nutmeg can add a subtle warmth that complements the creamy sauce beautifully. And if you find your sauce is a little too thick, don’t panic! Just whisk in a splash more chicken broth or milk until it reaches your desired consistency. Conversely, if it’s too thin, you can let it simmer a bit longer, or even mix a tablespoon of cornstarch with a tablespoon of cold water to make a slurry, then whisk it into the simmering sauce until thickened. I’ve learned these little tweaks after many happy (and a few not-so-happy, learning) kitchen adventures!
When it comes to the pasta, cooking it *al dente* is crucial. It will continue to cook in the oven, and you don’t want mushy pasta. So, take it out a minute or two before the package says it’s done. For the vegetables, using frozen peas is incredibly convenient, and they cook up perfectly without getting watery. If you prefer fresh, just make sure they’re tender. And if you don’t have carrots or celery readily available, don’t let that stop you! You can absolutely make this with just peas and onions, or add in other veggies you love, like mushrooms or corn.
I also love to experiment with different types of pasta. While penne or rotini are my go-to because they hold sauce so well, elbow macaroni gives it a more classic, almost mac-and-cheese-like feel, which my kids adore. For a little extra decadence, sometimes I’ll add a splash of heavy cream along with the milk, but honestly, whole milk makes it plenty creamy for me and is a little lighter. The panko topping is a nice touch for texture, but if you don’t have it, a handful of crushed crackers or even some shredded cheese on top before baking can be delicious too. The possibilities are truly endless, and that’s why I keep coming back to this recipe!
Storing and Reheating Tips
This Chicken Pot Pie Pasta is fantastic because it makes wonderful leftovers! Once it has cooled slightly after baking, cover it tightly with plastic wrap or transfer it to an airtight container. It will keep beautifully in the refrigerator for up to 3-4 days. The flavors actually tend to meld and deepen overnight, making it even tastier the next day!
When you’re ready to reheat, you have a few options. For individual servings, spoon some pasta into a microwave-safe bowl, add a tiny splash of milk or chicken broth (this helps bring back the moisture and creaminess), cover it loosely with a damp paper towel, and microwave on medium power until heated through. Stir halfway through for even heating.
If you have a larger portion or want to reheat the whole dish (or what’s left of it!), you can do so in the oven. Transfer it back into an oven-safe dish, cover it with foil, and bake at around 300°F (150°C) for 15-20 minutes, or until heated through. You might want to remove the foil for the last few minutes if it seems a bit dry, or if you had that lovely breadcrumb topping and want to re-crisp it.
Freezing this dish is also an option, though I find it’s best enjoyed fresh or from the fridge. If you do want to freeze it, let it cool completely, then portion it into freezer-safe containers. It should keep well in the freezer for about 1-2 months. Thaw it overnight in the refrigerator before reheating using the oven method. The texture might be slightly different after freezing and thawing, but it will still be incredibly comforting and delicious!
Frequently Asked Questions
Final Thoughts
So there you have it – my absolute favorite way to get all the cozy, comforting vibes of chicken pot pie without all the fuss of making pastry. This Chicken Pot Pie Pasta is a true weeknight warrior, a recipe that’s earned its permanent spot in my recipe rotation because it’s just so reliably delicious and satisfying. It’s the kind of meal that feels like a warm hug, perfect for any occasion when you just need a little bit of comfort and joy in your life.
I truly hope you give this recipe a try. It’s a labor of love that I’ve refined over the years, and I can’t wait for you to experience that creamy, savory, delightful goodness for yourself. If you end up making it, please, please let me know how it turns out in the comments below! I love hearing about your kitchen adventures and seeing your variations. Happy cooking, my friends!
Chicken Pot Pie Pasta
Ingredients
Main Ingredients
- 0.5 pound Chicken breast, cooked and shredded
- 0.5 cup Frozen peas
- 0.5 cup Frozen carrots
- 0.25 cup Butter
- 0.5 cup Onion, finely chopped
- 2 cloves Garlic, minced
- 0.5 cup All-purpose flour
- 2 cups Chicken broth
- 1 cup Milk
- 0.25 teaspoon Black pepper
- 0.5 teaspoon Salt
- 8 ounces Pasta, cooked al dente Such as penne, rotini, or elbow macaroni
Instructions
Preparation Steps
- In a large skillet or pot, melt the butter over medium heat.
- Add the chopped onion and cook until softened, about 5-7 minutes.
- Stir in the minced garlic and cook for another minute until fragrant.
- Whisk in the flour and cook for 1-2 minutes, stirring constantly, to create a roux.
- Gradually whisk in the chicken broth and milk until smooth. Bring to a simmer, stirring occasionally, until the sauce thickens.
- Stir in the shredded cooked chicken, frozen peas, and frozen carrots.
- Season with salt and pepper to taste. Cook for another 5-7 minutes, or until the vegetables are tender and the chicken is heated through.
- Add the cooked pasta to the sauce and stir to combine. Serve hot.
Notes
Featured Comments
“Impressed! Clear steps and so flavorful results. Perfect for busy nights.”
“New favorite here — turned out amazing. crowd-pleaser was spot on.”
“Super easy and turned out amazing! My family asked for seconds. Saving this one.”
“This sweet treat was absolutely loved — the balanced really stands out. Thanks!”
“Made it tonight and wow — absolutely loved! Will definitely make Chicken pot pie pasta again.”
“Packed with flavor and so simple. Exactly what I wanted from Chicken pot pie pasta.”


