Oh, my dear friends, gather ’round, because I’ve got something truly special to share with you today. You know how sometimes you just crave that ultimate comfort food? That warm, hug-in-a-bowl feeling that makes everything seem right with the world? For me, that’s always been chicken pot pie. But let’s be honest, sometimes the thought of making a whole pie crust from scratch after a long day can feel a little daunting, right? Well, I stumbled upon a little kitchen magic a while back, and it has completely changed my life – and my weeknights! It’s called Chicken pot pie pasta, and trust me, it’s everything you love about classic chicken pot pie, but in a dreamy, creamy pasta form. It’s like a warm hug, but way easier and, dare I say, even more satisfying. This recipe is a lifesaver on busy nights, and my kids honestly ask for this Chicken Pot Pie Pasta more than they ask for anything else. It’s a true winner!
What is chicken pot pie pasta?
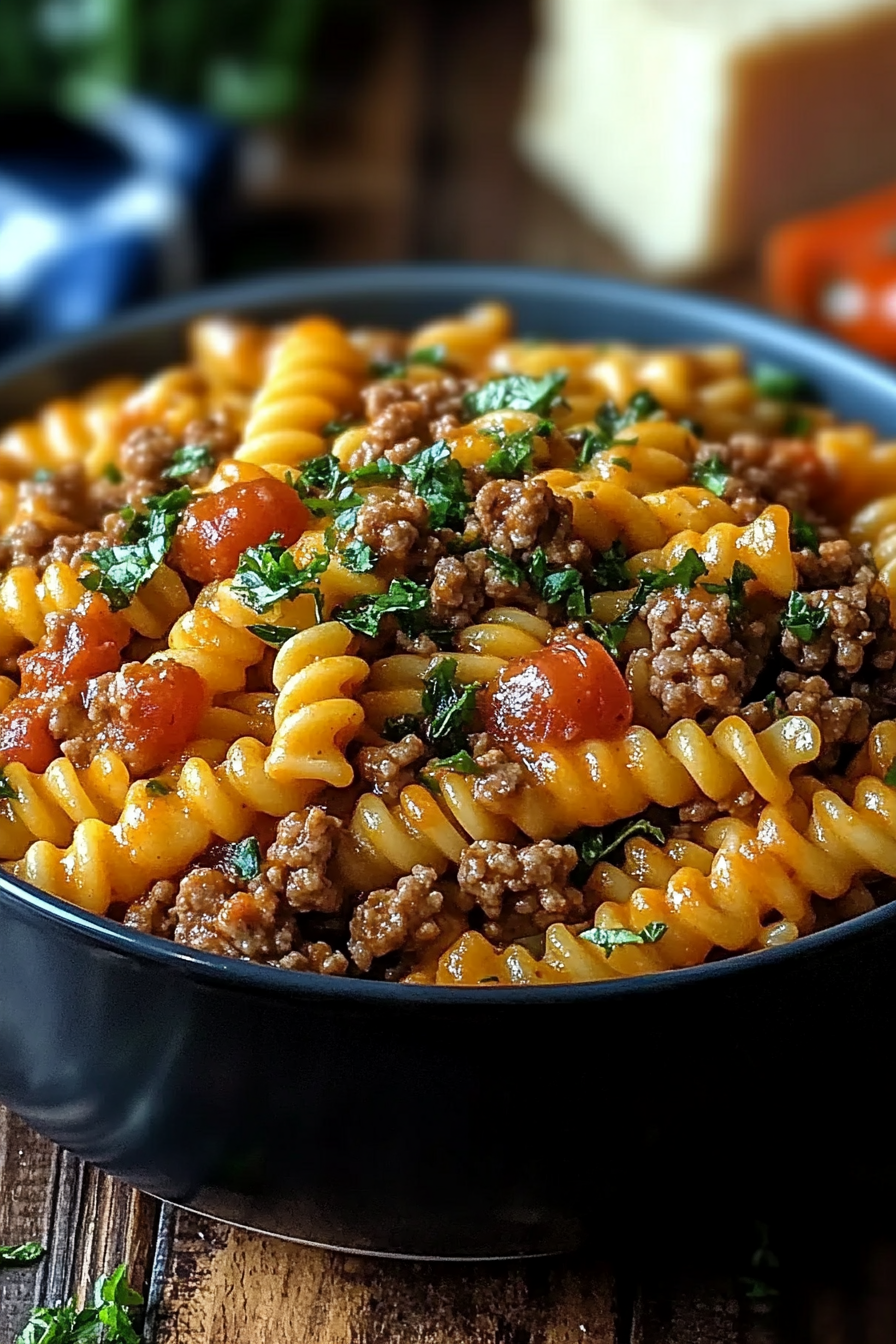
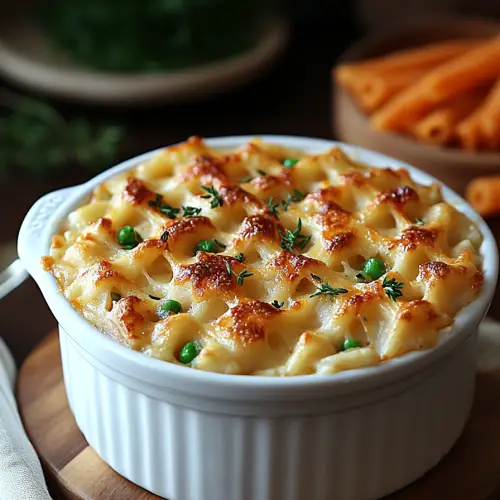
So, what exactly *is* Chicken Pot Pie Pasta? Think of it as the best of both worlds, smooshed together into one glorious dish. It’s essentially a creamy, savory pasta bake that captures all the beloved flavors of a traditional chicken pot pie. We’re talking tender chicken, sweet peas, carrots, and maybe a few other veggies swimming in a rich, luscious sauce, all tossed with your favorite pasta. It’s all baked together until it’s bubbly and golden, often with a little something on top for that extra bit of magic. It’s not fussy, it’s not complicated, and it’s incredibly forgiving. It’s essentially chicken pot pie’s more laid-back, incredibly delicious cousin who’s always up for a good time and never judges you for wearing sweatpants. It’s home cooking at its finest, made accessible for even the most time-crunched among us.
How do I make chicken pot pie Pasta?
Quick Overview
This Chicken pot pie Pasta is surprisingly straightforward. We’ll start by cooking our pasta, then whip up a quick, creamy sauce loaded with chicken and veggies, toss it all together, and bake until bubbly and golden. The beauty of this recipe is that it’s all about layering those familiar, comforting flavors into a simple pasta dish. It’s designed to be fuss-free, so you can get that amazing chicken pot pie taste with minimal effort. Trust me, it’s simpler than you think!
Ingredients
For the Main Pasta: For the main Pasta: For the main Pasta: For the main Pasta: For the main Pasta:
1 pound dried pasta (I love using rotini or penne because they hold the sauce so well, but elbows work great too!)
2 tablespoons olive oil
1 large yellow onion, diced
2 carrots, peeled and diced
2 celery stalks, diced
2 cloves garlic, minced
1.5 pounds boneless, skinless chicken breasts or thighs, cut into bite-sized pieces
1 teaspoon dried thyme
1/2 teaspoon dried rosemary
Salt and freshly ground black pepper to taste
4 cups chicken broth
1 cup frozen peas
1 cup frozen corn (optional, but adds a nice sweetness!)
1/2 cup heavy cream (or half-and-half for a lighter version)
1/4 cup all-purpose flour (or Gluten-Free Flour Blend)
1/2 cup grated Parmesan cheese (optional, but adds a lovely savory depth)
For the Optional Topping (Adds that Pie-like Crust!):
1 sheet puff pastry, thawed (follow package directions)
1 egg, beaten with 1 tablespoon water (for egg wash)
Step-by-Step Instructions
Step 1: Preheat & Prep Pan
First things first, let’s get your oven preheated to 375°F (190°C). While that’s warming up, grab a large, oven-safe skillet or a 9×13 inch baking dish. If you’re using a baking dish, you’ll cook your pasta separately. If you’re using a large oven-safe skillet (like cast iron), you can actually cook everything right in there, which means even fewer dishes to wash – my favorite kind of cooking!
Step 2: Mix Dry Ingredients
This step is more about preparing your chicken and flavor base. Pat your chicken pieces dry with paper towels. This is a little trick I learned that helps them brown nicely. In a small bowl, toss the chicken pieces with the dried thyme, rosemary, salt, and pepper. Make sure each piece is coated well. Set aside. Now, if you’re cooking your pasta separately, get a large pot of salted water boiling for that. Cook your pasta according to package directions until al dente. You don’t want it mushy, as it will cook more in the oven. Drain it well and set it aside.
Step 3: Mix Wet Ingredients
In a medium bowl, whisk together the chicken broth and the flour until there are no lumps. This is going to be our base for the creamy sauce. It’s important to get that flour fully incorporated to avoid a lumpy sauce later on. If you’re adding the heavy cream, whisk that in now too. Set this mixture aside.
Step 4: Combine
Now for the magic! If you’re using an oven-safe skillet, heat the olive oil over medium-high heat. Add the diced onion, carrots, and celery. Sauté for about 5-7 minutes until the vegetables are starting to soften. Add the minced garlic and cook for another minute until fragrant. Add your seasoned chicken pieces to the skillet. Cook, stirring occasionally, until the chicken is browned on all sides, about 5-7 minutes. Don’t worry about cooking it through completely at this stage, as it will finish cooking in the oven. If you’re using a baking dish and cooked your pasta separately, you’ll add the cooked chicken and sautéed veggies directly to your drained pasta in the baking dish.
Step 5: Prepare Filling
Pour the chicken broth and flour mixture (your “wet ingredients”) into the skillet with the chicken and vegetables. Stir well to combine, scraping up any browned bits from the bottom of the pan – that’s where so much flavor is! Bring the mixture to a simmer, stirring constantly, until the sauce begins to thicken, about 5 minutes. Stir in the frozen peas and corn (if using). Once the sauce has thickened nicely and everything is coated, remove the skillet from the heat. If you cooked your pasta separately, add the drained pasta to the baking dish with the chicken and veggie mixture, along with the peas and corn. Gently stir to combine everything. Stir in the Parmesan cheese, if you’re using it. Taste and adjust seasoning with more salt and pepper if needed. Remember, it should be wonderfully savory!
Step 6: Layer & Swirl
This is where we get that delightful topping. If you’re going the puff pastry route, carefully unroll your thawed puff pastry sheet. You might need to gently roll it out a little more to fit the top of your skillet or baking dish. Place it right on top of the Chicken Pot Pie Pasta mixture, pressing down slightly along the edges to seal. Cut a few slits in the top of the pastry with a sharp knife to allow steam to escape. Brush the entire top of the pastry with your egg wash for that beautiful golden-brown finish. If you’re not using puff pastry, you can simply top with a sprinkle of extra cheese, some breadcrumbs, or even just leave it as is!
Step 7: Bake
Place your skillet or baking dish on a baking sheet (this catches any potential spills and makes it easier to get in and out of the oven). Bake for 25-30 minutes, or until the sauce is bubbly and the puff pastry is puffed up and golden brown. If your pastry is browning too quickly, you can loosely tent it with foil. The key is that lovely bubbling from the sauce – that tells you it’s ready!
Step 8: Cool & Glaze
Once it’s out of the oven, let your Chicken Pot Pie Pasta rest for about 5-10 minutes before serving. This allows the sauce to thicken up a bit more and prevents everyone from burning their tongues (we’ve all been there!). If you used puff pastry, it should look beautifully golden and inviting.
Step 9: Slice & Serve
Now for the best part! Carefully slice and serve this glorious dish. It’s hearty and satisfying all on its own, so you don’t need much else. The aroma alone will have everyone gathering around the table. Enjoy that incredible comfort!
What to Serve It With
This Chicken Pot Pie Pasta is practically a meal in itself, but if you’re looking to round it out or dress it up a bit, here are some ideas that I’ve found work beautifully! For a simple and satisfying BREAKFAST (yes, leftovers are amazing for breakfast!), a small portion reheated is pure joy, maybe with a side of some fresh fruit to balance it out. For BRUNCH, I love serving it with a light, crisp green salad tossed with a lemon vinaigrette. It cuts through the richness beautifully. You could also add some crusty bread for dipping into that amazing sauce. As a more elegant DESSERT (don’t knock it until you try it – a small serving feels like a savory indulgence!), it’s lovely on its own or paired with a very light, slightly sweet dessert wine. For COZY SNACKS, especially if you’ve made mini portions in ramekins, they are perfect for a comforting afternoon bite. My family often just devours the leftovers straight from the fridge, but if I’m feeling fancy, I’ll serve a small scoop with a side of some steamed asparagus or green beans. It’s really that adaptable!
Top Tips for Perfecting Your Chicken Pot Pie Pasta
I’ve made this Chicken Pot Pie Pasta more times than I can count, and over the years, I’ve picked up a few tricks that really help make it sing. For the VEGETABLES, I almost always use frozen peas and corn because they’re perfectly tender and sweet right out of the bag, and they save so much prep time. If you’re using fresh peas and carrots, make sure to dice them quite small so they cook through properly in the sauce. For the PASTA, I really can’t stress enough how important it is not to overcook it initially. Al dente is your friend here! It needs to have a little bite to it because it will continue to cook and soften in the oven. The SAUCE is crucial, of course. Whisking the flour into the broth *before* adding it to the pan is key to a smooth, lump-free sauce. If you accidentally end up with a few lumps, don’t panic! You can strain the sauce, or sometimes a really vigorous whisking can break them up. For ingredient SWAPS, I’ve experimented quite a bit. If you don’t have chicken broth, vegetable broth works, though it will change the flavor profile slightly. For the cream, you can use half-and-half, or even a dairy-free milk like unsweetened cashew or oat milk if you need it to be dairy-free (though it won’t be quite as rich). The FLOUR is what thickens our sauce, so if you’re going gluten-free, a good gluten-free all-purpose flour blend that contains xanthan gum works well. Just make sure to whisk it thoroughly. When it comes to BAKING, I always use a baking sheet under my dish. It’s a lifesaver for any potential bubbling over, and it ensures even cooking. And the TOASTING of the herbs – if you have a moment, toasting the dried thyme and rosemary in the dry skillet for about 30 seconds before adding the oil and veggies can really bring out their aroma. It’s a small step, but it makes a difference! Finally, for the PUFF PASTRY topping, make sure it’s fully thawed but still chilled. Overworked or warm puff pastry won’t get as nicely puffed. And those little slits for steam? Don’t skip them, or you might end up with a pastry ‘explosion’ in your oven!
Storing and Reheating Tips
Let’s talk about what happens when you have glorious leftovers of this Chicken Pot Pie Pasta (which, by the way, is a rare and happy occasion in my house!). At ROOM TEMPERATURE, it’s best to let it cool completely and then cover it tightly within about two hours. It should be good for a couple of hours, but it’s really designed to be refrigerated soon after. For REFRIGERATOR STORAGE, this Chicken Pot Pie Pasta keeps wonderfully for about 3-4 days. I like to store it in an airtight container. If you topped it with puff pastry, it might soften a bit upon refrigeration, but it will still be delicious. For FREEZER INSTRUCTIONS, you can definitely freeze this! If you haven’t added the puff pastry topping yet, it freezes and reheats best. Portion it into freezer-safe containers or a freezer-safe baking dish, wrap it tightly with plastic wrap and then foil. It should last in the freezer for up to 2-3 months. When you’re ready to reheat from frozen, I recommend thawing it in the refrigerator overnight first. Then, bake it at around 350°F (175°C) until heated through. If you reheated a portion that had puff pastry, it might not be as crisp, but it will still be tasty. For reheating from the fridge, I simply pop it in the oven at 350°F (175°C) until it’s hot and bubbly, or you can reheat individual portions in the microwave. If the sauce seems a little dry after reheating, a splash of chicken broth or cream can help revive it. And for that PUFF PASTRY timing, if you’re freezing, it’s best to bake it fresh after thawing. If you’re refrigerating and want to crisp up the pastry again, you can always pop it in a hot oven for a few minutes before serving.
Frequently Asked Questions
Final Thoughts
So there you have it, my friends! This Chicken Pot Pie Pasta is more than just a recipe; it’s a culinary hug, a weeknight warrior, and a guaranteed crowd-pleaser. It takes all the beloved flavors of that classic comfort dish and makes it accessible, easy, and utterly delicious. I really hope you give this one a try. It’s the kind of meal that makes everyone happy, from the little ones to the grown-ups. If you love comforting pasta dishes, you might also enjoy my “Creamy Baked Ziti” recipe, which has a similar cozy vibe. I can’t wait to hear how your Chicken Pot Pie Pasta turns out! Please leave a comment below and tell me what you think, or if you’ve made any fun variations. Happy cooking!
Chicken Pot Pie Pasta
Ingredients
Main Ingredients
- 0.5 cup Butter
- 0.5 cup All-purpose flour
- 2 cups Chicken broth
- 1.5 cups Milk
- 3 cups Cooked chicken, shredded
- 1 cup Frozen peas
- 1 cup Frozen carrots, diced
- 0.5 teaspoon Salt
- 0.25 teaspoon Black pepper
- 16 ounces Pasta, cooked and drained such as rotini or penne
Instructions
Preparation Steps
- In a large saucepan or Dutch oven, melt butter over medium heat. Whisk in flour and cook for 1 minute, stirring constantly.
- Gradually whisk in chicken broth and milk until smooth. Bring to a simmer, stirring frequently, until the sauce thickens.
- Stir in the shredded chicken, frozen peas, and frozen carrots. Cook until heated through, about 5-7 minutes.
- Season with salt and black pepper.
- Add the cooked pasta to the sauce and stir to combine. Serve hot.
Notes
Featured Comments
“Impressed! Clear steps and quick weeknight win results. Perfect for busy nights.”
“New favorite here — family favorite. crowd-pleaser was spot on.”
“Super easy and turned out amazing! My family asked for seconds. Saving this one.”
“This sweet treat was absolutely loved — the rich really stands out. Thanks!”
“Made it tonight and wow — absolutely loved! Will definitely make Chicken Pot Pie Pasta again.”
“Packed with flavor and so simple. Exactly what I wanted from Chicken Pot Pie Pasta.”