

You know those recipes that just sneak up on you? The ones that start as a simple idea, maybe something you whipped up on a whim, and then suddenly they’re the thing everyone asks for? That’s exactly what happened with these crack burgers. I remember the first time I made them, I was trying to be a little fancy for a weekend lunch, and honestly, I wasn’t sure if the whole ‘burger meets sweetness’ thing would actually work. My husband took one bite, his eyes went wide, and he just said, “What is this magic?” And that, my friends, is how these crack burgers earned their name. They are utterly addictive. Forget your standard backyard BBQ fare for a moment, because this is something special, something that’ll have you licking your fingers and contemplating making a second batch before the first one is even gone.
What is crack burger?
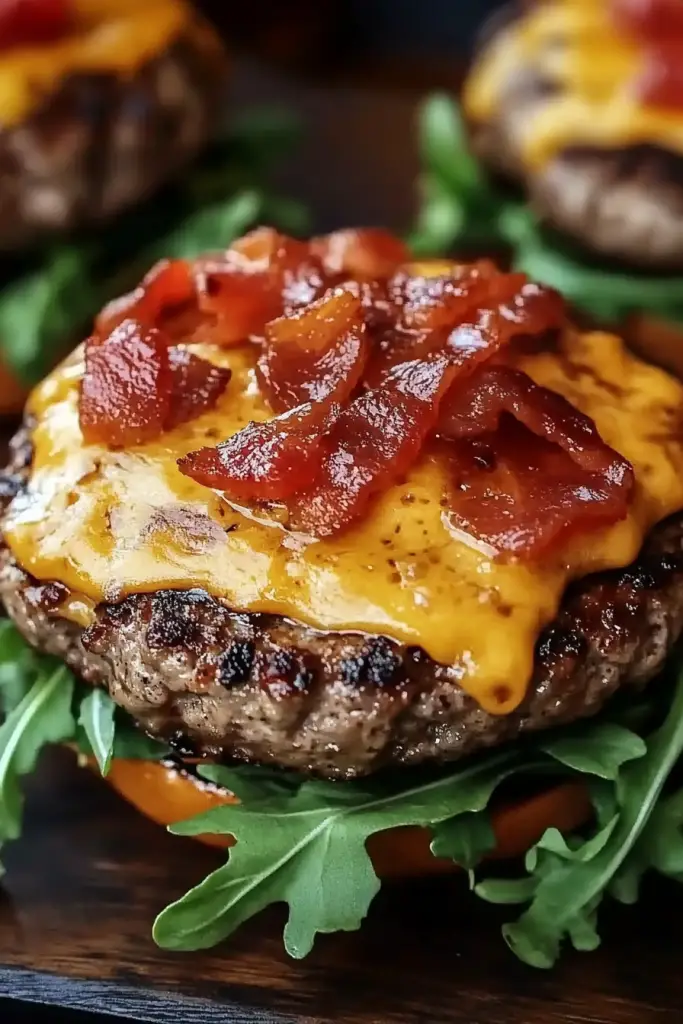
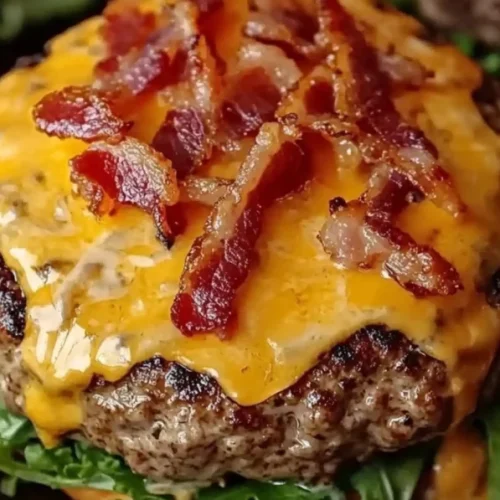
So, what exactly makes a burger a “crack burger”? It’s not about anything illicit, I promise! It’s purely about the incredible, crave-worthy flavor that makes them so irresistible. Think of it as the ultimate flavor explosion in burger form. We’re talking juicy, perfectly seasoned beef patties, but with a sweet and savory glaze that caramelizes beautifully under the broiler, creating this absolutely divine crust. It’s a little bit sweet, a little bit smoky, and intensely savory, all wrapped up in a burger that’s way more exciting than your everyday offering. The name really just captures that feeling of “I need another one *right now*.” It’s a simple concept, really, but the execution is what takes it to a whole new level of deliciousness.
How do you make crack burgers?
Quick Overview
The magic of these crack burgers lies in their straightforward approach. We start by forming our patties and getting them seasoned just right. Then, the star of the show: a quick, easy glaze that we’ll brush on. The final step involves a quick sear and then a little time under the broiler to let that glaze work its wonders, caramelizing into pure deliciousness. It’s a method designed for maximum flavor with minimal fuss, ensuring that even on your busiest days, you can create something truly spectacular. You’ll be amazed at how quickly these come together, and even more amazed at how fast they disappear!
Ingredients
For the Main Patties:
1.5 lbs ground beef (80/20 is my go-to for juiciness!)
1 teaspoon salt
1/2 teaspoon Black Pepper
1/4 teaspoon garlic powder
1/4 teaspoon onion powder
For the Crack Glaze:
1/4 cup ketchup
2 tablespoons brown sugar (light or dark, your preference!)
1 tablespoon Worcestershire sauce
1 teaspoon Dijon mustard
1/2 teaspoon smoked paprika (this is key for that smoky depth!)
A tiny pinch of cayenne pepper (optional, for a whisper of heat)
For Serving:
Burger buns, toasted
Your favorite burger toppings (lettuce, tomato, onion, pickles, cheese – the works!)
Step-by-Step Instructions
Step 1: Preheat & Prep Pan
First things first, let’s get our cooking surface ready. If you’re using a cast-iron skillet or a heavy-bottomed pan, place it over medium-high heat. You want it good and hot so you get a nice sear on those burgers. While the pan heats up, preheat your broiler to high. We’ll use that broiler for the final caramelization, and you want it ready to go. If you’re planning to toast your buns, now’s a good time to get them ready on a separate baking sheet, or you can toast them right on the grill or in a dry pan after the burgers are done. A lightly toasted bun is a must for holding all that deliciousness.
Step 2: Mix Dry Ingredients
In a medium bowl, gently combine your ground beef with the salt, black pepper, garlic powder, and onion powder. Now, here’s a little tip I learned from my grandma: try not to overmix the beef. You want to incorporate the seasonings evenly, but if you handle the meat too much, it can make your burgers tough. Just a gentle toss with your hands until everything is just combined is perfect. Think of it as giving the meat a light hug, not a wrestling match!
Step 3: Mix Wet Ingredients
This is where the magic really starts to happen with the glaze. In a small bowl, whisk together the ketchup, brown sugar, Worcestershire sauce, Dijon mustard, smoked paprika, and that optional pinch of cayenne if you like a little warmth. Stir it all up until it’s smooth and well combined. The brown sugar will dissolve into the other ingredients, creating this rich, glossy sauce. It smells amazing even at this stage, which is always a good sign!
Step 4: Combine
Now, let’s form those patties. Divide the seasoned ground beef into four equal portions. Gently shape each portion into a patty, about 3/4-inch thick. Don’t make them too thick, as they’ll cook more evenly this way. You can even make a slight indentation in the center of each patty with your thumb – this helps prevent them from puffing up in the middle while they cook. Place the patties on a plate or clean surface. If you have time, letting them chill in the fridge for about 15-20 minutes can help them hold their shape even better.
Step 5: Prepare Filling
Wait, what filling? Oh, that’s right, there’s no traditional “filling” for these burgers in the way you might think of a stuffed burger. The “filling” is actually the incredible, caramelized glaze that coats the outside! It’s applied in layers and cooked to perfection. So, while you might be used to adding cheese or bacon *inside* your burger, with these crack burgers, the real star is that sticky, sweet-savory glaze that forms on the exterior. It’s what makes them so unique and crave-worthy.
Step 6: Layer & Swirl
Okay, this is the fun part where we get ready to create that signature crack burger texture. Once your pan is hot and the patties are ready, carefully place them in the skillet. Let them sear for about 3-4 minutes per side for a nice crust. While the first side is searing, brush a generous amount of your prepared crack glaze over the top of each patty. Once you flip them, brush the other side. Don’t be shy with the glaze! You want a good coating.
Step 7: Bake
After you’ve seared both sides and glazed them, it’s time to let that broiler do its magic. Transfer your skillet (if oven-safe) or your patties onto a baking sheet to the oven. Broil for about 2-3 minutes, watching them very carefully! You want the glaze to bubble and caramelize, getting slightly browned and sticky. Keep an eye on them; they can go from perfect to burnt pretty quickly under the broiler. This step is crucial for that signature “crack” texture and flavor. It’s like magic happening right before your eyes!
Step 8: Cool & Glaze
Once they’re done under the broiler, carefully remove the skillet or baking sheet from the oven. Let the crack burgers rest for about 5 minutes on a cutting board or clean plate. This resting period is super important; it allows the juices to redistribute throughout the patty, making them even more tender and flavorful. While they rest, you can do one final light brush of glaze if you want an extra sticky finish, though it’s often not necessary. The residual heat will keep everything lovely and gooey.
Step 9: Slice & Serve
Now for the best part – serving! Place your beautifully glazed crack burgers on those toasted buns. Add your favorite toppings. I love a simple slice of sharp cheddar cheese that melts into the glaze, some crisp lettuce, and a juicy tomato slice. Pickles add a nice tang that cuts through the richness. Serve them immediately while they’re hot and gooey. Trust me, they don’t last long!
What to Serve It With
These crack burgers are so flavorful and satisfying on their own, but they also pair wonderfully with a variety of sides. For breakfast, imagine these as a savory component to a hearty start – perhaps alongside some crispy bacon and a perfectly fried egg. For a more elegant brunch, I love serving them open-faced on a toasted brioche bun with a dollop of avocado crema and a sprinkle of microgreens. It feels a bit fancy, but it’s still so easy! As a dessert, well, they’re not exactly a dessert, but for a truly decadent and casual snack, I’ve been known to chop up leftovers and put them on loaded Sweet Potato fries. It’s incredibly indulgent! For cozy snacks, my family loves them simply served on slider buns, perfect for movie nights or game days. My personal family tradition is to serve them with a big bowl of my homemade coleslaw – the creamy crunchiness is the perfect foil to the sticky sweetness of the burgers. They also go brilliantly with a simple green salad dressed with a light vinaigrette, or some classic potato salad. Whatever you choose, these burgers are guaranteed to be the star of the show!
Top Tips for Perfecting Your Crack Burgers
Over the years, I’ve learned a few tricks that I think really elevate these crack burgers from good to absolutely unforgettable. For the zucchini prep, if you’re using it in a bun or as a side, always grate it and let it sit in a colander for about 15-20 minutes. Squeeze out as much moisture as you possibly can. This prevents your bun from getting soggy or your side dish from becoming watery. When it comes to mixing the meat, I really can’t stress enough how important it is to not overwork it. Gentle handling is key for tender burgers. You want to see those distinct streaks of fat; that’s what makes them juicy. For the swirl customization, that really applies more to the glaze. Don’t be afraid to play with the ratios of the glaze ingredients to suit your taste. If you love a tangier kick, add a touch more Dijon. If you prefer it sweeter, a little extra brown sugar is never a bad thing. I once accidentally used honey instead of brown sugar and it was surprisingly delicious, though a bit more prone to burning, so watch it closely! For ingredient swaps, if you’re out of ketchup, a good quality tomato paste mixed with a little water and sugar can work in a pinch, though it won’t have quite the same depth. As for baking tips, remember that broiler temperatures can vary wildly between ovens. My best advice is to watch them like a hawk during those last few minutes. You can always pop them back under for another minute if needed, but you can’t un-burn them! I’ve learned that lesson the hard way a few times!
Storing and Reheating Tips
One of the best things about crack burgers is that they’re just as delicious the next day, even though there are rarely any leftovers! If you find yourself with some lucky remnants, storing them properly is key. At room temperature, I wouldn’t leave them out for more than two hours, especially if they have cheese on them, just to be safe. They really are best enjoyed fresh. For refrigerator storage, I like to place them in an airtight container, separated by parchment paper if you want to prevent them from sticking together too much. They’ll stay good in the fridge for up to 3 days. The glaze might firm up a bit, but that’s perfectly fine. Freezer instructions are a little different; I recommend freezing them *before* you glaze and broil them if you know you’ll want them later. Wrap individual, uncooked patties tightly in plastic wrap and then place them in a freezer bag. They can last for up to 2 months. To thaw, just transfer them to the fridge overnight and then proceed with the glazing and broiling as usual. If you have leftover *cooked* glazed burgers, I would store them in the fridge and reheat them gently. You can pop them back in a skillet over medium-low heat, or even in a toaster oven or conventional oven at around 300°F (150°C) until warmed through. Avoid microwaving if you can, as it can make them a bit tough. And for glaze timing, if you’re reheating, you can add a little extra glaze after they’re warmed up for that fresh-from-the-pan sticky goodness.
Frequently Asked Questions
Final Thoughts
So there you have it – the recipe for crack burgers that has become a staple in my kitchen. It’s a recipe born from a desire for something a little different, something that brings that “wow” factor without a ton of fuss. The combination of juicy beef and that sweet, savory, caramelized glaze is truly something special. It’s proof that sometimes the simplest ingredients, when brought together with a little care and a dash of inspiration, can create the most incredible flavors. If you’re looking for a burger that’s a step above the rest, something that will have your family and friends begging for the recipe, then you absolutely have to give these crack burgers a try. I can’t wait to hear what you think! And if you’ve tried them, share your favorite toppings or any fun variations you came up with in the comments below. Happy cooking!
Crack Burgers
Ingredients
Main Ingredients
- 0.5 lb ground beef 80/20 blend recommended
- 0.25 cup finely chopped onion
- 1 clove garlic, minced
- 0.5 teaspoon salt
- 0.25 teaspoon black pepper
- 2 tablespoons ketchup
- 1 tablespoon Worcestershire sauce
- 0.5 teaspoon brown sugar
- 0.5 teaspoon paprika
- 6 slices cheddar cheese
Instructions
Preparation Steps
- In a medium bowl, gently combine the ground beef, chopped onion, minced garlic, salt, and black pepper. Do not overmix.
- In a small bowl, whisk together the ketchup, Worcestershire sauce, brown sugar, and paprika to create the glaze.
- Divide the beef mixture into 6 equal portions and form into patties. Make a slight indentation in the center of each patty to prevent them from puffing up during cooking.
- Preheat your grill or a skillet to medium-high heat. Grill or pan-fry the burgers for about 4-5 minutes per side for medium-rare, or to your desired doneness.
- During the last 2 minutes of cooking, brush the glaze generously over both sides of the burgers. Add a slice of cheddar cheese on top of each burger and allow it to melt.
- Lightly toast the burger buns on the grill or in a pan. Place the glazed, cheesy burgers on the toasted buns and serve immediately.
Notes
Featured Comments
“Impressed! Clear steps and so flavorful results. Perfect for busy nights.”
“New favorite here — spot on. crowd-pleaser was spot on.”
“Super easy and turned out amazing! My family asked for seconds. Saving this one.”
“This sweet treat was absolutely loved — the zingy really stands out. Thanks!”
“Made it tonight and wow — family favorite! Will definitely make Crack burgers again.”
“Packed with flavor and so simple. Exactly what I wanted from Crack burgers.”


