

There’s something about biting into a warm, cheesy chicken enchilada that just makes everything better. I remember weekends when my grandma would pull out her big baking dish, the smell of cumin and chili powder filling the house, and my siblings and I hovering around the kitchen counter, eager for our favorite meal. Over the years, I’ve perfected this recipe, and I swear, no matter how busy the week gets, making these enchiladas feels like giving my family a big, comforting hug. They’re way easier than you’d think — I always do a little happy dance when I realize I’ve got everything I need in the fridge. Plus, this recipe’s flexible; I’ve swapped in spinach, added extra cheese, or even used turkey instead of chicken. Honestly, it’s sort of like that forgiving, cozy sweater you reach for on a chilly day — familiar, warm, and always satisfying. Trust me, once you make these, they’ll be fighting for seconds at your house, too.
What is chicken enchiladas?
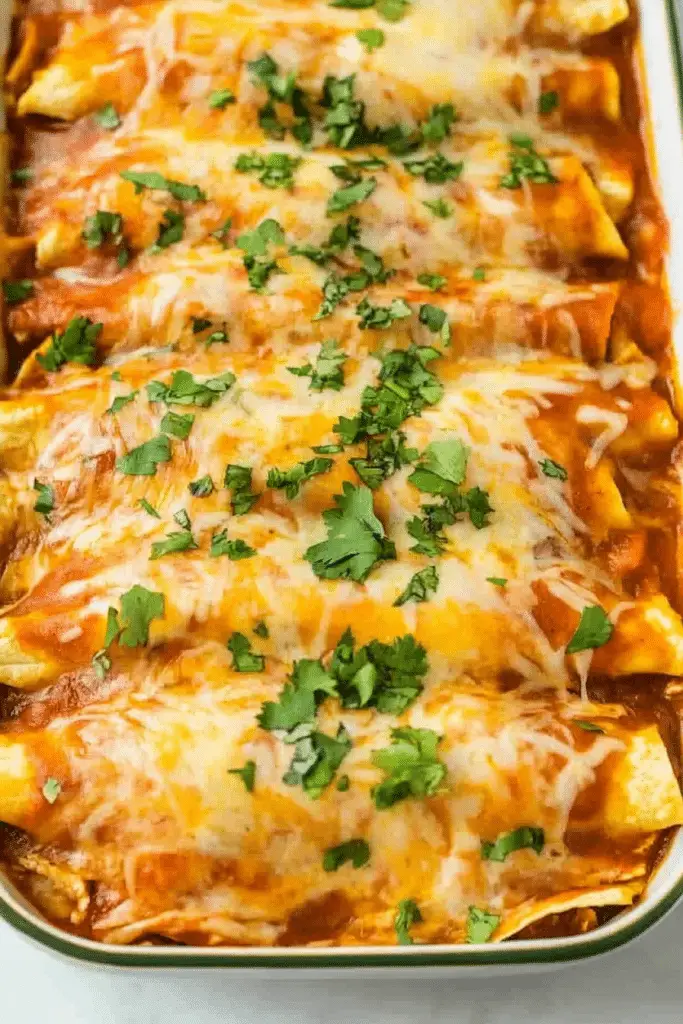
Think of chicken enchiladas as a warm, flavorful hug wrapped in a tortilla. It’s essentially a dish where soft corn or flour tortillas are stuffed with seasoned chicken and cheese, rolled up, and baked to gooey perfection. The term “enchilada” comes from the Mexican word “enchilar,” which means “to chili,” hinting at the spicy or chili-infused sauce that coats these delights. In my home, we call these our “weeknight lifesaver,” because they’re quick to assemble and even faster to disappear. It’s a perfect mix of tender shredded chicken, melty cheese, and savory sauce all in one bite. The best part? You can customize the filling and toppings — a sprinkle of cilantro, a dollop of sour cream, or even some diced avocado — making each batch just how you like it. Plus, they’re so versatile—great for feeding a crowd, or just leftovers for tomorrow’s lunch. Like a lot of family recipes, it’s become a little tradition we cherish around our table.
How do I make chicken enchiladas?
Quick Overview
In essence, making chicken enchiladas is a straightforward process that involves preparing your filling, rolling it into tortillas, layering everything in a baking dish, and pouring a rich chili sauce over the top before baking. The beauty here is how forgiving it is — you can prep the filling first, assemble ahead of time, and even freeze some before baking. All the magic happens in the oven, where the cheese melts into the sauce, creating pure comfort on a plate. Trust me, the smell alone will make anyone in your house come running.
Ingredients
For the Main Filling:
- 2 cups cooked, shredded chicken (leftover rotisserie chicken works wonders)
- 1 cup shredded cheese (cheddar, Monterey Jack, or a mix)
- 1 small onion, diced (optional but adds flavor)
- 1 teaspoon chili powder
- 1 teaspoon cumin
- Salt and pepper to taste
- 2 tablespoons chopped cilantro (if you love that fresh touch)
For the Sauce:
- 2 cups enchilada sauce (store-bought or homemade — I’ll share my secret recipe later!)
- 1 tablespoon olive oil
- 1 clove garlic, minced
- 1 teaspoon smoked paprika (adds depth)
For the Assembly:
- 10 corn or flour tortillas (warm them slightly — they roll easier!)
- Extra cheese for topping (more cheese? Yes, please!)
- Sour cream, sliced jalapenos, chopped cilantro, lime wedges for serving
Step-by-Step Instructions
Step 1: Preheat & Prep Pan
Set your oven to 375°F (190°C). Grab a 9×13-inch baking dish and lightly grease it or line it with parchment — that way, nothing sticks. This one’s easy to assemble ahead, so I like to have everything ready at this stage.
Step 2: Mix Dry Ingredients
If you’re adding spices to your shredded chicken, combine chili powder, cumin, salt, and pepper in a small bowl. Mix well and set aside. It’s a simple step but makes a big difference in flavor.
Step 3: Mix Wet Ingredients
If you’re sauteing onions or garlic, do this now in a bit of olive oil until fragrant. Mix the cooked chicken with the spices, cheese, and optional herbs. I always do this right after I cook the onion — it adds that extra savory punch.
Step 4: Combine
Mix the chicken and cheese mixture thoroughly — but don’t overmix. You want the filling to stay fluffy. Keep it simple; overmixing can make the filling dense.
Step 5: Prepare Filling
Lay out your tortillas and spoon a generous portion of the filling onto each. Roll it up tightly from one edge to the other. If the tortillas are a little stiff, warming them in the microwave for a few seconds makes rolling a breeze.
Step 6: Layer & Swirl
Place the rolled tortillas seam-side down in your prepared dish. Once all are lined up, pour the enchilada sauce evenly over the top. If you want a marbled look, before baking, swirl a little of the sauce into the top with a toothpick or skewer. Sprinkle extra cheese over everything for that irresistible cheesy crust.
Step 7: Bake
Bake uncovered for about 20-25 minutes, until bubbly and golden. Checking the cheese on top — it should be melty and slightly crispy around the edges. Every oven is different, so keep an eye on yours; you might need a few extra minutes for perfect cheese goo.
Step 8: Cool & Glaze
Let the dish rest for about 5 minutes after baking — this helps everything set. If you’re feeling fancy, drizzle a little sour cream or a squeeze of lime on top. Sometimes I add a splash of hot sauce for a little zing, especially if I’m feeling rebellious.
Step 9: Slice & Serve
Use a sharp knife to cut into squares. Serve with extra toppings like chopped cilantro, sliced avocado, or diced onions. These are perfect with a simple side salad or some Mexican rice. My family always asks for seconds — no joke, I swear it’s our most requested dinner now!
What to Serve It With
These chicken enchiladas are so adaptable — I love pairing them with different sides depending on the mood. For a quick breakfast twist, I’ll serve them with scrambled eggs and a fresh salsa, topped with a dollop of sour cream and a touch of hot sauce. It’s a comforting start to the day that feels a little special. For brunch, I’ll thin out some additional enchilada sauce, pour it over a platter of sliced leftovers, and sprinkle extra cheese for a cheesy skillet casserole. At dinner time, I love serving these alongside Mexican street corn or a crisp green salad for contrast. And when we’re craving something casual, I’ll just warm up some chips, throw in a few slices of jalapeno, and go all in. Honestly, you can’t go wrong — they’re delicious for cozy family nights, potlucks, or even packed in a lunchbox.
Top Tips for Perfecting Your Chicken Enchiladas
Over the years, I’ve picked up a few tricks that make these enchiladas turn out extra special. First, never skip warming the tortillas — it makes rolling so much easier and prevents tearing. I’ve made the mistake of rushing that step, and let’s just say, the filling wanted to escape! Also, the type of cheese matters. I love a good sharp cheddar combined with Monterey Jack — the meltiness is unbeatable. If you’re watching calories or want to make it healthier, you can swap out sour cream for Greek yogurt, and use reduced-fat cheese — it still turns out creamy and tasty. For the sauce, I’ve tested all kinds of store-bought brands, but I found that mixing my own enchilada sauce from tomato sauce, chili powder, garlic, and a pinch of cumin makes it way more flavorful. If you want extra smoky flavor, toss in a chipotle pepper or smoked paprika. One thing I’ve learned is that patience is key — don’t rush the baking process. That bubbly, slightly crisp top makes all the difference. Honestly, I’ve been tweaking this recipe for years based on what my family loves, and I promise, it keeps getting better every time.
Storing and Reheating Tips
Got leftovers? No worries! These chicken enchiladas store beautifully. If you’re planning to enjoy them within a day or two, just cover the baking dish with foil or plastic wrap and pop it in the fridge. They’re good for about 3-4 days that way. Just make sure to reheat in the oven or microwave until hot and bubbly — I prefer the oven for even reheating, about 15-20 minutes at 350°F, covered with foil. If you want to freeze them, assemble the dish, then wrap tightly in plastic wrap and foil. They’ll keep well for up to 3 months. When ready to eat, thaw in the fridge overnight, then bake covered for 30-35 minutes. I do recommend adding the cheese topping before reheating, so it melts into that gooey goodness. A quick tip: if you’re saving the sauce for later, wait until just before serving to pour it over the reheated enchiladas. That way, everything stays fresh and perfectly sauced.
Frequently Asked Questions
Final Thoughts
There’s nothing quite like a plate of homemade chicken enchiladas to warm up both your belly and your soul. This recipe has become a cornerstone in my family’s weekly menu — it’s quick, forgiving, and packed with flavor. I love how adaptable it is, whether I’m making it spicy, cheesy, or loaded with veggies. Every time I serve these, I get that satisfied smile from my family — proof that simple, good food is truly the sweetest thing. So grab your ingredients, roll up some love, and let your kitchen fill with that incredible aroma. Once you try this, I promise it’ll become a staple in your home, too. Happy baking, friends — can’t wait to hear how yours turns out! Don’t forget to share your tweaks and stories in the comments. I love hearing what makes this dish special for you.

chicken enchiladas
Ingredients
Main Ingredients
- 8 count flour tortillas
- 2.5 cups shredded chicken preferably from a rotisserie chicken
- 0.5 cup black beans
- 0.5 cup corn
- 10 oz diced tomatoes with green chiles
- 1 tsp cumin
- 0.5 tsp garlic powder
- 0.5 tsp onion powder
- 2 small cans red enchilada sauce
- 4 oz cheddar cheese shredded, divided
- 4 oz Monterey Jack cheese shredded, divided
- Cilantro for garnish
Instructions
Preparation Steps
- Preheat the oven to 350 degrees Fahrenheit.
- In a large bowl, mix shredded chicken, black beans, corn, diced tomatoes with green chiles, cumin, garlic powder, and onion powder.
- Spread 1/2 cup of enchilada sauce into the bottom of a 9x13 inch baking dish.
- Dip a tortilla into the enchilada sauce, then fill with about 1/3 cup of the chicken mixture, sprinkle with cheese, roll up, and place seam side down in the dish.
- Repeat with remaining tortillas and filling, arranging them tightly in the baking dish.
- Pour remaining enchilada sauce over assembled tortillas, then sprinkle with remaining cheese.
- Bake uncovered for 20 minutes or until cheese is bubbly and slightly browned.
- Garnish with chopped cilantro before serving.
Notes
Featured Comments
“This recipe sounds so comforting—nothing beats a warm, cheesy enchilada on a weekend! I can totally picture grandma’s kitchen.”
“So comforting! I love how enchiladas bring everyone together—especially when they’re homemade with love, just like your grandma’s.”
“Impressed! Clear steps and creamy results. Perfect for busy nights.”
“New favorite here — comforting. crowd-pleaser was spot on.”
“Super easy and turned out amazing! My family asked for seconds. Saving this one.”
“This sweet treat was absolutely loved — the zingy really stands out. Thanks!”


So comforting! I love how enchiladas bring everyone together—especially when they’re homemade with love, just like your grandma’s.
This recipe sounds so comforting—nothing beats a warm, cheesy enchilada on a weekend! I can totally picture grandma’s kitchen.