You know, there are some recipes that just feel like sunshine and happy memories all rolled into one. For me, that’s this Hummingbird Cake. It’s become my absolute favorite for Easter, and honestly, any time we need a little something special. It’s not just a cake; it’s a tradition. I remember the first time I ever made it, years ago, for a friend’s potluck. I was a little nervous because I’d heard it was a bit of a showstopper, and I was still finding my feet in the kitchen. But oh my goodness, the reaction! People raved about it, asking for the recipe before they’d even finished their first slice. It’s got that perfect balance of sweet, moist crumb and just the right amount of spice and fruit that makes it utterly irresistible. If you’re looking for Easter desserts that truly impress without keeping you chained to the oven all day, you *have* to try this. It’s honestly one of the easiest cakes to whip up, which is a huge win in my book, especially when the holidays get hectic.
What is a hummingbird cake?
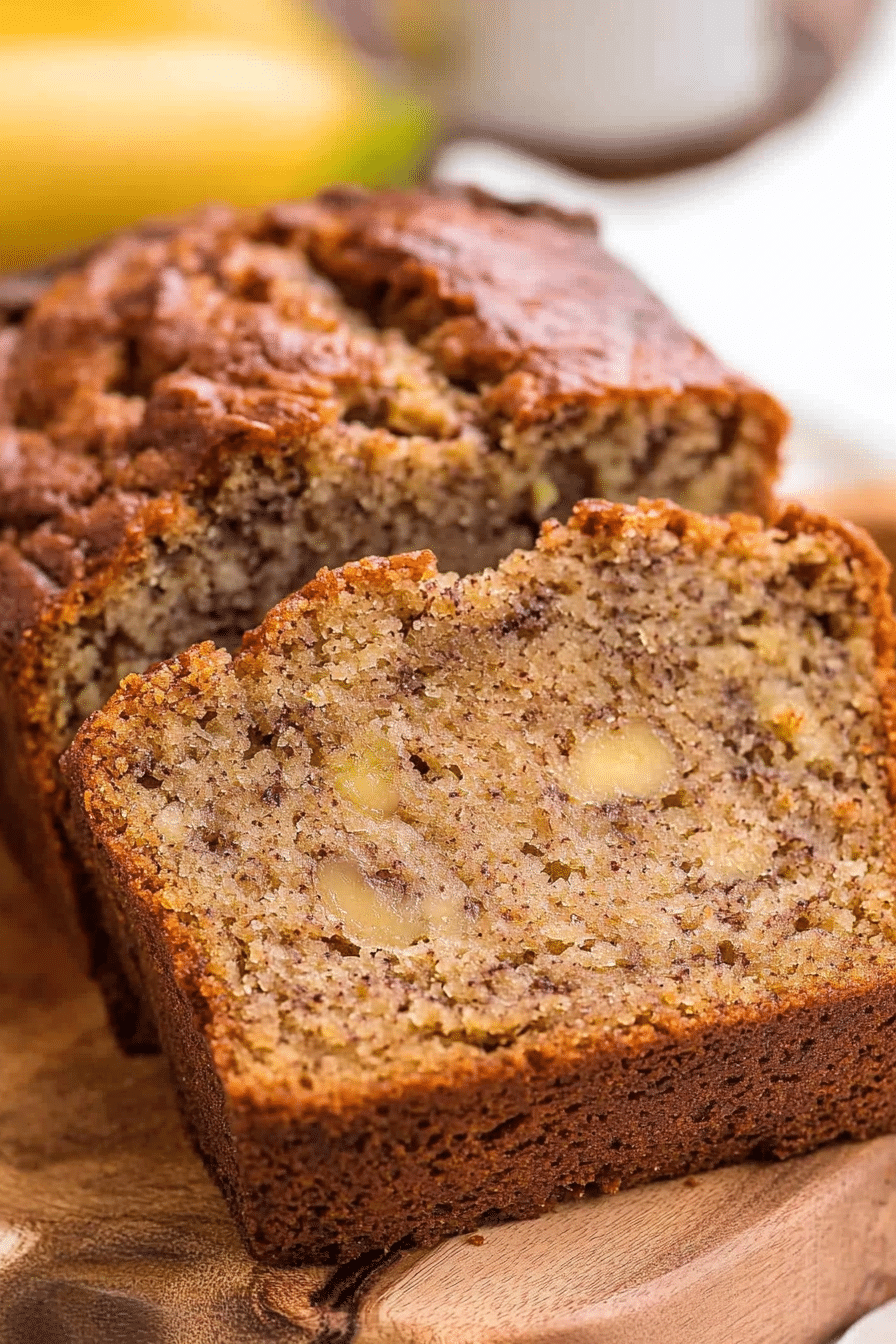
So, what exactly *is* a Hummingbird Cake? Well, the name itself is a little whimsical, isn’t it? It’s often said to be named because it’s so delicious it makes you hum with delight, or perhaps because it’s as sweet as nectar to hummingbirds. While the exact origin is a bit fuzzy, what I do know is that it’s a brilliantly moist cake packed with tropical flavors. Think ripe bananas, crushed pineapple, and crunchy pecans (or walnuts, if you prefer!). It’s essentially a Spice cake that gets its incredible texture and moisture from the fruit, and a little boost of richness from oil and eggs. It’s not overly fussy, which is why I adore it. It’s the kind of cake that looks elegant and tastes divine, but is actually surprisingly straightforward to make. It’s like the friend who shows up to a party looking perfectly put-together but is secretly the most relaxed person there. That’s this cake for you!
How do I make a Hummingbird cake?
Quick Overview
Making this Hummingbird Cake is wonderfully straightforward. You’ll be whisking together your dry ingredients, then your wet ingredients, before combining them gently. The star players – mashed bananas, crushed pineapple, and chopped pecans – get folded in at the end. Pour it into your prepared pans and bake until golden and a tester comes out clean. While it bakes, you’ll whip up a simple yet divine Cream Cheese Frosting. Once cooled, you’ll frost it, and that’s pretty much it! The beauty lies in its simplicity and the magic that happens when those flavors meld together.
Ingredients
For the Cake:
* 2 cups all-purpose flour: Make sure it’s fresh! I usually use unbleached, but whatever you have will work.
* 2 cups granulated sugar: This gives us that lovely sweetness and helps with the moist texture.
* 1 teaspoon baking soda: Our leavening agent, essential for a good rise.
* 1 teaspoon ground cinnamon: For that warm, comforting spice note.
* ½ teaspoon ground nutmeg: A little goes a long way to add depth.
* ¼ teaspoon salt: Balances out the sweetness and enhances flavors.
* 3 large eggs: At room temperature, they incorporate much better.
* 1 cup vegetable oil: Or another neutral oil like canola. This is key for the cake’s incredible moisture.
* 1 teaspoon Vanilla Extract: Pure vanilla extract, please! It makes a difference.
* 2 cups mashed ripe bananas: About 3-4 medium bananas. They should be spotty and fragrant for the best flavor. Make sure they’re truly mashed, not lumpy.
* 1 (8-ounce) can crushed pineapple, drained: Draining is important! We want the flavor, not excess liquid. Give it a good squeeze if needed.
* 1 cup chopped pecans (or walnuts): Toasted lightly, they’re even better! Adds a fantastic crunch.
What is the recipe for Cream Cheese Frosting?
* 1 (8-ounce) package Cream Cheese, softened: Make sure it’s truly soft for a smooth frosting.
* ½ cup unsalted butter, softened: Also needs to be soft so it creams nicely with the cream cheese.
* 1 teaspoon vanilla extract: Again, pure vanilla for the best flavor.
* 4 cups powdered sugar, sifted: Sifting prevents lumps and gives you a silky smooth frosting.
* 2-4 tablespoons milk or cream: To adjust consistency.
Step-by-Step Instructions
Step 1: Preheat & Prep Pan
First things first, get your oven preheating to 350°F (175°C). This is a pretty standard baking temperature, so most ovens handle it well. Now, grab two 9-inch round cake pans. I like to grease them really well with butter or baking spray, and then dust them lightly with flour. This is a crucial step to prevent any sticking! You can also line the bottoms with parchment paper rounds for extra insurance. Trust me, nobody wants their beautiful cake stuck to the pan.
Step 2: Mix Dry Ingredients
In a large mixing bowl, whisk together the flour, sugar, baking soda, cinnamon, nutmeg, and salt. You want to make sure everything is really well combined. Give it a good whisk, making sure there are no clumps of flour or spice. This ensures even distribution of the leavening agents and spices throughout the cake, which means a beautifully even bake and flavor.
Step 3: Mix Wet Ingredients
In a separate medium bowl, whisk together the eggs, vegetable oil, and vanilla extract until they are well combined and slightly frothy. Make sure the eggs are broken up and fully incorporated. This mixture forms the base for our moist cake.
Step 4: Combine
Now, pour the wet ingredients into the dry ingredients. Mix them together until *just* combined. I always say, don’t overmix! Overmixing develops the gluten in the flour, which can lead to a tougher cake. A few streaks of flour are perfectly fine at this stage; they’ll disappear when you add the mashed fruit.
Step 5: Prepare Filling
This is where the magic happens for the flavor and moisture. In a medium bowl, gently fold in your mashed ripe bananas, drained crushed pineapple, and chopped pecans. Make sure everything is evenly distributed throughout the batter. The batter will be quite thick at this point, and that’s exactly what you want!
Step 6: Layer & Swirl
Divide the batter evenly between your two prepared cake pans. You can eyeball it, or for perfect layers, use a kitchen scale. Smooth the tops gently with your spatula. Don’t worry about making it perfectly flat, the cake will bake up beautifully.
Step 7: Bake
Pop those pans into your preheated oven. Bake for about 30-35 minutes, or until a wooden skewer or toothpick inserted into the center of the cakes comes out clean. Keep an eye on them towards the end, as oven temperatures can vary. If the tops start to brown too quickly, you can loosely tent them with foil.
Step 8: Cool & Glaze
Once baked, let the cakes cool in their pans on a wire rack for about 10-15 minutes. This allows them to set up a bit more. Then, carefully invert them onto the wire rack to cool completely. While the cakes are cooling, prepare your cream cheese frosting. Beat the softened cream cheese and butter together until light and fluffy, then mix in the vanilla. Gradually add the sifted powdered sugar, alternating with the milk or cream, until you reach your desired spreading consistency. It should be smooth and creamy.
Step 9: Slice & Serve
Once the cakes are completely cool (this is important, otherwise the frosting will melt!), frost them generously. I like to frost the top of one layer, then place the second layer on top, and frost the entire cake. A simple spatula works wonders for a rustic finish, or you can get fancy with piping. Slice into wedges and enjoy! This cake is fantastic slightly chilled or at room temperature.
What to Serve It With
This Hummingbird Cake is so versatile, it truly fits into any meal or occasion. For a relaxed breakfast, I love having a slice with a strong cup of coffee. The spices and fruit just wake up your senses in the best way. It’s not overly sweet, so it feels perfectly acceptable as a morning treat.
For a more elegant Easter brunch, I’ll plate a generous slice with a dollop of whipped cream or a small scoop of vanilla bean ice cream. A few fresh berries on the side add a lovely pop of color and freshness. For beverages, a mimosa or a sparkling cider would be delightful.
As a dessert, it’s already a star! After dinner, I often serve it with a small glass of dessert wine, or simply on its own with a tiny dusting of powdered sugar if I want something a little lighter than the cream cheese frosting.
And for those cozy, quiet evenings when you just need a little comfort, a warm slice with a cup of herbal tea is pure bliss. My kids love it most when it’s slightly warm, almost like a treat fresh from the oven, with extra frosting!
Top Tips for Perfecting Your Hummingbird Cake
Over the years, I’ve picked up a few tricks that make this cake even better. First, when it comes to the bananas, use the ripest ones you can find – the ones with lots of brown spots are packed with natural sweetness and flavor, and they mash so easily. Don’t be tempted to use firm, yellow bananas; you’ll miss out on a lot of the signature flavor. And when you mash them, make sure there are no big lumps left; a smooth mash ensures an even texture throughout the cake.
For the crushed pineapple, draining it is crucial. I usually press it gently in a fine-mesh sieve with the back of a spoon to get out as much liquid as possible. Excess moisture can make the cake too wet or even soggy, and we don’t want that!
When mixing the batter, remember that rule: “just combined.” Seriously, it’s the most important tip for a tender cake. A few little flour streaks are your friends! Overmixing is the quickest way to a tough cake, and nobody wants that. Fold in the bananas, pineapple, and pecans gently, just until they’re distributed.
If you like nuts, toasting them beforehand makes a world of difference. Toss them on a dry baking sheet in the oven for about 5-7 minutes until fragrant, then let them cool before chopping and adding them to the batter. It really enhances their nutty flavor and adds a delightful crunch.
When it comes to baking, ovens can be quirky. I always recommend doing the toothpick test. If your cake is browning too quickly on top but not cooked through in the center, you can loosely tent it with a piece of aluminum foil. This reflects the heat and allows the inside to cook without burning the outside.
For the cream cheese frosting, the key is soft, but not melted, cream cheese and butter. If they’re too cold, you’ll get lumps, and if they’re too warm, your frosting will be too thin. Sifting your powdered sugar is another small step that makes a big difference for a smooth, silky frosting. And don’t be afraid to add a touch more milk or cream if it seems too stiff, or a bit more powdered sugar if it’s too runny. I’ve found that adding the liquid one tablespoon at a time is the safest way to get it just right.
Storing and Reheating Tips
This cake is pretty resilient and stays moist for quite a while, which is one of the reasons I love it for gatherings. If you have any leftovers (which is rare in my house!), you can store the frosted cake at room temperature for up to 2 days, as long as your kitchen isn’t too warm. Just make sure it’s covered well with plastic wrap or in an airtight cake carrier to prevent it from drying out.
If you need to store it for longer, or if your kitchen is on the warmer side, I recommend refrigerating it. Place the frosted cake in an airtight container or wrap it tightly with plastic wrap. It will keep well in the refrigerator for about 4-5 days. When you’re ready to serve it from the fridge, I always let it sit out at room temperature for about 20-30 minutes before slicing. This brings back some of that lovely soft texture.
Freezing is also an option, though I usually only do this with unfrosted layers. If you plan to freeze it, let the cake layers cool completely, then wrap them tightly in a couple of layers of plastic wrap, followed by a layer of aluminum foil. They can be frozen for up to 2-3 months. Thaw them overnight in the refrigerator, then bring them to room temperature before frosting. If you’re freezing frosted cake, it can get a bit tricky as the frosting might crack or become soggy upon thawing, so unfrosted is best for freezing.
For the glaze, if you’re keeping the cake at room temperature, the frosting usually holds up fine. If refrigerating, the frosting might firm up a bit, but it softens beautifully at room temperature. For best results, I always aim to frost the cake the day before serving or on the day of serving, if possible.
Frequently Asked Questions
Final Thoughts
So there you have it – my absolute favorite Hummingbird Cake recipe! It’s a cake that consistently delivers on flavor, moisture, and pure joy, making it the perfect addition to your Easter desserts spread, or really, any celebration. The combination of ripe bananas, sweet pineapple, warm spices, and crunchy pecans, all topped with that dreamy cream cheese frosting, is just irresistible. It’s more than just a recipe for me; it’s a little bit of happy baking magic that never fails to bring smiles.
If you love this cake, you might also enjoy my Spiced Carrot Cake with Cream Cheese Frosting or my Lemon Blueberry Bundt Cake for more delightful baking adventures. They share that same spirit of deliciousness and approachable baking.
I truly hope you give this Hummingbird Cake a try. It’s one of those recipes that just feels like a warm hug. I can’t wait to hear how yours turns out! Please leave a comment below with your thoughts, any variations you tried, or simply to share your baking triumphs. Happy baking, everyone!

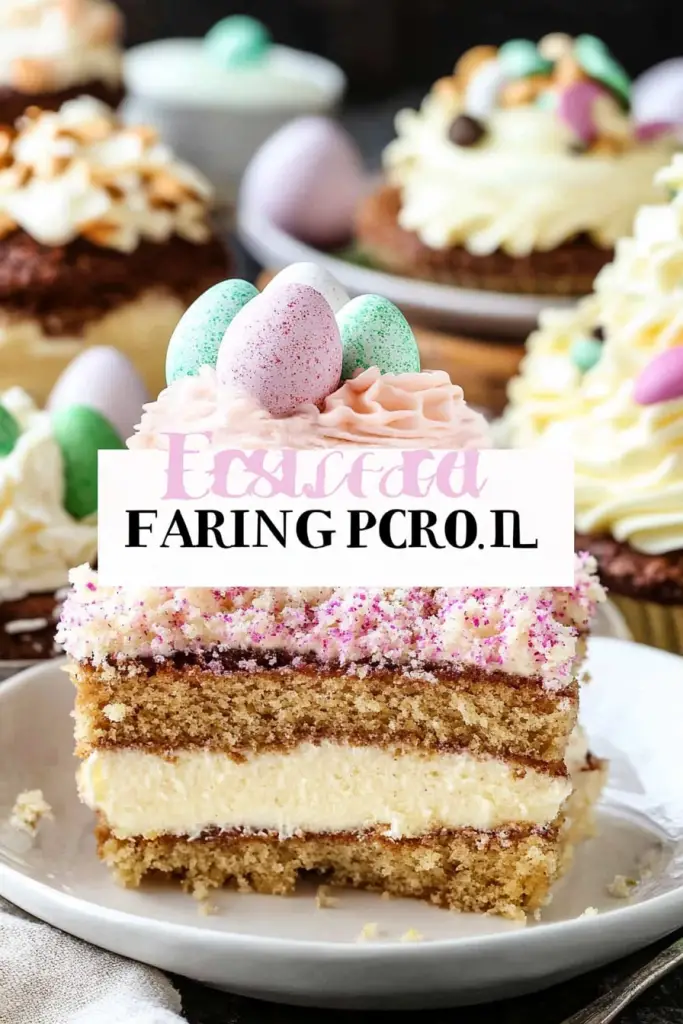
Easter Desserts Assortment
Ingredients
Easter Cupcakes
- 2.5 cups all-purpose flour
- 1.5 cups granulated sugar
- 0.75 cups unsalted butter, softened
- 4 large eggs
- 1 cup milk
- 1.5 teaspoons vanilla extract
- 2 teaspoons baking powder
- 0.5 teaspoons salt
Decorated Sugar Cookies
- 3 cups all-purpose flour
- 1 cup unsalted butter, softened
- 1 cup powdered sugar
- 2 large egg yolks
- 1 teaspoon vanilla extract
Chocolate Easter Cake
- 2 cups all-purpose flour
- 1.75 cups granulated sugar
- 0.75 cups unsweetened cocoa powder
- 1.5 teaspoons baking soda
- 1 teaspoon baking powder
- 0.5 teaspoons salt
- 2 large eggs
- 1 cup buttermilk
- 0.5 cups vegetable oil
- 1 teaspoon vanilla extract
- 1 cup hot water
Instructions
Easter Cupcake Preparation
- Preheat oven to 350°F (175°C). Line muffin tins with cupcake liners.
- In a large bowl, whisk together flour, sugar, baking powder, and salt.2.5 cups all-purpose flour
- Add softened butter and eggs to the dry ingredients. Beat until well combined.2.5 cups all-purpose flour
- In a separate bowl, whisk together milk and vanilla extract.2.5 cups all-purpose flour
- Gradually add the wet ingredients to the dry ingredients, mixing until just combined. Do not overmix.
- Divide batter evenly among prepared cupcake liners, filling each about two-thirds full.
- Bake for 18-22 minutes, or until a wooden skewer inserted into the center comes out clean.
- Let cool in muffin tins for a few minutes before transferring to a wire rack to cool completely.
Sugar Cookie Preparation
- Cream together butter and powdered sugar until light and fluffy.2.5 cups all-purpose flour
- Beat in egg yolks and vanilla extract.2.5 cups all-purpose flour
- Gradually add flour, mixing until just combined. Dough will be crumbly.2.5 cups all-purpose flour
- Divide dough in half, flatten each half into a disc, wrap in plastic wrap, and refrigerate for at least 1 hour.
- Preheat oven to 375°F (190°C). Line baking sheets with parchment paper.
- On a lightly floured surface, roll out each disc of dough to about 1/4-inch thickness. Cut out desired shapes using cookie cutters.
- Place cookies on prepared baking sheets and bake for 8-10 minutes, or until edges are lightly golden.
- Let cool on baking sheets for a few minutes before transferring to a wire rack to cool completely. Decorate with icing as desired.
Chocolate Easter Cake Preparation
- Preheat oven to 350°F (175°C). Grease and flour two 9-inch round cake pans.
- In a large bowl, whisk together flour, sugar, cocoa powder, baking soda, baking powder, and salt.2.5 cups all-purpose flour
- Add eggs, buttermilk, oil, and vanilla extract to the dry ingredients. Beat on medium speed for 2 minutes.2.5 cups all-purpose flour
- Carefully stir in hot water. Batter will be thin.2.5 cups all-purpose flour
- Pour batter evenly into prepared cake pans.
- Bake for 30-35 minutes, or until a wooden skewer inserted into the center comes out clean.
- Let cool in pans for 10 minutes before inverting onto a wire rack to cool completely. Frost as desired.
Notes
Featured Comments
“Impressed! Clear steps and creamy results. Perfect for busy nights.”
“New favorite here — so flavorful. crowd-pleaser was spot on.”
“Super easy and turned out amazing! My family asked for seconds. Saving this one.”
“This sweet treat was absolutely loved — the rich really stands out. Thanks!”
“Made it tonight and wow — family favorite! Will definitely make Easter desserts again.”
“Packed with flavor and so simple. Exactly what I wanted from Easter desserts.”