You know those days when a craving hits, a real, deep-down craving, and you just need something warm, comforting, and with a little kick? That’s precisely when my mind goes straight to these baked spicy bites. Honestly, they’re a lifesaver. I remember the first time I whipped them up. It was a chilly autumn evening, the kind where you just want to curl up with a good book and something delicious. I was looking for something beyond the usual cookies or brownies, something with a bit more pizzazz. And then it hit me – a delightful combination of sweet and heat, all baked into these perfectly tender, bite-sized morsels. They’re like a hug in edible form, but with a playful wink. If you’ve ever loved a good gingerbread cookie but wished it had a little more zest, you’re going to adore these baked spicy bites. They’ve become a staple in my home, requested constantly by family and friends alike. They’re surprisingly simple, which is always a win in my book!
What Are Baked Spicy Bites?
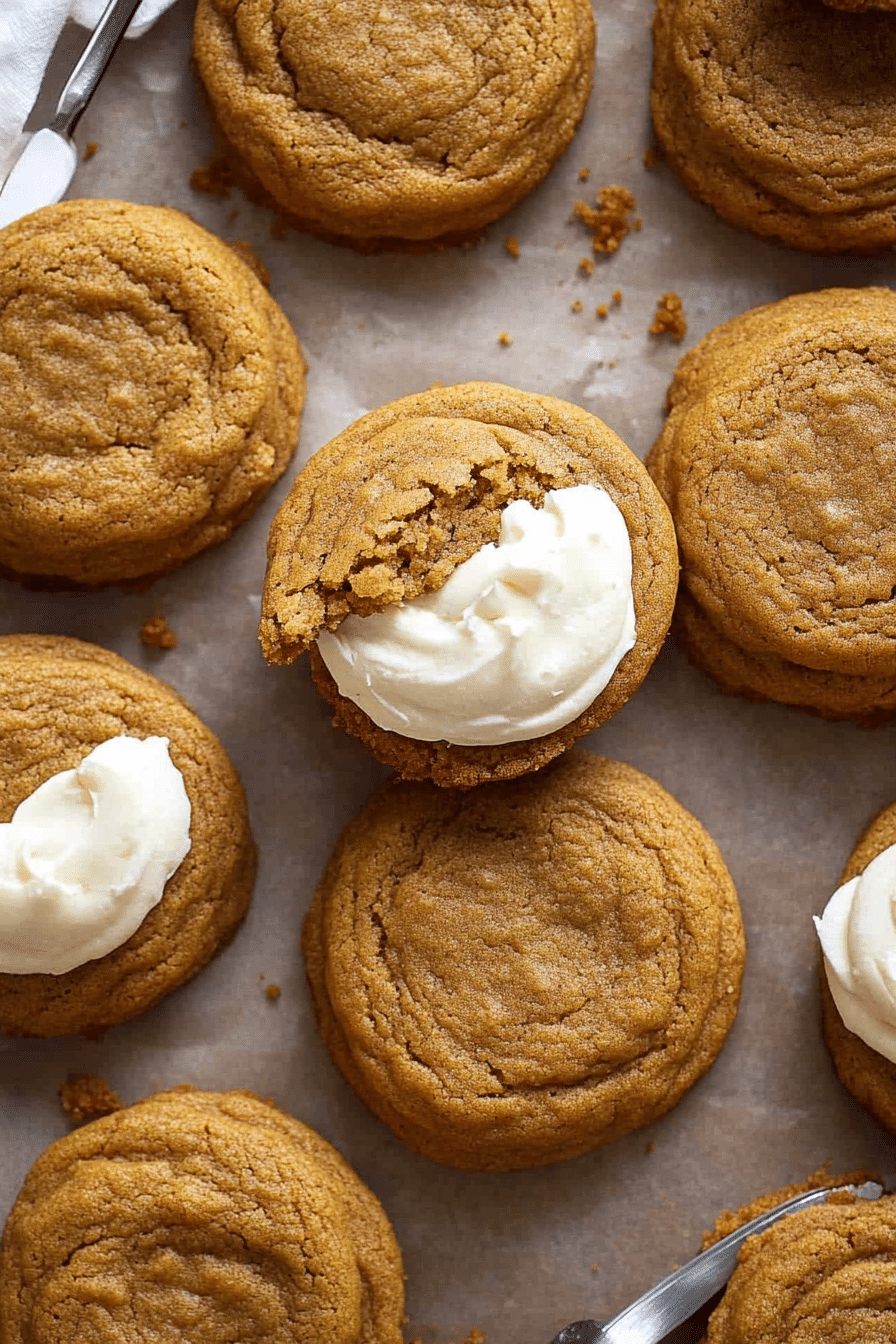
So, what exactly are these magical things I call baked spicy bites? Think of them as little flavor bombs, packed with warmth and just the right amount of gentle heat. They’re not overly sweet, which I personally love, but they have this incredible depth of flavor that comes from a blend of warming spices like cinnamon, ginger, and a touch of cayenne pepper. The name itself, “baked spicy bites,” really says it all – they’re baked until golden, they’re wonderfully spicy (in a good way!), and they’re perfectly sized for popping into your mouth. I like to think of them as the sophisticated cousin to a basic muffin or cookie. They have a lovely, slightly chewy texture on the inside with a delicate crispness around the edges, and when they come out of the oven, the aroma alone is enough to make your mouth water. They’re the perfect little treat when you need a pick-me-up or something to share at a gathering.
Why you’ll love this recipe?
There are so many reasons why I think you’ll fall head over heels for these baked spicy bites, just like I have. First off, the flavor profile is simply divine. It’s this comforting dance of sweet spices that feels so cozy, but then there’s that whisper of heat that wakes up your palate and keeps you coming back for more. It’s not overpowering, mind you, just enough to make things interesting! What I particularly adore is how easy they are to make. Seriously, on a busy weeknight, I can have these whipped up and in the oven in less time than it takes to decide what to watch on TV. All the ingredients are pretty common pantry staples too, so you likely won’t need a special trip to the grocery store. This makes them wonderfully cost-efficient, which is always a huge bonus. And talk about versatile! I’ve served these at everything from casual coffee mornings to more formal dessert buffets, and they’re always a hit. They’re fantastic alongside a steaming cup of coffee or tea, and they’re even surprisingly good crumbled over a scoop of vanilla Ice Cream. If you’re looking for a recipe that brings warmth, comfort, and a little bit of excitement to your kitchen, these baked spicy bites are it. They’ve honestly earned a permanent spot on my “go-to” recipe list.
How to Make Baked Spicy Bites
Quick Overview
Making these baked spicy bites is a straightforward process that’s incredibly rewarding. You’ll basically be mixing up a simple batter, adding in your spice blend and a touch of sweetness, and then baking them off into delightful little morsels. The key is to get the spice balance just right and avoid overmixing the batter, which ensures a tender texture. They bake up quickly, filling your kitchen with an irresistible aroma. The whole process from start to finish is usually under an hour, making them perfect for when you need a delicious homemade treat in a pinch.
Ingredients
For the Main Batter:
1 ½ cups all-purpose flour (I always use unbleached for a better texture)
1 teaspoon baking soda (make sure it’s fresh!)
½ teaspoon salt
1 teaspoon ground cinnamon
½ teaspoon ground ginger
¼ teaspoon ground cloves
⅛ teaspoon cayenne pepper (adjust this to your spice preference – start small if you’re unsure!)
½ cup (1 stick) unsalted butter, softened (I like to use good quality butter for the best flavor)
¾ cup packed light brown sugar (the molasses in brown sugar gives them a lovely moistness)
1 large egg
1 teaspoon Vanilla Extract
½ cup unsweetened applesauce (this is my secret for extra moisture without making them greasy!)
¼ cup milk (whole milk gives the best richness, but almond or soy milk works too)
For the Optional Filling/Swirl:
2 tablespoons finely chopped crystallized ginger (for an extra punch!)
2 tablespoons mini chocolate chips (dark chocolate is lovely here)
1 tablespoon granulated sugar mixed with ¼ teaspoon cinnamon (for a sweet topping)
For the Optional Glaze:
1 cup powdered sugar
2-3 tablespoons milk or cream
½ teaspoon vanilla extract
A pinch of cinnamon or a dash more cayenne (optional)
Step-by-Step Instructions
Step 1: Preheat & Prep Pan
First things first, let’s get that oven ready. Preheat it to 350°F (175°C). I like to line my baking sheets with parchment paper. This is a little trick I learned after a few batches of slightly stuck bites – parchment paper makes cleanup a breeze and ensures they don’t stick. If you don’t have parchment, just grease your baking sheets lightly.
Step 2: Mix Dry Ingredients
In a medium bowl, whisk together the flour, baking soda, salt, cinnamon, ginger, cloves, and that little pinch of cayenne pepper. Give it a good whisk to make sure all those spices are evenly distributed. This ensures every bite gets that perfect spicy flavor. If your spices have been sitting around for ages, give them a sniff – if they don’t smell fragrant, it might be time for fresh ones!
Step 3: Mix Wet Ingredients
In a large bowl, cream together the softened butter and the packed brown sugar until light and fluffy. This usually takes about 2-3 minutes with an electric mixer. Then, beat in the egg and vanilla extract until well combined. Next, stir in the unsweetened applesauce and milk. It might look a little separated at this stage, but don’t worry, it will come together when you add the dry ingredients.
Step 4: Combine
Gradually add the dry ingredients to the wet ingredients, mixing on low speed (or by hand with a spatula) until just combined. Be careful not to overmix! Overmixing develops the gluten in the flour, which can make your baked spicy bites tough instead of tender. Stop mixing as soon as you no longer see streaks of flour. The batter should be thick but pourable.
Step 5: Prepare Filling (Optional)
If you’re feeling fancy, now’s the time to prepare your optional additions. If you’re using crystallized ginger and chocolate chips, just have them ready to go. For the sweet topping, mix the granulated sugar with the cinnamon in a tiny bowl.
Step 6: Layer & Swirl (Optional)
This step is purely for fun and added flair! You can either gently fold in the crystallized ginger or chocolate chips into the batter, or you can dollop spoonfuls of batter into your prepared muffin tin (or onto a baking sheet for bite-sized balls) and then sprinkle your sugar-cinnamon mix on top. For a swirled effect, you can alternate spoonfuls of batter and a drizzle of something like melted chocolate or a thicker jam, then swirl gently with a toothpick. Or, simply drop rounded tablespoons of the batter onto your prepared baking sheets, leaving a bit of space between them, and then sprinkle the cinnamon-sugar mixture over the tops. I usually make them into little bite-sized balls, about 1.5 to 2 tablespoons each.
Step 7: Bake
Bake for 12-15 minutes, or until the edges are lightly golden and a toothpick inserted into the center comes out clean. Keep an eye on them, as oven temperatures can vary. I always start checking around the 12-minute mark. They should spring back slightly when gently touched.
Step 8: Cool & Glaze
Let the baked spicy bites cool on the baking sheet for a few minutes before transferring them to a wire rack to cool completely. If you’re planning to glaze them, make sure they are fully cooled. For the glaze, whisk together the powdered sugar, milk/cream, vanilla, and any optional spices until smooth and drizzle-able. You want a consistency that’s thick enough to coat but still easy to drizzle. Drizzle it over the cooled bites. Some people like a thick glaze, others prefer just a light dusting. I love the contrast of the sweet glaze against the slightly spicy bite!
Step 9: Slice & Serve
These are best served at room temperature or slightly warm. If you made them as larger bites, you can certainly slice them in half before serving. They’re perfect on their own, but really shine with a cup of coffee or a glass of milk. Enjoy the explosion of flavor!
What to Serve It With
These baked spicy bites are so wonderfully versatile, you can enjoy them at almost any time of day or for any occasion. For breakfast, they’re a delightful accompaniment to your morning coffee or tea. I like to serve them warm, perhaps with a small dollop of Greek yogurt for a little tang. For a more festive brunch spread, I’ll arrange them on a tiered stand, maybe with some fresh berries and a sprig of mint. They add a lovely, unexpected touch of warmth to the table. As a dessert, they’re simply divine. I often serve them after a hearty meal, perhaps alongside a scoop of good quality vanilla bean Ice Cream or a drizzle of caramel sauce. The contrast between the warm spice and the cool ice cream is pure bliss! And for those cozy snack times when you just need a little something to lift your spirits, these baked spicy bites are absolute perfection. They’re great for packing in a lunchbox for a mid-day treat, or just enjoying with a cup of hot chocolate on a rainy afternoon. My family’s tradition is to have them with hot apple cider in the fall, and it just feels like the coziest thing in the world.
Top Tips for Perfecting Your Baked Spicy Bites
Over the years, I’ve learned a few things that really help elevate these baked spicy bites from good to absolutely unforgettable. When it comes to the spices, don’t be afraid to play around! The ¼ teaspoon of cayenne pepper is my sweet spot, but if you love heat, you can bump it up to ½ teaspoon. Conversely, if you’re sensitive to spice, start with just a tiny pinch or omit it entirely. The goal is a pleasant warmth, not a fiery burn. For the batter, the key is *not* to overmix once you add the dry ingredients. Mix only until the flour disappears. A few little lumps are totally fine; they’ll bake out and result in a much more tender bite. I learned this the hard way early on, and it made a world of difference. If you’re making them into little balls, use a cookie scoop for consistent sizing. This ensures they all bake evenly. For the optional cinnamon-sugar topping, pressing it down gently into the batter just before baking helps it adhere beautifully. When it comes to ingredient swaps, I’ve experimented quite a bit. If you don’t have applesauce, you can try unsweetened pumpkin puree or even mashed banana, though these will alter the flavor slightly. For a dairy-free version, simply use your favorite non-dairy milk and vegan butter. I’ve even made these with a gluten-free all-purpose Flour Blend, and they turned out wonderfully, though they might be slightly denser. Just ensure your blend has a good binder like xanthan gum. Baking time can vary depending on your oven, so always do the toothpick test. A few moist crumbs clinging to the toothpick is perfect; a wet batter means they need more time. If you find your tops are browning too quickly, you can loosely tent them with foil for the last few minutes of baking.
Storing and Reheating Tips
These baked spicy bites are delightfully durable when it comes to storing, which is one of the things I love about them. If you happen to have any leftovers (which is rare in my house!), you can store them at room temperature in an airtight container for up to 3 days. They actually get a little chewier and more flavorful after a day. If you plan to keep them longer, or if your kitchen is particularly warm, the refrigerator is your best bet. Store them in an airtight container or a resealable bag in the fridge for up to a week. They’ll maintain their quality really well. And for those times you want to make a big batch and have them on hand for weeks to come, freezing is absolutely an option! Let the baked spicy bites cool completely, then wrap them individually in plastic wrap, followed by a layer of aluminum foil or place them in a freezer-safe bag. They’ll stay good in the freezer for up to 3 months. When you’re ready to enjoy them, you can thaw them overnight in the refrigerator or at room temperature. If they seem a little dry after thawing, a quick 10-15 seconds in the microwave can revive their softness. If you’ve glazed them, I generally recommend doing that *after* you’ve reheated them, or just before serving, to keep the glaze looking its best. A light dusting of powdered sugar also works beautifully if you don’t want to deal with a full glaze for storage.
Frequently Asked Questions
Final Thoughts
So there you have it – my go-to recipe for baked spicy bites! I truly hope you give these a try. They’re more than just a recipe to me; they’re a little piece of comfort, a burst of flavor, and a guaranteed way to bring a smile to someone’s face. The combination of warming spices, the gentle heat from the cayenne, and that perfectly tender texture makes them absolutely irresistible. They’re the kind of treat that makes your kitchen smell amazing and your taste buds sing. If you love this recipe, you might also enjoy my “Fudgy Chocolate Zucchini Bread” or my “Cinnamon Streusel Coffee Cake” – they share that same cozy, comforting vibe. I can’t wait to hear what you think of these baked spicy bites! Please leave a comment below and let me know how yours turned out, or share any fun twists you added. Happy baking!

baked spicy bites
Ingredients
Main Ingredients
- 12 large jalapeno peppers sliced in half lengthwise
- 70.87 g light cream cheese
- 5 medium scallions green part only, sliced
- 56.7 g shredded low fat sharp cheddar
- 0.5 cup egg beaters or egg whites beaten
- 0.5 cup panko crumbs
- 0.125 tsp paprika
- 0.125 tsp garlic powder
- 0.125 tsp chili powder
- salt and fresh pepper to taste
- spray oil
Instructions
Preparation Steps
- Preheat oven to 350F.
- Wearing rubber gloves, cut peppers in half lengthwise and scoop out the seeds and membrane.
- Combine cream cheese, cheddar and scallions in a medium bowl.
- Combine panko, paprika, chili powder, garlic powder, salt and pepper in another bowl.
- Fill peppers with cheese filling using a small spoon or spatula.
- Dip peppers in egg beaters or egg whites.
- Place pepper in panko mixture, using a spoon to ensure coating.
- Spray a baking pan with oil spray. Lining with parchment paper is recommended for easier cleanup.
- Lightly spray the coated peppers with a little more oil spray.
- Bake in the oven for about 20-25 minutes, until golden and cheese oozes out. Remove from oven and serve hot.
Notes
Featured Comments
“Impressed! Clear steps and turned out amazing results. Perfect for busy nights.”
“New favorite here — spot on. crowd-pleaser was spot on.”
“Super easy and turned out amazing! My family asked for seconds. Saving this one.”
“This sweet treat was absolutely loved — the hearty really stands out. Thanks!”
“Made it tonight and wow — family favorite! Will definitely make Easy Baked Spicy Bites again.”
“Packed with flavor and so simple. Exactly what I wanted from Easy Baked Spicy Bites.”


