

If you’re anything like me, the evenings can get wild. Between chores, homework, and trying to keep everyone fed without turning on the stove for hours, I’m always on the lookout for dinner solutions that are quick, tasty, and wouldn’t require me to suddenly become a professional chef. That’s where my beloved sheet pan dinner comes in—seriously, it’s a total lifesaver on busy nights. I’ve made countless versions over the years, and honestly, the smell alone from roasting everything together is enough to make everyone come running to the kitchen. It’s surprisingly versatile, budget-friendly, and even my kids ask for seconds (which, trust me, doesn’t happen often around here!). Plus, the cleanup? So easy. It’s like doing a magic trick—throw everything on the pan and bomb-proof deliciousness appears. If you haven’t tried a sheet pan dinner yet, prepare to have your dinner routine changed forever. Ready to join me in the kitchen? Let’s dive into the magic of a truly simple—but insanely good—meal!
What is a sheet pan dinner?
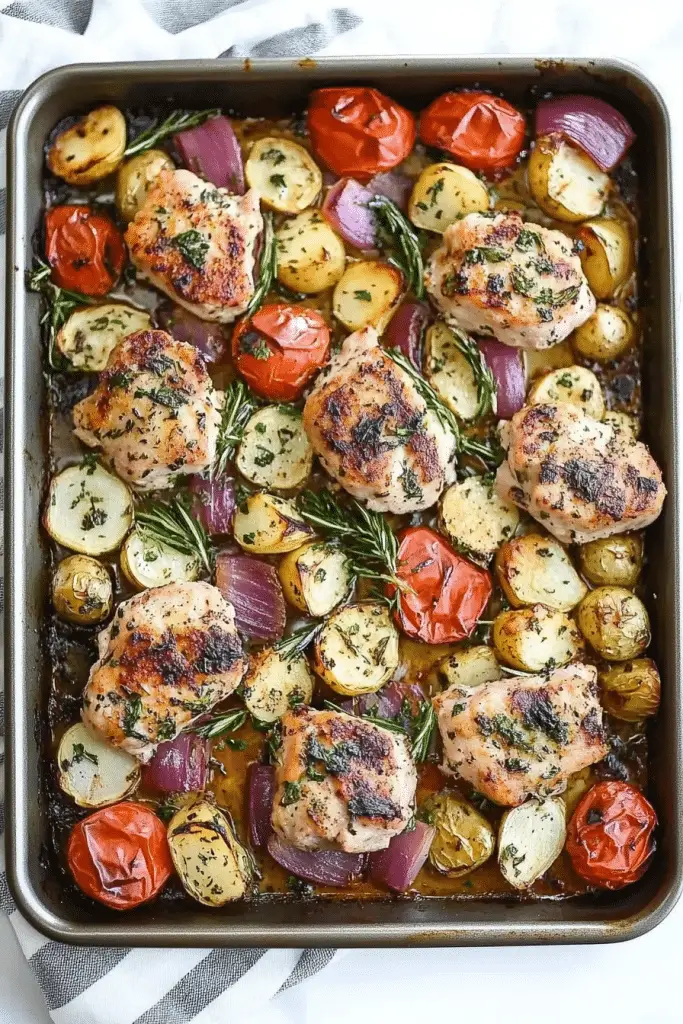
A sheet pan dinner is exactly what it sounds like: a complete meal cooked on a single baking sheet. Think of it as a no-fuss, all-in-one family-friendly recipe where meat, vegetables, and sometimes even carbs get roasted together in perfectly coordinated harmony. The beauty is in the simplicity—no multiple pots or pans, just toss, season, and bake. It’s essentially your dinner shortcut that maximizes flavor while minimizing effort. The name comes from the sheet pan or baking sheet, which is the stage for all the deliciousness. Think of it as a culinary magic trick that turns humble ingredients into a flavorful, balanced meal with just a little prep and a hot oven. Over the years, I’ve seen countless variations of this concept—from chicken and potatoes to veggie-packed medleys—and every single one feels like a cozy hug after a long day. It’s what I turn to when I want something reliable yet satisfying, and I bet you’ll love it too once you try it!
How do I make a perfect sheet pan dinner?
Quick Overview
This recipe is as simple as it sounds—gather your favorite proteins and vegetables, toss them with seasonings, arrange on a baking sheet, and roast until everything is tender and caramelized. The secret is in slicing everything evenly and spacing it well on the pan so it roasts rather than steams. The oven does the heavy lifting, and within about 30-40 minutes, you get a meal that’s vibrant, delicious, and pretty darn good-looking. I love the fact that it’s almost impossible to mess up—just keep an eye on your ingredients, and taste and adjust seasoning at the end if needed. The leftovers reheat beautifully, making this a true weeknight superstar. Plus, cleanup? Barely any—just toss the sheet in the dishwasher or give it a quick scrub, and you’re done!
Ingredients
For the main protein:
Chicken breasts or thighs (skinless, boneless for ease), salmon fillets, or even tofu cubes—whatever you prefer. About 1 to 1.5 pounds works well. I usually buy organic chicken and try to choose cuts that are evenly sized for even cooking.
For the Vegetables:
Broccoli florets, bell peppers, zucchini slices, cherry tomatoes, red onions, or sweet potatoes—these are my go-tos. Aim for about 4 cups total. Cut everything into uniform pieces so they cook evenly. I like to use a mix for color and flavor diversity.
For the Seasoning:
Olive oil, garlic powder, smoked paprika, dried Italian herbs, salt, and black pepper. Feel free to add chili flakes or lemon zest for extra zing. I always keep my seasonings simple because the roasting process intensifies their flavor.
Step-by-Step Instructions
Step 1: Preheat & Prep Pan
Set your oven to 400°F (200°C) and line your baking sheet with parchment paper or a silicone baking mat—trust me, this makes cleanup way easier. Spread out your ingredients so they have room to breathe; overcrowding leads to steaming, not roasting. I always do this first so everything’s ready to go right after I get the seasonings mixed.
Step 2: Mix Dry Ingredients
In a small bowl, combine your spices—paprika, garlic powder, Italian herbs, salt, and pepper. Mix well to create a flavor base. That’s the secret to having every piece taste amazing—season thoroughly but evenly.
Step 3: Mix Wet Ingredients
Drizzle olive oil over the veggies and protein. Usually, about 2-3 tablespoons per pound of ingredients works perfectly. Toss everything until well coated—this not only adds flavor but also helps the seasonings stick and promotes caramelization.
Step 4: Combine
Sprinkle your spice mixture over everything and toss again gently. Spread the ingredients evenly on your prepared baking sheet, giving each piece some space. That’s key to getting those crispy edges everyone loves.
Step 5: Prepare Filling (Optional)
If you’re adding a filling like cheese or herbs, now’s the time. I love adding crumbled feta or sprinkled thyme for an extra layer of flavor. Keep it simple but feel free to experiment!
Step 6: Layer & Swirl
Arrange your protein and veggies so they’re not overlapping much—this helps everything roast evenly. For a fun touch, swirl the veggies around the protein before popping it into the oven, so juices mingle and flavors blend beautifully.
Step 7: Bake
Slide your tray into the oven and bake for 25-40 minutes, depending on what you’re roasting. Chicken thighs might need a little longer, while salmon cooks fast. Keep an eye on it—look for golden, caramelized edges and cooked-through meat. I usually toss a quick glance at the 20-minute mark to make sure nothing’s overdone.
Step 8: Cool & Glaze
Let the sheet pan rest for 5 minutes after baking. If you’re adding a glaze—honey mustard, balsamic reduction, or a simple squeeze of lemon—do it now, while everything’s still warm. It soaks in beautifully and amps up the flavor.
Step 9: Slice & Serve
Use a sharp knife to slice the chicken or fish, then serve directly from the pan—because: minimal dishes, maximum flavor. Garnish with fresh herbs or a drizzle of olive oil if you like. I love to sprinkle chopped parsley or a bit of crushed red pepper flakes for color and heat. This dish looks gorgeous on the table and tastes like it took all afternoon, but it really didn’t.
What to Serve It With
This sheet pan dinner is so adaptable, I often serve it with a side of rice, quinoa, or crusty bread. For breakfast-for-dinner vibe, eggs and a dollop of yogurt would be amazing. When I’ve made it for brunch, I’ll drape it with fresh basil and a splash of balsamic vinegar—just enough to make everyone ask for seconds. As a cozy dinner, I pair it with a simple green salad and a glass of crisp white wine or sparkling water infused with lemon. My kids love when I serve the veggies charred and crispy, and they especially ask for extra sauce or dips—try a tangy tzatziki or a spicy hummus. Honestly, there’s something so comforting about all the flavors roasting together, making every bite feel like a warm hug. This dish is pretty much a blank slate—you can switch up ingredients based on what’s in your fridge or what’s on sale that week. The freedom is part of what makes it so addictive!
Top Tips for Perfecting Your Sheet Pan Dinner
After dozens of rounds, I’ve learned a few tricks that make this dish even better:
Zucchini Prep: Zucchini releases a lot of moisture, which can make your sheet pan less crispy. I always sprinkle salt on it, let it sit for 10 minutes, then pat dry with paper towels. This step makes a big difference in getting that perfect roast texture.
Mixing Advice: Overmixing veggies can make them mushy. Toss gently and spread them out in a single layer for the best results. Using a light hand with the oil and seasonings helps keep everything nice and crispy.
Swirl Customization: For a prettier presentation, try swirling your sauce or herbs into the veggies before roasting. It creates striations of color and flavor that look as good as they taste. I sometimes add a drizzle of balsamic or a sprinkle of crumbled feta after baking for a flavor pop.
Ingredient Swaps: If you’re out of something, don’t stress. Bell peppers can be replaced with cherry tomatoes, chicken thighs can be swapped with salmon, and sweet potatoes with regular potatoes. The key is keeping proportions balanced so nothing overpowers the other.
Baking Tips: Always preheat your oven fully; it makes a noticeable difference in caramelization. Oven racks closer to the heat source will give you crispier edges, especially for veggies. Test doneness with a fork or knife—meat should run clear or register at the right temperature. And don’t forget, leftovers taste even better the next day! Just reheat in the oven for crispy results.
Honestly, I’ve experimented so much that I now have a mental checklist—season early, space ingredients evenly, and keep an eye on the clock. The more you make it, the more intuitive it becomes. My biggest lesson? Trust your nose and your taste buds. Adjust seasonings as you go, and don’t be afraid to add a little flair—bit of lemon zest, a dash of hot sauce, or fresh herbs at the end can elevate the dish to new heights.
Storing and Reheating Tips
This dish keeps beautifully, which makes it perfect for leftovers. Store leftovers in an airtight container in the fridge for up to 3 days. To reheat, spread the leftovers on a baking sheet and pop in a 375°F oven for about 10-15 minutes or until warmed through and crispy again. I avoid microwaving because it tends to make the veggies soggy, and I really love that roasted texture. If you’ve added a glaze or sauce, keep it in a separate container and add fresh when reheating to keep things vibrant. Freezing is also an option—just make sure to wrap everything tightly so it doesn’t get freezer burn. Thaw in the fridge overnight and reheat as described. The flavors might dull slightly after freezing, but trust me, it still tastes amazing. Just don’t forget to adjust the seasoning when reheating—sometimes a little splash of fresh lemon or herbs brightens everything right back up.
Frequently Asked Questions
Final Thoughts
Honestly, once you master the art of a good sheet pan dinner, it becomes your secret weapon for busy nights, lazy weekends, or whenever you simply want a wholesome, no-fuss meal. The ability to throw in whatever’s in the fridge, season it just right, and come out with a fragrant, beautiful dish is such a thrill. I’ve shared this recipe with friends, and they’ve all told me it’s become a staple at their house too—full of flavor, easy to adapt, and practically foolproof. This is comfort food at its best, wrapped up in a single pan and a lot of love. So get your ingredients ready, line your sheet, and let the oven do its magic. And don’t forget—cooking should be fun, so don’t shy away from tweaking it to make it your own. Happy baking, and I can’t wait to hear how yours turns out! Drop a comment or share your favorite variation below—let’s swap ideas and keep the inspiration going.
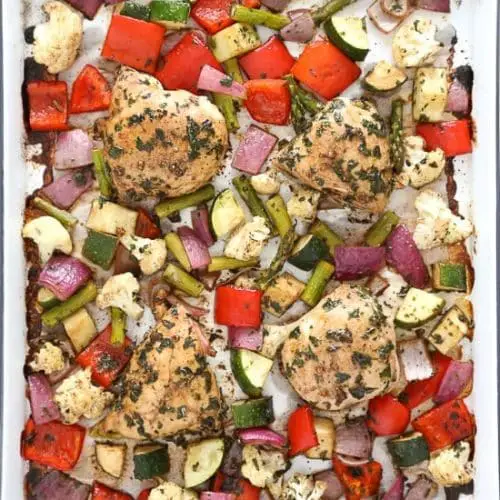
Sheet Pan Dinner
Ingredients
Main Ingredients
- 16 ounces boneless skinless chicken breasts
- 1 tablespoon balsamic vinegar
- 0.5 tablespoon extra-virgin olive oil
- 2 cloves garlic
- 2 teaspoons chopped basil
- 1 teaspoon chopped parsley
- 0.75 teaspoon kosher salt
- 1 large red bell pepper cored and cut into 1-inch pieces
- 7 ounces zucchini quartered lengthwise and cut into 1-inch cubes
- 1 cup asparagus cut into 1-inch pieces
- 1 medium red onion cut into 1-inch pieces, layers separated
- 1 cup cauliflower florets
Instructions
Preparation Steps
- Preheat the oven to 450 degrees F. Line a large sheet pan with parchment, if desired.
- Season chicken with 1 tablespoon balsamic vinegar, 1/2 tablespoon olive oil, garlic, basil, parsley, and salt.
- Marinate while you prep the vegetables, the longer the better.
- In a large bowl, toss the vegetables with 2 tablespoons balsamic vinegar, 1.5 tablespoons olive oil, salt, black pepper, basil, and parsley.
- Spread out the vegetables on the sheet pan. Nestle the chicken among the vegetables and roast for about 20 minutes until cooked through.
- Serve immediately.
Notes
Featured Comments
“Impressed! Clear steps and turned out amazing results. Perfect for busy nights.”
“New favorite here — turned out amazing. crowd-pleaser was spot on.”
“Super easy and turned out amazing! My family asked for seconds. Saving this one.”
“This sweet treat was absolutely loved — the zingy really stands out. Thanks!”
“Made it tonight and wow — super easy! Will definitely make Easy Balsamic Chicken Sheet Pan Dinner again.”
“Packed with flavor and so simple. Exactly what I wanted from Easy Balsamic Chicken Sheet Pan Dinner.”


