


There’s something about the smell of teriyaki chicken simmering on the stove that instantly takes me back to my childhood — those weekend dinners at my grandma’s house where she’d whip up this sticky, savory dish in no time, filling the entire kitchen with a sweet soy aroma that made everyone gather around. Honestly, I’ll never get tired of it. It’s one of those comfort foods that’s incredibly easy to make but tastes like you’ve spent hours perfecting it. My kids ask for this all the time, and I love how versatile it is — serve it over rice, noodles, or even with steamed veggies. Plus, it’s a lifesaver on busy nights when I need something hearty but quick. Trust me on this: once you try my go-to teriyaki chicken recipe, it’ll become a staple that you whip up whenever your craving something sweet, salty, and downright delicious. The best part? It’s surprisingly simple, and I guarantee, it’ll disappear off the plate in minutes. Get ready to fall in love.
What is Teriyaki chicken?
Think of teriyaki chicken as the cozy sweater of Asian-inspired dishes — warm, comforting, and oh-so-satisfying. The word “teriyaki” actually comes from the Japanese words “teri,” meaning shine or luster, and “yaki,” which means grill or broil. It’s essentially a method of cooking chicken (or other proteins) in a sweet-savory glaze made from soy sauce, mirin (sweet rice wine), sake, and sugar. The result is tender, juicy chicken with a glossy, caramelized coating that’s irresistible. It’s a dish that’s versatile enough for weeknight dinners or weekend gatherings, and it’s become a global comfort food staple for a reason. My version is super straightforward — I like to keep it simple so that the flavor really shines without any fuss. Think of it as your go-to homemade takeout — but way better and way more personal. It’s the kind of dish that makes you feel like a pro in the kitchen, even if you’re just starting out.
How do I make Teriyaki Chicken?
Quick Overview
This recipe comes together in three main phases: preparing a flavorful sauce, quickly searing the chicken, and then simmering everything together until the sauce thickens into a glossy, sticky glaze. I do most of the hard work upfront — making the sauce while the chicken cooks — so that when you combine everything, it’s just a matter of minutes before dinner is served. The key is to use high heat for the chicken so it gets a beautiful caramelized crust, and then let the sauce reduce slightly to develop that irresistible shine and flavor. It’s honestly foolproof once you get the hang of it, and my favorite part is how the sauce gets all gooey and clings to every piece of chicken. It’s perfect served over steaming jasmine rice or tossed with stir-fried veggies. This is the kind of dish that makes you feel like a restaurant chef — even if you’re just in your cozy home kitchen.
Ingredients
For the Sauce:
– 1/2 cup soy sauce (go for low sodium if you prefer less salt) – 1/2 cup soy sauce (go for low sodium
– 1/4 cup mirin (sweet rice wine; fortified sake works too)
– 2 tablespoons honey or brown sugar (for that perfect sweetness)
– 2 cloves garlic, minced
– 1 teaspoon ginger, freshly grated (trust me, it brightens everything!)
– 1 tablespoon rice vinegar (adds a nice tang)
– 1 tablespoon cornstarch dissolved in 2 tablespoons water (for thickening)
For the Chicken:
– 1 to 1.5 pounds chicken thighs or breasts (thighs stay juicier, breasts are leaner)
– Salt and pepper to taste
– 1 tablespoon cooking oil (vegetable or canola works fine)
Optional Extras:
– Sesame seeds for garnish
– Sliced green onions for freshness
– Steamed broccoli or snap peas on the side
Step-by-Step Instructions
Step 1: Preheat & Prep Pan
Start by heating your skillet over medium-high heat. I always do this to get that initial sizzle. While it heats, pat your chicken dry with paper towels — this helps it sear better and get that gorgeous caramelization. Season the chicken with salt and pepper. Once the pan is nice and hot, add a tablespoon of oil, and let it shimmer. Place the chicken pieces in the pan, skin side down if using thighs, and let them cook without moving for about 4-5 minutes until golden brown. Flip and cook for another 3-4 minutes. The goal here is to sear the outside, not cook it all the way through — we’ll finish it off in the sauce.
Step 2: Mix Dry & Wet Ingredients
While the chicken is searing, whisk together the soy sauce, mirin, honey, garlic, and ginger in a bowl. This fragrant mix is what gives the dish its signature flavor. In a separate small bowl, dissolve the cornstarch in water, so it’s ready to thicken the sauce later. This step is crucial — if you add the cornstarch too early, it might clump, so polish your technique and keep it aside for now.
Step 3: Mix Wet Ingredients
Combine everything into one bowl — soy sauce, mirin, honey, garlic, ginger, and rice vinegar. When you pour this into the pan with the seared chicken, the smell alone will make your mouth water. Keep the heat at medium to prevent burning and to allow the flavors to meld beautifully.
Step 4: Combine
Pour the sauce over the chicken in the skillet. Use a spoon to gently turn the chicken so it’s coated evenly. Let everything simmer for about 8-10 minutes, turning the chicken occasionally, until the sauce thickens and becomes irresistibly sticky. If you notice the sauce thickening too quickly or starting to burn, turn down the heat a bit. Trust me, patience here makes all the difference.
Step 5: Prepare Filling
If you like, you can toss in sliced bell peppers, thinly shredded carrots, or even pineapple chunks at this point. It’s a great way to add color and texture. Remember, the sauce is what makes this dish shine, so don’t overstuff the pan — keep it simple for the best results.
Step 6: Layer & Swirl
Once your sauce is nice and thick, use a spoon to swirl it around the chicken or baste the pieces to coat them fully. For a beautiful marbled effect, I sometimes add a gentle swirl with a skewer or butterknife to create a pretty pattern. This step isn’t just pretty — it helps the sauce cling beautifully when served.
Step 7: Bake
If you want extra caramelization, transfer the chicken to an oven-safe dish and broil for 2-3 minutes, watching carefully so it doesn’t burn. This gives you that perfect glossy finish and deeper flavor. Otherwise, just serve straight from the skillet once the sauce is glossy and thickened.
Step 8: Cool & Glaze
Allow the chicken to rest for a few minutes. Drizzle any remaining sauce over the top for that shiny, sticky coating that everyone loves. If you’re fancy, sprinkle with sesame seeds and chopped green onions right before serving to add crunch and freshness.
Step 9: Slice & Serve
Slice the chicken against the grain — it makes a big difference in tenderness. Serve it over fluffy jasmine rice or toss it with some steamed greens. You can also serve it with a side of stir-fried noodles or a crisp cucumber salad for contrast. The sauce will soak into everything, creating a satisfying bite each time. I like to garnish with a few extra sesame seeds and green onions for that restaurant-quality look.
What to Serve It With
This teriyaki chicken is basically a blank canvas—you can keep it simple or go all out. For breakfast, it’s a fun twist to toss the sliced chicken with scrambled eggs and toasted bread. My family loves it as a quick weeknight dinner, especially when served over steaming jasmine rice cooked with a splash of coconut milk for extra flavor. If I want something a little more special, I like to serve it with crispy steamed broccoli or snap peas drizzled with sesame oil — it adds that perfect crunch and freshness. When entertaining friends, I set out small bowls of chopped green onions, toasted sesame seeds, and hot sauce for customizing. And, of course, my kids’ favorite is piling generous portions of the glazed chicken onto a plate and watching them devour it in minutes. This dish always warms up our home and makes me feel like a pro in my own kitchen — no fancy takeout needed.
Top Tips for Perfecting Your Teriyaki Chicken
After making this countless times, I’ve learned a few tricks that make all the difference. First, don’t skimp on the ginger — fresh is so much better than jarred! It adds a bright punch that lifts the whole flavor profile. When searing the chicken, Make sure your pan is hot enough; if not, you risk sticking or uneven browning. I learned this the hard way early on! For a more caramelized crust, I sometimes sprinkle a little sugar over the chicken at the end of searing — it’s a trick I picked up from a chef friend and it really adds that restaurant-like shine. When swirling the sauce around, don’t rush the reduction process — patience here results in a thicker, stickier glaze that really coats the chicken nicely. Want to change things up? Swap out honey for maple syrup or agave — both give a different, lovely sweetness. Also, in a pinch, soy sauce can be replaced with coconut aminos for a gluten-free option, though the flavor shifts slightly. During baking or broiling, keep a close eye — that sugary glaze can burn suddenly if you’re not careful. And finally, taste your sauce before serving — sometimes I add a splash more vinegar or honey to balance the flavors just right. It’s all about those little tweaks that make this dish perfect every time.
Storing and Reheating Tips
This dish keeps surprisingly well. Once cooled, store leftovers in an airtight container in the fridge — it’s good for 3-4 days. I like to divide the chicken and sauce, so I can reheat just what I want without losing texture. When reheating, the best method is gently in a skillet over low heat, stirring occasionally, until warm and saucy again. Microwave works too, but I find it can make the chicken a little rubbery if you’re not careful, so go for short bursts and stir often. If you want to keep it for longer, freeze it in a sealed container for up to two months. To reheat from frozen, thaw it in the fridge overnight and follow the skillet method. For the glaze, I recommend adding a splash of water or broth if it thickened too much during storage — this helps restore that glossy, sticky consistency. If I plan ahead, I keep some extra sauce aside to drizzle over the chicken when reheating, so that it stays moist and flavorful. Honestly, leftovers taste just as good as freshly cooked, if not better — the flavors have time to meld together. It’s such a lifesaver on busy mornings or when I want a quick lunch. Just trust me on this: mastering storage and reheating will make you love this dish even more.
Frequently Asked Questions
Final Thoughts
Honestly, this teriyaki chicken recipe has become my family’s go-to whenever we want something that feels indulgent but is totally fail-proof. The sweet and savory sauce, combined with juicy chicken, hits all the right notes — I get excited just writing about it. It’s perfect for busy weeknights when you want something quick yet satisfying, but also fancy enough for a little get-together. Over the years, I’ve tweaked and played around, adding little touches like toasted sesame seeds or extra garlic, and every time, it turns out just as fantastic. I really encourage you to give it a try — once you master the basic technique, you can customize it endlessly to suit your taste. Cooking in the kitchen should be fun and personal, so don’t be afraid to make it your own. I’d love to hear how yours turns out — share your twists and tips in the comments below. Happy baking, and enjoy every flavorful bite!
teriyaki chicken
Ingredients
Main Ingredients
- 1.25 lbs boneless skinless chicken breasts diced into 1-inch cubes
- 1 tbsp olive oil
- 0.25 cup low-sodium soy sauce
- 0.25 cup water
- 2 tbsp honey
- 1.5 tbsp packed light brown sugar
- 1 tbsp rice vinegar
- 0.25 tsp toasted sesame oil
- 2 tsp peeled and minced fresh ginger
- 2 tsp peesled and minced fresh garlic (2 cloves)
- 2 tsp cornstarch
Instructions
Preparation Steps
- Heat olive oil in a 12-inch non-stick skillet over medium-high heat.
- Add the chicken and cook for 3 to 4 minutes until browned, then flip and cook until internal temperature reaches 160°F, about 3 minutes longer.
- In a small bowl, whisk together soy sauce, water, honey, brown sugar, rice vinegar, sesame oil, ginger, garlic, and cornstarch.
- Pour the sauce over cooked chicken and cook for 30 to 60 seconds until the sauce has thickened. Toss to coat evenly.
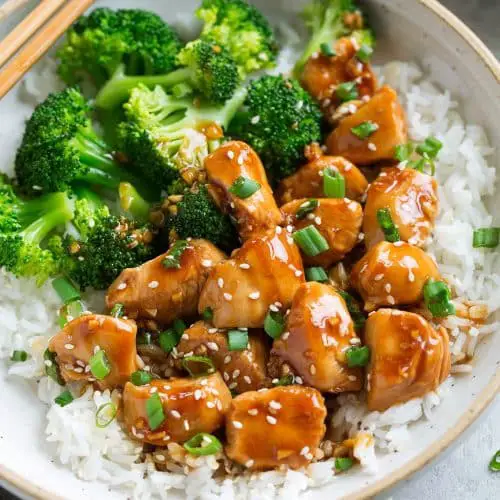
- Serve warm, garnished with chopped green onions and sesame seeds if desired.
Notes
Featured Comments
“Impressed! Clear steps and comforting results. Perfect for busy nights.”
“New favorite here — so flavorful. crowd-pleaser was spot on.”
“Super easy and turned out amazing! My family asked for seconds. Saving this one.”
“This sweet treat was absolutely loved — the cozy really stands out. Thanks!”
“Made it tonight and wow — restaurant-level! Will definitely make Easy Glazed Chicken Recipe again.”
“Packed with flavor and so simple. Exactly what I wanted from Easy Glazed Chicken Recipe.”


