

The Best Cranberry Orange Scones You’ll Ever Make
There is something truly magical about waking up on a chilly weekend morning, pouring a hot cup of coffee, and filling the kitchen with the smell of baking pastries. For years, I was intimidated by the idea of making my own scones. I always assumed those perfectly flaky, towering triangles you see in fancy bakery display cases required some sort of culinary degree to pull off at home. But let me tell you a little secret: they are incredibly easy to make, and these Cranberry Orange Scones are absolute proof of that.
When the holidays roll around, or honestly, whenever I am craving a cozy morning treat, this is the recipe I reach for. The bright, zesty aroma of fresh orange rubbing against sugar, combined with the tart pop of cranberries, is just out of this world. They are perfectly dense, wonderfully tender, and completely bypass that dry, crumbly texture that gives bad scones a bad name. Whether you are hosting a festive holiday brunch or just want to spoil your family on a lazy Sunday, these homemade scones are going to make you look like an absolute baking genius.
What Are Cranberry Orange Scones?
If you have never experienced a properly made scone before, you are in for a serious treat. A great scone sits somewhere beautifully between a rich, buttery biscuit and a dense, tender cake. Unlike muffins, which are soft and cakey all the way through, Cranberry Orange Scones have a slightly crisp, golden-brown exterior that gives way to a soft, flaky inside.
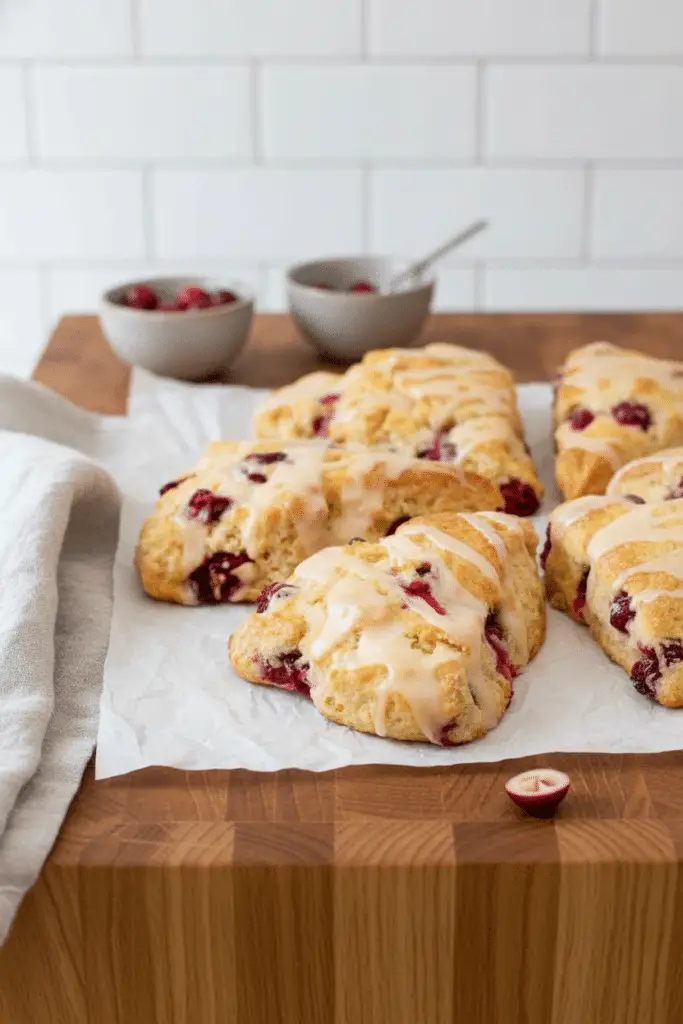
This specific variation takes that classic, buttery dough and loads it up with vibrant flavors. We pack the dough with fresh or frozen cranberries, which burst slightly in the oven and provide a tart contrast to the rich pastry. Then, we infuse the dough with fresh orange zest, ensuring every single bite has a beautiful citrus undertone. Finally, to balance out the tartness of the cranberries, the warm scones are drizzled with a simple, sweet orange and vanilla glaze. The result is a pastry that feels incredibly balanced—not too sweet, not too tart, and perfectly buttery.
How to Make Cranberry Orange Scones
Quick Overview
Before we get our hands covered in flour, let’s talk about the game plan. The absolute golden rule of making incredible scones is keeping your ingredients cold. I cannot stress this enough! The secret to those beautiful, flaky layers is tiny pockets of cold butter melting rapidly in a hot oven, creating steam that puffs the dough up.
We are going to start by tossing our dry ingredients together, then grating in our frozen butter. After a quick toss, we will fold in our wet ingredients—just until the dough barely holds together. Overmixing is the enemy of a tender scone! We will shape the dough into a circle, cut it into wedges, and—this is crucial—pop them in the fridge to chill while the oven preheats. This quick chill ensures they hold their shape and rise tall instead of spreading out flat.
Ingredients
- All-Purpose Flour: 2 cups. Make sure to spoon and level your flour so you don’t end up with dense scones!
- Granulated Sugar: ⅓ cup, just enough to sweeten the dough without overpowering the cranberries.
- Baking Powder: 1 tablespoon. This gives our scones that beautiful, tall rise.
- Salt: ½ teaspoon to balance the flavors.
- Unsalted Butter: ½ cup (1 stick). It must be very cold or frozen. We will be grating it!
- Buttermilk: ½ cup (plus a little extra for brushing). The acidity makes the dough tender and reacts with the baking powder.
- Egg: 1 large egg to bind everything together.
- Vanilla Extract: 2 teaspoons for warmth and depth of flavor.
- Cranberries: 1 cup. Fresh or frozen work perfectly. No need to thaw if using frozen!
- Orange Zest: 1 tablespoon. Be sure to only zest the orange part, not the bitter white pith.
For the Vanilla Orange Glaze:
- Powdered Sugar: 1 cup, sifted if it’s clumpy.
- Orange Juice: 1 to 2 tablespoons, depending on how thick you like your glaze.
- Vanilla Extract: 1 teaspoon.
Step-by-Step Instructions
Step 1: Whisk the Dry Ingredients
Grab a large mixing bowl and whisk together your all-purpose flour, granulated sugar, baking powder, and salt. Make sure it’s well combined so the baking powder is evenly distributed.
Step 2: Grate the Butter
Take your frozen stick of butter and grate it using the large holes of a box grater directly into the flour mixture. Toss the butter shreds gently with your hands or a pastry blender until the mixture looks like coarse crumbs.
Step 3: Mix the Wet Ingredients
In a separate small bowl, whisk together the buttermilk, egg, and vanilla extract until smooth.
Step 4: Bring the Dough Together
Pour your wet ingredients into the dry butter-flour mixture. Add your cranberries and fresh orange zest. Use a spatula or your hands to gently fold everything together. Stop mixing as soon as the dough holds together in a shaggy ball. Do not overwork it!
Step 5: Shape and Slice
Sprinkle a little flour onto a piece of parchment paper or your clean counter. Turn the dough out and gently press it into an 8-inch circle, about ¾ of an inch thick. Brush the top lightly with a little extra buttermilk. Using a sharp knife, cut the circle into 8 equal wedges (like a pizza).
Step 6: Chill the Scones
Pull the wedges slightly apart so they have room to expand, and place them on a parchment-lined baking sheet. Put the whole baking sheet in the refrigerator for 20 minutes. While they chill, preheat your oven to 400°F.
Step 7: Bake to Perfection
Bake the chilled scones for 20 to 25 minutes, or until the tops and edges are a beautiful golden brown. Let them cool on the pan for a few minutes before moving them to a wire rack.
Step 8: Glaze and Serve
While the scones cool, whisk together the powdered sugar, orange juice, and vanilla extract until smooth. Drizzle the glaze generously over the slightly cooled scones. Enjoy!
What to Serve It With
These Cranberry Orange Scones are incredibly versatile and steal the show at any breakfast table. I absolutely love serving them warm with a generous smear of salted butter or clotted cream if I’m feeling fancy. They are the perfect companion to a hot cup of dark roast coffee or a steaming mug of Earl Grey tea, which beautifully complements the citrus notes.
If you are making these for a holiday brunch, they pair wonderfully with savory dishes to balance out the meal. Try serving them alongside a hearty breakfast casserole, some crispy thick-cut bacon, or a fluffy goat cheese and spinach quiche. And of course, if you’re celebrating, a fresh mimosa (using the leftover juice from your oranges!) is practically mandatory.
Top Tips for Perfecting Your Cranberry Orange Scones
Grate Your Butter: I know I sound like a broken record, but grating frozen butter is the ultimate scone hack. It creates perfectly sized ribbons of butter that coat easily in flour without needing to be worked in with your warm hands.
Do Not Overmix: Scone dough is not bread dough; it does not want to be kneaded! Mix it just until the wet and dry ingredients are incorporated. It is totally okay if the dough looks a little shaggy or messy.
The Chill is Mandatory: Don’t skip the 20-minute resting period in the fridge! As you work the dough, the butter inevitably warms up. Chilling it solidifies the butter again, ensuring your scones puff up tall instead of melting into flat puddles on your baking sheet.
Brush for a Bakery Finish: Brushing the tops with buttermilk or heavy cream right before baking is what gives them that gorgeous, glossy, golden-brown crust that makes them look like they came straight from a professional bakery.
Storing and Reheating Tips
If you happen to have leftover scones (a rare occurrence in my house!), they are very easy to store. Let them cool completely to room temperature, then place them in an airtight container. They will stay fresh on the counter for up to 4 days. Pro tip: Toss a slice of sandwich bread into the container with them! The scones will absorb the moisture from the bread, keeping them incredibly soft.
To freeze unbaked scones, place the cut wedges on a baking sheet and freeze until solid. Then, transfer them to a freezer-safe zip-top bag for up to 3 months. You can bake them straight from frozen—just add 2 or 3 extra minutes to the baking time.
If you want to freeze already baked scones, wrap each completely cooled scone tightly in plastic wrap, then place them in a freezer bag. Thaw them overnight in the fridge or on the counter for an hour. I highly recommend popping day-old or thawed scones in the microwave for 10-15 seconds or in a warm oven for a few minutes to bring back that fresh-baked softness.
Frequently Asked Questions
Final Thoughts
There you have it—the only Cranberry Orange Scone recipe you will ever need! I really hope you give these a try, whether it’s for a special holiday morning or just a random Tuesday when you need a little extra comfort. Baking from scratch doesn’t have to be stressful, and the joy of pulling a tray of these golden, fragrant beauties out of your own oven is truly unmatched.
If you end up making a batch, please let me know how they turned out for you! Pour yourself a big cup of coffee, grab a warm scone, and enjoy every single buttery, citrusy bite. Happy baking, friends!

Cranberry Orange Scones
Ingredients
Main Ingredients
- 2 cups all-purpose flour
- 0.33 cup granulated sugar
- 0.5 teaspoon salt
- 1 tablespoon baking powder
- 0.5 cup unsalted butter grated and very cold or frozen (1 stick)
- 0.5 cup buttermilk or heavy cream plus more for brushing on top
- 1 large egg
- 2 teaspoons vanilla extract
- 1 cup fresh cranberries or frozen
- 1 tablespoon orange zest
- 1 cup powdered sugar
- 1.5 tablespoons orange juice or milk
- 1 teaspoon vanilla extract
Instructions
Preparation Steps
- In a large bowl, whisk together flour, sugar, salt and baking powder. Using a pastry blender or your hands, cut in butter until mixture is crumbly.
- In a small bowl, whisk together egg, buttermilk and vanilla extract. Add liquid ingredients, cranberries, and orange zest to the dry ingredients and stir until moistened, and mixture is well combined and holds together in a ball.
- Sprinkle a small amount of flour onto parchment paper or counter. Press dough into 8 inch circle, about 0.75 inch thick. Brush top with additional buttermilk.
- Using a sharp knife, cut circle into 8 wedges. Divide triangles and place on a baking sheet lined with parchment paper or a silicone baking mat, leaving enough space for the scones to expand when cooked.
- Place scones in refrigerator for 20 minutes. While scones chill, preheat oven to 400°F.
- Bake scones for 20 to 25 minutes, or until golden brown. Remove from oven and cool slightly.
- In a small bowl, whisk together powdered sugar, orange juice and vanilla extract until smooth. Drizzle the tops of each scone generously with glaze. For even more orange flavor in your glaze, feel free to add orange zest as well.
- Serve warm or let cool completely before storing.
Notes
Featured Comments
“I absolutely love the idea of these scones – they sound so fresh and flavorful!”
“These scones are absolutely divine! The perfect balance of tangy lemon and sweet cranberry is just irresistible—I can almost taste them right now.”
“Impressed! Clear steps and comforting results. Perfect for busy nights.”
“New favorite here — spot on. crowd-pleaser was spot on.”
“Super easy and turned out amazing! My family asked for seconds. Saving this one.”
“This sweet treat was absolutely loved — the silky really stands out. Thanks!”


These scones are absolutely divine! The perfect balance of tangy lemon and sweet cranberry is just irresistible—I can almost taste them right now.
I absolutely love the idea of these scones – they sound so fresh and flavorful!