

Oh, where do I even begin with this Shrimp Pad Thai? It’s one of those dishes that instantly transports me back to my very first trip to Thailand, the humid air thick with the scent of spices and something utterly delicious. But honestly, this recipe isn’t just about nostalgia; it’s my absolute go-to when I’m craving that perfect balance of sweet, sour, salty, and spicy, all wrapped up in one glorious noodle dish. I’ve tried countless versions over the years, from fancy restaurant takeouts to more involved home-cooked attempts, but this one? This is the one that hits every single note perfectly, and the best part is, it’s surprisingly doable for a weeknight. Forget those sad, mushy noodle disasters; this Shrimp Pad Thai is vibrant, flavorful, and always, always a crowd-pleaser. If you’ve ever been intimidated by making authentic-tasting Pad Thai at home, trust me, you’re in for a treat. It’s a bit like making a great stir-fry, but with that signature noodle magic.
What is shrimp pad thai?
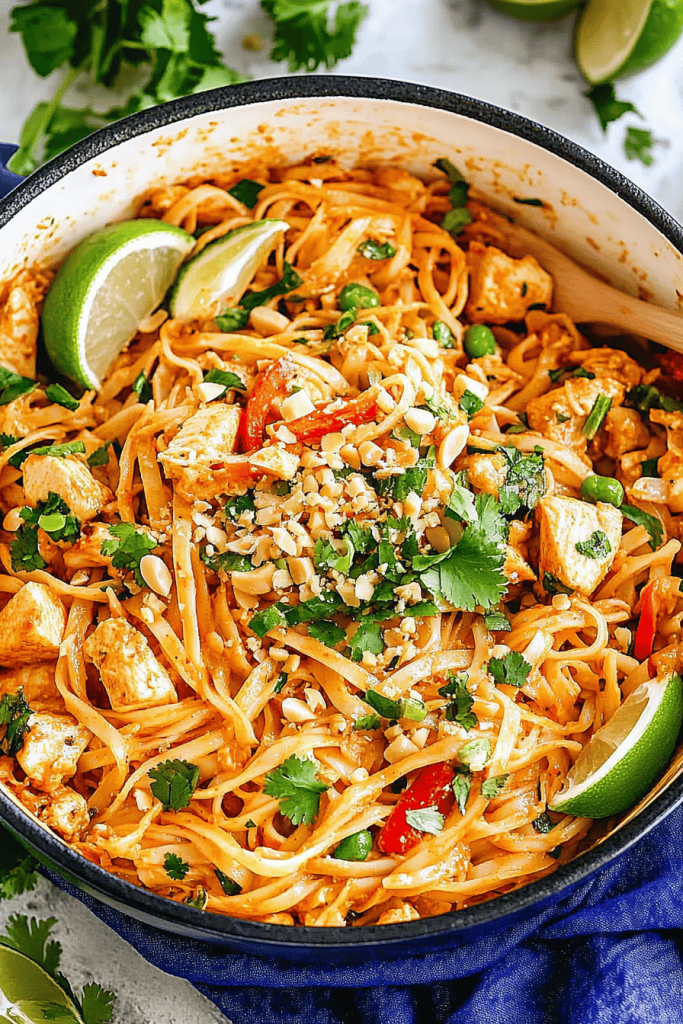
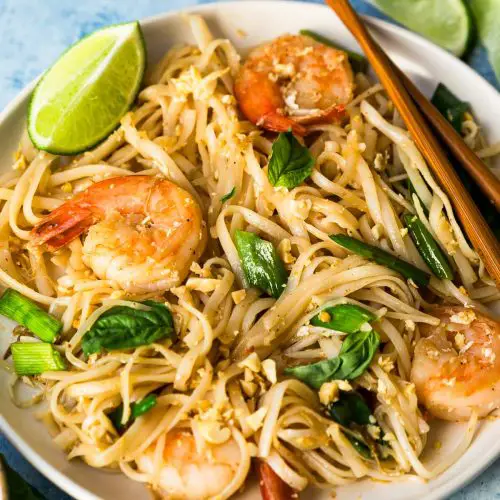
So, what exactly *is* Shrimp Pad Thai? At its heart, it’s a classic Thai stir-fried noodle dish. The name itself, “Pad Thai,” literally means “fried Thai style.” It’s a national dish of Thailand, and for good reason! It’s a beautiful symphony of textures and flavors. You’ve got tender rice noodles, plump, juicy shrimp, crunchy bean sprouts, and often some scrambled egg, all tossed in a signature tamarind-based sauce. Think of it as a flavor explosion – it’s got that irresistible sweet and sour tang from the tamarind, a good kick of savory from fish sauce, a hint of sweetness from palm sugar, and usually a little heat from chilies. It’s the kind of dish that makes your taste buds do a happy dance. It’s far more complex in flavor than your average weeknight pasta, yet it comes together so quickly. It’s the perfect example of how a few simple, well-balanced ingredients can create something truly magical and deeply satisfying.
How do I make shrimp pad thai?
Quick Overview
Making this Shrimp Pad Thai is all about timing and having your ingredients ready to go. You’ll start by rehydrating your rice noodles, then whip up a quick, flavorful sauce using tamarind, fish sauce, and palm sugar. While the noodles soften, you’ll sauté your aromatics, shrimp, and egg. Then, it’s a rapid stir-fry where you toss everything together with the sauce and some fresh veggies. The whole thing comes together in a flash, so it’s crucial to have everything prepped before you even turn on the stove. It’s a quick, dynamic process that results in perfectly cooked noodles and a sauce that’s just bursting with flavor. It’s the kind of cooking that makes you feel like a pro, even if you’re just making dinner!
Ingredients
For the Main Batter:
Rice Noodles: 8 ounces wide, flat dried rice noodles (sometimes labeled “Pad Thai noodles” or “Chow Fun noodles”). Look for ones that are about 1/4 inch wide. You don’t want the super thin vermicelli kind for this. The key is to soak them until they are pliable but not mushy – we’ll finish cooking them in the pan. Over-soaked noodles are the biggest culprit of gummy Pad Thai!
For the Filling:
Shrimp: 1 pound medium or large shrimp, peeled and deveined. I like to leave the tails on for presentation, but you can remove them if you prefer. Fresh or frozen and thawed both work great.
Eggs: 2 large eggs. These get scrambled right into the noodles, adding a lovely richness and binding everything together.
Garlic: 4 cloves, minced. Fresh garlic is a must here for that aromatic base.
Shallots: 2 medium shallots, thinly sliced. Shallots offer a milder, sweeter onion flavor than regular onions, which I think is perfect for Pad Thai.
Bean Sprouts: 2 cups fresh bean sprouts. You want that crisp crunch! Reserve some for garnish.
Chives or Green Onions: 1/2 cup chopped garlic chives or green onions (whites and greens separated). Garlic chives have a distinct flavor that’s traditional, but green onions work wonderfully too.
Peanuts: 1/4 cup roasted unsalted peanuts, roughly chopped. For crunch and a nutty finish.
Lime: 1 lime, cut into wedges, for serving. This is essential for that final squeeze of brightness!
Optional Chili: 1 small red chili, thinly sliced, or a pinch of Red Pepper flakes for heat. Adjust to your spice preference!
For the Glaze:
Tamarind Paste: 3 tablespoons tamarind paste (not concentrate, the kind in a block that you dilute, or the thick paste from a jar). If you use tamarind concentrate, you’ll need less, maybe 1-2 tablespoons, and you’ll want to dilute it a bit with water. Tamarind is the soul of Pad Thai, giving it that signature sweet-and-sour tang. I always have a jar of paste on hand!
Fish Sauce: 3 tablespoons fish sauce. This is where the salty umami comes from. Don’t be scared of it; it mellows out beautifully when cooked.
Palm Sugar: 3 tablespoons palm sugar, finely chopped or grated. Palm sugar has a lovely caramel-like flavor that’s less sharp than white sugar. If you can’t find it, you can substitute brown sugar or even regular granulated sugar, but palm sugar really adds that authentic touch.
Water: 1/4 cup water, or more as needed to achieve the right sauce consistency.
Step-by-Step Instructions
Step 1: Preheat & Prep Pan
First things first, get those noodles soaking! Place your dried rice noodles in a large bowl and cover them completely with hot tap water. Let them soak for about 15-20 minutes, or until they are pliable and bend easily but still have a slight firmness to them. You don’t want them to be soft and floppy yet, as they’ll continue to cook in the pan. While the noodles are soaking, get your wok or a large, heavy-bottomed skillet screaming hot over medium-high heat. Add 1 tablespoon of neutral oil (like vegetable or canola) and swirl it around. This is where the magic happens, so having a hot pan is key for that perfect stir-fry texture!
Step 2: Mix Dry Ingredients
This step is more about preparing the sauce base. In a small bowl, whisk together the tamarind paste, fish sauce, palm sugar, and 1/4 cup of water. Keep whisking until the palm sugar is dissolved and you have a smooth, syrupy liquid. Taste it! This is your chance to adjust the flavor profile. If it’s too sour, add a little more sugar. Too sweet? A splash more fish sauce. Too salty? A tiny bit more water or sugar. The goal is a balanced sweet, sour, and salty taste. This sauce is what will coat every strand of noodle and make your Pad Thai sing!
Step 3: Mix Wet Ingredients
While the noodles are soaking and you’ve got your sauce ready, let’s prep the other components. Crack your two eggs into a small bowl. I like to lightly whisk them with a fork, just enough to break up the yolks. Then, set them aside. Make sure your shrimp are peeled and deveined, your garlic is minced, and your shallots are thinly sliced. Chop your chives or green onions, separating the white parts from the green. Having everything prepped and within easy reach is the secret to a successful stir-fry. It all happens so fast, you won’t have time to chop once you start!
Step 4: Combine
Now that your noodles are properly soaked, drain them thoroughly. You want to get rid of as much water as possible. If they seem a bit sticky, you can toss them with a tiny bit more oil. Add the drained noodles to your screaming hot wok with the oil you added earlier. Pour about half of your prepared Pad Thai sauce over the noodles. Stir-fry for about 2-3 minutes, tossing constantly, until the noodles start to soften and absorb the sauce. If the noodles are sticking too much, add a splash more water or oil. The key here is constant movement to prevent sticking and ensure even cooking.
Step 5: Prepare Filling
Push the noodles to one side of the wok. Add another tablespoon of oil to the empty side. Add your minced garlic and sliced shallots and stir-fry for about 30 seconds until fragrant. Now, add your shrimp to the pan. Cook for about 1-2 minutes per side, just until they turn pink and opaque. Don’t overcook them! Once the shrimp are almost done, push them to the side with the noodles. Pour your lightly whisked eggs into the hot space in the wok. Let them set for a few seconds, then scramble them with your spatula, breaking them into bite-sized pieces. Once the eggs are cooked, toss everything together – the noodles, shrimp, garlic, shallots, and scrambled eggs.
Step 6: Layer & Swirl
Now for the final exciting toss! Pour the remaining Pad Thai sauce over the noodle and shrimp mixture. Add most of your bean sprouts and the white parts of your chives or green onions. Stir-fry everything vigorously for another 2-3 minutes, making sure every noodle is coated in that glorious sauce and the bean sprouts are slightly wilted but still crisp. You’re looking for a beautiful, glossy coating on the noodles. If it seems a little dry, add a splash more water. If it’s too saucy, just keep stir-frying to let some of the liquid evaporate. This is where the dish really comes alive and the flavors meld together perfectly.
Step 7: Bake
This step is actually not baking, but rather the final stir-frying stage. We’ve already done all the cooking! The phrase “Bake” might be a leftover from a different recipe context. The actual cooking happens entirely on the stovetop in that hot wok or skillet. What you want to aim for is to have the noodles perfectly tender, the shrimp cooked through, and the sauce beautifully coating everything. The entire process, from start to finish, should only take about 15-20 minutes once you start stir-frying. The goal is to serve it immediately while it’s hot and fresh!
Step 8: Cool & Glaze
We’re not actually cooling and glazing here in the traditional baking sense. The “glaze” is that delicious sauce we made and tossed everything in! The final touches happen right before serving. Remove the wok from the heat. Stir in most of the remaining bean sprouts and the green parts of the chives or green onions, reserving some for garnish. Give it one last gentle toss. This is the point where you’d add any final chili flakes or sliced chilies if you’re using them. The residual heat will wilt the fresh greens and sprouts just enough.
Step 9: Slice & Serve
To serve this amazing Shrimp Pad Thai, divide it among serving plates. Garnish generously with the chopped roasted peanuts and any reserved fresh bean sprouts and green onions. Make sure to place a lime wedge on the side of each plate. Encourage everyone to squeeze fresh lime juice over their Pad Thai right before eating – it brightens up all the flavors and adds that final zing! This dish is best enjoyed immediately, piping hot, for the ultimate noodle experience. The aroma alone will have everyone digging in!
What to Serve It With
Shrimp Pad Thai is such a complete meal in itself, but sometimes you just want a little something extra to round out the experience. For a quick breakfast, I often just have a small portion leftover from dinner with a strong cup of Thai iced tea. It’s surprisingly satisfying and wakes me up!
When I’m feeling a bit more festive, perhaps for a weekend brunch, I love pairing it with some simple, fresh elements. A light Cucumber Salad with a rice vinegar dressing is fantastic, or some delicate steamed dumplings. For drinks, a crisp white wine or even just some sparkling water with mint and cucumber is lovely.
As a dessert, you might think it’s odd to serve Pad Thai before dessert, but I often find myself craving something sweet *after* a savory meal like this. A small bowl of mango sticky rice is the perfect Thai-inspired finish, or even just some fresh, ripe tropical fruit like pineapple or papaya. It complements the spicy and savory notes without being too heavy.
And for those cozy snack nights, when I just want a comforting bowl of noodles? I don’t need much else! Maybe a small side of crispy fried wontons or some steamed edamame if I have them on hand. My family often just devours the Pad Thai on its own, and honestly, it’s so flavorful and satisfying that it doesn’t really need anything else. The joy is in the simple pleasure of that delicious noodle bowl!
Top Tips for Perfecting Your Shrimp Pad Thai
Over the years of making this dish countless times, I’ve picked up a few tricks that I think make all the difference. First, regarding the noodles: don’t over-soak them! This is probably the most crucial step. They should be pliable but still have a bit of a chew. If they’re too soft when they go into the pan, they’ll turn to mush. It’s always better to slightly under-soak and have them finish cooking in the wok. I’ve definitely learned that lesson the hard way!
When it comes to mixing, the key is high heat and quick movement. Don’t be afraid to get that wok really hot! This ensures you get a lovely stir-fried texture rather than steamed, soggy noodles. Also, make sure you have all your ingredients prepped and within arm’s reach *before* you start cooking. Once things hit that hot wok, it moves fast, and you won’t have time to chop an onion or find the fish sauce. I’ve made that mistake more than once in my early days!
The sauce is where the magic truly happens. Don’t be shy about tasting and adjusting it. Everyone’s preference for sweet, sour, and salty is slightly different. Tamarind paste can vary in its tanginess, so tasting is essential. If you can’t find palm sugar, brown sugar is a good substitute, but palm sugar adds a lovely caramel note that’s really special. I’ve also experimented with different types of fish sauce, and while most good quality ones work, some have a richer flavor.
Ingredient swaps are totally doable. If you don’t have shrimp, chicken or firm tofu work brilliantly. Just make sure to cook them properly before adding the noodles. For the chives, regular green onions are perfectly fine, but if you can find garlic chives, give them a try – they have a unique flavor that really elevates the dish. And for the peanuts, if you have an allergy, toasted sesame seeds can offer a nice crunch, though the flavor profile will be different.
Finally, don’t be afraid of the fish sauce! It smells potent on its own, but when it’s cooked down and balanced with the other flavors, it adds an incredible depth of umami. Trust me on this one – it’s the backbone of so many delicious Asian dishes. And remember, serve it immediately! Pad Thai is best enjoyed right off the wok when the noodles are perfectly cooked and the flavors are vibrant. Enjoy the process, and don’t stress too much – even a slightly imperfect batch will still be incredibly delicious!
Storing and Reheating Tips
If you happen to have any leftover Shrimp Pad Thai (which is rare in my house!), storing it properly is key to enjoying it later. At room temperature, I wouldn’t leave it out for more than two hours, especially if it contains shrimp and egg. For best quality and safety, it’s always ideal to refrigerate it relatively quickly after it’s cooled down a bit.
For refrigerator storage, the best way is to transfer the cooled Pad Thai into an airtight container. This helps prevent it from drying out and absorbs any unwanted odors from other foods in the fridge. It should stay delicious in the fridge for about 2 to 3 days. I’ve found that the noodles can sometimes stick together a bit after refrigeration, but don’t worry, that’s easily fixed when reheating.
Freezing Pad Thai is also an option if you want to make a larger batch. Let the Pad Thai cool completely. Then, portion it into freezer-safe containers or heavy-duty freezer bags. Remove as much air as possible to prevent freezer burn. Properly stored, it can last in the freezer for up to 2 months. When you’re ready to thaw, the best method is to transfer it from the freezer to the refrigerator overnight.
The glaze itself generally holds up well with storage. When reheating, whether from the fridge or after thawing from the freezer, the key is to add a little moisture back into the dish. A splash of water or a bit of chicken or vegetable broth can work wonders. Stir it into the noodles as you reheat them in a skillet over medium heat or in the microwave. This helps to loosen up the noodles and bring back that saucy texture. If you’re reheating from frozen and want to add fresh bean sprouts or chives, do so towards the end of the reheating process so they retain some of their crunch and freshness. And always, always squeeze fresh lime juice over it after reheating to bring back that essential brightness!
Frequently Asked Questions
Final Thoughts
I really hope you give this Shrimp Pad Thai recipe a try. It’s one of those dishes that has brought so much joy to my kitchen, and I just know it will do the same for yours. It’s the perfect example of how a relatively simple dish can deliver such an incredible depth of flavor. From the satisfying chew of the noodles to the sweet-salty-sour tang of the sauce, every bite is a little adventure. It’s a lifesaver for busy weeknights, impressive enough for guests, and just plain comforting. If you love Thai food, or even if you’re just looking for a new go-to noodle dish, this is it!
If you enjoy this recipe, you might also want to explore some of my other favorite Asian-inspired dishes, like my quick Chicken Stir-fry or my ever-popular Lemongrass Chicken skewers. They all share that same focus on fresh ingredients and vibrant flavors. I’d absolutely love to hear how your Shrimp Pad Thai turns out! Please leave a comment below with your thoughts, any variations you tried, or just to say hello. And if you share a photo on social media, be sure to tag me – I love seeing your culinary creations! Happy cooking!
Shrimp Pad Thai
Ingredients
Noodles
- 3 ounces packaged rice noodles
For the Stir-fry
- 2 teaspoons oil (such as peanut oil or avocado oil)
- 1 clove garlic finely minced
- 8 ounces medium-sized shrimp shelled and deveined
- 2 ounces fried firm tofu cut into slices (optional)
- 1 large egg
- 1 large egg white you can use the whole egg if you prefer
- 5 ounces bean sprouts
- 1 ounce Chinese chives or scallions, cut into 2-inch lengths
- 1 tablespoon crushed peanuts
- lime wedges for serving
- basil optional for garnish
For the Sauce
- 1.5 tablespoons fish sauce Thai Kitchen brand for gluten free
- 1 tablespoon sugar
- 2 tablespoons water
- 1 tablespoon rice vinegar
- 0.5 teaspoon chili powder or more, to taste
Instructions
Preparation Steps
- Follow the package instructions to cook the dry rice noodles. The rice noodles should be soft (but still chewy and not mushy) after boiling.
- Rinse the boiled noodles with cold running water.
- Mix all the seasoning ingredients in a small bowl until well combined, set aside.
- Heat up a large skillet on high heat and add the oil. As soon as the oil is hot, add the garlic to the skillet and start stirring until you smell the aroma of the garlic. Add the shrimp and the tofu and continue stirring.
- As soon as the shrimp changes color, add the noodles and stir-continuously, about 30 seconds.
- Use the spatula to push the noodles to one side of the skillet, and crack the eggs on the empty side of the skillet. Use the spatula to break the egg yolk and let cook for about 30 seconds.
- Combine the egg and the noodles, and add the seasoning sauce. Stir to combine well with the noodles.
- Next, add the bean sprouts and chives and continue stirring.
- As soon as the bean sprouts are cooked, stir-in the crushed peanut.
- Turn off the heat and serve the Pad Thai immediately with the lime wedges.
Notes
Featured Comments
“Impressed! Clear steps and quick weeknight win results. Perfect for busy nights.”
“New favorite here — restaurant-level. crowd-pleaser was spot on.”
“Super easy and turned out amazing! My family asked for seconds. Saving this one.”
“This sweet treat was absolutely loved — the light really stands out. Thanks!”
“Made it tonight and wow — turned out amazing! Will definitely make Easy Shrimp Pad Thai Recipe again.”
“Packed with flavor and so simple. Exactly what I wanted from Easy Shrimp Pad Thai Recipe.”


