

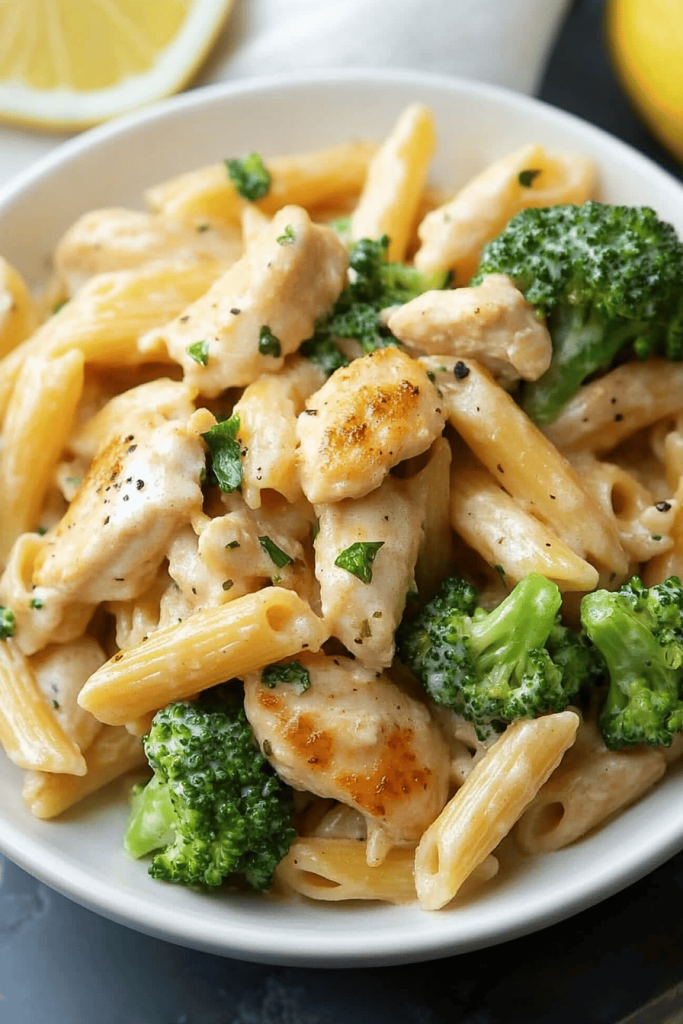
You know those meals that just feel like a hug? The ones that make the whole house smell amazing and instantly bring everyone to the kitchen, eager to see what’s cooking? This stove tri tip steak is exactly that for my family. It’s become our go-to for everything from weeknight dinners when we’re pressed for time but still want something special, to weekend barbecues where it’s the star of the show. I remember the first time I successfully nailed a tri tip steak indoors, using just my trusty cast-iron skillet. I’d always associated tri tip with grilling, that glorious char and smoky aroma. But life happens, the weather turns, or we just crave that perfect, juicy steak without all the fuss. This method? It’s a game-changer. Forget dry, tough steak; this stove tri tip steak is tender, flavorful, and honestly, surprisingly simple to achieve right on your stovetop. It’s a culinary little victory that I just had to share with you.
What is a Stove Tri Tip Steak?
So, what exactly is this magical thing we’re talking about? At its heart, a stove tri tip steak is simply a beautiful cut of beef, the tri tip roast, seared and cooked to perfection entirely on the stovetop, typically in a heavy-bottomed pan like cast iron. Think of it as the indoor, no-grill-required cousin to your favorite grilled steak. The tri tip itself comes from the bottom sirloin and has this fantastic triangular shape, hence the name. What makes it so great for this method is its inherent tenderness and robust beefy flavor. We’re not trying to reinvent the wheel here; we’re just using a smart technique to get that incredible steakhouse quality right in your own kitchen, without needing any special equipment beyond a good pan and your stove. It’s essentially about harnessing the direct heat of the stovetop to create a gorgeous crust while keeping the inside wonderfully juicy and pink.
How do I make a Tri Tip Steak?
Quick Overview
The magic of this stove tri tip steak lies in creating a perfect sear on the outside while gently cooking the inside to your desired doneness, all within a heavy skillet. We’ll start by getting the steak seasoned and at room temperature, then sear it intensely on all sides to develop that incredible crust. A little butter basting with aromatics takes it to the next level before a short rest allows the juices to redistribute. It’s a straightforward process that’s more about technique and paying attention to the steak than complicated steps.
Ingredients
For the Steak:
1 (2-3 lb) Tri Tip Roast, trimmed of excess silver skin
2 tablespoons Olive Oil or Avocado Oil (high smoke point is key!)
1 teaspoon Kosher Salt, or more to taste
1 teaspoon Freshly Ground Black Pepper, or more to taste
2-3 sprigs Fresh Rosemary or Thyme (optional, but SO good)
2-3 cloves Garlic, smashed
For Basting (Optional, but highly recommended):
3-4 tablespoons Unsalted Butter
Step-by-Step Instructions
Step 1: Preheat & Prep Pan
First things first, you want to take your tri tip roast out of the refrigerator about 45-60 minutes before you plan to cook it. This is crucial for even cooking – a cold steak hitting a hot pan won’t cook uniformly. While the steak is coming to room temperature, get your skillet ready. I swear by my trusty cast-iron skillet for this. Place it over medium-high heat. Let it get good and hot; you’ll know it’s ready when a drop of water sizzles and evaporates instantly. Add your olive oil – you want enough to lightly coat the bottom of the pan. Let that shimmer, but don’t let it smoke excessively. A little bit of smoke is okay, but if it’s billowing, your pan is too hot.
Step 2: Mix Dry Ingredients
This step is super simple but so important for building flavor. Pat your tri tip roast completely dry with paper towels. Seriously, get it as dry as you can. Moisture is the enemy of a good sear! Then, generously season it on all sides with kosher salt and freshly ground black pepper. I like to use about a teaspoon of each, but feel free to adjust to your preference. Don’t be shy with the seasoning; a good amount helps create that delicious crust. Make sure to get the edges too. This initial seasoning forms the base of all that wonderful flavor.
Step 3: Mix Wet Ingredients
While the steak is resting and seasoning, let’s get our aromatics ready if you’re using them. Smash your garlic cloves with the flat side of your knife – this helps release their fragrant oils. If you’re using fresh herbs like rosemary or thyme, give them a little bruise too, just to wake up their scent. These aren’t strictly necessary, but they add an incredible depth of flavor when you baste the steak later. Just having them ready to go makes the whole process smoother.
Step 4: Combine
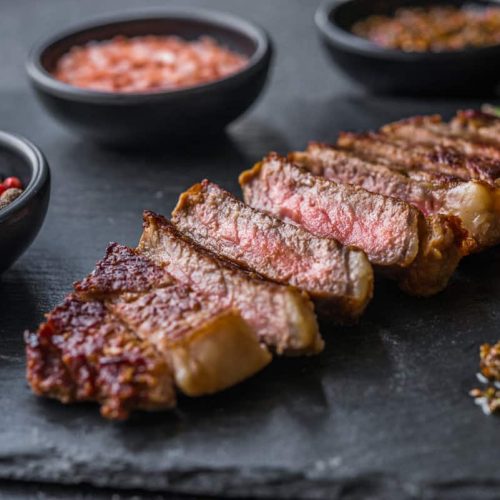
Now for the main event: searing! Carefully place your seasoned tri tip roast, fat-side down if there’s a significant fat cap, into the hot skillet with the shimmering oil. You should hear a satisfying sizzle immediately. Let it sear undisturbed for about 3-4 minutes. You want a deep, golden-brown crust to form. Resist the urge to move it around too much! After 3-4 minutes, flip the steak and sear the other side for another 3-4 minutes. Then, sear the edges. If you have a particularly thick roast, you might want to sear the narrow tips for a minute or two each as well. The goal is to get a beautiful brown crust on every surface.
Step 5: Prepare Filling
This step is for the butter basting, which really elevates the steak. Once you’ve got a good sear on all sides, reduce the heat to medium-low. Add your butter to the skillet. As the butter melts, tilt the pan slightly towards you. Using a spoon, continuously scoop the melted butter and pour it over the top of the steak. This is called basting. Add your smashed garlic cloves and herb sprigs to the butter. Continue basting for another 3-5 minutes, or until the steak reaches your desired internal temperature. For medium-rare, aim for an internal temperature of about 130-135°F (54-57°C).
Step 6: Layer & Swirl
This step is more about achieving that perfect crust and infusing flavor. Once the steak has been seared on all sides and basted to your liking, it’s time to check the internal temperature. Use an instant-read meat thermometer inserted into the thickest part of the roast. Remember, the temperature will rise a few more degrees as it rests. For medium-rare, pull it off the heat when it registers around 130-135°F. If you prefer it more well-done, aim for higher temperatures (140-145°F for medium, 150-155°F for medium-well).
Step 7: Bake
Technically, we’re not “baking” in an oven here, but this is the phase where the steak finishes cooking and rests. Once the steak has reached its target temperature, carefully remove it from the skillet and place it on a clean cutting board. Tent it loosely with foil. It’s incredibly important to let the steak rest for at least 10-15 minutes. This allows the juices, which have been driven to the center during cooking, to redistribute throughout the meat. If you cut into it too soon, all those delicious juices will run out onto the board, leaving you with a drier steak. Trust me on this one; the rest is non-negotiable for a tender, juicy result.
Step 8: Cool & Glaze
The “glaze” here is really the delicious pan juices and melted butter from the basting. After the steak has rested, you can pour any accumulated juices from the cutting board back over the steak. If you want to make a quick pan sauce, you can deglaze the skillet with a splash of beef broth or red wine, scraping up all those flavorful bits from the bottom, and reduce it. But honestly, the basting alone is usually enough to make this steak sing. Just let it sit for a few minutes after resting to allow the juices to settle.
Step 9: Slice & Serve
Now for the best part! Slice your rested tri tip against the grain. You’ll notice the grain direction can change on a tri tip, so pay attention to get the most tender slices. I like to slice it about 1/4-inch thick. Arrange the slices on a platter or individual plates. Drizzle any resting juices over the top. The aroma alone will have everyone at the table swooning. It’s a beautiful presentation, and the taste is just phenomenal. This stove tri tip steak is proof that you don’t need a grill to make an extraordinary steak.
What to Serve It With
Oh, the possibilities are endless! This stove tri tip steak is so versatile, it’s become a centerpiece for so many meals in our house. For a hearty breakfast that feels like a weekend treat, I love serving it sliced alongside some perfectly scrambled eggs and crispy hash browns. It’s a decadent start to the day that my family absolutely adores. When we’re doing a proper brunch, I’ll often arrange the tri tip slices artfully on a platter with some fresh fruit like melon and berries, maybe a small bowl of hollandaise sauce on the side, and of course, mimosas or a good coffee. It feels so elegant and celebratory. As a dessert, believe it or not, a small portion of perfectly cooked, tender tri tip can be surprisingly satisfying alongside a light, crisp salad with a tangy vinaigrette, especially if you’ve had a big meal earlier. It’s a lighter, protein-rich way to end things. And for those cozy snack occasions, or just when you’re craving something substantial without a full meal, I love to have leftover tri tip cold, sliced thin, and piled onto crusty bread with a smear of horseradish cream. It’s basically the best open-faced sandwich you’ll ever have. We also have a tradition of pairing it with roasted root vegetables like carrots and parsnips in the fall, or grilled asparagus in the spring. It just works with everything!
Top Tips for Perfecting Your Stove Tri Tip Steak
Over the years, I’ve picked up a few tricks that I think really make a difference in getting that restaurant-quality stove tri tip steak at home. First, about the tri tip itself: always look for a roast that has a nice, even thickness if possible. This helps it cook more uniformly. Trimming excess silver skin is important because it’s a tough membrane that won’t break down during cooking. Don’t trim off all the fat though; a good layer of fat on one side will render down and help baste the steak, adding incredible flavor and moisture. When it comes to searing, the key is a screaming hot pan and not overcrowding it. If your pan isn’t big enough for the tri tip, cook it in batches. For mixing, well, there’s not much “mixing” for the steak itself, but really pressing that salt and pepper into the meat is crucial. I’ve learned that sometimes a light sprinkle just falls off. Really pat it on there! For the swirl, I’m referring to the swirling butter during basting. Make sure the heat is controlled so the butter doesn’t burn. If it starts to brown too quickly, lower the heat. Ingredient swaps are minimal here; olive oil or avocado oil are best for their high smoke point. You could technically use a neutral oil like canola, but olive oil adds a subtle flavor I really enjoy. For baking – or rather, resting – don’t skimp on the time! Ten minutes is the absolute minimum; fifteen is even better. Think of it as part of the cooking process. And for glaze variations, well, the pan juices are the “glaze” here. If you want to add more, a splash of Worcestershire sauce or a tiny bit of balsamic vinegar added to the butter while basting can add another layer of complexity. I’ve also experimented with adding a sprig of garlic and a bay leaf to the basting butter, which is lovely. My biggest lesson learned? Don’t be afraid of the heat for the initial sear. That intense heat is what builds that beautiful, caramelized crust that locks in all the juices. And always, always use a meat thermometer. It’s your best friend for nailing that perfect internal temperature, every single time. It takes the guesswork out of it completely.
Storing and Reheating Tips
One of the best things about a tri tip steak is that it’s fantastic as leftovers! If you’ve got some cooked steak hanging around, here’s how to keep it tasting its best. For storing, I always let the steak cool down a bit at room temperature before wrapping it. Then, I wrap it tightly in plastic wrap, followed by a layer of aluminum foil, or place it in an airtight container. At room temperature, it’s best to eat any leftovers within about 2 hours. In the refrigerator, it will stay good for about 3-4 days. The key is to keep it well-sealed to prevent it from drying out. If you plan to freeze it, this is also totally doable. Wrap individual portions tightly in plastic wrap, then in foil, and then place them in a freezer-safe bag or container. It should last for about 2-3 months in the freezer. When you’re ready to reheat, the best method is often the gentlest. For refrigerator-stored steak, I like to gently warm slices in a skillet over low heat with a tiny bit of butter or oil, just until heated through. You can also reheat it in a preheated oven at around 250°F (120°C) for about 10-15 minutes, wrapped loosely in foil. Avoid microwaving if you can, as it can make the steak a bit tough. If reheating from frozen, it’s best to thaw it in the refrigerator overnight first. The glaze timing advice is interesting – usually, the steak is best served immediately after cooking and resting, so there’s no real “glaze” to worry about storing separately. If you happened to make an extra pan sauce, that would store separately in the fridge for a few days.
Frequently Asked Questions
Final Thoughts
So there you have it – my absolute favorite way to make a stove tri tip steak that’s incredibly flavorful, wonderfully tender, and surprisingly easy to pull off right on your stovetop. It’s the kind of meal that makes you feel like a culinary rockstar without actually having to spend hours in the kitchen. I really hope you give this a try, especially if you’ve ever been intimidated by cooking steak indoors. It’s just so rewarding to get that perfect medium-rare finish and that beautiful crust. If you enjoyed this recipe, I think you might also love my recipe for pan-seared salmon with lemon-dill sauce, or my foolproof method for Baked Chicken thighs. They’re all about simple techniques yielding maximum flavor. I can’t wait to hear how your stove tri tip steak turns out! Please leave a comment below and share your experience, or any fun variations you tried. And if you loved it, a quick rating would be amazing! Happy cooking!
Stove Top Tri-Tip Steak
Ingredients
Main Ingredients
- 2 tablespoons extra virgin olive oil
- salt to taste
- pepper to taste
- 2 pounds tri-tip steak 1-inch thick
Instructions
Preparation Steps
- Trim any excess fat from either side of your steak.
- Heat a large heavy skillet over medium-high heat. Once the skillet is hot, add olive oil to the pan.
- When the oil is hot, add the steak to the skillet and season with salt and pepper to taste.
- Sear the steak for 2 minutes per side.
- Reduce the heat to medium.
- Cook the steak 6-8 minutes for medium doneness or 9-11 minutes for well done. Use a meat thermometer to check for doneness.
- Remove the steak from the skillet to rest for at least 5 minutes.
- Slice the steak against the grain and serve. Enjoy!
Notes
Featured Comments
“This sounds absolutely delicious — I’ve been craving something like this all week! Can’t wait to try your recipe.”
“Impressed! Clear steps and absolutely loved results. Perfect for busy nights.”
“New favorite here — comforting. crowd-pleaser was spot on.”
“Super easy and turned out amazing! My family asked for seconds. Saving this one.”
“This sweet treat was absolutely loved — the hearty really stands out. Thanks!”
“Made it tonight and wow — comforting! Will definitely make Easy Stove Tri Tip Steak Perfection again.”


This sounds absolutely delicious — I’ve been craving something like this all week! Can’t wait to try your recipe.