


Oh, this recipe! If there’s one thing that instantly transports me back to sun-drenched afternoons and the sound of gentle waves, it’s the taste of a perfectly blended Frozen Limonada de Coco. It’s more than just a drink; it’s a memory, a feeling, a little vacation you can whip up right in your own kitchen. I remember the first time I tried it on a trip to the Caribbean – it was so refreshing, so creamy, and just… magical. I’ve been trying to recreate that pure bliss ever since, tweaking and tasting until I landed on this version. It’s like a creamy, dreamy, citrusy hug that’s ridiculously easy to make, especially when you’re craving something wonderfully cool and not *too* sweet. Honestly, this Frozen Limonada de Coco is my go-to when I need a little pick-me-up, a sweet escape from the everyday hustle, or when I have friends over and want to serve something that feels a bit special without spending hours in the kitchen. It’s the kind of drink that makes you close your eyes and smile. And guess what? It uses ingredients you probably already have or can easily find, making it a total lifesaver on a warm day when you just want to relax.
What is a frozen limonade?
So, what exactly is this delightful concoction? At its heart, a Frozen Limonada de Coco is a blended frozen beverage that combines the bright, zesty punch of lime (limón) with the rich, tropical creaminess of coconut. Think of it as a sophisticated, grown-up slushy, or a dairy-free twist on a piña colada, but with that distinctive tangy lime kick that makes it utterly addictive. The “de coco” part, of course, refers to the coconut milk or cream, which gives it that luxuriously smooth texture. It’s essentially a symphony of sweet, tart, and creamy notes all harmonizing in your glass. It’s the kind of drink that feels indulgent but is surprisingly light and incredibly thirst-quenching. It’s not just a sweet drink; it’s got a wonderful balance that keeps you coming back for another sip, and another! The beauty of it is its simplicity; it’s just a few key ingredients blended together to create something truly special and evocative of tropical getaways.
How do I make limonade de coco?
Quick Overview
Making this Frozen Limonada de Coco is ridiculously simple. You’ll basically be combining ice, coconut milk, fresh lime juice, and a touch of sweetener in a blender. Blend until it’s perfectly smooth and frosty, then pour into your favorite glasses. That’s it! No cooking, no complicated steps, just pure, unadulterated frozen deliciousness. The key is using fresh lime juice for that vibrant citrus flavor, and full-fat coconut milk for maximum creaminess. This recipe is a lifesaver when you need a quick, refreshing treat that feels incredibly indulgent but is surprisingly easy on your time and your wallet.
Ingredients
For the main drink:
- 4 cups ice cubes: Use good quality ice that isn’t too old and freezer-burnt. This is what gives us that lovely frozen texture.
- 1 can (13.5 oz) full-fat coconut milk, chilled: This is crucial for creaminess! Make sure it’s full-fat; the light version won’t give you that rich, velvety texture. Chilling it helps it blend better and contributes to the frosty consistency.
- 1/2 cup fresh lime juice: Please, please, *please* use fresh limes! Bottled lime juice just doesn’t have the same bright, zesty flavor. You’ll likely need about 4-6 medium limes.
- 1/4 cup to 1/2 cup sweetener: This is where you can really customize! I usually start with 1/4 cup of agave nectar or simple syrup and add more to taste. Maple syrup works too, but it might add a slight maple note. You can also use granulated sugar, but it might not dissolve as smoothly unless you make a simple syrup first.
- Optional: 1 teaspoon lime zest: If you love a super intense lime flavor, a little zest adds another layer of aromatic brightness.
Step-by-Step Instructions
Step 1: Prepare Your Blender
Make sure your blender is clean and ready to go. If your ice cubes are super large, you might want to break them up a bit so your blender can handle them more easily. This just ensures a smoother blend.
Step 2: Add Coconut Milk and Lime Juice
Pour the chilled full-fat coconut milk into the blender. Then, add your freshly squeezed lime juice. I always recommend squeezing your limes over a small bowl first, just in case you get any seeds, and it also lets you measure the juice accurately.
Step 3: Add Sweetener and Zest (Optional)
Now, add your chosen sweetener. Start with the lower amount, as you can always add more later if needed. If you’re using lime zest for an extra punch of citrusy aroma, toss that in now too.
Step 4: Add Ice and Blend
Pile in the ice cubes. Secure the lid on your blender tightly! Start blending on a low speed to break up the ice, then gradually increase to high speed. Blend until the mixture is completely smooth, creamy, and has a frosty, slushy consistency. This usually takes about 60-90 seconds, depending on your blender’s power. If it seems too thick, you can add a tiny splash of water or more coconut milk. If it’s too thin, add a few more ice cubes and blend again.
Step 5: Taste and Adjust
This is the most important part! Carefully taste your Frozen Limonada de Coco. Does it need more sweetness? More tartness from lime? Adjust as needed. Blend again for a few seconds after any adjustments to ensure everything is incorporated.
Step 6: Pour and Garnish
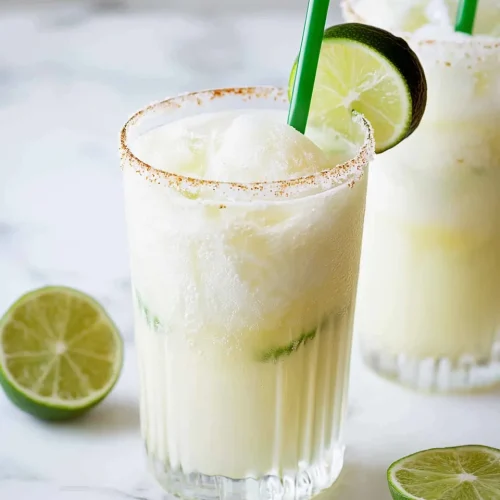
Pour the creamy, dreamy mixture into chilled glasses. For an extra special touch, you can garnish with a thin slice of lime on the rim of the glass or a little sprinkle of lime zest. I love using mason jars for a rustic feel or pretty cocktail glasses if I’m feeling fancy.
Step 7: Serve Immediately
Frozen Limonada de Coco is best enjoyed immediately while it’s perfectly frosty and cold. Grab a straw and enjoy your tropical escape!
What to Serve It With
This Frozen Limonada de Coco is so versatile, it fits in perfectly with almost any meal or occasion! For **Breakfast**, it’s a fantastic alternative to coffee if you’re looking for something light and refreshing to start your day. Imagine sipping on this alongside a light pastry or a bowl of fresh fruit – pure bliss! When it comes to **Brunch**, this drink really shines. It’s elegant enough for guests but still super easy. I love serving it in tall glasses with a sprig of mint or a small skewer of berries. It pairs wonderfully with quiches, savory breakfast casseroles, or even fluffy pancakes. As a **Dessert**, it’s surprisingly satisfying. It’s creamy and flavorful, but the lime keeps it from feeling too heavy after a meal. It’s a wonderful palate cleanser and a delightful way to end a dinner party, especially when served in smaller, more elegant glasses. And for those **Cozy Snacks**, this is my secret weapon! On a hot afternoon, or when I just need a little treat, a glass of this is pure comfort. It feels indulgent but is so simple. I often pair it with a small bowl of nuts or some light, crisp cookies. My kids, surprisingly, love a non-alcoholic version of this with their afternoon snack too – they call it their “special sunshine drink”!
Top Tips for Perfecting Your Frozen Limonada de Coco
Over the years, I’ve learned a few little tricks that can really elevate your Frozen Limonada de Coco from good to absolutely spectacular. One of the biggest things is definitely the **coconut milk**. Always go for full-fat. Seriously, trust me on this one. The light version just doesn’t have the same richness or creaminess, and it can make the drink a bit icy rather than velvety. Chilling the can of coconut milk in the fridge overnight before you make it is another game-changer. The cream solidifies at the top, and you can scoop out that thick, luscious cream for the ultimate texture. When it comes to the **lime juice**, fresh is non-negotiable. I’ve tried it with bottled stuff, and it just tastes… well, like bottled lime juice. It lacks that bright, authentic zing. Squeeze them yourself, and if you want an extra layer of amazing aroma, add a little bit of lime zest to the blender – it makes a surprising difference! For the **sweetener**, I tend to start on the lower end and taste as I go. Everyone’s preference is different, and the tartness of limes can vary. Agave nectar is my usual go-to because it blends in smoothly and has a neutral flavor, but a simple syrup made from equal parts sugar and water, cooled down, is also fantastic. You can even use maple syrup if you don’t mind a subtle maple hint. If your blender isn’t super powerful, **pre-chill your glasses** and even add a few extra ice cubes if the mixture seems to be melting too quickly while you’re pouring. This ensures that perfect frosty consistency from the first sip to the last. Lastly, don’t be afraid to experiment with **add-ins**! A tiny splash of Vanilla Extract can add a subtle depth, or a few fresh mint leaves blended in give it an extra layer of cool refreshment. For an adult version, a shot of good white rum is, of course, a classic and delicious addition that makes it feel like a real treat.
Storing and Reheating Tips
While this Frozen Limonada de Coco is absolutely best enjoyed right after it’s made, because, let’s be honest, who doesn’t love that perfectly frosty texture? I totally get that sometimes you might have a little leftover, or you want to prep ahead. So, here’s the scoop on storing it. For **Room Temperature** storage, it’s really not ideal. This drink is meant to be cold and slushy, and it will melt pretty quickly at room temperature, losing its delightful texture. If you absolutely must leave it out for a short while, try to keep it in a shaded, cool spot, but plan to drink it within an hour at most. If you have leftovers and want to keep them for later, your best bet is **Refrigerator Storage**, but with a caveat. Pour any leftovers into an airtight container or a jar and pop it in the fridge. It will likely separate a bit and lose some of its frosty quality, becoming more like a thick smoothie or a slushy that’s begun to melt. When you’re ready to enjoy it again, you’ll probably need to give it a good stir or even a quick blitz in the blender to bring back some of that original texture. It should stay good in the fridge for about 24 hours, but the quality is definitely best on day one. For **Freezer Instructions**, this is your best bet for longer storage. Pour your leftover Frozen Limonada de Coco into a freezer-safe container or a sturdy zip-top bag. Make sure to press out as much air as possible before sealing. It can typically stay frozen for up to 2-3 weeks. When you’re ready to thaw, take it out of the freezer and let it sit at room temperature for about 15-20 minutes, or until it reaches a consistency you can blend again. Then, pop it back into the blender for a quick whiz to revive its frosty texture. Regarding **Glaze Timing Advice**, if you’re making a glaze (though this recipe is delicious enough on its own!), it’s best to add any glaze *just before serving*. If you’re storing it, keep the glaze separate and add it right before you’re about to enjoy your drink again. This prevents the glaze from becoming soggy or the drink from getting too sweet during storage.
Frequently Asked Questions
Final Thoughts
There you have it – my absolute favorite way to make a Frozen Limonada de Coco! It’s just one of those recipes that brings so much joy, whether you’re sipping it on a sweltering day, serving it at a party, or just needing a little taste of paradise. The blend of bright, zesty lime with the creamy, tropical coconut is simply irresistible, and the fact that it’s so incredibly easy to make is just the icing on the cake (or, in this case, the lime on the rim!). I truly hope you give this a try, and that it brings a little bit of sunshine and tropical bliss into your kitchen, just like it does for me. If you love this refreshing treat, you might also enjoy my recipe for Coconut Water Refresher or my Easy Mango Lassi – they both capture that same refreshing, tropical vibe! I can’t wait to hear what you think! If you make this, please leave a comment below and let me know how it turned out, or share your own favorite variations. Happy blending!
Frozen Limonada de Coco
Ingredients
Main Ingredients
- 2 cups Coconut Milk full fat
- 1 cup Lime Juice freshly squeezed
- 0.75 cup Sweetened Condensed Milk
- 4 cups Ice Cubes
- 0.5 cup Shredded Coconut sweetened, for garnish (optional)
- Lime Slices for garnish (optional)
Instructions
Preparation Steps
- In a blender, combine the coconut milk, fresh lime juice, and sweetened condensed milk.
- Add the ice cubes to the blender.
- Blend on high speed until the mixture is smooth and has a slushy consistency. If it's too thick, you can add a little more coconut milk or water. If it's too thin, add more ice.
- Pour the frozen limonada de coco into glasses.
- Garnish with shredded coconut and lime slices, if desired.
- Serve immediately and enjoy!
Notes
Featured Comments
“This sounds so refreshing! I love how coconut and lime come together — perfect for summer.”
“This takes me straight back to my beach trips! The combo of coconut and lime is pure magic—so refreshing.”
“Impressed! Clear steps and quick weeknight win results. Perfect for busy nights.”
“New favorite here — absolutely loved. crowd-pleaser was spot on.”
“Super easy and turned out amazing! My family asked for seconds. Saving this one.”
“This sweet treat was absolutely loved — the buttery really stands out. Thanks!”


This takes me straight back to my beach trips! The combo of coconut and lime is pure magic—so refreshing.
This sounds so refreshing! I love how coconut and lime come together — perfect for summer.