

If you’ve ever wandered into a diner craving something warm, crispy, and totally comfort-food worthy, chances are you’ve come across a plate of hashbrowns. I remember the first time I tried one perfectly golden and crunchy from my favorite breakfast spot — it was like a tiny, savory miracle. Since then, I’ve been on a quest to make that magic at home, and let me tell you, it’s easier than you might think! This recipe has become my secret weapon on busy mornings or lazy weekends, and honestly, nothing beats the smell of freshly made hashbrowns sizzling away in the pan. My kids ask for this all the time, and I love that I can whip up a batch with pantry staples. Trust me — once you master this crispy treat, it’ll disappear in minutes at your house too. So grab your grater and let’s jump right into creating the perfect hashbrown — crispy, tender, and packed with flavor!
What is hashbrown?
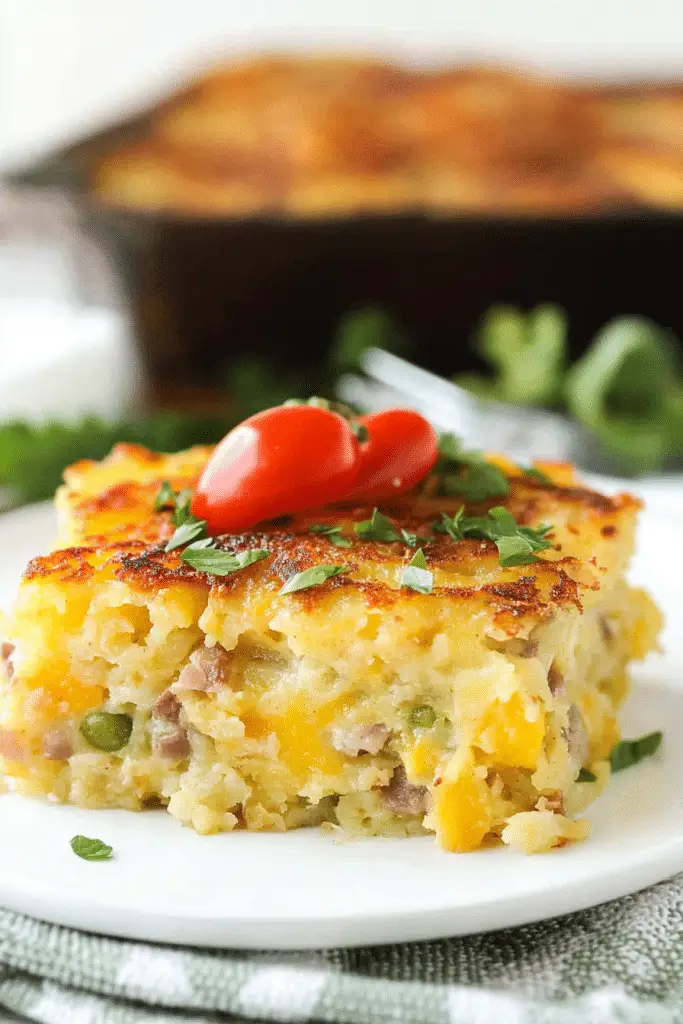
Think of hashbrowns as the ultimate potato delicacy that’s basically a crispy, shredded potato patty. The name comes from the short form of “hash roasted potatoes,” which is a pretty apt description because it’s all about transforming humble potatoes into something extraordinary through a simple process of shredding, seasoning, and frying. It’s essentially like turning a humble spud into golden nuggets of joy. Whether you call them hashbrowns, hash browns, or even crispy potato nests, these are a breakfast classic but also a sneaky good snack or side dish. Think of it as a love child between hash and fried potatoes — raw, shredded potatoes are pressed into a pan and cooked until their edges crackle and turn irresistibly crispy. It’s so satisfying to hear that first crunch when you take a bite, right?
How do I make Hashbrown?
Quick Overview
This recipe is all about grabbing some fresh potatoes, shredding them finely, and then pressing them into a hot skillet until they’re beautifully golden and crispy. No complicated steps, no fancy ingredients. I like to squeeze out excess moisture from the shredded potatoes — it makes a huge difference in getting that perfect crunch. Then, just season, press, and fry until they’re irresistibly crispy on the outside but still tender inside. Honestly, once you get the hang of it, it’s a no-fail process—perfect for those mornings when you want something homemade but don’t want to spend hours in the kitchen.
Ingredients
For the Main Batter:
– 4 large Russet potatoes (the starchy kind gives the best texture)
– 1 small onion (optional, but adds a nice flavor boost)
– 2-3 tablespoons vegetable oil or melted butter
– Salt and pepper to taste
– A pinch of garlic powder or paprika for extra flavor (optional)
For the Filling:
– Shredded cheese, cooked bacon bits, chopped scallions (these are fun mix-ins if you want to jazz things up!)
For the Glaze:
– A light drizzle of honey or a sprinkle of smoked paprika—totally optional but adds a nice finish. If you prefer a sweeter touch, a bit of maple syrup works beautifully, especially on breakfast hashbrowns served with eggs.
Step-by-Step Instructions
Step 1: Preheat & Prep Pan
Start by heating a large skillet over medium-high heat. I always do this first so I don’t forget — the pan needs to be hot when the potatoes hit it. Add about 2 tablespoons of oil or butter, enough to coat the bottom. When it’s shimmering (but not smoking), you’re ready to go. Also, peel the potatoes if you want a smoother look, but I personally leave the skins on for extra texture and nutrients. Rinse, shred using a box grater, and then toss the shredded potatoes into a clean kitchen towel or cheesecloth to squeeze out as much moisture as possible. This step is crucial — moisture is the enemy of crispiness! Trust me, I learned this the hard way — too wet, and they end up soggy.
Step 2: Mix Dry Ingredients
In a large bowl, combine your shredded potatoes with some salt, pepper, and optional seasonings like garlic powder. Mix well, ensuring the seasoning is evenly distributed. This helps that flavor penetrate every bite. I usually do a quick taste test on a tiny bit — because salt actually brings out the potato’s natural flavor and helps them crisp up even more.
Step 3: Mix Wet Ingredients
In a small bowl, whisk together your oil or melted butter. You want enough to help everything stick together and aid with browning. Sometimes I toss in a teaspoon of apple cider vinegar or a splash of soy sauce for an extra savory punch — experiment and find what makes your taste buds happy!
Step 4: Combine
Pour the wet mixture over the shredded potatoes and toss gently, making sure every shred is coated. Be careful not to overmix — you want to keep it light so the hashbrowns stay fluffy inside. If the mixture seems dry, add a tad more oil or a splash of water, but avoid making it too wet.
Step 5: Prepare Filling
If you’re adding cheese, cooked bacon, or scallions, fold those in now. I love mixing in shredded cheddar and freshly chopped scallions for that perfect morning vibe, but feel free to switch it up based on your mood or what’s in the fridge!
Step 6: Layer & Swirl
Once your mixture is ready, spread it into the hot skillet, pressing down firmly with a spatula. I love to create a kind of pancake shape — thick enough to get that crunch on all sides but not so tall that it won’t cook through. If you want, swirl some additional ingredients on top or make a pattern with your toppings for a beautiful presentation! Cooking on medium-high, let the hashbrowns cook undisturbed for about 4-5 minutes until the edges turn golden and crispy.
Step 7: Bake
Carefully flip the hashbrown (a wide spatula works best), and cook the other side for another 4-5 minutes. If you like them extra crispy, just turn the heat down a little and let it sizzle longer. Keep an eye on it — you’re aiming for that perfect contrast between golden-brown exterior and soft, flavorful interior. For thicker hashbrowns, cover the skillet with a lid for a few minutes before flipping to ensure they cook evenly inside.
Step 8: Cool & Glaze
Once done, transfer the hashbrowns to a paper towel-lined plate to drain any excess oil. Let them sit for a minute; this helps the crispy crust set. If you’re using a glaze or drizzle, do it warm or at room temperature so it sticks nicely. I often drizzle honey or sprinkle smoked paprika over the top for that little extra zing — you can get creative here!
Step 9: Slice & Serve
Finally, slice your masterpiece into wedges or squares—whatever pleases you—and serve hot. These are best enjoyed right out of the pan, but they also reheat wonderfully in a skillet or toaster oven if you want leftovers. I like to serve mine with scrambled eggs, hot sauce, or even a dollop of sour cream. Honestly, I think they taste even better the next day — if they last that long!
What to Serve It With
This hashbrown recipe is famously versatile. In the morning, I love pairing it with fluffy scrambled eggs, crispy bacon, and a strong cup of coffee — it’s like a little breakfast feast in one plate. My kids often ask for these with a side of fruit and some maple syrup drizzled over the top for a sweet-salty combo. For brunch, I’ll pile on some sliced avocado, a fried egg, and maybe some dollops of salsa — it’s a real crowd-pleaser. If I’m feeling fancy, I’ll serve hashbrowns topped with melted cheese and a runny fried egg for an indulgent brunch dish. And honestly, they’re just as good as a cozy snack when you want something satisfying after a long day, paired with a cold beer or a warm cup of tea. That crispy exterior, warm potato inside, and the optional toppings totally make it special — a family favorite I turn to over and over again.
Top Tips for Perfecting Your Hashbrown
After making this a dozen times, I’ve picked up a few tricks that make all the difference. First, always squeeze out as much moisture from the shredded potatoes as possible — soggy hashbrowns are a no-go. I keep a stack of paper towels nearby and give them a good squeeze; this step is key to getting that crispy exterior. Second, don’t rush the cooking process — patience on medium-high heat produces the best crust. If you crank up the heat, you risk burning the outside while the inside remains raw; if you go too low, they get greasy and limp. I’ve tested swapping in sweet potatoes or parsnips, and while the flavor is different, the texture still works — just adjust seasonings accordingly. For a different look, try adding chopped herbs or a sprinkle of paprika on top before flipping. Oh, and when swirling toppings or fillings, use a toothpick or skewer to create swirling patterns — it’s surprisingly fun and makes your hashbrowns look as good as they taste. Trust me, it took a few tries to nail the consistency, but now I know exactly when they’re perfect — the smell alone will tell you. Bright golden, crispy edges, and tender middle — that’s the goal!
Storing and Reheating Tips
If you happen to have leftovers — which is rare in my house — store them in an airtight container in the fridge. They’ll last about 2 days, but honestly, these hashbrowns are best fresh. To reheat, skip the microwave if you can — it often leaves them soggy. Instead, warm a little oil in a skillet over medium heat, and fry each piece for a few minutes until heated through and crispy again. If you want to freeze them, lay the cooked hashbrowns flat on a baking sheet and freeze until firm, then pack into freezer bags. To reheat from frozen, just toss them back in a hot skillet, and they’ll regain that just-fried texture in no time. Just keep an eye on them — the goal is crispy but not burnt! If you added a glaze or toppings, apply those after reheating to keep everything looking and tasting fresh. This way, you get that satisfying crunch even days later, making leftovers almost as good as fresh out of the pan.
Frequently Asked Questions
Final Thoughts
If there’s one recipe I keep coming back to, it’s this hashbrown! There’s something so nostalgic about that perfect crispy edge, the scent of potatoes cooking, and the anticipation of that first satisfying crunch. It’s like a tiny party every time I make them — everyone in the family gathers around the kitchen, eager to taste. Over the years, I’ve tried many variations, from adding cheese to experimenting with different spices, and I can honestly say this recipe is the foundation of all great hashbrowns. Plus, it’s so forgiving — you can customize it endlessly and still come out with a winner. Once you get the technique down, it’s hard to go back to store-bought frozen ones because nothing beats the real deal fresh from your own skillet. So go ahead, give it a try, and watch your family devour these little golden treasures. I can’t wait to hear how yours turns out — happy cooking!
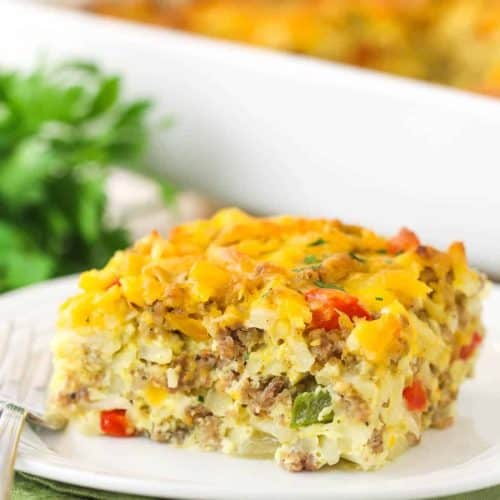
Hashbrown Breakfast Casserole
Ingredients
Main Ingredients
- 20 ounces shredded hash browns (thawed)
- 2 pounds sausage, cooked and crumbled drained
- 1 cup diced onion ½ medium onion
- 0.67 cup diced red bell pepper ½ bell pepper
- 0.67 cup diced green bell pepper ½ bell pepper
- 3 cups cheddar cheese divided
- 8 large eggs
- 1.33 cups milk
- 1.25 teaspoon salt
- 0.75 teaspoon black pepper
Instructions
Preparation Steps
- Preheat oven to 350°F (175°C) and lightly grease a 9x13 inch baking pan.
- In a large bowl, combine the hash browns, cooked sausage, diced onion, diced bell peppers, and 2 cups of the cheddar cheese. Gently mix the ingredients together and spread them evenly in the prepared baking pan.
- In a separate bowl, whisk together the eggs, milk, salt, and black pepper until well combined.
- Pour the egg mixture evenly over the hash brown mixture in the baking pan. Sprinkle the remaining 1 cup of cheddar cheese evenly on top.
- Bake uncovered for 55-65 minutes, or until the casserole is cooked through and bubbly around the edges.
Notes
Featured Comments
“I love this recipe! The crispy golden potatoes are such a comforting start to the day. Definitely adding this to my weekend breakfast menu.”
“Impressed! Clear steps and turned out amazing results. Perfect for busy nights.”
“New favorite here — comforting. crowd-pleaser was spot on.”
“Super easy and turned out amazing! My family asked for seconds. Saving this one.”
“This sweet treat was absolutely loved — the cozy really stands out. Thanks!”
“Made it tonight and wow — perfect for busy nights! Will definitely make Golden Potato Breakfast Bake How To again.”


I love this recipe! The crispy golden potatoes are such a comforting start to the day. Definitely adding this to my weekend breakfast menu.