

Oh, I am SO excited to share this recipe with you today! If there’s one thing that brings a jingle to my heart and a smile to my face, it’s these Grinch cookies. Honestly, they’re more than just cookies; they’re like a little hug in edible form. I remember the first time I made them. It was a frantic afternoon a few days before Christmas, and the house was a whirlwind of wrapping paper and holiday chaos. I needed something festive, something easy, and something that would make my little ones forget about their impatience for Santa. These Grinch cookies were an absolute lifesaver! They’re got that perfect balance of sweet and a little bit tart, with a texture that’s just *chef’s kiss*. They remind me a bit of a tender shortbread, but with a delightful chewy center that makes you go back for just one more (or maybe two!). If you’ve ever loved a classic Sugar cookie but wished it had a bit more personality, you’re in for a real treat. These are going to be your new go-to for any occasion that calls for a little extra cheer. They’re truly special, and the joy they bring is just immeasurable.
What are Grinch Cookies?
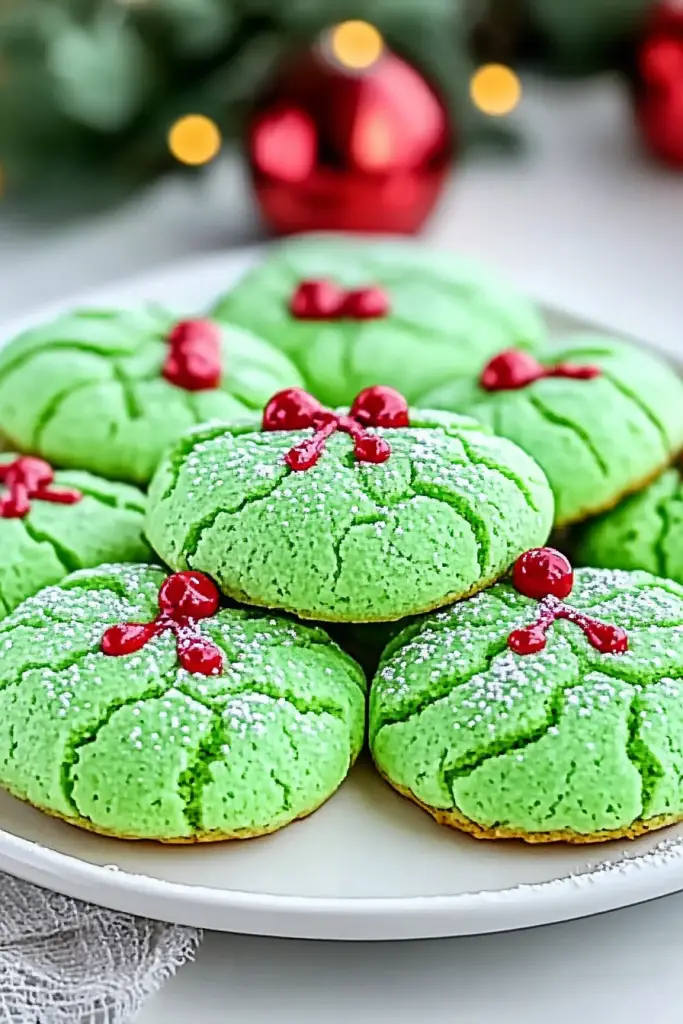
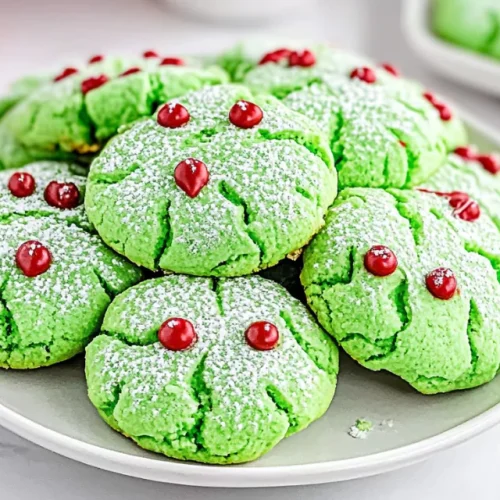
So, what exactly *are* these whimsical little delights? Think of them as your favorite, slightly festive sugar cookie‘s cooler, quirkier cousin. The name “Grinch Cookies” usually refers to a cookie that embodies the spirit of the Dr. Seuss character – often green, a little bit fuzzy-looking (in the most delicious way!), and undeniably charming. These Grinch cookies are typically a soft, buttery cookie with a slightly cakey texture, often infused with a hint of lime or lemon for a bright, zesty kick. The “Grinch” part really comes alive with a vibrant green hue, usually achieved with food coloring, and sometimes a playful swirl of red or pink to mimic the Grinch’s heart growing! It’s essentially a classic cookie base that’s been given a fun, festive makeover. It’s not complicated at all, and that’s part of its magic. It’s the kind of cookie that makes you feel like a kid again, no matter your age. It’s that perfect bite of holiday spirit, condensed into a delightful, melt-in-your-mouth treat.
How to Make Grinch Cookies
Quick Overview
Making these Grinch cookies is surprisingly straightforward. You’ll start by creaming together butter and sugar until light and fluffy, then adding in eggs and vanilla. The dry ingredients are whisked together separately before being gradually added to the wet. The magic happens when you incorporate the green color and lime zest, giving them that signature look and flavor. The dough is then swirled with a complementary color, like red, and baked until perfectly golden. It’s a simple, rewarding process that yields a crowd-pleasing cookie every single time. You’ll be amazed at how easily this comes together, even if you’re not a seasoned baker.
Ingredients
For the Main Batter:
Here’s what you’ll need for the delicious base of these cookies. I always like to make sure my butter is softened, not melted, for the best texture. It makes a world of difference! You’ll need:
- 1 cup (2 sticks) unsalted butter, softened
- 1 ½ cups granulated sugar
- 2 large eggs
- 1 teaspoon vanilla extract
- 1 teaspoon lime zest (from about 1 large lime)
- 2 ¾ cups all-purpose flour
- 1 teaspoon baking powder
- ½ teaspoon salt
- Green food coloring (gel works best for vibrant color)
For the Filling/Swirl:
This is where we add that extra pop of color and flavor. You can adjust the amount of red or pink coloring to your liking!
- ¼ cup all-purpose flour
- 2 tablespoons unsalted butter, softened
- ¼ cup powdered sugar
- 1 teaspoon milk (or a splash more for thinner consistency)
- Red or pink food coloring (optional, but highly recommended!)
For the Glaze (Optional, but delightful!):
A simple glaze adds a lovely sheen and a touch more sweetness. It’s completely optional, but I think it makes them extra special.
- 1 cup powdered sugar
- 2-3 tablespoons milk or lime juice
- A tiny drop of green food coloring (optional, for a lighter green hue)
Step-by-Step Instructions
Step 1: Preheat & Prep Pan
First things first, get your oven preheating to 375°F (190°C). While the oven heats up, line a couple of baking sheets with parchment paper. This is a non-negotiable for me – parchment paper is a baker’s best friend, preventing sticking and making cleanup a breeze. If you don’t have parchment, you can lightly grease your baking sheets, but I find parchment gives a more even bake and prevents those dreaded burnt bottoms.
Step 2: Mix Dry Ingredients
In a medium bowl, whisk together the 2 ¾ cups of all-purpose flour, baking powder, and salt. Whisking them together ensures the leavening agent and salt are evenly distributed throughout the flour. This is a simple step, but it’s crucial for ensuring your cookies bake up with the right texture and don’t have any surprising pockets of baking soda or salt. Give it a good whisk until everything looks uniform.
Step 3: Mix Wet Ingredients
In a large bowl, using an electric mixer (or a sturdy whisk and some elbow grease!), cream together the softened butter and granulated sugar until the mixture is light and fluffy. This process, called creaming, incorporates air into the butter and sugar, which is what gives cookies their lift and tender texture. Beat it for a good 2-3 minutes until it’s pale yellow and looks like fluffy clouds. Then, beat in the eggs one at a time, followed by the Vanilla Extract and the lime zest. Make sure to scrape down the sides of the bowl a few times to ensure everything is incorporated evenly.
Step 4: Combine
Gradually add the dry ingredients to the wet ingredients, mixing on low speed until just combined. Be careful not to overmix here! Overmixing develops the gluten in the flour too much, which can result in tough cookies. Once it’s *almost* combined, add your green food coloring, a little at a time, until you achieve your desired Grinch-green shade. I usually start with a toothpick dipped in gel coloring and add more until I’m happy. The dough should be thick but still a bit soft.
Step 5: Prepare Filling
In a small bowl, cream together the ¼ cup softened butter with the powdered sugar until smooth. Add the milk and mix until you have a smooth, spreadable paste. If it’s too thick, add another tiny splash of milk. If it’s too thin, add a touch more powdered sugar. Now, add a drop or two of red or pink food coloring and stir until you get a nice, contrasting color. This little bit of red will create beautiful swirls in your Grinch cookies.
Step 6: Layer & Swirl
Now for the fun part! Take about two-thirds of your green Cookie Dough and spread it evenly into your prepared baking sheets. Don’t worry about making it perfect; a rustic look is great. Then, dollop spoonfuls of the red filling mixture randomly over the green dough. Use a knife or a skewer to gently swirl the red into the green, creating a marbled effect. Be careful not to over-swirl, or you’ll lose the distinct colors. You want those beautiful green and red patterns to show!
Step 7: Bake
Bake for 9-12 minutes, or until the edges are lightly golden and the centers are set. Keep an eye on them, as oven temperatures can vary. You want them baked through but still wonderfully soft in the center. For me, 10 minutes is usually the sweet spot. They’ll continue to set up as they cool.
Step 8: Cool & Glaze
Let the cookies cool on the baking sheets for about 5 minutes before transferring them to a wire rack to cool completely. Once they’re completely cool, you can whip up the optional glaze by whisking together the powdered sugar and milk or lime juice until smooth. Add a tiny drop of green food coloring if you like. Drizzle the glaze over the cooled cookies. It adds a lovely touch and makes them look extra professional!
Step 9: Slice & Serve
Once the glaze is set (or if you skipped the glaze), you can slice your Grinch cookies into squares or bars. I usually use a sharp knife and cut them into pretty squares. Serve them up and watch the smiles appear! They’re best served at room temperature, but they’re pretty darn delicious straight from the cooling rack too. Presentation-wise, I love arranging them on a festive platter.
What to Serve It With
These Grinch cookies are so wonderfully versatile, they fit in perfectly with just about any meal or occasion. For Breakfast, imagine pairing a warm cookie with a steaming mug of coffee or a glass of cold milk. They’re a delightful little pick-me-up that feels a bit like a treat but is totally acceptable on a weekday morning, especially if they’re made with whole wheat flour! For Brunch, these cookies add such a cheerful touch to a spread. I like to arrange them on a pretty tiered stand alongside fresh fruit, pastries, and maybe some mini quiches. A sparkling mimosa or a fresh-squeezed orange juice complements their zesty flavor perfectly. As Dessert, they are simply divine. Serve them after a cozy dinner with a scoop of vanilla bean Ice Cream or alongside a rich chocolate cake for a fun contrast. They’re also a fantastic little bite with a cup of herbal tea as a post-dinner palate cleanser. And for those Cozy Snacks moments, which let’s be honest, happen more often than I’d like to admit, these are my absolute go-to. They’re perfect for an afternoon slump or a late-night craving when you want something sweet but don’t want the fuss of baking a whole pie. Pair them with a warm cup of hot chocolate or a simple glass of milk, and you’ve got pure comfort. My family has a tradition of having one of these with hot cocoa on Christmas Eve while we watch “How the Grinch Stole Christmas!” – it just wouldn’t be the same without them!
Top Tips for Perfecting Your Grinch Cookies
Over the years, I’ve learned a thing or two about making these Grinch cookies absolutely perfect, and I want to share those little nuggets of wisdom with you! When it comes to the Zucchini Prep (oops, wrong recipe in my head for a sec! Let me correct that!), actually, for *these* Grinch cookies, the key is really in the butter and sugar creaming. Ensure your butter is truly softened – it should yield to gentle pressure but not be greasy or melted. This is crucial for incorporating air, which leads to a tender crumb. If your butter is too cold, you won’t get enough air, and if it’s too warm, the cookies might spread too much. For Mixing Advice, the cardinal rule is “do not overmix” once you add the flour. Mix until the flour streaks just disappear. A few tiny streaks of flour are okay; they’ll get incorporated as you add the color and swirl. Overmixing gluten is the enemy of tender cookies! When it comes to Swirl Customization, don’t be afraid to experiment! For a bolder Grinch effect, you can use a vibrant green gel food coloring and swirl in a contrasting red or even a bright pink. For a more subtle look, a lighter green and a soft pink work beautifully. The key is to gently swirl; too much blending will make the colors muddy. My personal favorite is a vibrant green with a bright red swirl. For Ingredient Swaps, if you’re out of lime zest, a little lemon zest works wonderfully, or even a touch of almond extract can add a different, delicious flavor profile. You can also use dairy-free butter if needed, though the texture might be slightly different. For Baking Tips, remember that every oven is a little different. Start checking your cookies around the 9-minute mark. They should look set in the center and just starting to turn golden at the edges. If they’re browning too quickly on the bottom, you might need to lower your oven temperature slightly for the next batch or move your oven rack down a notch. And for Glaze Variations, if you find the glaze too thick, a teaspoon of milk or lime juice at a time will thin it out. If it’s too thin, a bit more powdered sugar will thicken it up. You can also skip the glaze altogether if you prefer a less sweet cookie, or dust them with a little powdered sugar for a snowy effect. I learned this the hard way with a batch that was too pale – a little bit of green in the glaze makes all the difference for that Grinchy vibe!
Storing and Reheating Tips
Storing these Grinch cookies is pretty simple, and they stay delicious for a good while, which is always a bonus, right? For Room Temperature storage, make sure the cookies are completely cooled before you store them. I usually keep them in an airtight container, and they’ll stay fresh and wonderfully soft for about 3-4 days. If it’s really humid, you might want to add a slice of bread to the container; it helps keep them soft by absorbing a bit of moisture. For Refrigerator Storage, you can store them in an airtight container for up to a week. However, I find that refrigeration can sometimes make them a little firmer. If you do refrigerate them, let them come back to room temperature for about 15-20 minutes before serving for the best texture. For Freezer Instructions, these cookies freeze like a dream! Once completely cooled (and without glaze, if possible, as it can sometimes crack when freezing), wrap them tightly in plastic wrap, then place them in a freezer-safe airtight container or a heavy-duty freezer bag. They’ll keep well in the freezer for up to 2-3 months. To thaw, just transfer them from the freezer to the refrigerator overnight, and then let them sit at room temperature for a bit before serving. For Glaze Timing Advice, if you plan to freeze your cookies, it’s best to wait to add the glaze until *after* they have thawed and are ready to be served. This prevents the glaze from cracking or becoming sticky during freezing and thawing. If you’re just storing them at room temperature or in the fridge, adding the glaze before storing is perfectly fine!
Frequently Asked Questions
Final Thoughts
So there you have it – my absolute favorite Grinch cookies! They’re more than just a sweet treat; they’re a little bit of pure joy, a dash of holiday magic, and a whole lot of deliciousness all rolled into one. What I love most is how they manage to be both incredibly simple to make and delightfully impressive. They’re the perfect balance of buttery goodness, zesty brightness, and that fun, festive flair that makes any occasion feel a bit more special. If you enjoyed this recipe, I think you might also adore my Spiced Gingerbread Cookies or my Classic Sugar Cookie Cut-Outs – they’re equally festive and full of holiday spirit! This Grinch cookie recipe is truly a winner, a keeper, a recipe I know I’ll be making for years and years to come. It brings such a smile to my face every time I bake them, and seeing the delight on my family’s faces is the best reward. I truly hope you give these a try and that they bring as much happiness to your kitchen as they do to mine. I can’t wait to hear what you think – please leave a comment below and let me know how your Grinch cookies turned out! Happy baking, my friends!
Grinch Cookies
Ingredients
For the Cookies
- 0.5 cup Unsalted Butter softened
- 1 cup Granulated Sugar
- 1 Egg
- 1 teaspoon Vanilla Extract
- 2.5 cups All-Purpose Flour
- 1 teaspoon Baking Soda
- 0.5 teaspoon Salt
- 0.5 teaspoon Ground Nutmeg
For the Grinch Icing
- 2 cups Powdered Sugar
- 2 tablespoons Milk
- 0.5 teaspoon Almond Extract optional
- 1 drop Green Food Coloring
For Decoration
- 1 Red Heart Candies
Instructions
Cookie Preparation
- Preheat oven to 350°F (175°C). Line baking sheets with parchment paper.
- In a large bowl, cream together the softened butter and granulated sugar until light and fluffy.
- Beat in the egg and vanilla extract until well combined.
- In a separate bowl, whisk together the flour, baking soda, salt, and nutmeg.
- Gradually add the dry ingredients to the wet ingredients, mixing until just combined. Do not overmix.
- Drop rounded tablespoons of dough onto the prepared baking sheets, about 2 inches apart.
- Bake for 10-12 minutes, or until the edges are lightly golden. The centers should still be soft.
- Let the cookies cool on the baking sheets for a few minutes before transferring them to a wire rack to cool completely.
Icing and Decoration
- While the cookies are cooling, prepare the icing. In a medium bowl, whisk together the powdered sugar, milk, and almond extract (if using) until smooth and pourable. Add more milk a teaspoon at a time if needed to reach desired consistency.
- Add the green food coloring, one drop at a time, and stir until you achieve a vibrant Grinch green color.
- Once the cookies are completely cool, dip the tops into the green icing, letting any excess drip off.
- Immediately place a red heart candy onto the center of each iced cookie before the icing sets.
- Allow the icing to set completely before serving or storing.
Notes
Featured Comments
“Impressed! Clear steps and restaurant-level results. Perfect for busy nights.”
“New favorite here — absolutely loved. crowd-pleaser was spot on.”
“Super easy and turned out amazing! My family asked for seconds. Saving this one.”
“This sweet treat was absolutely loved — the cozy really stands out. Thanks!”
“Made it tonight and wow — comforting! Will definitely make Grinch Cookies again.”
“Packed with flavor and so simple. Exactly what I wanted from Grinch Cookies.”


