

I grew up with the smell of cinnamon drifting through the kitchen on Sunday mornings, watching my mom slide a pan of French toast onto the table. Hasselback French toast took that memory and gave it a playful twist: you slice the loaf almost in a fan, without cutting all the way through, so every bite is tender, custardy, and show-stopping. This isn’t just breakfast—it’s a little performance you can pull off on a weekday if you slice your loaf the night before. I’ll be honest, it’s become my go-to for when I want something comforting but not complicated. I remember the first time I made it, my kids crowded the counter, noses twitching at the sweet scent of vanilla and butter. It’s also a great bridge between regular French toast and a decadent Bread Pudding. The name Hasselback French toast hints at that elegant “accordion” slice that soaks up all the custard; trust me, the result feels fancy but is really just a handful of simple tricks, and I love how forgiving it is when you’re juggling morning chaos.
What is Hasselback French toast?
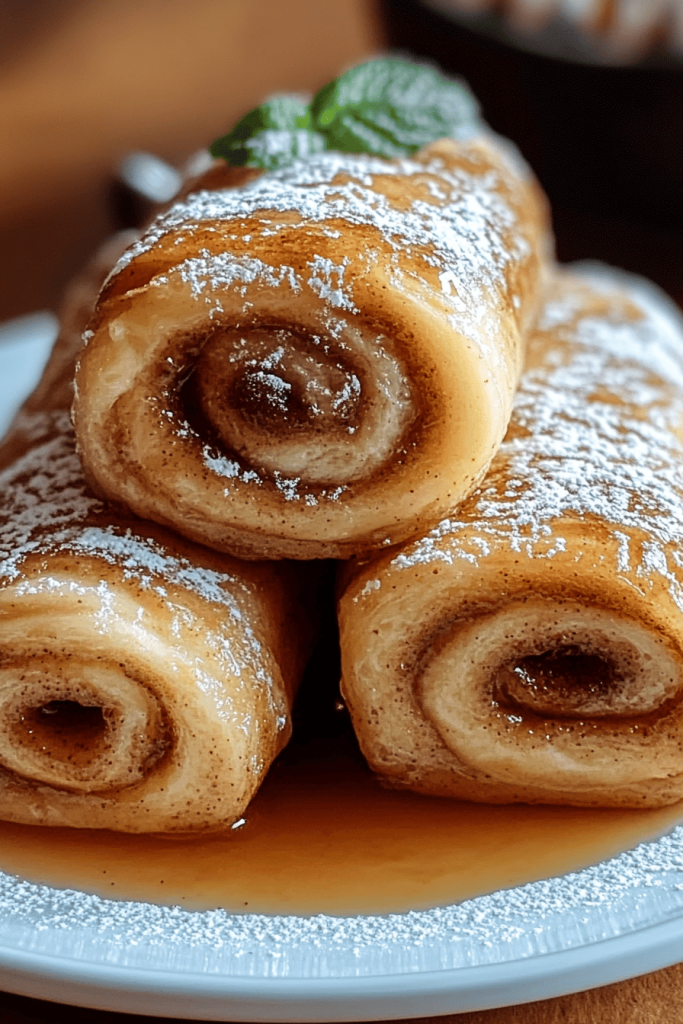
Think of Hasselback French Toast as regular French toast, but dressed up with an “accordion” cut. The loaf is sliced almost all the way through so the slices fan open, creating more surface area for custard to soak in and butter to melt along the edges. It’s essentially bread that’s been carved into a delicate ribcage of crunchy-tender pieces, then bathed in a rich egg-milk mixture and baked until it puffs and browns. The origin of the name comes from the Hasselback technique—famed for potatoes—where shallow cuts create dramatic slices without fully separating the layers. Here, that technique turns into a dramatic breakfast centerpiece. It’s a simple concept that makes breakfast feel like a treat, and you can customize the filling and glaze to suit your mood or what you have on hand.
How do you make French toast?
Quick Overview
Here’s the quick version: choose a sturdy loaf and slice it almost all the way through into a fan, then immerse those fans in a rich egg-millk custard. Stuff a creamy filling into the slits if you’re feeling fancy, arrange the slices on a parchment-lined sheet, bake until the edges are crisp and golden, then drizzle with glaze. It’s a straightforward process, and the big payoff is in the slicing technique—every bite carries a little more custard and butter than traditional French toast, with a dramatic presentation to boot.
Ingredients
For the Main Batter:
- 4 large eggs
- 1 cup whole milk (or almond milk for a lighter, dairy-free version)
- 1/2 cup heavy cream (optional for extra richness)
- 2 tablespoons maple syrup or honey
- 1 teaspoon pure vanilla extract
- 1/2 teaspoon ground cinnamon
- Pinch of salt
For the Filling:
- 4 ounces cream cheese, softened
- 2 tablespoons powdered sugar (adjust to taste)
- 1/2 teaspoon vanilla extract
- Optional swirl: 1/4 cup fruit compote or mini chocolate chips
For the Glaze:
- 1/2 cup powdered sugar
- 2–3 tablespoons milk or dairy-free milk
- 1/2 teaspoon vanilla extract
- Optional: a splash of maple or a pinch of citrus zest for brightness
Step-by-Step Instructions
Step 1: Preheat & Prep Pan
Preheat your oven to 375°F (190°C). Line a baking sheet with parchment or a silicone mat. You want the slices to roast rather than steam, so don’t overcrowd the pan.
Step 2: Slice the Bread Hasselback Style
Choose a sturdy loaf—sourdough works beautifully—and lay it on the cutting board. With chopsticks or two wooden spoons on either side, slice the loaf into fans: cut almost all the way through, leaving the bottom crust intact. This is the magic trick that gives you those perfect, dramatic folds.
Step 3: Mix Dry Ingredients
In a small bowl, whisk together the cinnamon and salt. You’re not making a cake here, just a touch of warm seasoning that will wake up the toast.
Step 4: Mix Wet Ingredients
In a larger bowl, whisk eggs, milk, cream (if using), vanilla, and maple syrup until smooth and a little frothy. The mixture should feel luxuriously thick, not thin like skim milk.
Step 5: Combine
Pour the wet into the dry until it’s well combined. If you notice a few small clumps, that’s fine—overmixing will make the custard tougher. You want it to plump and cling to the bread.
Step 6: Prepare Filling
In a separate bowl, beat together the Cream Cheese, powdered sugar, and vanilla until creamy and spreadable. If you’re omitting the filling, skip this step and go straight to dipping.
Step 7: Layer & Swirl
Gently spread the cream cheese filling into the slits of your bread fans. If you’re not using filling, just press a little extra butter between the slices as they rest on the pan. For extra flavor, you can swirl a spoonful of fruit compote into the cream cheese before you stuff it.
Step 8: Bake
Dip the sliced loaf into the custard, letting it soak for a minute, then arrange the fans on the prepared sheet. Bake for 25–30 minutes, until the edges are deeply golden and the center looks puffed. If the top seems to be browning too fast, cover loosely with foil for the last 5–7 minutes.
Step 9: Cool & Glaze
Let it rest a few minutes; the flavors settle and the custard firms up a touch. Whisk together the glaze ingredients until smooth. Drizzle generously over the toast and let it sit for a minute to set a touch before slicing.
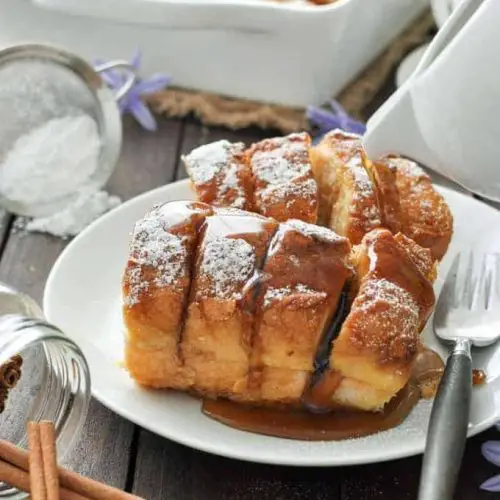
Step 10: Slice & Serve
Cut across the loaf to reveal the pretty inner layers, then fan it onto plates with a quick squeeze of maple, berries, or whipped cream. This is one of those dishes that looks like you spent half your morning plating, but you actually did it in a single, relaxed bake.
What to Serve It With
This Hasselback French toast shines on its own, but a few thoughtful accompaniments lift it from brunch to celebration.
For Breakfast: A bright cup of coffee or espresso, a dollop of yogurt, and fresh berries. I like a light dusting of extra cinnamon for that morning cozy factor.
For Brunch: A sparkling beverage or a light mimosa, lemon zest on the plate, and a handful of toasted almonds for crunch. The contrast between the soft toast and a crisp almond bite is addictive.
As Dessert: A scoop of vanilla bean ice cream or crème anglaise, plus a caramel drizzle. The warmth of the toast with the cold creamy topping just sings after dinner.
For Cozy Snacks: A mug of tea or hot chocolate, plus a little fruit compote on the side. You’ll notice this is the kind of recipe that makes you feel tucked in and cared for.
In my family, we always pair this with a simple fruit compote or a spoonful of yogurt and fresh peaches. It’s a classic that travels well—from a weekend brunch to a weeknight treat when you need a comforting end to your day.
Top Tips for Perfecting Your Hasselback French toast
[Expert advice organized by technique:]
Bread Prep: Use bread that’s a day or two old so it holds the custard without turning soggy. Stale bread drinks up the mixture like a sponge, and those crisp, toasted edges are everything. If you’re using a softer loaf, toast the slices lightly before slicing Hasselback-style to help them keep their structure.
Mixing Advice: Don’t overmix the wet and dry ingredients. A few small lumps are totally fine, and overwork will make the custard dense. When you dip the bread, give it a moment so the slits can soak in some extra goodness.
Swirl Customization: The cream cheese filling is optional but magical. If you want a fruit-forward version, try a strawberry or blueberry compote swirl. For chocolate lovers, fold in mini chips or a little cocoa powder to the filling for a café-délice vibe.
Ingredient Swaps: Almond milk works beautifully for a lighter texture, and coconut milk can bring a tropical note if you’re into that. For the glaze, a maple-pecan variation adds a nice crunch if you like a nutty finish. If you’re avoiding dairy, use dairy-free butter and a plant-based glaze base—the flavor will still be delicious.
Baking Tips: If you’re using a fan oven, rotate the pan halfway through to promote even browning. If your oven runs hot, lower the temperature by 25°F and extend the bake time a few minutes. The key is a deeply golden edge with a soft center.
Glaze Variations: Aim for a glaze that’s pourable but thick enough to cling to the slices. Add a little citrus zest, a dash of espresso powder, or a pinch of sea salt to balance sweetness. You can also serve the glaze on the side for folks who like dipping rather than drizzling.
[Lessons learned from countless breakfasts: the first time I tried this, I skipped the glaze and found the toast a bit dry. The glaze makes all the difference, and it’s a quick, forgiving addition that ties the whole dish together. I’ve also learned that the cream cheese filling shines when cooled slightly, so it’s easier to spread and won’t slide out of the slits as you bake.]
Storing and Reheating Tips
Make-ahead versions really do exist here, and they’re a lifesaver when mornings feel like a sprint. Store and reheat with confidence, and you’ll still enjoy a fluffy, flavorful slice.
Room Temperature: If you’ve already baked and cooled the Hasselback French toast, it’s best eaten within two hours. If you’re keeping it out longer, cover it loosely with a clean towel to maintain some moisture and warmth, but know the edges won’t stay as crisp as fresh from the oven.
Refrigerator Storage: Wrap slices individually or store the whole loaf covered in the fridge for up to 3 days. Reheat in a 350°F (175°C) oven for 8–10 minutes, or briefly in a toaster oven to re-crisp the edges.
Freezer Instructions: Freeze sliced, assembled toast on a sheet tray first, then transfer to a freezer bag. Reheat from frozen at 350°F (175°C) for 12–15 minutes, or until heated through and edges are crisp. Glaze should be added after reheating to maintain that shiny finish.
Glaze Timing Advice: If you’re serving later, drizzle the glaze just before serving to keep the sheen and texture. If you’re freezing, keep the glaze separate and add it when you reheat for best consistency.
[In our house, we often bake a big batch on the weekend and freeze portions for quick weekday breakfasts. The kids still beg for “the hasselback” on busy mornings, and I love how easy it is to reheat without losing its charm.]
Frequently Asked Questions
Final Thoughts
This Hasselback French toast feels like a little celebration you can pull off in a sleepy kitchen. It looks special, but it’s built on familiar, comforting flavors—the kind of dish that makes you pause, inhale the cinnamon, and remind yourself why mornings can still feel magical. If you’re cooking for family, friends, or a quiet weekend date, this is the recipe you’ll reach for again and again because it’s forgiving, flexible, and always delicious. I love the way the slices fan out, the way the custard sinks into every nook, and the way the glaze glimmers like a tiny crown. Give it a try, and tell me how you customized your Hasselback French toast—cream cheese filling, a fruit swirl, or a chocolate drizzle? I can’t wait to hear your variations. Happy baking!
Hasselback French Toast
Ingredients
Main Ingredients
- 0.5 inch thick Brioche bread or challah, day-old is best
- 4 large Eggs
- 1 cup Milk whole milk recommended
- 2 tablespoons Granulated sugar
- 1 teaspoon Vanilla extract
- 0.5 teaspoon Ground cinnamon
- 0.25 teaspoon Ground nutmeg
- 0.5 cup Butter melted, for cooking
Instructions
Preparation Steps
- Using a sharp knife, make parallel slices about 0.5 inch apart across the top of each bread slice, stopping just before you cut all the way through.0.5 inch thick Brioche bread
- In a shallow dish, whisk together the eggs, milk, granulated sugar, vanilla extract, cinnamon, and nutmeg until well combined.0.5 inch thick Brioche bread
- Dip each bread slice into the egg mixture, ensuring the custard gets into all the slices. Let it soak for about 1-2 minutes per side.0.5 inch thick Brioche bread
- Heat the melted butter in a large skillet or griddle over medium heat.0.5 inch thick Brioche bread
- Carefully place the soaked bread slices onto the hot skillet. Cook for 4-5 minutes per side, or until golden brown and cooked through. You may need to cook in batches.0.5 inch thick Brioche bread
- Serve immediately with your favorite toppings such as maple syrup, powdered sugar, or fresh berries.
Notes
Featured Comments
“Impressed! Clear steps and super easy results. Perfect for busy nights.”
“New favorite here — creamy. crowd-pleaser was spot on.”
“Super easy and turned out amazing! My family asked for seconds. Saving this one.”
“This sweet treat was absolutely loved — the bright really stands out. Thanks!”
“Made it tonight and wow — crowd-pleaser! Will definitely make Hasselback French toast again.”
“Packed with flavor and so simple. Exactly what I wanted from Hasselback French toast.”


