

Oh, where do I even begin with these Jalapeno Popper Pinwheels? They’re not just a recipe; they’re pure joy in every bite. I remember the first time I ever tried a jalapeño popper – it was at a potluck years ago, and it was so good I practically inhaled it! But let’s be honest, stuffing jalapeños can be a bit fiddly, and sometimes you just want that incredible flavor without all the fuss. That’s exactly why I developed these pinwheels. They’re like the beloved jalapeño popper’s cooler, easier-to-handle cousin. Think of them as a delightful swirl of cheesy, spicy, savory goodness, all wrapped up in a tender, slightly sweet dough. If you’re a fan of those classic poppers, or even just love a really good appetizer that’s surprisingly simple to whip up, you are going to be obsessed. These Jalapeno Popper Pinwheels are the ultimate crowd-pleaser, and honestly, they’ve saved me more times than I can count when unexpected guests show up or when I need a guaranteed win for a neighborhood get-together. They’re just that good.
What is a jalapeno popper pinwheel?
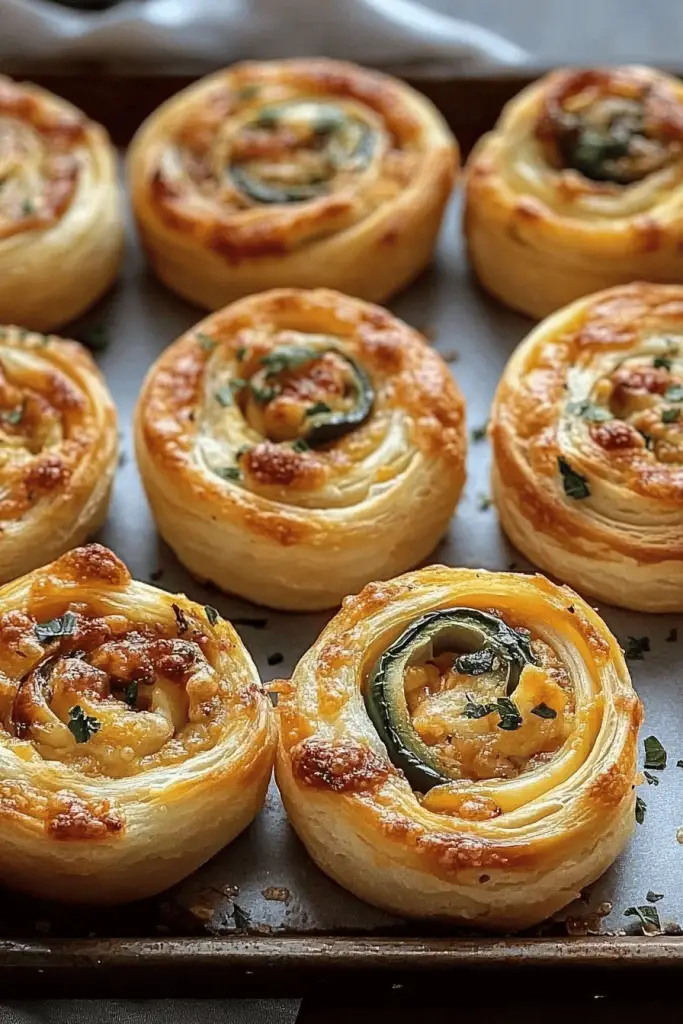
So, what exactly are Jalapeno Popper Pinwheels? Imagine all the deliciousness of a classic jalapeño popper – that perfect blend of creamy cheese, a hint of spicy jalapeño, and savory goodness – but transformed into an easy-to-make, bite-sized roll. It’s essentially a savory swirl bread where the “swirl” is a luscious mixture inspired by jalapeño popper filling. Instead of stuffing individual peppers, we create a flavorful dough, spread it with a creamy, cheesy, jalapeño mixture, and then roll it up tightly. Once baked, you slice it into these beautiful pinwheels, revealing a gorgeous spiral of flavor. It’s like a party in your mouth, and everyone’s invited! They’re less messy than traditional poppers, easier to share, and honestly, the texture is just divine. It’s that comforting, satisfying feeling you get from a good bread, combined with the exciting kick of a jalapeño popper. It’s the best of both worlds, rolled into one fantastic treat.
How do you make jalapeno popper pinwheels?
Quick Overview
Making these Jalapeno Popper Pinwheels is a straightforward process that’s more about assembly than complex techniques. You’ll mix up a simple dough, prepare a zesty jalapeño-Cream Cheese filling, spread it all out, roll it up, slice it, and bake until golden and delicious. It’s a beautiful dance of simple steps that results in a stunning and incredibly tasty treat. The beauty of this recipe lies in its ability to deliver maximum flavor with minimal fuss, making it a lifesaver for busy weeknights or last-minute entertaining.
Ingredients
For the Main Batter:
2 ¼ cups All-Purpose Flour: This is your foundational ingredient, giving the pinwheels their structure. Make sure it’s all-purpose so you get that nice, soft texture. If you’re feeling adventurous, you could try a blend with a little Whole Wheat for a nuttier flavor, but I always stick to all-purpose for consistent results.
2 teaspoons Baking Powder: This is what gives our pinwheels a lovely lift and tender crumb. Don’t skip this!
½ teaspoon Salt: Just enough to enhance all the other flavors and bring everything together.
¼ cup Granulated Sugar: A touch of sweetness balances out the savory and spicy elements beautifully. It’s not enough to make them taste like cookies, but it rounds out the flavor profile perfectly.
½ cup Unsalted Butter, cold and cubed: Cold butter is key here for creating a flaky, tender dough. Make sure it’s nice and cold, almost frozen! I always pop mine in the freezer for about 10-15 minutes before I start mixing.
¾ cup Milk (whole or 2% recommended): Milk adds moisture and helps bind the dough. Whole milk will give you the richest flavor and texture, but 2% works great too. I’ve even tested this with almond milk and it actually made it even creamier, which was a surprise!
For the Filling:
8 ounces Cream Cheese, softened: This is the luscious base of our filling. Make sure it’s nice and soft so it spreads easily without lumps. I usually take it out of the fridge about an hour before I start.
1 cup Shredded Cheddar Cheese (sharp or medium): Sharp cheddar gives a more intense flavor, but medium is great if you prefer it milder. Using a good quality cheese makes a difference!
½ cup Finely Diced Fresh Jalapeños: This is where the magic happens! For a milder heat, remove the seeds and membranes. For more kick, leave some in. I usually use about 1-2 medium jalapeños. You can also use pickled jalapeños, but fresh has a brighter flavor.
¼ teaspoon Garlic Powder: Just a little hint of garlic to amp up the savory notes.
¼ teaspoon Onion Powder: Same as the garlic powder, it adds depth without being overpowering.
Salt and Black Pepper to taste: Don’t forget to season your filling!
For the Optional Glaze:
½ cup Powdered Sugar: For a touch of sweetness and a nice finish.
1-2 tablespoons Milk or Cream: To get the glaze to the perfect drizzling consistency. You want it pourable but not too thin.
Pinch of Smoked Paprika (optional): For a beautiful color and a hint of smoky flavor that complements the jalapeño.
Step-by-Step Instructions
Step 1: Preheat & Prep Pan
First things first, let’s get your oven fired up to 375°F (190°C). This temperature is perfect for getting the pinwheels golden brown on the outside while keeping the inside wonderfully soft. While the oven heats, lightly grease a baking sheet or line it with parchment paper. Parchment paper is my secret weapon for easy cleanup – seriously, it’s a game-changer!
Step 2: Mix Dry Ingredients
Grab a large bowl. Whisk together the flour, baking powder, salt, and granulated sugar. This ensures everything is evenly distributed, so you don’t end up with pockets of salt or baking powder in your dough. It’s a simple step, but it really helps make sure your pinwheels turn out perfectly consistent every time.
Step 3: Mix Wet Ingredients
In a separate medium bowl, or in the bowl of a stand mixer if you’re using one, cream together the softened cream cheese and butter until smooth and well combined. Then, gradually mix in the milk until you have a cohesive, slightly thick batter. Don’t overmix; just make sure everything is incorporated.
Step 4: Combine
Now, let’s bring those wet and dry ingredients together. Pour the wet ingredients into the dry ingredients. Mix them together with a spatula or a wooden spoon until just combined. Be careful not to overmix! Overmixing can develop the gluten too much, resulting in tough pinwheels. You want a soft, slightly sticky dough. It’s okay if there are a few little streaks of flour; they’ll come together as you knead.
Step 5: Prepare Filling
In a medium bowl, combine the softened cream cheese, shredded cheddar cheese, finely diced jalapeños, garlic powder, and onion powder. Season with salt and pepper to your liking. Mix everything thoroughly until it’s well combined and creamy. Taste it at this stage! This is your chance to adjust the seasonings or add more jalapeños if you’re feeling brave. This filling is so good, you might be tempted to eat it with a spoon!
Step 6: Layer & Swirl
Turn your dough out onto a lightly floured surface. Gently knead it a few times just to bring it together, then roll it out into a rectangle, roughly 10×14 inches. Aim for an even thickness. Spread the jalapeño cream cheese filling evenly over the dough, leaving about a ½-inch border along one of the long edges. This border will help seal the roll. Starting from the long edge that’s fully covered with filling, carefully and tightly roll up the dough, like you’re making a jelly roll. Try to keep the roll as snug as possible without squishing the filling out. Once rolled, pinch the seam to seal it. Then, if the roll looks a little lopsided, you can gently shape it into a more uniform cylinder.
Step 7: Bake
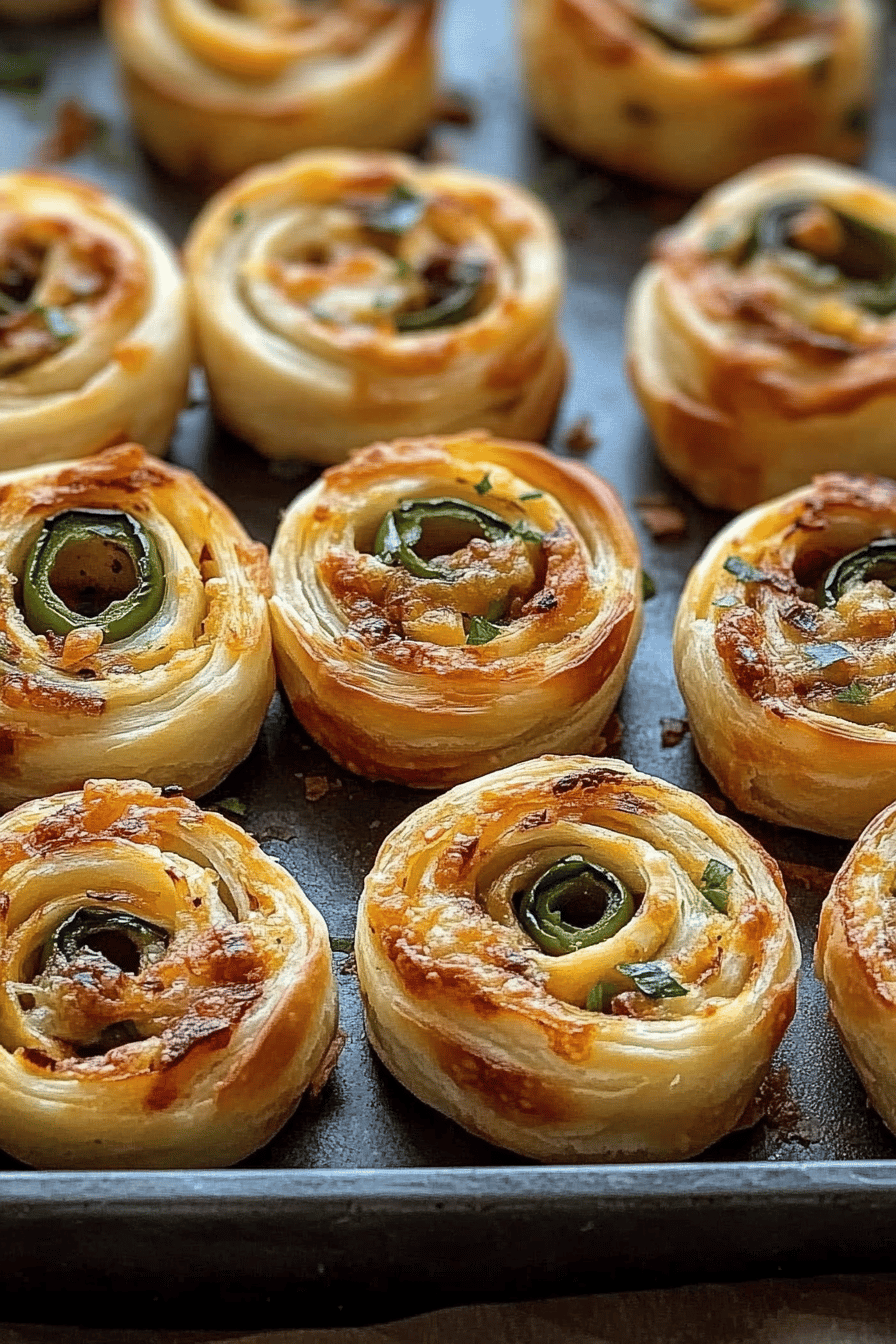
Now for the fun part! Use a sharp knife to slice the roll into 1-inch thick pinwheels. You should get about 12-15 pinwheels. Carefully place them cut-side down onto your prepared baking sheet, leaving a little space between them as they will puff up slightly. Bake for 18-22 minutes, or until the edges are golden brown and the centers are set. The exact time will depend on your oven, so keep an eye on them. You want them cooked through but still wonderfully tender.
Step 8: Cool & Glaze
Once they’re baked to perfection, remove the pinwheels from the oven and let them cool on the baking sheet for about 5-10 minutes. This allows them to firm up a bit. While they’re cooling, whisk together the powdered sugar, milk, and smoked paprika (if using) in a small bowl until smooth. You want a drizzly consistency. Drizzle the glaze over the warm pinwheels. The warmth will help the glaze set nicely. If you’re not using a glaze, this is also a great time to sprinkle with a little extra cheese or some fresh herbs.
Step 9: Slice & Serve
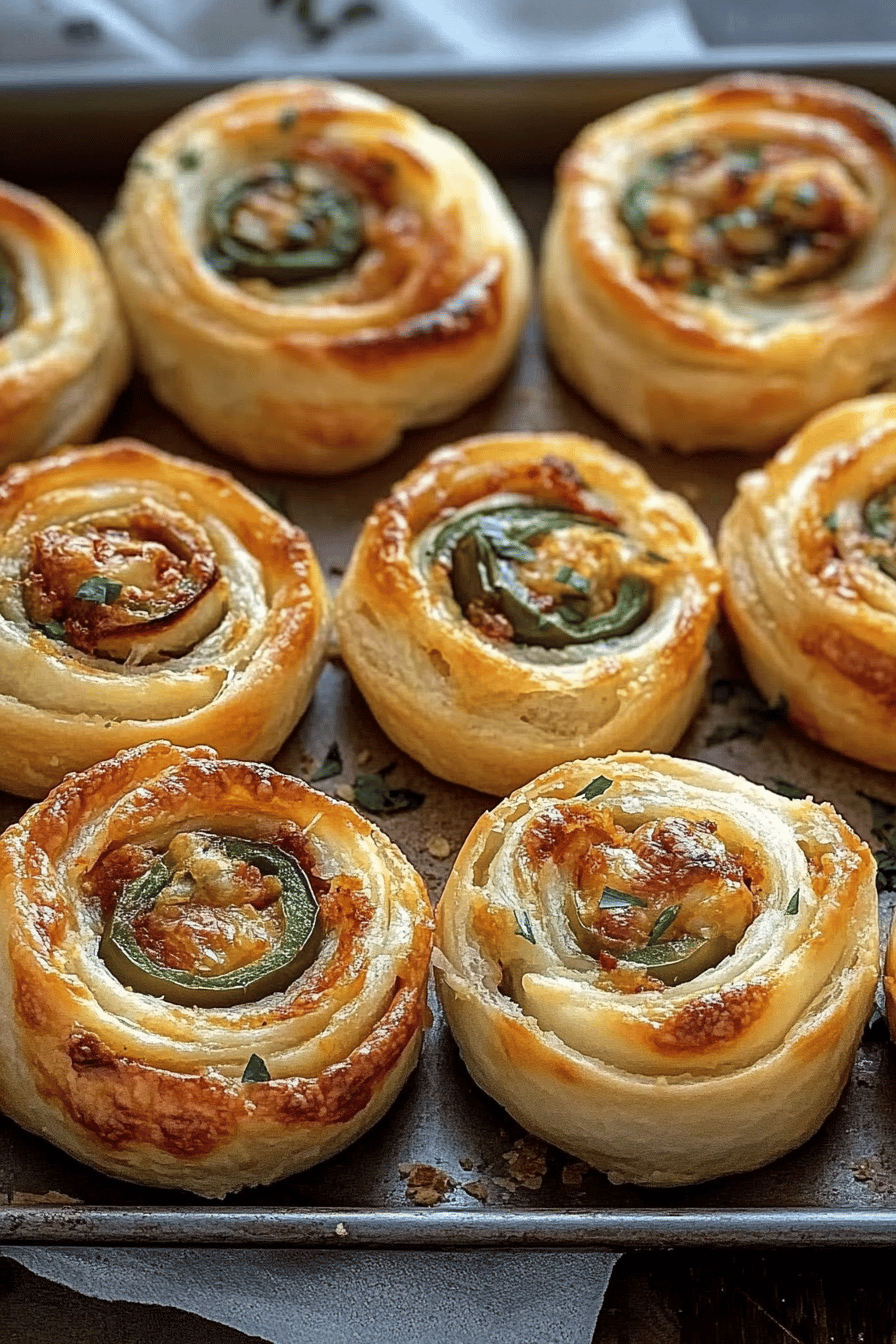
Once the glaze has set slightly, you can carefully lift the pinwheels from the baking sheet. Serve them warm! They are absolutely divine when they’re fresh out of the oven and still warm, but they’re also delicious at room temperature. The gooey cheese and tender dough are at their best when warm.
What to Serve It With
These Jalapeno Popper Pinwheels are incredibly versatile and can be enjoyed at any time of day, in so many different ways! For breakfast, they make a delightful change from your usual muffins or scones. Imagine serving them warm with a side of scrambled eggs or a simple fruit salad. The hint of spice is surprisingly pleasant in the morning, and the cheesy goodness is just comforting. A strong cup of coffee or a freshly squeezed orange juice pairs perfectly. When it comes to brunch, these pinwheels really shine. They add an elegant touch to any spread. Serve them alongside quiches, frittatas, or a build-your-own breakfast taco bar. A mimosa or a sparkling cider would be lovely accompaniments. They’re also fantastic as a sweet treat for dessert! If you’ve got a sweet tooth but don’t want anything too heavy, these offer a wonderful balance. A light dusting of powdered sugar or a berry coulis can elevate them even further. Pair them with a dessert wine or a coffee. And of course, for those cozy snack moments, they are pure perfection. I love making a batch when we’re settling in for a movie night or having friends over for a casual get-together. They’re so easy to grab and eat, and they always disappear in minutes. Serve them with a side of ranch dressing for dipping, or alongside a platter of other finger foods like mini sliders or a cheese board. My kids actually ask for these all the time, especially when we have friends over – they consider them a super cool party snack!
Top Tips for Perfecting Your Jalapeno Popper Pinwheels
Over the years, I’ve learned a few little tricks that really help make these Jalapeno Popper Pinwheels absolutely perfect every single time. First off, when it comes to the jalapeños, don’t be afraid to get comfortable with them! If you’re sensitive to heat, wear gloves when you’re dicing them, and make sure to remove all the seeds and the white pith – that’s where most of the intense heat lives. For a really mild flavor, you can even give the diced jalapeños a quick rinse under cold water and pat them dry. If you want that extra kick, leave some seeds in! It’s all about personal preference, and this recipe is forgiving. When you’re mixing the dough, it’s so important to avoid overmixing. I know I’ve said it before, but it’s worth repeating. Just mix until the dough *just* comes together. A few streaks of flour are fine; they’ll disappear as you knead. Overmixing develops the gluten too much, which can lead to tough, chewy pinwheels instead of the tender, flaky ones we’re aiming for. Think gentle and quick! For the swirl, the tighter you roll, the more beautiful pinwheels you’ll get. Starting from the long edge and rolling as snugly as you can without forcing the filling out will give you that gorgeous spiral. If your dough feels a little sticky when you’re rolling it out, don’t be tempted to add too much extra flour. Just use a light dusting on your surface and rolling pin. Sometimes a little bit of a sticky dough is exactly what you want for a tender result. When it comes to ingredient swaps, I’ve experimented a bit! If you don’t have cheddar, Monterey Jack or a pepper jack cheese works wonderfully for an extra layer of heat. You can also try adding a tablespoon or two of chopped fresh chives or cilantro to the filling for a burst of freshness. For a dairy-free option, I haven’t personally tested it extensively, but using a good quality vegan cream cheese and shredded vegan cheddar should work. You might need to adjust the milk in the dough slightly as vegan alternatives can vary in consistency. Baking can be tricky since every oven is a little different. My best advice is to watch for those golden brown edges and a set center. If you notice the tops browning too quickly before the insides are cooked, you can loosely tent the baking sheet with foil for the last 5-10 minutes of baking. And for the glaze – consistency is key! You want it thick enough to drizzle but not so thin that it just runs off. Start with the minimum amount of milk and add more, a tiny bit at a time, until you get that perfect ribbons-off-the-spoon consistency. If it gets too thin, just whisk in a little more powdered sugar.
Storing and Reheating Tips
These Jalapeno Popper Pinwheels are best enjoyed fresh and warm, but they store surprisingly well, making them great for leftovers (if you even have any!). At room temperature, they’ll stay delicious for about 2-3 hours. Just make sure they’re covered loosely with plastic wrap or a clean kitchen towel to prevent them from drying out too much. For refrigerator storage, make sure they have cooled down completely first. Store them in an airtight container or wrap them tightly in plastic wrap. They should keep well in the fridge for up to 3-4 days. The texture might change slightly, becoming a little denser, but the flavor will still be fantastic. When it comes to freezing, these pinwheels are surprisingly freezer-friendly. You can freeze them either baked or unbaked. If freezing baked pinwheels, let them cool completely, then wrap them individually in plastic wrap, followed by a layer of aluminum foil or a freezer bag. They’ll keep in the freezer for up to 2-3 months. To reheat, place them on a baking sheet in a 350°F (175°C) oven for about 10-15 minutes, or until heated through and slightly crisped up. If you prefer to freeze unbaked pinwheels, slice the roll, place the pinwheels on a parchment-lined baking sheet, freeze until solid, then transfer to a freezer bag. Bake them directly from frozen, adding a few extra minutes to the baking time. As for the glaze, I always recommend applying it fresh if possible, especially if you’re storing them for more than a day. If you’ve glazed them before storing, the glaze might get a little sticky or soft. You can always make a fresh batch of glaze to drizzle over them after reheating for the best presentation and flavor.
Frequently Asked Questions
Final Thoughts
So there you have it – my absolute favorite Jalapeno Popper Pinwheels! I truly hope you give these a try. They’re more than just a snack; they’re a little bite of happiness that always brings people together. The combination of that tangy cream cheese, the subtle kick of jalapeño, and the perfectly baked dough is just pure magic. They’re proof that you don’t need complicated steps or exotic ingredients to create something truly delicious and memorable. Whether you’re hosting a party, need an easy appetizer for game night, or just want to treat yourself to something incredibly satisfying, these pinwheels are a winner every single time. If you’re a fan of this recipe, I think you might also love my Spicy Cheese Breadsticks or my Cream Cheese Stuffed Mini Peppers – they have a similar vibe of being big on flavor and easy to make! I can’t wait to hear what you think, so please leave a comment below and let me know how your Jalapeno Popper Pinwheels turned out. Did you try any fun variations? I’d love to see your creations! Happy baking, and enjoy every delicious bite!

Jalapeno Popper Pinwheels
Ingredients
Main Ingredients
- 1 large tube refrigerated crescent dough
- 226.8 grams cream cheese softened
- 0.5 cup cheddar cheese shredded
- 0.25 cup Parmesan cheese grated
- 2 tablespoons fresh chives chopped
- 1 teaspoon garlic powder
- 0.5 teaspoon onion powder
- 4 ounces cream cheese softened
- 4 ounces pepper jack cheese shredded
- 2 ounces jalapenos fresh, seeded and finely diced
- 0.5 teaspoon salt
- 0.25 teaspoon black pepper
Instructions
Preparation Steps
- Preheat your oven to 375°F (190°C). Line a baking sheet with parchment paper.
- Unroll the crescent dough and press the seams together to form a rectangle. Pinch the seams to seal.
- In a medium bowl, combine the softened cream cheese, shredded cheddar cheese, grated Parmesan cheese, chopped chives, garlic powder, and onion powder. Mix until well combined.
- In a separate bowl, combine the remaining softened cream cheese, shredded pepper jack cheese, diced jalapenos, salt, and black pepper. Mix until well combined.
- Spread the first cream cheese mixture evenly over the crescent dough rectangle, leaving a small border at the top edge.
- Spread the jalapeno cream cheese mixture over the first layer.
- Starting from the long edge, tightly roll up the dough into a log.
- Using a sharp knife, slice the log into 16 even pinwheels.
- Place the pinwheels cut-side down on the prepared baking sheet.
- Bake for 20-25 minutes, or until golden brown and heated through.
- Let cool slightly before serving.
Notes
Featured Comments
“I absolutely love jalapeño popper flavors—these pinwheels look incredible! Can’t wait to try making them.”
“Impressed! Clear steps and spot on results. Perfect for busy nights.”
“New favorite here — turned out amazing. crowd-pleaser was spot on.”
“Super easy and turned out amazing! My family asked for seconds. Saving this one.”
“This sweet treat was absolutely loved — the hearty really stands out. Thanks!”
“Made it tonight and wow — family favorite! Will definitely make Jalapeno Popper Pinwheels again.”


I absolutely love jalapeño popper flavors—these pinwheels look incredible! Can’t wait to try making them.