

You know those nights? The ones where you stare into the fridge with a vague sense of dread, knowing you need to feed everyone, but inspiration has officially left the building. Yeah, those. For the longest time, my go-to for those frantic evenings was some sad, dry chicken breast that tasted vaguely of cardboard. It was… fine. But then, I stumbled upon this method for oven-Baked Chicken breast, and honestly, it’s been a total game-changer. It’s so ridiculously simple, yet the results are anything but basic. We’re talking juicy, tender chicken with a flavor that makes you want to lick the plate. It’s the kind of dish that makes you feel like a culinary superhero, even if you’re just throwing it together after a long day. Forget those complicated marinades or endless prep; this is the real deal, the weeknight warrior I never knew I needed.
What is this delicious oven baked chicken breast?
So, what exactly is this magic we’re conjuring? Think of it as your weeknight savior, a foolproof method for achieving perfectly cooked, incredibly Flavorful Chicken breast every single time. It’s not a fancy new technique or some obscure ingredient you can only find at specialty stores. Instead, it’s all about harnessing the power of simple, good-quality ingredients and a smart, straightforward cooking approach. The name itself, oven-baked chicken breast, is pretty self-explanatory, but the *how* is where the beauty lies. It’s essentially a way to ensure your chicken doesn’t dry out in the oven, locking in moisture and infusing it with amazing taste without a whole lot of fuss. It’s the kind of recipe that makes you wonder why you ever bothered with anything else when you’re craving that simple, satisfying protein boost.
How do I make oven baked chicken breast?
Quick Overview
In a nutshell, this recipe involves a simple seasoning blend that you’ll generously coat onto your Chicken Breasts. Then, they bake in a preheated oven until perfectly cooked through and wonderfully tender. The magic is in the balance of spices and the controlled heat of the oven, which prevents the chicken from drying out. It’s truly as straightforward as it sounds, making it accessible for cooks of all levels. You’ll be amazed at how such a simple process yields such delicious results.
Ingredients
For the Chicken:
2-4 boneless, skinless chicken breasts (about 6-8 ounces each)
A good glug of olive oil (about 2 tablespoons)
My Go-To Seasoning Blend:
1 teaspoon smoked paprika
1 teaspoon garlic powder
1 teaspoon onion powder
1/2 teaspoon dried oregano
1/2 teaspoon dried thyme
1/4 teaspoon cayenne pepper (optional, for a little kick!)
Salt and freshly ground Black Pepper to taste
For Serving (Optional but Recommended!):
Fresh parsley, chopped (for garnish)
Lemon wedges (for a zesty finish)
Step-by-Step Instructions
Step 1: Preheat & Prep Pan
First things first, let’s get that oven nice and hot. I always preheat my oven to 400°F (200°C). While it’s heating up, grab a baking sheet. You can line it with parchment paper or foil if you want super easy cleanup, or just lightly grease it with a little more olive oil. This step is crucial because a properly preheated oven ensures the chicken cooks evenly and gets a lovely little sear on the outside without overcooking.
Step 2: Mix Dry Ingredients
Now, let’s whip up that fantastic seasoning blend. In a small bowl, combine the smoked paprika, garlic powder, onion powder, dried oregano, dried thyme, and cayenne pepper (if you’re using it). Give it all a good stir until it’s well combined. Don’t be shy with the salt and pepper; I usually add about 1 teaspoon of salt and 1/2 teaspoon of pepper to start, but you can adjust this to your preference. This blend is my absolute favorite because it hits all the right savory notes without being overpowering.
Step 3: Mix Wet Ingredients
This step is super simple. Just grab your olive oil and put it in a small bowl. You don’t need to add anything else to the oil itself at this stage; its job is to help the seasonings adhere beautifully to the chicken and add a bit of richness.
Step 4: Combine
Pat your chicken breasts dry with paper towels. This is a little step that makes a big difference, as it helps the oil and seasonings stick better, leading to a nicer crust. Place the chicken breasts on your prepared baking sheet. Drizzle them generously with the olive oil, making sure to coat all sides. Then, sprinkle the seasoning blend all over the chicken breasts. Use your hands to really rub the seasonings in, ensuring every nook and cranny is covered. Don’t be afraid to get a little messy!
Step 5: Prepare Filling
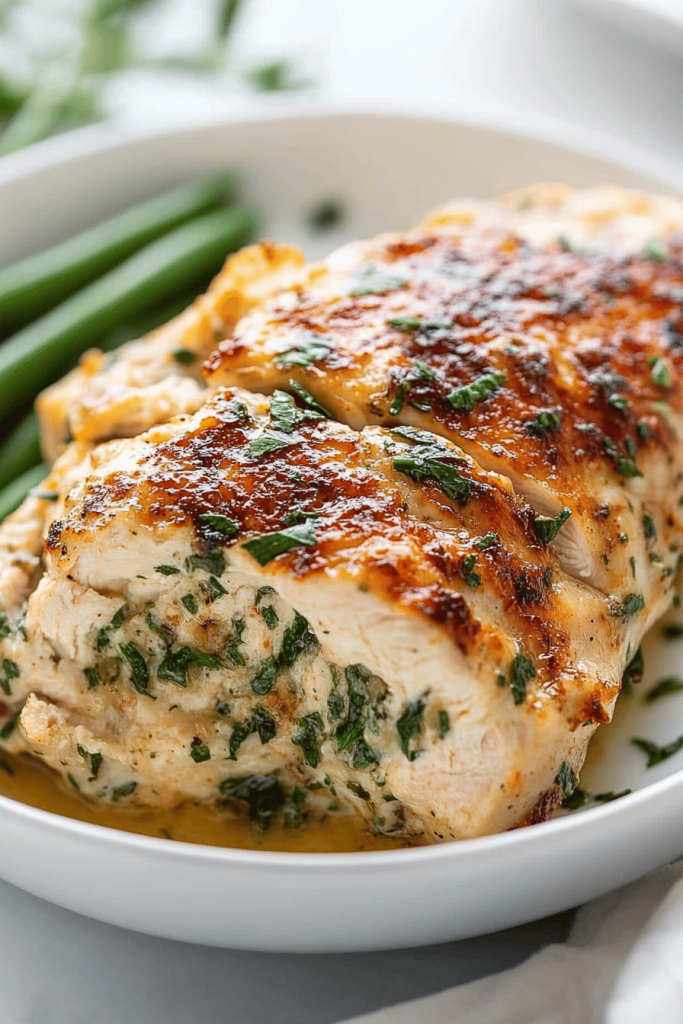
This recipe doesn’t require a separate filling, but you can absolutely add one if you’re feeling adventurous! For example, you could butterfly the chicken breasts and stuff them with a bit of cheese and spinach before baking. However, for this basic, foolproof method, we’re focusing on the seasoned chicken itself.
Step 6: Layer & Swirl
There’s no layering or swirling involved in this particular oven-baked chicken breast recipe, keeping it wonderfully simple! The seasonings are applied directly to the surface of the chicken.
Step 7: Bake
Now for the best part: baking! Place the baking sheet with the seasoned chicken breasts into your preheated oven. Bake for 20-25 minutes. The exact time will depend on the thickness of your chicken breasts. You’re looking for the internal temperature to reach 165°F (74°C) when checked with a meat thermometer inserted into the thickest part. The chicken should also be opaque all the way through, with no pink remaining. I usually give them a little check around the 20-minute mark to avoid overcooking.
Step 8: Cool & Glaze
Once the chicken reaches the perfect temperature, carefully remove the baking sheet from the oven. It’s really important to let the chicken rest for about 5-10 minutes before slicing. This allows the juices to redistribute throughout the meat, ensuring every bite is moist and tender. If you’re using a glaze, this is when you would apply it, though this recipe is absolutely delicious without one. For a simple glaze, you could mix a little honey with some Dijon mustard and brush it over the hot chicken right after it comes out of the oven.
Step 9: Slice & Serve
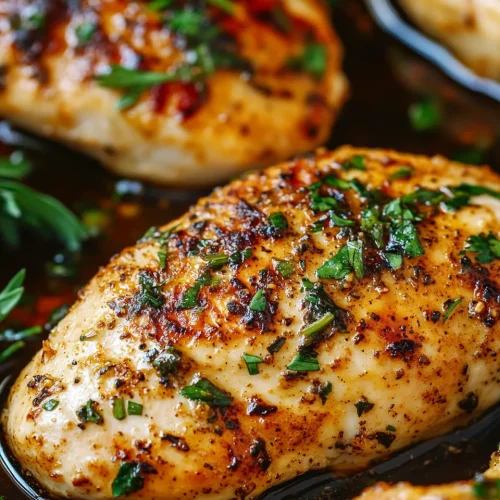
After resting, slice the chicken breasts against the grain. This helps to break up the muscle fibers, making the chicken even more tender. I love to garnish mine with some fresh chopped parsley for a pop of color and serve it with lemon wedges on the side for anyone who wants an extra burst of brightness. It’s that simple!
What to Serve It With
This oven-baked chicken breast is so versatile, it honestly pairs with almost anything! For a quick and easy breakfast, I sometimes slice up leftovers and serve them alongside scrambled eggs or in a breakfast burrito. It adds a wonderful savory element that’s so much better than just plain eggs. For a more elegant brunch spread, I’ll slice it thinly and arrange it on a platter with a colorful fruit salad and maybe some mini quiches. It looks so sophisticated, but it took minimal effort! As a light and healthy dinner, it’s perfect served with a big, vibrant salad or some steamed green beans. And for a truly comforting meal, I love serving it with mashed potatoes or roasted root vegetables. My kids especially love it when I shred it and use it in tacos or quesadillas with their favorite toppings. It’s also fantastic alongside rice pilaf or a hearty lentil soup. You can honestly adapt it to any meal or craving!
Top Tips for Perfecting Your Oven-Baked Chicken Breast
I’ve made this recipe more times than I can count, and over the years, I’ve picked up a few tricks that I think really make a difference. First, and I can’t stress this enough, is patting your chicken breasts completely dry with paper towels before you season them. This step is crucial for getting that lovely, slightly crisp exterior and ensuring the seasonings really stick. Don’t skip it! When it comes to mixing the dry ingredients, I like to make a big batch of my go-to blend and keep it in an airtight container in my spice cabinet. It’s so convenient to just reach for it whenever the craving strikes. You can totally customize this blend too; I know some people who love adding a pinch of smoked paprika for extra depth, or a bit more cayenne for a spicier kick. For the baking itself, remember that oven temperatures can vary, so always trust your meat thermometer. It’s your best friend for ensuring perfectly cooked, not overcooked, chicken. I usually start checking mine around the 20-minute mark. If you’re planning on making a large batch, try to use chicken breasts that are all roughly the same thickness so they cook evenly. This is a mistake I made early on, ending up with some perfectly cooked pieces and some a little dry! As for ingredient swaps, if you don’t have smoked paprika, regular paprika will work in a pinch, but the smoked version really adds a lovely depth. And if you’re not a fan of cayenne, just leave it out – it’s totally optional! I’ve also found that using good quality olive oil makes a difference in the final flavor. Remember to let the chicken rest after baking; this is non-negotiable for juicy chicken. That’s where all those delicious juices settle back into the meat. Oh, and if you’re making a lot, I’ve found that sometimes slightly reducing the oven temperature for the last few minutes can help keep it from browning too quickly while ensuring it’s cooked through.
Storing and Reheating Tips
One of the best things about this oven-baked chicken breast is how well it stores and reheats, making it perfect for meal prep. Once it’s completely cooled, I like to store it in an airtight container in the refrigerator. It usually stays fresh and delicious for about 3-4 days. For longer storage, you can definitely freeze it! Wrap individual chicken breasts tightly in plastic wrap, then place them in a freezer-safe bag or container. It should keep well in the freezer for up to 2-3 months. When you’re ready to reheat, I have a few methods that work best. For just warming up a single breast, I’ll often slice it and then gently heat it in a skillet over low heat with a splash of water or broth to keep it moist. Alternatively, you can reheat it in the oven at a lower temperature, around 300°F (150°C), until warmed through. Microwaving works in a pinch, but be careful not to overdo it, as it can sometimes make the chicken a bit rubbery. If you’ve frozen it, the best way to thaw is to transfer it to the refrigerator overnight before reheating. If you’re planning on using the chicken in a dish like a salad or sandwich, you can even enjoy it cold straight from the fridge – it’s that good! I try to add any glaze only after reheating, right before serving, to keep it fresh and vibrant.
Frequently Asked Questions
Final Thoughts
So there you have it – my absolute favorite way to make oven-baked chicken breast. It’s simple, it’s incredibly satisfying, and it’s the kind of recipe that just works, no matter how hectic your day is. I truly hope you give this a try and that it becomes as much of a staple in your kitchen as it is in mine. It’s amazing how a few pantry spices and a little bit of oven time can transform something as common as chicken breast into something truly special. If you’re looking for other quick and easy dinner ideas, you might also love my recipe for [Link to another recipe, e.g., “One-Pan Lemon Herb Roasted Salmon”]. I can’t wait to hear how your oven-baked chicken breast turns out! Feel free to leave a comment below with your thoughts or any variations you tried. Happy cooking!
Oven-Baked Chicken Breast
Ingredients
Main Ingredients
- 4 piece Boneless, skinless chicken breasts
- 2 tablespoons Olive oil
- 1 teaspoon Paprika
- 0.5 teaspoon Garlic powder
- 0.5 teaspoon Onion powder
- 0.25 teaspoon Black pepper
- 0.5 teaspoon Salt
Instructions
Preparation Steps
- Preheat your oven to 400°F (200°C).
- Pat the chicken breasts dry with paper towels. This helps create a better sear and ensures even cooking.
- In a small bowl, mix together the olive oil, paprika, garlic powder, onion powder, black pepper, and salt.
- Rub the spice mixture evenly over both sides of each chicken breast.
- Place the seasoned chicken breasts in a baking dish or on a baking sheet lined with parchment paper.
- Bake for 20-25 minutes, or until the internal temperature of the chicken reaches 165°F (74°C). Cooking time may vary depending on the thickness of the chicken breasts.
- Once cooked, let the chicken breasts rest for 5 minutes before slicing and serving. This allows the juices to redistribute, making the chicken more moist.
Notes
Featured Comments
“Yeah, this is the exact meal I need on those nights — simple, satisfying, and ready in under 30 minutes. Thanks for the easy solution!”
“Impressed! Clear steps and creamy results. Perfect for busy nights.”
“New favorite here — restaurant-level. crowd-pleaser was spot on.”
“Super easy and turned out amazing! My family asked for seconds. Saving this one.”
“This sweet treat was absolutely loved — the zingy really stands out. Thanks!”
“Made it tonight and wow — turned out amazing! Will definitely make oven-baked chicken breast again.”


Yeah, this is the exact meal I need on those nights — simple, satisfying, and ready in under 30 minutes. Thanks for the easy solution!