

Oh, where do I even begin with these panko Chicken Tenders? They’re the kind of thing that instantly makes a weeknight dinner feel like a special occasion, and honestly, they’ve saved my sanity more times than I can count. You know those days when you get home, and the thought of actually *cooking* feels like climbing Mount Everest? Yeah, this is my secret weapon. It’s so ridiculously simple, yet the payoff is just… immense. Forget those sad, soggy frozen versions; this is the real deal, the kind that has everyone (and I mean *everyone*, including my super picky eaters) asking for seconds. It’s the ultimate comfort food, and when you get that perfect crunch followed by juicy chicken? Pure bliss. Honestly, if you’ve ever attempted fried chicken and ended up with a greasy mess, don’t you worry. This panko chicken tender recipe is foolproof and delivers that golden, crispy perfection every single time. It’s like the grown-up, sophisticated cousin to the chicken nuggets we all loved as kids, but way, way better.
What are Panko Chicken tenders?
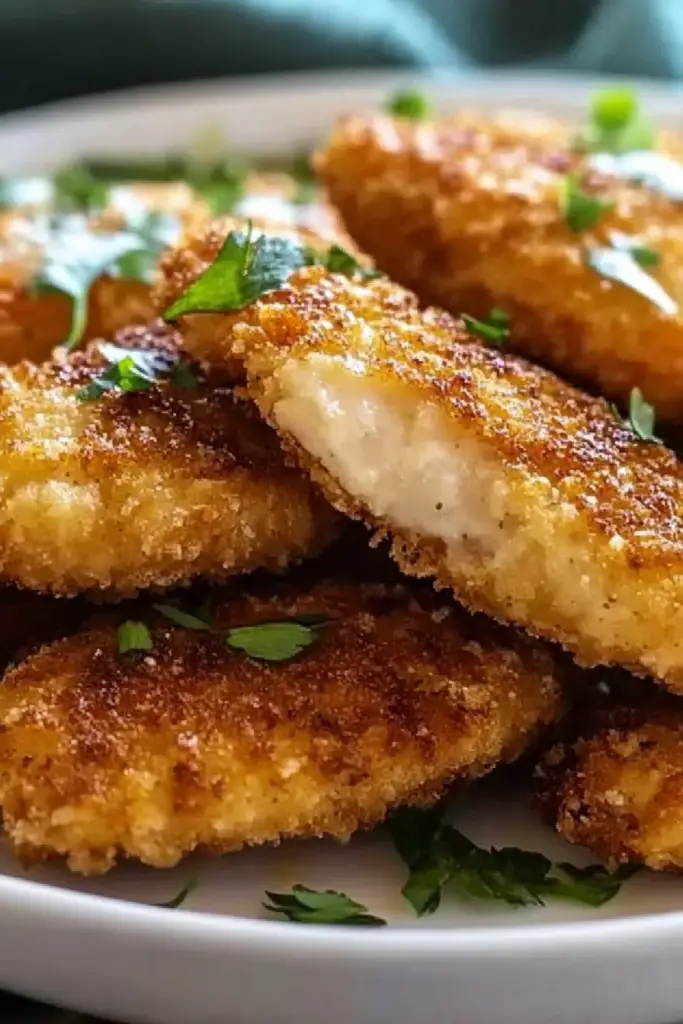
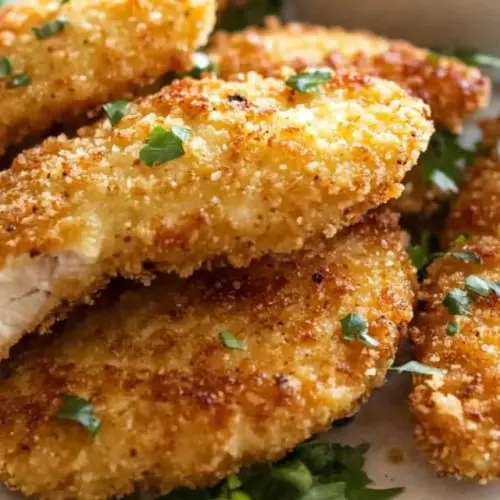
So, what exactly are we talking about when I say “panko Chicken Tenders“? Think of them as the absolute best version of chicken strips you can imagine. They’re strips of tender chicken breast, usually coated in a super-crispy panko breadcrumb mixture, and then baked (or fried, if you’re feeling adventurous!). The “panko” part is key here. Panko are Japanese breadcrumbs, and they’re lighter, airier, and have a much flakier texture than regular breadcrumbs. This means when they hit the heat, they puff up and create this incredible, shatteringly crisp coating that’s just out of this world. It’s not heavy or greasy at all; it’s just pure, delightful crunch. It’s essentially a fuss-free way to get that satisfying fried chicken experience without all the mess and oil. My kids actually call them “fancy chicken fingers,” and honestly, I can’t disagree!
How do I make panko chicken tenders?
Quick Overview
Get ready for some seriously crispy, juicy chicken! The whole process is beautifully straightforward. We’re talking about taking simple chicken tenderloins, giving them a quick dip in a flavorful egg wash, and then coating them generously in our seasoned panko mixture. Then, they go into the oven for a relatively short bake until they’re golden brown and perfectly crisp. It’s minimal effort for maximum deliciousness, and the best part is the incredible texture you get. This method ensures even cooking and that signature panko crunch without the fuss of deep-frying.
Ingredients
For the Main Batter:
You’ll need about 1.5 pounds of chicken tenderloins. Look for good quality ones; they’re usually pretty uniform in size, which helps them cook evenly. If you can only find Chicken Breasts, just slice them into strips about 1/2 inch thick. I like to trim off any excess fat or sinew, though it’s not strictly necessary. For the wet part of the batter, you’ll need 2 large eggs. I usually crack them into a shallow dish and whisk them up really well. A splash of milk or water (about a tablespoon) helps thin it out just enough so it coats the chicken without being too thick.
For the Panko Coating:
This is where the magic happens! You’ll need about 2 cups of panko breadcrumbs. Don’t skimp on the panko; it’s what gives us that amazing crunch. I always find mine in the international aisle of the grocery store. To make sure these aren’t just plain breadcrumbs, we’re going to season them up! About 1 teaspoon of salt and 1/2 teaspoon of Black Pepper is my go-to, but you can totally play around with this. I sometimes add a little garlic powder (about 1/2 teaspoon) or even a pinch of paprika for a hint of color and subtle flavor. A good whisk to combine everything ensures even seasoning.
For Serving (Optional but Recommended!):
While these are fantastic on their own, a dipping sauce takes them to the next level. My favorites include honey mustard, ranch dressing, BBQ sauce, or even a spicy sriracha mayo. Seriously, whatever your heart desires!
Step-by-Step Instructions
Step 1: Preheat & Prep Pan
First things first, let’s get that oven preheated. I always set mine to 400°F (200°C). While the oven is heating up, grab a large baking sheet. The key to getting that super crispy bottom is to line your baking sheet with parchment paper. This does two things: it prevents sticking like a dream, and it makes cleanup an absolute breeze. Trust me on this one; no one wants to scrub burnt-on bits from a baking sheet!
Step 2: Mix Dry Ingredients
In a shallow bowl or dish, combine your panko breadcrumbs, salt, pepper, and any other dry seasonings you’re using, like garlic powder or paprika. Give it all a good whisk with a fork or a small whisk until everything is evenly distributed. You want to make sure every single panko flake gets a chance to be seasoned. This step is crucial for flavor distribution. If your panko is all plain and your seasoning is clumped in one spot, you’ll have unevenly flavored bites, and that’s just sad.
Step 3: Mix Wet Ingredients
In a separate shallow bowl, crack your two large eggs. Add that splash of milk or water – I usually just eyeball about a tablespoon, but a little more or less is fine. Whisk it all together with a fork until there are no streaks of egg white left. You want a nice, uniform golden liquid. Make sure you whisk it really well; this helps it coat the chicken evenly without leaving behind any slimy bits.
Step 4: Prepare Chicken
Now for the chicken! If you’re using tenderloins, they’re usually ready to go. If you’re using chicken breasts, make sure you’ve sliced them into even strips, about 1/2 inch thick and 3-4 inches long. Pat your chicken pieces *very* dry with paper towels. This is a little trick that helps the egg wash adhere better and ultimately leads to a crispier coating. Don’t skip this step!
Step 5: Coat the Chicken
This is the fun part! Working with one piece of chicken at a time, dip it into the egg mixture, making sure it’s fully coated. Let any excess drip off for a second. Then, transfer the egg-coated chicken to the panko mixture. Press the panko onto the chicken, turning it to coat both sides thoroughly. You want a really generous coating of panko. Don’t be shy! Once it’s well-coated, place the chicken tender on your prepared baking sheet. Repeat this process with all the chicken pieces, making sure they aren’t touching each other on the baking sheet. If they are, they’ll steam instead of crisping up.
Step 6: Arrange on Baking Sheet
Once all your chicken tenders are coated and arranged on the baking sheet, give them a little space. This is really important for even cooking and maximum crispiness. If your baking sheet is too crowded, use a second one. I like to arrange them in a single layer, leaving a little breathing room between each piece. This helps the hot air circulate around them, giving you that perfect, golden-brown finish.
Step 7: Bake
Now, pop that baking sheet into your preheated oven at 400°F (200°C). You’ll want to bake them for about 20-25 minutes. The exact time will depend on your oven and the thickness of your chicken strips. About halfway through the baking time, I like to flip them over. This ensures they get nice and golden brown on both sides. You’ll know they’re done when they’re beautifully golden, crispy, and the internal temperature reaches 165°F (74°C) on a meat thermometer.
Step 8: Cool & Serve
Once they’re perfectly cooked and looking gorgeous, carefully remove the baking sheet from the oven. Let the panko chicken tenders rest on the baking sheet for just a few minutes. This allows the juices to redistribute, making them even more tender. Then, serve them up hot with your favorite dipping sauces! The smell alone will have everyone rushing to the table.
Step 9: Enjoy!
That’s it! Your incredibly crispy, flavorful panko chicken tenders are ready to be devoured. I love serving these with a side of fries, a fresh salad, or even just as a snack. They disappear in minutes at my house, so be prepared!
What to Serve It With
These panko chicken tenders are so versatile, they really fit into any meal plan! For a quick and easy breakfast, surprisingly, they work wonderfully! Imagine them alongside some scrambled eggs and maybe a small fruit salad. It’s a protein-packed start to the day that feels a little decadent. If you’re thinking brunch, these are a total winner. Serve them on a platter with a variety of dips – think avocado crema, honey mustard, and a zesty ranch. They make a fantastic alternative to mini quiches or sausages. For a more dessert-like experience, though it sounds odd, they can be a savory bite before a sweet treat. Or, if you’re just craving something comforting, these are perfect for a cozy snack. I often serve them with a big bowl of sweet potato fries and a simple green salad. My kids absolutely love them dipped in ketchup, but I’m partial to a good honey mustard or even a spicy aioli. They’re also fantastic tucked into pita bread with some shredded lettuce and a drizzle of tahini for a quick lunch.
Top Tips for Perfecting Your Panko Chicken Tenders
Over the years, I’ve learned a few tricks that really elevate these panko chicken tenders from “good” to “absolutely phenomenal.” First, when it comes to the chicken itself, make sure it’s really dry. I can’t stress this enough! Patting the chicken tenderloins or strips thoroughly with paper towels before you dip them in the egg is a game-changer. It helps the egg adhere better and creates a more consistent surface for the panko to stick to, which means a crispier coating. Don’t be afraid to really press that panko onto the chicken; you want a thick, even layer all around. Another crucial tip is to avoid overcrowding the baking sheet. This is probably the most common mistake people make. If you pile the chicken tenders on top of each other or too close together, they’ll steam instead of bake to a perfect crisp. Use two baking sheets if you have to – it’s worth it for that texture! I also find that flipping the chicken tenders halfway through the baking time really helps ensure even browning and crispiness on both sides. Some ovens run hotter than others, so keep an eye on them towards the end of the cooking time. If they’re browning too quickly, you can always reduce the temperature slightly. And for ingredient swaps, if you’re not a fan of plain panko, try adding some grated Parmesan cheese to the panko mixture – it adds a lovely salty, nutty flavor. A little smoked paprika or a pinch of cayenne pepper can also add a nice kick. Experiment and find what you love!
Storing and Reheating Tips
These panko chicken tenders are, of course, best enjoyed fresh and hot right out of the oven. But life happens, and sometimes you have leftovers! If you find yourself with some delicious chicken tenders that didn’t quite get devoured, don’t despair. You can store them in an airtight container in the refrigerator for up to 3 days. Make sure they’ve cooled down completely before you seal the container; this prevents condensation, which can make the coating a bit soggy. When it comes to reheating, the microwave isn’t your friend here – it tends to make them soft and chewy. The best way to bring back that incredible crispiness is to pop them back into a preheated oven. Spread them out on a baking sheet at around 375°F (190°C) for about 5-8 minutes, or until they’re heated through and crispy again. You can also use an air fryer at about 350°F (175°C) for a few minutes. If you’re really short on time, a toaster oven works wonders too. For freezing, I recommend letting them cool completely, then placing them in a single layer on a baking sheet in the freezer until solid. Once frozen, transfer them to a freezer-safe bag or container. They’ll keep well in the freezer for up to 2-3 months. Thaw them in the refrigerator overnight before reheating using the oven or air fryer method for the best results.
Frequently Asked Questions
Final Thoughts
So there you have it – my go-to recipe for panko chicken tenders. It’s honestly one of those recipes that I’m so excited to share because it brings so much joy and makes life so much easier. The incredible crunch, the tender chicken, the minimal fuss – it all adds up to a winner every single time. Whether you’re cooking for a crowd, feeding picky eaters, or just looking for a delicious and satisfying meal, these panko chicken tenders are the answer. They’re proof that sometimes, the simplest things are the most delicious. If you love this recipe, I think you might also enjoy my recipe for crispy baked chicken wings or my easy oven-fried chicken cutlets – they’ve got that same satisfying crunch! I truly can’t wait to hear how your panko chicken tenders turn out. Please, let me know in the comments below how you liked them and what dipping sauces you paired them with! Happy cooking, and enjoy every crispy bite!
Panko Chicken Tenders
Ingredients
Main Ingredients
- 1.5 pounds chicken breast cut into tenders
- 1.5 cups panko breadcrumbs
- 0.5 cup all-purpose flour
- 2 large eggs
- 1 teaspoon salt
- 0.5 teaspoon black pepper
- 0.5 teaspoon paprika
- 0.25 teaspoon garlic powder
- 0.5 cup vegetable oil for frying
Instructions
Preparation Steps
- In a shallow dish, whisk the eggs with salt, pepper, paprika, and garlic powder.
- In another shallow dish, place the flour. In a third shallow dish, place the panko breadcrumbs.
- Dredge each chicken tender first in the flour, shaking off any excess. Then dip it into the egg mixture, letting any excess drip off. Finally, coat it thoroughly with panko breadcrumbs.
- Heat the vegetable oil in a large skillet over medium-high heat.
- Carefully place the coated chicken tenders in the hot oil, working in batches if necessary to avoid overcrowding the pan.
- Fry for 3-4 minutes per side, or until golden brown and cooked through.
- Remove the chicken tenders from the skillet and place them on a wire rack set over a baking sheet to drain any excess oil.
- Serve hot with your favorite dipping sauces.
Notes
Featured Comments
“Impressed! Clear steps and super easy results. Perfect for busy nights.”
“New favorite here — super easy. crowd-pleaser was spot on.”
“Super easy and turned out amazing! My family asked for seconds. Saving this one.”
“This sweet treat was absolutely loved — the bright really stands out. Thanks!”
“Made it tonight and wow — absolutely loved! Will definitely make Panko chicken tenders again.”
“Packed with flavor and so simple. Exactly what I wanted from Panko chicken tenders.”


