

There’s something magical about a warm tray of Philly Cheesesteak Sliders that smells like family game night and Sunday lunch all rolled into one. I remember as a kid the kitchen filling with the sizzle of onions and the whisper of minty oregano from a stubbornly open spice cabinet, and Dad whispering that the secret was patience—letting the onions caramelize until they sang. We’d tuck those glossy ribbons of ribeye and gooey cheese into soft buns, and the whole room would gather around the table like it was a little celebration. This recipe is a cozy, streamlined cousin to the classic Philly cheesesteak—easier to stash in the fridge for a busy week, perfect for a crowd, and just as forgiving as a Sunday supper. Philly Cheesesteak Sliders are my go-to when the house is buzzing and I want something savory, comforting, and totally shareable. Trust me, this version disappears in minutes at my house, and my kids actually ask for seconds. It’s simple, soulful, and a total crowd-pleaser.
What is Philly Cheesesteak Sliders?
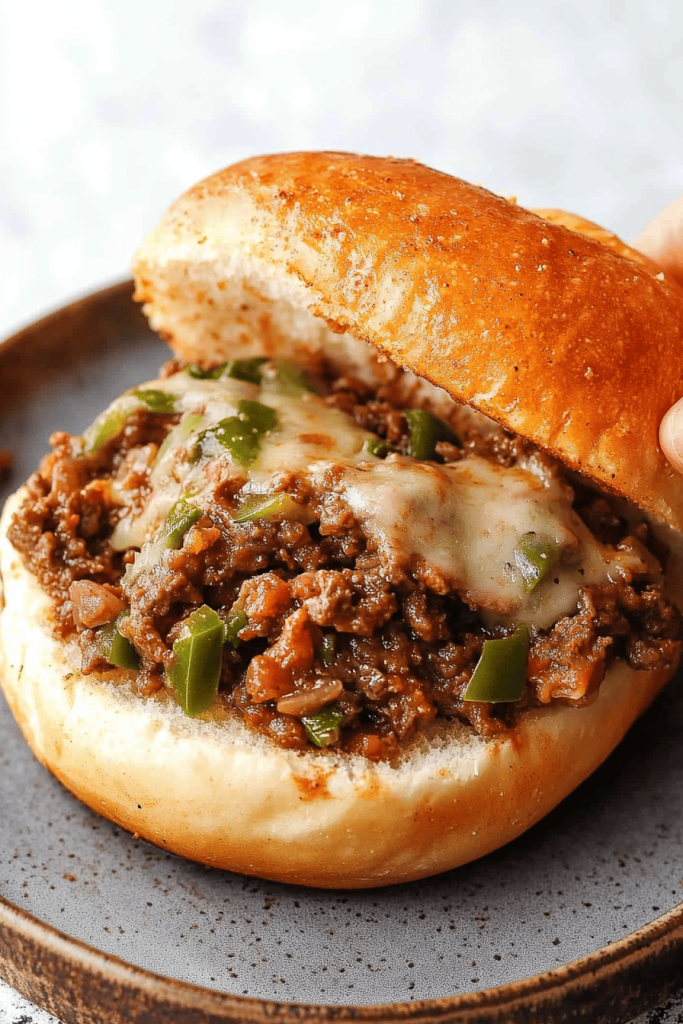
Philly Cheesesteak Sliders are mini versions of the famous Philly sandwich—thinly sliced beef, caramelized onions, melty cheese, and a soft bun, all packed into bite-sized servings. Think of them as “little cheesesteaks” you can pop in your mouth in two bites rather than two hands full. The idea behind the sliders is to keep the same juicy, beefy essence of a classic cheesesteak while making it easy to feed a crowd with minimal fuss. The name comes straight from Philadelphia’s iconic sandwich scene, where long rolls and sizzling steak defined a city’s love affair with comfort food. In our kitchen, we swap stubborn long loaves for friendly mini buns, which means more crispy edges, faster baking, and a fun, shareable presentation. It’s essentially the same great flavor—beefy, peppery, melty—just in slider form that’s perfect for game nights, potlucks, or a casual weeknight dinner.
How do you make Philly Cheesesteak Sliders?
Quick Overview
In a nutshell, you season and sear thin beef, caramelize onions and peppers, melt cheese, and nestle everything onto soft slider buns. The “batter” or base here is a quick biscuit-like dough that yields tender mini buns you bake on a sheet pan. You’ll split the dough rounds, layer them with a juicy beef-onion-pepper filling and cheese, then crown with a second round before a quick bake to finish. The result is a warm, savory stack with crisp edges and a melt-in-your-mouth center. It’s hands-on enough to feel like cooking, but forgiving enough that you won’t stress about exact timing. And yes, the kitchen will smell like your favorite sandwich until everyone’s back at the table, ready to bite in together.
Ingredients
For the Main Batter:
- 2 cups all-purpose flour
- 1 tablespoon baking powder
- 1 teaspoon salt
- 1 tablespoon sugar
- 1/2 cup cold unsalted butter, cubed
- 1 cup cold milk or buttermilk
For the Filling:
- 12 ounces thinly sliced ribeye or flank steak, or use leftover roasted beef
- 1 tablespoon olive oil
- 1 large onion, thinly sliced
- 1 small green bell pepper, thinly sliced
- 2 cloves garlic, minced
- Salt and Black Pepper, to taste
- 8 slices provolone or white American cheese
For the Glaze:
- 2 tablespoons butter, melted
- 1 garlic clove, minced
- 1/2 teaspoon Italian seasoning (optional)
- Pinch of sugar (optional, to balance the glaze)
Step-by-Step Instructions
Step 1: Preheat & Prep Pan
Preheat your oven to 425°F (220°C). Line two baking sheets with parchment if you have it, or just lightly grease a single sheet. This is where those little biscuit rounds will bake into perfect slider buns, so give yourself a little space for rising and browning.
Step 2: Mix Dry Ingredients
In a large bowl, whisk together the flour, baking powder, salt, and sugar. The dry mix is the quiet start—this is where the texture begins. Pro tip: whisking well ensures even rise and a tender crumb. I always sift once if I’ve got the time because it makes the final bite feel lighter.
Step 3: Mix Wet Ingredients
In a separate bowl, blend the milk with the melted butter. You want the butter to be cooled a touch so it doesn’t seize up the milk, but still pretty cold to keep the dough from getting too sticky. Stir until just combined. It should look shaggy and wet—don’t overmix at this stage.
Step 4: Combine
Pour the wet mixture into the dry ingredients and stir with a wooden spoon until a shaggy dough forms. It will be a bit tacky, and that’s exactly what you want for soft, tender sliders. If it seems too dry, a splash more milk is fine; if it’s too wet, a tablespoon or two more flour will bring it back into balance. Avoid overmixing, or the finished buns will be tough.
Step 5: Prepare Filling
Heat a skillet over medium-high heat with the olive oil. Add the onions and peppers, and season with a pinch of salt. Cook, stirring occasionally, until they’re caramelized and deeply golden, about 8-10 minutes. Add the garlic toward the end so it perfume-ifies the pan without turning bitter. In a separate pan, sear the sliced beef until just browned and still juicy—thin, quick searing helps keep it tender. If you’re using leftovers, skip the sear and just rewarm gently with a splash of broth to keep it moist. Salt, pepper, and a whisper of paprika or oregano can echo classic cheesesteak flavors beautifully.
Step 6: Layer & Swirl
Flour a surface and roll the dough into a rough rectangle about 1/2 inch thick. Use a round cutter or a cup to stamp out 12 equal rounds. Place 6 rounds on the prepared sheet as the “buns.” Brush each round lightly with a small amount of melted butter to help with browning. Spoon a portion of the beef-onion-pepper mixture onto each bottom bun, top with a slice of cheese, and crown with a second dough round. If you like, you can gently press the edges to seal, creating a little pocket of filling inside each slider. The goal is a snug little cap so the cheese doesn’t ooze out entirely during baking.
Step 7: Bake
Bake for 12-15 minutes, or until the tops are golden brown and a toothpick comes out clean from the center of a bun. If your buns aren’t browning evenly, rotate the sheet halfway through. If you want extra cheesiness, lay a small slice of cheese on top of each slider during the last 2 minutes of bake, letting it melt into a glossy finish.
Step 8: Cool & Glaze
While the sliders bake, whisk together the glaze ingredients: melted butter, minced garlic, Italian seasoning, and a pinch of sugar if you like. As soon as they come out of the oven, brush the tops with the glaze for a glossy finish and a touch of savory-sweet aroma. This glaze is optional but highly recommended if you want that restaurant-like shine and a little extra depth of flavor.
Step 9: Slice & Serve
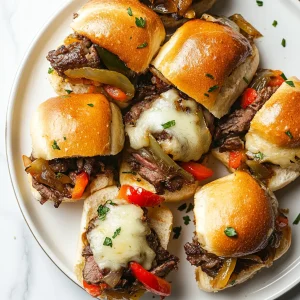
Let the sliders rest for about 5 minutes so the cheese can set a touch. Then slice them in half horizontally and arrange on a platter. If you baked two sheets, you’ll have plenty to feed a hungry crowd. These mini cheesesteaks are best while still warm, with the cheese just barely holding together but oozing slightly for that signature cheesesteak pull. Serve with pickles, a extra napkins, and a quick green salad to keep things bright and balanced.
What to Serve It With
These Philly Cheesesteak Sliders shine on their own, but they also sing with quick, bright sides. Here are a few ideas that suit different occasions:
For Breakfast: Set out a tray with mini sliders alongside a crisp, refreshing cucumber-tennant salad and a light, lemony yogurt dip. You’ll be surprised how well the savory-meets-brunch vibe works, especially with a pot of strong coffee and a pitcher of orange juice.
For Brunch: Pair with roasted cherry tomatoes, a handful of arugula, and a tangy chimichurri drizzle. A sparkling tea or a light Bloody Mary can elevate the sunshine vibes without stealing the show from your sliders.
As Dinner: Serve with roasted root vegetables and a garlicky kale or spinach side. A simple green salad with lemon vinaigrette brightens the plate and keeps the meal feeling balanced.
For Cozy Snacks: These sliders are built for casual, comfy nights. Offer a small bowl of cornichons, a quick corn fritter, and a mug of tomato soup for dipping—my family loves the little dunk-and-go moments that happen around the table.
Personally, I love making these for game nights or a quick weeknight treat when we want something special without the long technique list. The scent alone brings everyone to the kitchen, and watching the cheese melt into the beef feels like a warm hug. If you’re cooking for kids, you can dial back the onions a touch or swap in milder peppers for a smoother, less spicy bite. And if you’ve got leftovers, these sliders reheat beautifully—a quick oven blast or a gentle skillet warm-up brings them back to life without drying them out.
Top Tips for Perfecting Your Philly Cheesesteak Sliders
These little crowd-pleasers are forgiving, and a few smart tweaks go a long way. Here are my best tricks, organized by technique:
Beef Prep: Freeze the beef for 15-20 minutes before slicing it ultra-thin. This makes it easier to slice paper-thin so it cooks fast and stays tender. If you’re starting with leftovers, slice it as thin as you can and rewarm with a splash of broth to keep it juicy.
Dough Handling: Don’t overwork the dough once you add the wet ingredients. A few light folds are plenty. The goal is a tender crumb, not a dense, chewy bite. If the dough feels too wet, add a tablespoon of flour at a time until it holds its shape better.
Cheese Choice: Provolone is traditional for cheesesteaks, but white American melts incredibly smoothly. If you like a sharp bite, a little aged cheddar mixed with mozzarella creates a nice counterpoint to the sweetness of onions.
Layering & Baking: Don’t rush the bake. If your oven runs hot, lower the temperature by 25°F and extend the bake time a bit. The cheese should be set, not pooly. If you’re worried about the buns getting too brown, tent with a bit of foil in the last few minutes.
Make-Ahead & Freezing: Assemble the slider buns up to the point of laying the top rounds, then freeze on a sheet pan. Once frozen, transfer to a zip-top bag. Bake from frozen, adding a few extra minutes. You can also freeze the cooked, assembled sliders—reheat gently in a low oven to avoid drying out.
Glaze Variations: If you want a more pronounced garlic note, add a tiny splash of Worcestershire sauce to the glaze. For a glossy finish with a tang, mix in a teaspoon of honey or maple syrup. If you’re dairy-free, swap in olive oil or a dairy-free butter substitute for the glaze.
Texture & Color: For the best texture, aim for lightly caramelized onions (not mushy). They’ll add both sweetness and bite, balancing the beef’s savoriness. A good sear on the beef at the start makes a huge difference in depth of flavor.
My big lesson is simple: the sliders taste best when you keep things flexible. If you’re short on time, use store-bought slider buns and focus on the sear and the glaze. If you’ve got time, give the dough a gentle rise and let the oven do some of the heavy lifting for you. The beauty of Philly Cheesesteak Sliders is that they’re forgiving enough to fit your schedule while still feeling indulgent and special. This is a recipe I’ve tested countless times, and every batch reminds me that good food doesn’t have to be complicated to feel like a hug from someone you love.
Storing and Reheating Tips
Storage-friendly and still tasty, these sliders shine when you plan ahead. Here’s how I handle them so they stay delicious from fridge to table.
Room Temperature: If you’re serving within a couple of hours, keep the assembled sliders covered with a clean towel to retain moisture and prevent the tops from drying out. Don’t leave them out all day; the beef and cheese will begin to sweat and lose texture.
Refrigerator Storage: Store baked and cooled sliders in an airtight container for up to 2 days. Reheat in a 350°F (175°C) oven for 8-10 minutes, or until warmed through and the cheese is melty again. If you’ve already glazed them, reheat covered with foil to prevent the glaze from burning or browning too aggressively.
Freezer Instructions: Freeze the fully baked, cooled sliders in a single layer on a parchment-lined tray, then transfer to a resealable bag. They’ll keep for up to 2 months. Reheat from frozen in a 350°F (175°C) oven for 12-15 minutes, or until hot in the center and bubbling at the edges.
Glaze Timing Advice: If you’re freezing, you can glaze them after reheating to set a glossy finish. If you freeze before glazing, reheat and then brush with the glaze for the final touch. Taste-wise, the glaze brings a gentle gloss and a hint of savoriness that’s worth the extra step for plated, polished sliders.
Freshness wins, but these sliders are wonderfully forgiving. If you want to switch up the cheese or add a few sautéed mushrooms, go for it—your kitchen, your rules. The key is to keep the beef juicy, the onions sweet, and the cheese wonderfully molten.
Frequently Asked Questions
Final Thoughts
Philly Cheesesteak Sliders have earned a steady place at my table because they’re comforting, flexible, and deeply satisfying. They pair the familiarity of old-school flavors with the instant-joy factor of bite-sized bites. If you’re new to cheesesteaks, this is a friendly doorway—bold, savory, and not overly fussy. If you’ve made Philly Cheesesteaks before, you’ll recognize the same backbone here: beef that’s sliced thin and seared, onions that caramelize into sweetness, and cheese that melts into a glossy, inviting blanket. The sliders are a playful homage to the city’s culinary heritage while being perfectly suited for modern weeknights, potlucks, and casual gatherings. I’d love to hear how yours turn out—what cheese did you reach for, did you switch up the veggies, or did you glaze them twice for extra shine? Drop a comment, rate the recipe, and tell me your own twists. Happy baking—and even happier eating!
Philly Cheesesteak Sliders
Ingredients
Main Ingredients
- 1 pound sirloin steak thinly sliced
- 1 large onion thinly sliced
- 0.5 cup cheddar cheese shredded
- 0.5 cup provolone cheese shredded
- 0.125 cup butter melted
- 12 slider buns slider buns
- 2 tablespoon olive oil
- 1 teaspoon salt
- 0.5 teaspoon black pepper
Instructions
Preparation Steps
- In a large skillet, heat olive oil over medium-high heat. Add sirloin steak and cook until browned, about 3-5 minutes. Remove steak from skillet and set aside.
- Add sliced onion and bell pepper to the same skillet. Cook until softened, about 5-7 minutes.
- Return the steak to the skillet. Stir in salt and pepper.
- Sprinkle both cheddar and provolone cheeses over the steak and vegetable mixture. Cook until the cheese is melted and bubbly.
- While the cheese is melting, slice the slider buns in half horizontally. Brush the cut sides with melted butter.
- Toast the slider buns under the broiler or in a toaster oven until golden brown.
- Spoon the cheesesteak mixture onto the bottom halves of the toasted slider buns.
- Place the top halves of the buns on top. Serve immediately.
Notes
Featured Comments
“Impressed! Clear steps and quick weeknight win results. Perfect for busy nights.”
“New favorite here — absolutely loved. crowd-pleaser was spot on.”
“Super easy and turned out amazing! My family asked for seconds. Saving this one.”
“This sweet treat was absolutely loved — the cozy really stands out. Thanks!”
“Made it tonight and wow — creamy! Will definitely make Philly Cheesesteak Sliders again.”
“Packed with flavor and so simple. Exactly what I wanted from Philly Cheesesteak Sliders.”


