


There’s something magical about opening a jar of pickled beetroot on a busy weeknight. The deep magenta glow, the zing of vinegar, the kiss of sugar, and that whisper of spice—it feels like a little victory in a glass. I first fell in love with pickled beetroot after my grandmother handed me a jar she’d canned from late-summer beets. It wasn’t just the flavor; it was the memory: the way the kitchen filled with sweetness and tang, the way my kids begged for a spoonful straight from the jar, the way it turned a simple grain bowl into something celebratory. If you’ve never thought to pickle beets at home, trust me—this is the recipe that makes you think, why didn’t I start sooner? This one’s a lifesaver on busy nights, and the color alone never fails to spark a smile. And yes, it’s irresistibly versatile—pickled beetroot shines in salads, sandwiches, and quick-tickled sides alike, bringing brightness that ketchup or mayo can only dream of. So grab a handful of beets, a jar or two, and let’s make something that tastes like a hug in a jar.
What is pickled beetroot?
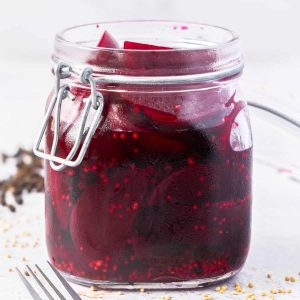
Think of pickled beetroot as beetroot that’s been gently marinated in a simple vinegary-sugary bath until it’s tender, tangy, and deeply flavorful. It’s essentially beetroot plus a brine—water, vinegar, sugar, salt, and a few aromatics—that lets the beets drink up flavor while keeping their shape and color. The name itself comes from the traditional preservation method used across many European kitchens, where beets were kept in jars to brighten winter plates. My version is straightforward and forgiving: you cook the beets to tenderness, scald a bright brine, and let the jars do the rest. It’s a super approachable project for weekend canning, or a quick fridge pickle that’s ready in a day or two. And yes, the color is as stunning in person as it looks in photos—an instant conversation starter for your salads, bowls, and boards.
How to Make Pickled Beetroot
Quick Overview
In just a few steps, you’ll transform humble beets into a jewel-toned condiment that tastes like sunshine and nostalgia. First, you’ll cook the beets until tender but still snappy, then you’ll simmer a bright brine with vinegar, sugar, salt, and aromatics. While the beets are warm, you’ll pack them into clean jars and pour the hot brine over, letting them marinate. The magic happens as the jars cool and the flavors mellow into something pleasantly balanced. It’s a straightforward process, and the results are clearly worth it—crisp, tangy, and deeply flavorful pickled beetroot that can hold its own in all sorts of dishes.
Ingredients
For the Main Brine (the brine that makes the magic):
- 1 ½ cups distilled white vinegar (5% acidity)
- 1 ½ cups water
- ⅓ cup granulated sugar (adjust to taste)
- 1 tablespoon salt (kosher or sea salt)
- 2-3 whole bay leaves
- 1 teaspoon mustard seeds
- 6-8 whole black peppercorns
- Optional: a few coriander seeds, a pinch of red pepper flakes for kick
- Optional aromatics: a strip of orange zest or a clove of garlic, sliced
For the Beet Filling (the beets themselves):
- 2 to 2 ½ pounds fresh beets, scrubbed and trimmed
- Water for boiling or roasting
- Optional: 1 tablespoon olive oil (if roasting for extra glow)
- Salt to taste
For the Glaze (optional finishing touch you can skip or use later):
- ¼ cup beet juice (from the beets themselves)
- 1-2 teaspoons sugar or honey (to taste)
- ½ teaspoon white wine vinegar or lemon juice
Step-by-Step Instructions
Step 1: Preheat & Prep Pan
If you’re roasting beets for color and depth, preheat your oven to 400°F (204°C). Scrub the beets well, trim the greens, and rub with a touch of olive oil and a pinch of salt. Roast until tender when pierced with a knife, about 25-35 minutes depending on size. If you prefer boiling, simmer the beets in salted water until tender, then cool. Either method works beautifully for pickled beetroot—the cooker you choose is your call, but I always aim for a tender bite that still retains shape. The goal is beets that are just shy of falling apart, so they’ll hold up in the jars and soak up that brine nicely.
Step 2: Mix Dry Ingredients
While the beets cook, you can start building your aroma base. In a small bowl, combine the mustard seeds, peppercorns, bay leaves, and any optional coriander seeds or Red Pepper flakes. These dried bits are what give pickled beetroot its characteristic warmth. I like to crush a few peppercorns gently with the back of a spoon to release their oils; it’s a tiny step that makes a noticeable difference in the final flavor.
Step 3: Mix Wet Ingredients
In a medium saucepan, whisk together the vinegar, water, sugar, and salt. Bring to a gentle simmer, stirring to dissolve the sugar and salt completely. If you’re using orange zest or garlic, add it here so the brine picks up those bright notes. Let the mixture simmer just enough to wake up the aromatics, then remove it from heat.
Step 4: Combine
When the beets are tender, let them cool just enough to handle. Peel the skins away (the heat helps this come off easily), then slice the beets into rounds or wedges, depending on your preference. Arrange the slices in clean jars, leaving a little space between pieces. Pour the hot brine over the beets, making sure every piece is submerged. If you’re using the optional aromatics, tuck a couple into each jar for a pretty scent and extra flavor.
Step 5: Prepare Filling
The “filling” here is simple: tender, well-cut beets that soak up that brine. If you roasted the beets, you’ll notice the edges have a slight caramelized edge from roasting—this is wonderful, because it adds nuance to the pickle. If you boiled them, you’ll still get a vibrant color and a clean bite. For a little variation, you can experiment with golden beets or even purple carrots for contrast. The key is consistency in size so the brine penetrates evenly.
Step 6: Layer & Swirl
When you’re packing the jars, aim for a neat, compact layer of beets with a few air pockets here and there so the brine can circulate. If you like a marbled look, you can layer beet slices with a few cloves of garlic or a strip of orange zest to create subtle stripes of color and aroma. Swirl the jars gently as you fill, but don’t splash the brine; you want to keep the beets firmly submerged so they pickle evenly.
Step 7: Bake
In this recipe, “bake” is a stand-in for a gentle processing step that helps the flavors settle and keeps everything tidy in jars. Once the jars are filled, you can either skip processing entirely if you’re refrigerating and using within a couple weeks, or you can do a light water bath to seal and store at room temperature for longer. If you choose to water-bath, submerge the filled jars in a pot of boiling water for 10-15 minutes, then remove and let cool undisturbed. The beets will take on more color and the brine will thicken slightly as it settles. Either method yields glossy, crisp pickled beetroot that’s ready to enjoy sooner than you think.
Step 8: Cool & Glaze
Let the jars rest and cool completely before you move them. If you’re using the glaze, simmer the beet juice with sugar and a splash of vinegar until it’s a glossy, syrupy consistency. Drizzle a tiny amount over a beet slice on a plate for tasting, or brush lightly over the jar’s inner edges for a touch of sheen. The glaze is optional, but it’s a nice cherry-on-top if you’re serving pickled beetroot as part of a larger spread.
Step 9: Slice & Serve
Chill your jars for at least 24 hours to let the flavors mingle fully. When you’re ready to serve, slice a few beets onto a crisp salad, tuck them into a sandwich, or pile them onto a board with tangy cheeses and nuts. The vivid color makes any plate feel festive, and the flavor is bright enough to wake up even the dullest weeknight dinner. My kids actually ask for seconds when I pull out a jar—there’s something about the balance of sweet and sour that keeps them reaching for more. And if you’ve got extra, use the leftover brine as a zingy marinade for roasted veggies or a quick dressing for greens.
What to Serve It With
Creative ideas for different occasions—because pickled beetroot is a true chameleon in the pantry.
For Breakfast: Slice thin on a mushroom and avocado toast, then finish with a crack of Black Pepper and feta. The acidity cuts through creamy textures, and the color wakes you up before coffee even cools. A dollop of goat cheese on whole-grain toast with pickled beetroot is also a dream with your morning tea.
For Brunch: Run a spoonful into a chickpea salad pita or sprinkle over a citrusy quinoa bowl. A few ribbons of beetroot brighten the plate and pair beautifully with fresh herbs and briny feta. It’s a simple way to dress up a brunch spread without extra fuss.
As Dessert: Okay, not a traditional dessert, but try a beetroot and chocolate cheesecake slice with a tiny ribbon of glaze—surprisingly good. Or serve it beside a little almond cake with a dollop of tangy yogurt; the beetroot’s brightness makes the dessert feel lighter and more refreshing.
For Cozy Snacks: Add thinly sliced pickled beetroot to a board with crusty bread, smoked fish, and soft cheeses. The crunch and tang are a perfect counterpoint to creamy cheese and fatty fish. This is how I sneak in a little color and brightness during long winter evenings.
Over the years, I’ve found that a jar of pickled beetroot is a ticket to faster dinners and more confident plating. It’s a small thing that shifts a plate from “meh” to memorable. And if you’ve got a crowd that loves color and contrast, this is the dish that will disappear in minutes—my family proves it time and again.
Top Tips for Perfecting Your Pickled Beetroot
Here are the little tweaks I’ve learned after countless batches, all aimed at helping you nail this every single time.
Beet Prep: Choose beets that are evenly sized for uniform cooking. Scrub well; if you’re worried about staining, wear gloves and lemon juice on your cutting board to help lift the color later. I never peel beets until after they’re cooked—the skins slip off easily when warm and it prevents knife nicks.
Mixing Advice: Don’t overcook the beets or they’ll crumble in jars. You want a tender bite, not mush. When you slice, aim for uniform thickness so every bite gets a consistent soak in the brine.
Brine Variations: If you love a stronger kick, add a pinch more salt or a dash of chili. For a lighter profile, reduce the sugar a bit and add a touch more vinegar. A bay leaf here and there is magical for depth, but you can keep it simple with just mustard seeds and peppercorns if that’s your vibe.
Beet Color & Marble: If you want dramatic color, you can leave the skins on for longer during the initial cook and only peel after a gentle cool. The color will bleed into the brine a little, creating a richer, more marbled look in the jars.
Ingredient Swaps: Golden beets are gorgeous and milder in flavor; they’ll still pickle beautifully. If you’re avoiding sugar, you can use a touch of maple syrup or a splash of honey for a nuanced sweetness. For a vegan-friendly glaze, simply reduce the glaze with beet juice, a splash of vinegar, and a touch of sugar to taste.
Baking Tips: If you’re baking jars for longer shelf life, keep the water bath at a steady simmer and ensure jars are fully covered by water. The process helps preserve the bright color and crisp-tender texture. If you’re short on time, refrigerate and enjoy within a couple of weeks.
Glaze Variations: A light glaze is delicious over a few plated slices or a salad, but you can skip it altogether. If you want more shine, a thin brush of the glaze while the beets are warm helps the syrup cling and looks pretty on a plate.
Lessons learned: always taste the brine before pouring over the jars. A quick adjustment to salt or sugar at that stage can save you from overly sharp or bland pickled beetroot. And trust me, the first time you crack open a jar you’ll wish you’d started sooner—the aroma alone is addictive.
Storing and Reheating Tips
Storing your pickled beetroot properly is half the battle won. Here’s how I handle it at home, depending on how long you plan to keep it and whether you’ve processed the jars.
Room Temperature: If you’ve processed the jars in a water bath, they can be stored in a cool, dark pantry for up to 3-6 months. Make sure the lid seals properly and the ring is tight. Avoid storing near heat or sunlight, which can degrade the vibrant color and flavor over time.
Refrigerator Storage: For quick access or if you didn’t water-bath, keep the jars in the fridge. They’ll stay bright and crisp for up to 3-4 weeks. Opened jars should be kept refrigerated and used within a week for best texture and flavor.
Freezer Instructions: Freezing pickled beetroot isn’t ideal because the beets can become mushy upon thawing and the brine’s texture can separate. If you must, freeze in small portions and use within 1-2 months, then thaw in the refrigerator and use immediately in salads or bowls.
Glaze Timing Advice: If you plan to use a glaze, apply it when you’re ready to serve or just before plating. Glazed beet slices don’t store as well as plain pickled beets, so glaze in smaller batches for best results.
[These methods have kept my pickled beetroot tasting crisp, vibrant, and delicious through many gatherings. The key is to keep it cool, away from strong light, and to use clean, dry jars for the best long-term result.]
Frequently Asked Questions
Final Thoughts
Pickled beetroot has become a quiet anchor in my weekly cooking rhythm. It’s not flashy, but it’s consistently satisfying—the kind of recipe you reach for when you want something flavorful without a fuss. The beets stay firm; the brine brings brightness; the color makes plates sing. If you’re new to pickling, you’ll appreciate how forgiving this method is: you can adjust the flavor, the sweetness, and even the color with a few simple tweaks, and you’ll still end up with something deliciously memorable. I encourage you to set aside a couple of jars for the fridge and a couple for the pantry. Taste as you go, trust your palate, and you’ll be amazed at how fast this becomes a family favorite. Happy picking, and I can’t wait to hear how yours turns out! If you try variations, leave a comment and share your favorite tweak or pairing. And if you love it as much as we do, spread the joy—friends and family appreciate a good jar as much as a good story.
Pickled Beetroot
Ingredients
Main Ingredients
- 1 kg fresh beetroot peeled and cut into bite-sized pieces
- 0.5 liter white vinegar
- 0.25 liter water
- 150 gram granulated sugar
- 1 teaspoon salt
- 2 whole bay leaves
- 10 whole peppercorns
Instructions
Preparation Steps
- Wash the beetroot thoroughly. Peel them and cut into bite-sized pieces. You can wear gloves to avoid staining your hands.
- In a large saucepan, combine the white vinegar, water, granulated sugar, and salt. Add the bay leaves and peppercorns.
- Bring the mixture to a simmer over medium heat, stirring until the sugar and salt are dissolved. Let it simmer for about 5 minutes.
- Add the prepared beetroot pieces to the simmering liquid. Ensure the beetroot is submerged in the brine.
- Bring the mixture back to a simmer, then reduce the heat to low, cover, and cook for 20-25 minutes, or until the beetroot is tender but still slightly firm.
- Carefully ladle the pickled beetroot and brine into sterilized jars. Leave about 1-2 cm of headspace at the top.
- Seal the jars tightly and let them cool completely at room temperature. Once cooled, store in the refrigerator for at least 24 hours before serving to allow the flavors to meld.
Notes
Featured Comments
“I always keep a jar on hand—so easy and vibrant, perfect for adding color and flavor to any meal!”
“Impressed! Clear steps and quick weeknight win results. Perfect for busy nights.”
“New favorite here — absolutely loved. crowd-pleaser was spot on.”
“Super easy and turned out amazing! My family asked for seconds. Saving this one.”
“This sweet treat was absolutely loved — the hearty really stands out. Thanks!”
“Made it tonight and wow — spot on! Will definitely make pickled beetroot again.”


I always keep a jar on hand—so easy and vibrant, perfect for adding color and flavor to any meal!