

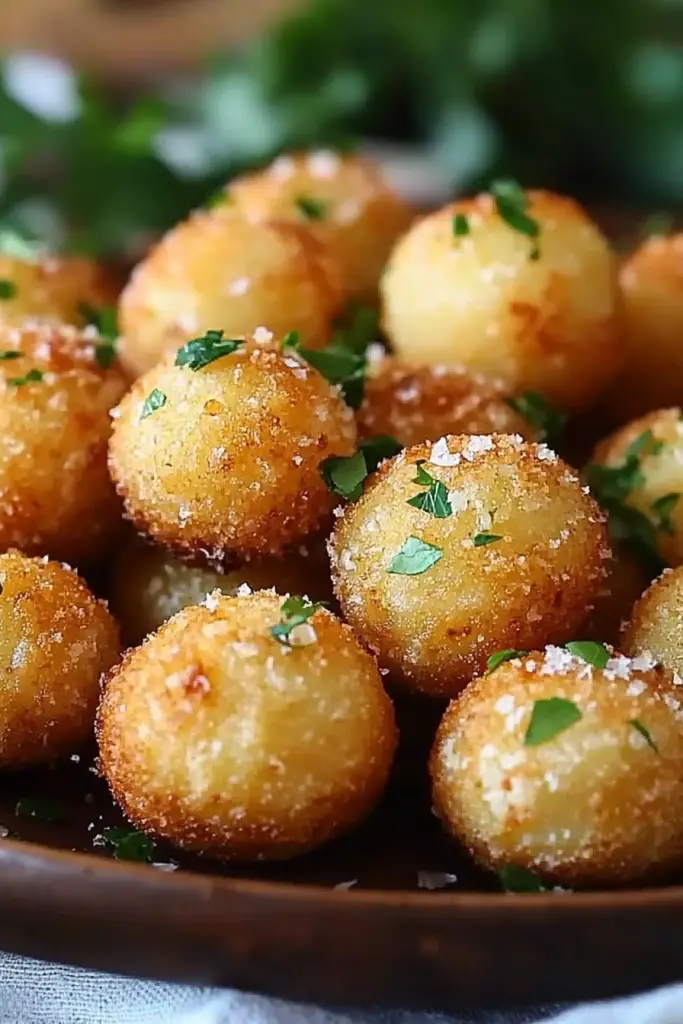
There are some recipes that just feel like a warm hug, aren’t there? For me, that recipe is my Grandma’s potato balls. Growing up, the smell of these baking would fill our entire house, a sure sign that a special weekend was upon us, or maybe just a Tuesday that needed a little extra love. They’re not fancy, but oh my goodness, they are delicious. If you’ve ever had those little savory bites that are somehow crispy on the outside and melt-in-your-mouth tender on the inside, you’re probably thinking of something like these. They’re a bit like a savory donut meets a perfectly seasoned Mashed Potato cloud. They’re my absolute go-to when I need something satisfying, budget-friendly, and something that, quite frankly, disappears in minutes at my house. Honestly, they’re a game-changer.
What are potato balls?
So, what exactly are these magical little things I call potato balls? Think of them as small, savory delights made primarily from Mashed Potatoes, bound together with a few simple ingredients, and then baked to golden perfection. The name itself is pretty straightforward – they’re literally balls made of potato! But don’t let the simple name fool you. There’s a secret ingredient, or rather, a secret technique that makes these so incredibly moreish. They’re not fried like potato fritters, and they’re not quite a croquette, though they share some similarities. They’re their own special category of deliciousness. It’s the kind of food that’s so comforting, so satisfying, and so unbelievably easy to make, you’ll wonder why you haven’t been making them all along. They’re just pure, unadulterated potato goodness, in a bite-sized form.
How do I make Grandma’s Potato Balls?
Quick Overview
Making these potato balls is honestly a breeze! We’ll start by boiling and mashing our potatoes until they’re perfectly smooth. Then, we’ll mix in the binding ingredients, form them into little balls, and bake them until they’re golden brown and irresistible. It’s a simple process that yields incredibly rewarding results. You’ll be amazed at how a few basic steps can lead to such a delicious outcome. Trust me, this method is foolproof and results in perfectly textured potato balls every time.
Ingredients
For the Main Batter:
4 large russet potatoes (about 2 pounds), peeled and quartered
1/2 cup all-purpose flour, plus more for dusting
1 large egg, lightly beaten
2 tablespoons unsalted butter, softened
1/2 teaspoon salt, or to taste
1/4 teaspoon black pepper, or to taste
Optional additions for flavor: 1/4 cup finely chopped chives, 2 cloves garlic minced, or a pinch of nutmeg.
When choosing potatoes, I always go for russets. They have a lovely dry, fluffy texture when mashed, which is exactly what we need here. If you can’t find russets, Yukon Golds will work in a pinch, but you might need to adjust the flour slightly as they can be a bit more moist. Make sure your potatoes are well-drained after boiling; excess water is the enemy of good potato balls!
For the Filling (Optional but Highly Recommended!):
1/2 cup shredded cheddar cheese (or your favorite cheese like Gruyère, Monterey Jack, or even a mix!)
2-3 strips bacon, cooked until crispy and crumbled
A sprinkle of finely chopped green onions
The filling is where you can really have fun! I grew up with a simple cheese filling, but as I got older and started experimenting, adding crispy bacon was a game-changer. You can also add a bit of sautéed onion or even some finely chopped ham. Just make sure the filling ingredients are small enough to be enclosed easily within the potato ball.
For Baking & Serving:
2 tablespoons olive oil or melted butter, for brushing
Fresh parsley or chives, chopped, for garnish (optional)
Sour Cream or your favorite dipping sauce, for serving
For brushing, olive oil gives a slightly crispier finish, while melted butter adds a richer flavor. Both are delicious! And for serving, sour cream is a classic, but these are also amazing with a spicy aioli, ranch dip, or even a sweet chili sauce.
Step-by-Step Instructions
Step 1: Preheat & Prep Pan
First things first, let’s get our oven ready. Preheat it to 400°F (200°C). While the oven is heating up, grab a large baking sheet and lightly grease it with a bit of cooking spray or olive oil, or line it with parchment paper for super easy cleanup. This step is crucial to prevent our precious potato balls from sticking!
Step 2: Mix Dry Ingredients
In a large mixing bowl, combine the mashed potatoes, flour, salt, pepper, and any of your chosen optional flavorings like minced garlic or nutmeg. I usually mash my potatoes when they’re still warm, which makes them easier to work with and ensures they’re lump-free. If you’re using them, add the chives or other dry additions now.
Step 3: Mix Wet Ingredients
In a separate, smaller bowl, whisk together the lightly beaten egg and the softened butter until well combined. This is our binding agent, and it also adds a lovely richness to the potato mixture.
Step 4: Combine
Now, pour the wet ingredients into the bowl with the mashed potatoes. Gently mix everything together with a sturdy spoon or a spatula until it’s just combined. Be careful not to overmix here! Overworking the dough can make the potato balls tough. We want a soft, pliable dough that’s easy to handle. It should feel a bit like thick play-doh.
Step 5: Prepare Filling
If you’re using a filling, now’s the time to get it ready. In a small bowl, mix together your shredded cheese, crumbled bacon, and chopped green onions. This is the part that makes these truly special for me. It’s like a little surprise party inside each potato ball!
Step 6: Shape the Potato Balls
Lightly flour your hands with some all-purpose flour – this prevents the dough from sticking to your fingers. Take about 2-3 tablespoons of the potato mixture and flatten it in your palm. If you’re using a filling, place about a teaspoon of the filling mixture in the center. Gently bring the edges of the potato dough up and around the filling, sealing it completely to form a smooth ball. Place the formed ball onto your prepared baking sheet. Repeat this with the remaining dough and filling. If you’re not using a filling, just roll the dough into smooth, uniform balls.
Step 7: Bake
Once all your potato balls are shaped and on the baking sheet, lightly brush the tops with olive oil or melted butter. Pop them into the preheated oven and bake for 20-25 minutes, or until they are beautifully golden brown and slightly firm to the touch. I like to rotate the baking sheet halfway through baking to ensure even browning.
Step 8: Cool & Glaze (Not Applicable Here, but good to know for other recipes!)
This recipe doesn’t typically use a glaze, but if it did, this is where you’d let them cool slightly before drizzling. For these potato balls, we’re just going to let them rest for a couple of minutes after they come out of the oven.
Step 9: Slice & Serve
Let the potato balls cool on the baking sheet for about 5 minutes. This helps them firm up a bit more. Then, carefully transfer them to a serving platter. Garnish with fresh chopped parsley or chives if you like, and serve them warm with a dollop of sour cream or your favorite dipping sauce. They’re best enjoyed hot and fresh!
What to Serve It With
These potato balls are so versatile, they really fit into so many meal occasions! For a cozy Breakfast, I love serving them alongside some scrambled eggs and a side of crispy bacon. They feel so much more exciting than plain toast! Or, just a couple of them with a really good cup of coffee is a perfect way to start a leisurely weekend morning. For a more elaborate Brunch, they can be a wonderful addition to a buffet alongside quiches, fruit salads, and mini sandwiches. Their savory nature makes them a nice contrast to sweeter brunch items. I often present them in a charming bowl with a little garnish. As a delightful Dessert alternative, they might sound strange, but hear me out! If you omit the savory spices and opt for a sweeter filling (like a tiny bit of jam or even a bit of cream cheese with a hint of vanilla), and then serve them with a light dusting of powdered sugar, they become a unique sweet treat. It’s unexpected and always gets people talking! And for those Cozy Snacks, this is where they truly shine. They’re perfect for movie nights, game days, or just a little pick-me-up during a busy afternoon. I often serve them in a big bowl with a variety of dipping sauces – ranch, honey mustard, or even a smoky barbecue sauce. My family’s tradition is to have them whenever we have a family game night; they’re the perfect finger food that keeps everyone happy and fueled for friendly competition!
Top Tips for Perfecting Your Potato Balls
I’ve made these potato balls more times than I can count, and over the years, I’ve picked up a few tricks that I think really make a difference. For the Zucchini Prep – wait, no zucchini! That’s for my zucchini bread! For the Potato Prep, the key is to get them as dry as possible after boiling. I always let them steam in the colander for a few minutes after draining to get rid of any excess moisture. This is super important for getting that nice texture without making them too heavy or mushy. When it comes to Mixing Advice, remember what I said earlier about not overmixing. You want just enough to bring everything together. If the dough feels too sticky, you can add a tiny bit more flour, but be cautious – too much flour can make them dense. For the Ball Shaping, make sure to roll them into nice, smooth balls. This helps them bake evenly. If you’re using a filling, ensure it’s completely sealed inside. If any filling leaks out during baking, it can make a mess and sometimes prevent the outside from getting nice and crispy. For Ingredient Swaps, I’ve experimented a lot! If you’re dairy-free, you can try using a plant-based butter alternative and a dairy-free cheese, though the texture might be slightly different. For the egg, you could try a flax egg (1 tablespoon flaxseed meal mixed with 3 tablespoons water, let sit for 5 minutes) as a binder. For Baking Tips, I always place my baking sheet on the middle rack of the oven. This helps ensure even heat distribution. If you notice one side browning faster than the other, simply rotate the pan. Don’t be afraid to bake them a little longer if you want them extra crispy – just keep an eye on them to prevent burning. And for Glaze Variations, while we don’t glaze these, if you were to adapt them into something sweeter, a simple powdered sugar glaze or a cream cheese glaze would be divine. For savory versions, a sprinkle of Parmesan cheese after baking can add an extra layer of flavor!
Storing and Reheating Tips
These potato balls are truly best enjoyed fresh from the oven, but life happens, and sometimes we have leftovers! If you have any that magically survived, storing them properly is key. At Room Temperature, they’re best consumed within a few hours. If you need to store them for a bit longer, I’d recommend covering them loosely with foil to prevent them from drying out, but try not to seal them tightly, as this can make them a bit soggy. For Refrigerator Storage, make sure they’ve cooled down completely before packing them into an airtight container. They’ll keep well in the fridge for about 2-3 days. I find that lining the container with a paper towel can help absorb any excess moisture. When it comes to Freezer Instructions, these freeze surprisingly well! Once they’re completely cooled, you can place them on a baking sheet in a single layer and freeze them until firm. Then, transfer them to a freezer-safe bag or container. They’ll stay good in the freezer for up to 2-3 months. To reheat from frozen, I usually pop them directly into a preheated oven at around 350°F (175°C) for about 15-20 minutes, or until heated through and crispy again. Reheating them in an air fryer also works wonderfully! For Glaze Timing Advice, since these are savory and not typically glazed, this section isn’t directly applicable, but generally, if you had a glazed item, you’d add the glaze *after* reheating for the best texture.
Frequently Asked Questions
Final Thoughts
There you have it – my Grandma’s truly special potato balls! I really hope you give this recipe a try. It’s more than just a recipe to me; it’s a connection to my childhood, to family dinners, and to the simple joy of creating something delicious with your own two hands. These potato balls are proof that you don’t need complicated ingredients or fancy techniques to make something incredibly satisfying. They’re a testament to the humble potato, elevated to star status with just a few simple additions. They’re the perfect example of comfort food done right – easy, flavorful, and always a crowd-pleaser. If you love this recipe, you might also enjoy my recipe for fluffy cheddar biscuits or my easy baked mac and cheese. They share that same comforting, homestyle appeal! I can’t wait to hear what you think of these potato balls. Let me know in the comments below how they turned out for you, and if you tried any fun filling variations! Happy baking, and I hope they bring as much joy to your table as they do to mine!
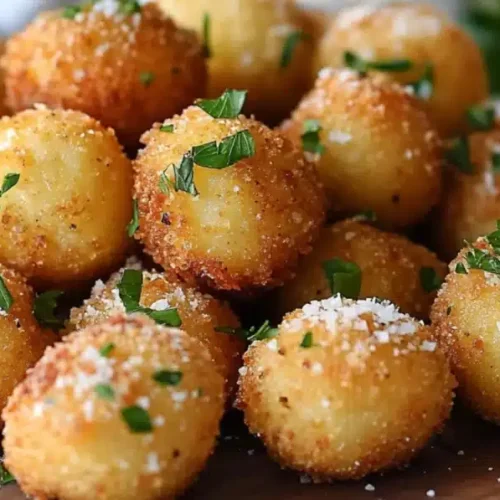
Crispy Potato Balls
Ingredients
Main Ingredients
- 1 lb potatoes Russet or Yukon Gold, peeled and boiled until tender
- 0.5 cup all-purpose flour
- 1 large egg beaten
- 0.5 cup grated Parmesan cheese
- 1 tsp garlic powder
- 0.5 tsp salt
- 0.25 tsp black pepper
- 2 cups vegetable oil for frying
Instructions
Preparation Steps
- Mash the boiled potatoes until smooth. Allow them to cool slightly.
- In a bowl, combine the mashed potatoes, flour, beaten egg, Parmesan cheese, garlic powder, salt, and pepper. Mix until well combined and a dough forms.
- Roll the mixture into small balls, about 1.5 inches in diameter.
- Heat the vegetable oil in a deep skillet or pot over medium-high heat. The oil should be hot but not smoking (around 350°F or 175°C).
- Carefully fry the potato balls in batches, turning occasionally, until golden brown and crispy. This will take about 3-5 minutes per batch.
- Remove the potato balls with a slotted spoon and drain on paper towels.
- Serve hot with your favorite dipping sauce.
Notes
Featured Comments
“Impressed! Clear steps and spot on results. Perfect for busy nights.”
“New favorite here — comforting. crowd-pleaser was spot on.”
“Super easy and turned out amazing! My family asked for seconds. Saving this one.”
“This sweet treat was absolutely loved — the rich really stands out. Thanks!”
“Made it tonight and wow — super easy! Will definitely make potato balls again.”
“Packed with flavor and so simple. Exactly what I wanted from potato balls.”


