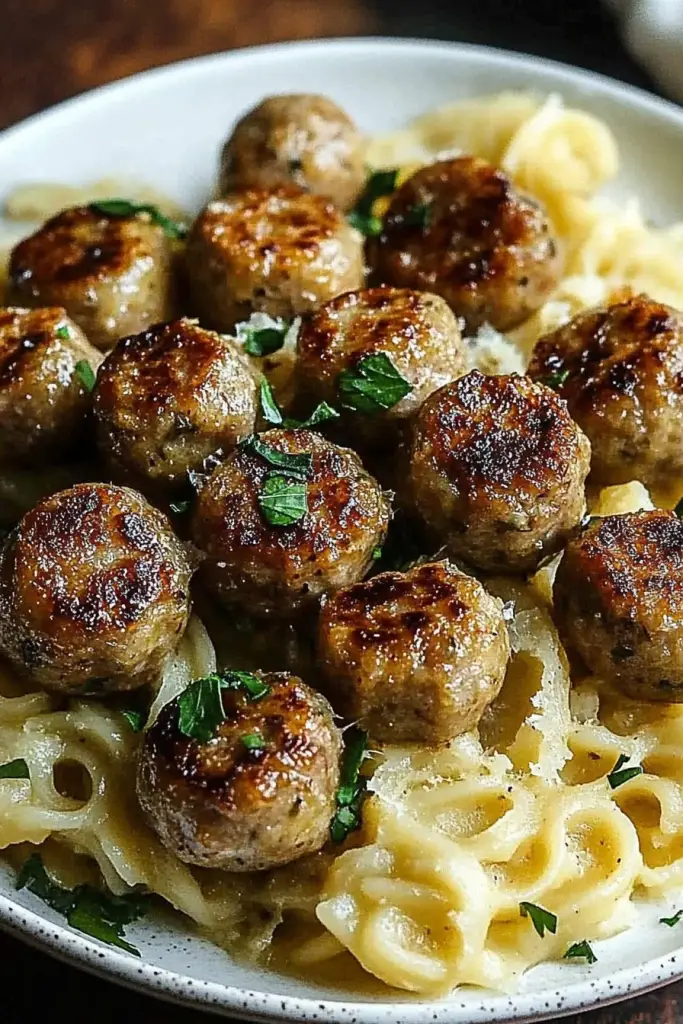
Oh, hey there! Come on in, grab a mug. I was just thinking about this recipe, and honestly, it’s one of those things that has become an absolute staple in our house. If you’re anything like me, sometimes life just gets… well, *life*. Between work, school pick-ups, and trying to find matching socks, the last thing I want to worry about is what’s for dinner or snacks. That’s where these little flavor bombs come in. They’re not quite cookies, not quite cake, but they’re *always* a hit. I remember the first time I made them, I was experimenting, trying to come up with something that my picky eaters would actually devour without a fuss. And let me tell you, the way these Sausage Bites disappeared was nothing short of miraculous. They’re incredibly satisfying, bursting with savory goodness, and just about the easiest thing you can whip up when you need a win. Think of them as the ultimate crowd-pleaser, from toddlers to grandparents. Seriously, if you’re looking for a go-to recipe that’s both incredibly tasty and surprisingly simple, you’ve landed in the right spot. These sausage bites are pure magic.
What are sausage bites?
So, what exactly *are* these magical little treats? At their heart, sausage bites are small, bite-sized morsels that combine the savory punch of sausage with a slightly sweet, tender dough. They’re not your typical breakfast sausage links, oh no. Think of them as a delightful little savory pastry, almost like a mini sausage roll but with a softer, more integrated casing. The name itself, “sausage bites,” kind of says it all – they’re perfect for popping into your mouth, one after another. It’s essentially a marriage of comfort food elements, bringing together a satisfying, meaty flavor with a comforting, bready texture. They’re versatile enough to be served at a fancy brunch or just plonked down on a plate for a casual afternoon snack. I love that they’re so adaptable; you can really play around with the sausage flavor you choose, which then completely changes the character of the bite. It’s a simple concept, really, but the execution is what makes them so special and so darn addictive.
Why you’ll love this recipe?
Honestly, there are so many reasons why I keep coming back to this recipe, and I just know you will too! First off, the *flavor* is out of this world. It’s that perfect balance of savory and slightly sweet that just makes your taste buds sing. The sausage lends this amazing depth, and the tender dough is like a warm hug. What I love most about these sausage bites is how incredibly *simple* they are to make. We’re talking minimal fuss, minimal ingredients, and maximum deliciousness. This is one of those recipes that’s a lifesaver on busy weeknights when the kids are clamoring for something before dinner, or when unexpected guests pop over. You can whip these up in no time, and they always get rave reviews. Plus, they’re surprisingly *cost-efficient*. You probably already have most of the ingredients in your pantry, and a pound of sausage doesn’t break the bank, making this an economical way to feed a crowd or have delicious snacks on hand. And let’s talk about *versatility*! These aren’t just for one meal. I serve them at breakfast, brunch, as a party appetizer, or even as a light dinner alongside a big salad. They’re a fantastic alternative to my Spicy Cheese Ball Bites. when I want something a little more substantial but still in bite-sized form. My kids ask for these all the time, especially the ones with a touch of maple in the glaze. It’s the kind of recipe that makes you feel like a kitchen superhero, even when you’re just throwing things together.
How do I make sausage biscuits?
Quick Overview
The beauty of these sausage bites lies in their straightforward approach. You’ll mix up a simple batter, fold in your seasoned sausage, and bake them until golden and puffed. It’s a no-knead situation, and the batter comes together in minutes. The key is to get the sausage evenly distributed so every bite is packed with flavor. They bake up beautifully, getting nice and slightly crispy on the edges while staying wonderfully tender inside. It’s the kind of recipe that makes your kitchen smell amazing and delivers on taste every single time. Trust me, you’ll be amazed at how something so simple can be so incredibly delicious and satisfying.
Ingredients
For the Main Batter:
You’ll need about 2 cups of all-purpose flour – sift it if you’re feeling fancy, but honestly, it’s not critical for this recipe. I always use unbleached all-purpose flour for a slightly better texture. Then, we’ve got 1/4 cup of granulated sugar, just enough to balance out the savory sausage. A teaspoon of baking powder is crucial for that lovely lift; don’t skip it, or your bites might be a bit too dense. And of course, half a teaspoon of salt to enhance all those flavors. I also like to add a pinch of Black Pepper right into the batter, which adds a subtle warmth.
For the Filling:
The star here is 1 pound of your favorite sausage. I usually go for a good quality breakfast sausage, either mild or with a little bit of a kick. You can also use Italian sausage (mild or hot!), chorizo, or even a plant-based sausage if you prefer. Just make sure it’s raw and crumbled. I like to pan-fry it just until it’s mostly cooked and drained of excess grease before adding it to the batter. Sometimes, I’ll even add a finely diced small onion or some chopped chives to the sausage while it’s cooking for an extra layer of flavor.
For the Glaze:
This is totally optional, but I *highly* recommend it! For a simple glaze, whisk together 1 cup of powdered sugar with 2-3 tablespoons of milk (or water, or even a little bit of melted butter for richness). You want it to be pourable but not too thin. Sometimes, I add a splash of Vanilla Extract, or a tiny bit of maple syrup for a sweet contrast to the savory sausage. If you’re feeling adventurous, a pinch of cayenne pepper in the glaze adds a fantastic sweet and spicy kick that is just divine.
Step-by-Step Instructions
Step 1: Preheat & Prep Pan
First things first, let’s get that oven preheated to 375 degrees Fahrenheit (about 190 degrees Celsius). While it’s heating up, I like to prep my baking sheet. You can line it with parchment paper for super easy cleanup, or just give it a light greasing. If you’re using parchment, make sure it’s smoothed out so your sausage bites bake evenly.
Step 2: Mix Dry Ingredients
In a large bowl, combine the all-purpose flour, granulated sugar, baking powder, salt, and that pinch of black pepper. Give it all a good whisk together. This step is simple, but it ensures that your leavening agent and seasoning are evenly distributed throughout the batter, which means your bites will rise beautifully and have consistent flavor.
Step 3: Mix Wet Ingredients
Now, in a separate, smaller bowl, whisk together your egg and milk. If you’re using any liquid flavoring like vanilla extract for the batter (I sometimes add a tiny splash here too!), whisk it in now. Make sure the egg is fully beaten and incorporated into the milk.
Step 4: Combine
Pour the wet ingredients into the bowl with the dry ingredients. Mix everything together with a spatula or a wooden spoon until just combined. Be careful not to overmix! A few lumps are perfectly fine. Overmixing can lead to tough sausage bites, and nobody wants that. We’re aiming for a shaggy dough, not a perfectly smooth batter.
Step 5: Prepare Filling
If you haven’t already, cook your sausage in a skillet over medium heat until it’s browned and cooked through. Drain off any excess grease really well – this is important! You don’t want greasy sausage bites. Crumble it into small pieces as it cooks. If you’re adding in onions or chives, sauté them with the sausage until softened. Let the cooked sausage cool slightly.
Step 6: Layer & Swirl
Now, gently fold the cooked and slightly cooled sausage crumbles into the batter. Mix just enough to distribute them evenly. Don’t overwork it! You want to see distinct pieces of sausage throughout the dough. The mixture will be thick and quite studded with sausage.
Step 7: Bake
Using two spoons or a small cookie scoop, drop rounded spoonfuls of the batter onto your prepared baking sheet, leaving about an inch between them as they will puff up. Aim for a size that’s about 1 to 1.5 inches in diameter. Bake for 15-20 minutes, or until they are golden brown on the edges and a toothpick inserted into the center comes out clean. Keep an eye on them, as oven temperatures can vary!
Step 8: Cool & Glaze
Once baked, let the sausage bites cool on the baking sheet for a few minutes before transferring them to a wire rack to cool further. If you’re adding the glaze, wait until they’re mostly cooled, but still a little warm. Drizzle the glaze over the top. I like to do a messy, swooping pattern – it looks more rustic and homemade that way! If you want a sharper contrast, let them cool completely before drizzling.
Step 9: Slice & Serve
These are best served warm or at room temperature. If they’re larger, you can easily slice them in half. Arrange them on a platter and watch them disappear! They’re perfect for dipping in a little extra mustard or a spicy aioli if you’re feeling fancy.
What to Serve It With
Oh, the possibilities are endless! These little sausage bites are like the chameleons of the appetizer world. For a delightful **Breakfast** treat, I love serving them alongside a steaming mug of coffee and perhaps some fresh fruit salad. They’re hearty enough to be a satisfying start to the day without being too heavy. For a more elegant **Brunch** spread, I’ll arrange them on a beautiful platter with some mini quiches and a sparkling mimosa. They add a lovely savory element that complements sweeter dishes perfectly. When we’re having them purely **As Dessert** (yes, you heard me right!), especially if I’ve added that maple glaze, I’ll serve them with a scoop of vanilla bean Ice Cream or a dollop of lightly sweetened whipped cream. It’s surprisingly decadent! And for those **Cozy Snacks** occasions, which happen more often than I’d like to admit, I just pile them high on a plate with a bowl of my favorite grainy mustard or a zesty ranch dip. My family absolutely loves having these as an after-school snack, and they’re always gone in a flash. It’s become a bit of a tradition for us to have them during movie nights too – they’re so much easier to manage than a full plate of anything else!
Top Tips for Perfecting Your Sausage Bites
I’ve made these sausage bites more times than I can count, and over the years, I’ve picked up a few tricks that I think really make a difference. For instance, when it comes to the sausage, make sure you drain off *all* the excess grease after cooking. Seriously, don’t skimp on this step! Too much grease can make the bites soggy and affect their texture. I learned that the hard way one time and nobody was happy! Regarding mixing, the key is to handle the dough gently. Overmixing develops the gluten too much, which can result in tough, dense bites. You want them to be tender and fluffy. Just mix until the ingredients are *barely* combined. For that swirl effect with the glaze, don’t aim for perfection. A freehand drizzle looks so much more appealing and homemade than something overly precise. I usually just zigzag it back and forth. If you want to get creative with ingredient swaps, try using different types of sausage – spicy Italian sausage gives them a fantastic kick, and a good quality chorizo adds a smoky depth. For a sweeter variation, you can add a tablespoon of dried cranberries or finely chopped apple to the sausage mixture. And when it comes to baking, ovens are tricky beasts! It’s always best to keep an eye on them during the last few minutes of baking. If yours tends to brown too quickly on the bottom, you can always move the rack to the upper-middle position. For the glaze, consistency is key. If it’s too thick, add a tiny bit more liquid; if it’s too thin, whisk in a little more powdered sugar. I’ve tested it with almond milk, and it actually made it even creamier! Another tip is to experiment with adding a sprinkle of cheese – like cheddar or Parmesan – into the batter along with the sausage. It adds another delightful savory dimension.
Storing and Reheating Tips
These delicious sausage bites are pretty forgiving when it comes to storage, which is another reason I love them! At **Room Temperature**, they’re best enjoyed within a day. Just keep them in an airtight container, and they’ll maintain their texture fairly well. After about 24 hours, they might start to lose a bit of their crispness. For **Refrigerator Storage**, they’ll keep beautifully for up to 3-4 days. I usually pop them into a good quality airtight container, and they stay surprisingly moist and flavorful. This is great for having snacks ready to go throughout the week. If you plan on freezing them, which is a fantastic option for having these on hand long-term, make sure they’ve cooled completely first. Wrap them tightly in plastic wrap, then transfer them to a freezer-safe bag or container. They should last for about 2-3 months in the freezer. When you’re ready to reheat, you can thaw them overnight in the refrigerator. For the best texture, I like to give them a quick warm-up in a moderate oven (around 300°F or 150°C) for about 5-10 minutes, or until heated through. Microwaving works too, but they can sometimes get a little chewier. For the **Glaze Timing Advice**, if you’re storing them with the glaze already on, they’re best eaten within a day or two, as the glaze can start to get a bit sticky and soft over time. If you want them to stay neat for longer storage, I recommend glazing them right before serving. It’s super easy to whip up a quick batch of glaze and drizzle it on when you’re ready to eat!
Frequently Asked Questions
Final Thoughts
So there you have it, my friends! These sausage bites are truly a gem. They’re proof that you don’t need complicated techniques or fancy ingredients to create something incredibly delicious and satisfying. I love them because they remind me that good food doesn’t have to be stressful. They’re the perfect little package of savory goodness that always manages to bring smiles to faces, big and small. They’re more than just a recipe; they’re a shortcut to happy moments, whether it’s a quick snack, a party appetizer, or a comforting addition to any meal. If you’re looking for a recipe that’s reliable, easy, and always a crowd-pleaser, I really hope you’ll give these sausage bites a try. You might even find yourself making them as often as I do! I can’t wait to hear what you think, so please drop a comment below and let me know how yours turn out! And if you’ve got any fun variations or serving ideas, share them – I’m always looking for new ways to enjoy these little treasures. Happy baking, everyone!

Sausage Bites
Ingredients
Main Ingredients
- 0.5 pound Italian sausage mild or hot
- 1 ounce cream cheese softened
- 0.25 cup shredded cheddar cheese
- 0.125 cup chopped fresh chives
- 1 teaspoon garlic powder
- 0.5 teaspoon onion powder
- 0.25 teaspoon black pepper
Instructions
Preparation Steps
- Preheat oven to 375°F (190°C). Line a baking sheet with parchment paper.
- In a large bowl, crumble the Italian sausage. Add the softened cream cheese, shredded cheddar cheese, chopped chives, garlic powder, onion powder, and black pepper. Mix well until all ingredients are thoroughly combined.
- Roll the mixture into small balls, about 1 inch in diameter.
- Place the sausage balls on the prepared baking sheet.
- Bake for 18-20 minutes, or until the sausage balls are cooked through and lightly browned.
- Serve hot.
Notes
Featured Comments
“Impressed! Clear steps and so flavorful results. Perfect for busy nights.”
“New favorite here — crowd-pleaser. crowd-pleaser was spot on.”
“Super easy and turned out amazing! My family asked for seconds. Saving this one.”
“This sweet treat was absolutely loved — the hearty really stands out. Thanks!”
“Made it tonight and wow — restaurant-level! Will definitely make Sausage Bites again.”
“Packed with flavor and so simple. Exactly what I wanted from Sausage Bites.”


