

There’s something about comfort food that just hits differently when it’s packed with flavor and a little bit of flair. I remember the first time I tried a birria grilled cheese — my mind went straight to childhood grilled cheese, but with this incredible, savory twist that completely transformed it. The smell alone is enough to make everyone in the house come rushing—it’s rich, cheesy, and just a little smoky, with hints of that tender, shredded birria beef simmered to perfection. Honestly, it’s become my go-to when I want something warm and satisfying, but also a little fancy for weekend brunch or a quick dinner. What I love most about this is how easy it is to turn a classic into something extraordinary with a few simple ingredients and a little love. Trust me, this is one of those recipes that disappear in minutes at my house—and I always do this when I want to impress guests or just treat my family to something special. After all, isn’t the best food the kind that makes you feel good, inside and out?
What is a Birria Grilled Cheese?
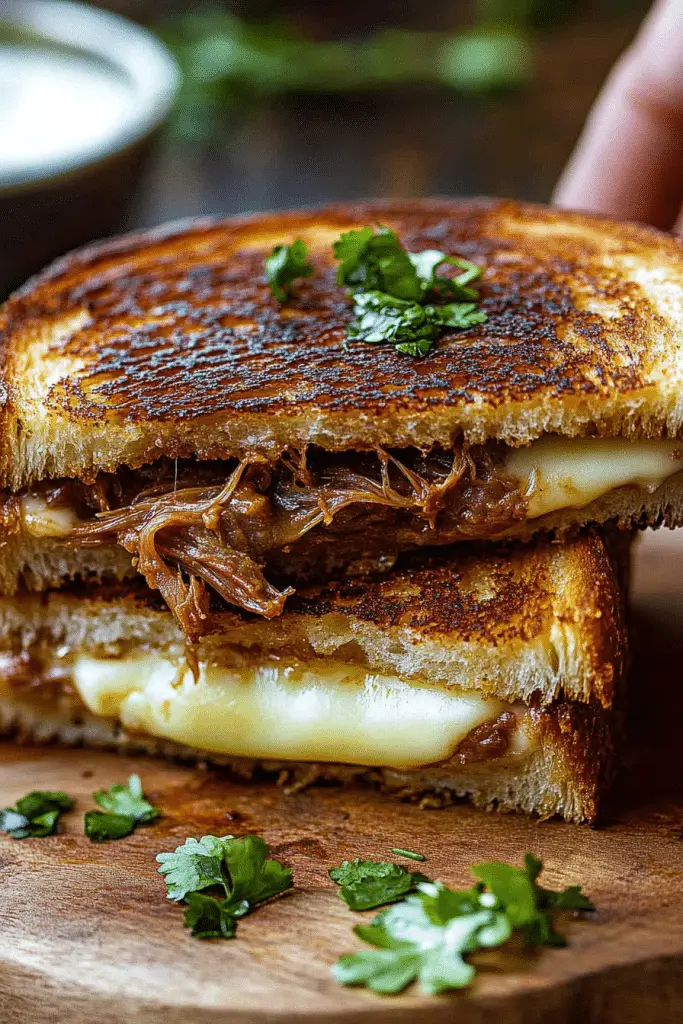
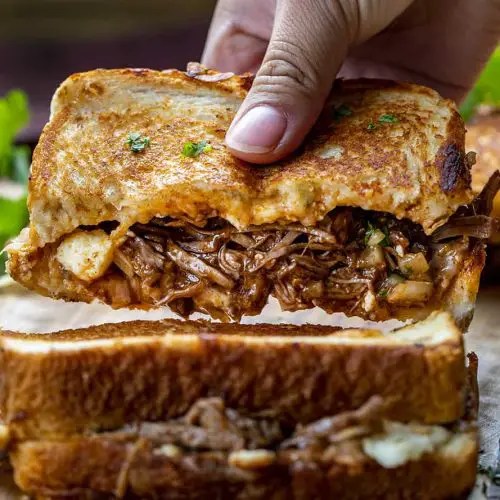
Think of birria grilled cheese as a soulful mashup of two beloved comfort foods: the gooey, crispy grilled cheese and the tender, flavorful Mexican birria. Birria is traditionally a stewed meat — usually beef or goat — cooked with a rich mix of chilies, garlic, and spices until it’s melt-in-your-mouth tender. It’s smoky, spicy, and deeply savory. The magic happens when you take that shredded, savory beef and sandwich it between slices of melty cheese, then fry it up until the bread is golden and crispy—think of it as a savory, cheesy hug. The beauty of this dish is how it combines hearty, rich flavors with that irresistible crunch of a perfect grilled cheese, with the added complexity of the spices and slow-cooked meat. It’s essentially comfort food with a major flavor punch, perfect for cozy nights, weekend brunches, or whenever you’re craving something just a little different but totally satisfying.
How do you make a Birria Grilled Cheese?
Quick Overview
This recipe comes together in just a few basic steps, and a lot of the magic is in using that tender, flavorful birria beef. Start by warming up the shredded meat, then assemble your sandwich—cheese, a good bread, and the savory birria inside. Grill it until golden on the outside and the cheese is luxuriously melty. Finish with a quick drizzle of salsa or a sprinkle of fresh herbs if you like. It’s an easy, crowd-pleasing dish that I Guarantee will become a weeknight staple in your house. What makes this special is how you can customize the fillings and toppings while still keeping it straightforward. Plus, it’s just as good leftover — if there’s any left!—so you’re making the most of every bit of that flavorful birria.
Ingredients
For the Main Filling (Birria):
- 2 cups shredded birria beef (store-bought or homemade)
- ¼ cup cooking juices or broth from the birria for added moisture
For the Sandwich:
- 8 slices good-quality sandwich bread or baguette slices
- 2 cups shredded cheese (cheddar, Monterey Jack, or a melty Mexican cheese blend)
- Butter or oil for grilling
- Optional: chopped cilantro, diced onions, sliced jalapeños for topping
For the Extra Touch (Optional):
- Fresh salsa or pico de gallo
- Avocado slices
- A squeeze of lime
- A drizzle of smoky chipotle sauce
Step-by-Step Instructions
Step 1: Preheat & Prep Pan
Start by heating your skillet over medium heat. I like to use a cast iron since it gives that perfect crispy crust, but a non-stick works just as well. Spread some butter or a light coating of oil—trust me, this step makes all the difference—then let it warm up while you prepare the sandwich. I always do this when my kids are wandering around the kitchen, asking when dinner will be ready!
Step 2: Mix Dry Ingredients
No dry ingredients here, really—unless you count the bread and cheese! But I do like to have everything ready beforehand, especially my shredded cheese and the warmed-up birria, so assembly goes smoothly.
Step 3: Mix Wet Ingredients
If you want an extra moist and flavorful sandwich, I usually splash just a little of the birria beef’s cooking juices on the inside of the bread — it keeps things juicy and takes the flavor up a notch. Just be careful not to add too much or it’ll get soggy.
Step 4: Combine
Layer a slice of bread, a generous handful of cheese, a scoop of warm birria, then more cheese on top — you want the cheese to bind everything together. Top with another slice of bread. Gently press down; I use a spatula to help get that perfect, even crust.
Step 5: Prepare Filling
Make sure your birria is shredded and seasoned nicely — I actually like to toss in a tiny squeeze of lime or some chopped cilantro right before stuffing it into the sandwich. This freshens things up and balances the richness.
Step 6: Layer & Swirl
Pour the filling into your bread, then swirl or layer it to make sure every bite has a mix of cheesy, meaty goodness. If I’m feeling fancy, I like to sprinkle a little chopped jalapeño or even a few pickled onions for some crunch and zing.
Step 7: Bake
Cook your sandwich in the skillet over medium heat, about 3-4 minutes per side, until the bread is golden and crispy and the cheese is melted. If your heat is too high, the bread burns before the cheese melts, so keep an eye on it. I cover the pan for a minute or two near the end to help the cheese melt thoroughly.
Step 8: Cool & Glaze
Once done, let it rest for a minute so the cheese sets a little — patience is everything here. If you wanna add a little extra flair, drizzle some smoky chipotle sauce or scatter fresh herbs while it’s still warm for that perfect presentation.
Step 9: Slice & Serve
Cut carefully using a serrated knife to get neat slices. Serve it hot with a side of salsa, sour cream, or just a simple green salad. I swear, this dish looks pretty and tastes even better — perfect for gloating a little at the dinner table.
What to Serve It With
This birria grilled cheese is pretty much perfect on its own, but I love pairing it with fresh sides or toppings depending on the occasion. For morning brunch, a quick toddle of fresh fruit and a splash of hot coffee feels just right. If I’m serving it for dinner, I usually whip up a simple side of Mexican street corn or a crisp green salad dressed with lime and cilantro. Sometimes, my kids ask for this as a snack with a dollop of sour cream or guacamole. It’s comfort in every bite, and I’ve found that a cold beer or a bubbly agua fresca makes it even better. The really fun part is how versatile it is — you can make it spicy with extra jalapeños or keep it mild for kids. Either way, it’s a total win and a great way to turn leftovers into something extraordinary.
Top Tips for Perfecting Your Birria Grilled Cheese
Making this dish perfect is all about those little details. First, when preparing the birria, always shred the meat finely—you want every morsel to be easy to layer and melt with the cheese. I tested this with different cheeses, and trust me—mixing a melty Monterey Jack with sharp cheddar gives a beautiful balance of stretch and flavor. Speaking of layers, don’t be shy with cheese! More cheese means gooier, more decadent bites. When assembling, I always spread a tiny bit of the beef’s cooking juice on the bread for extra flavor and moisture. This keeps the sandwich juicy without making it soggy.
As for the bread, I prefer a sturdy baguette or crusty sourdough—it holds up well to the juicy filling. I learned the hard way that soft bread can turn soggy quickly, so to get that crispy, golden crust, I keep the heat manageable and flip carefully. Trust me on this one—low and slow is the way to go.
If you want to mix things up, you can test different cheeses like mozzarella or even vegan cheese for a dairy-free version. Just keep in mind, the melting quality varies. I’ve also experimented with adding a touch of cumin or smoked paprika to the cheese mix—it adds a little smoky depth that pairs beautifully with the ancho or guajillo chilies in the birria. Do I have tips for perfecting it further? Absolutely. I’ve found that reheating in a hot skillet after storing makes the leftovers crispy again, which keeps every bite exciting. And always, always taste as you go—balancing the spices and acidity is key to making this dish unforgettable. It’s a forgiving recipe, but the first few times I made it, I learned that patience and a gentle hand truly make all the difference.
Storing and Reheating Tips
This one’s a winner for make-ahead meals. If you have leftovers, let the sandwich cool completely before wrapping tightly in foil or stored in an airtight container. Keep in mind: the bread will soften a bit after refrigeration, but the flavors stay amazingly vibrant. I usually eat mine within 2-3 days for the best texture. When you’re ready to reheat, skip the microwave if you can—cast iron or skillet is better to revive that crispy crust. Just pop it in over medium heat for 3-5 minutes, pressing down gently. If you want it to be crispy inside again, you can even cover the pan with a lid for the first couple of minutes to help melt that cheese thoroughly. As for the glaze or toppings, I recommend adding those fresh on serving, so the flavor and texture stay bright and appealing. If you’ve frozen it, just let it thaw overnight in the fridge, then reheat—trust me, it’s almost as good as fresh. The key is not to overdo it with the reheating time or it might dry out a little, but a quick reheat in a hot pan usually solves that.
Frequently Asked Questions
Final Thoughts
If you’re anything like me, you’re always hunting for a dish that’s hearty, easy, and memorable. This birria grilled cheese checks all those boxes—and then some. It’s a recipe I’ve made countless times, tweaking here and there, and every single time it gets rave reviews at my dinner table. The combination of smoky, tender meat with melted cheese, crispy bread, and a little freshness from herbs or salsa is just unbeatable. It’s perfect for those nights when you want a little bit of everything—rich, crispy, spicy, cheesy—all wrapped up in one irresistible sandwich. Plus, it’s flexible, forgiving, and downright delicious. I can’t wait for you to try it and hear how it turns out. And hey, if you experiment with toppings or fillings, tell me about it! Happy baking (and melting), my friend!
birria grilled cheese
Ingredients
Main Ingredients
- 3 pounds shredded beef
- 8 slices Texas toast
- 1 cup cheddar cheese
- 0.5 cup mozzarella cheese
- 1 medium white onion finely diced
- 2 tablespoons olive oil
- 1 tablespoon beef bouillon powder
- 1 can (28 ounces) enchilada sauce
- 0.5 cup unsalted butter
- 2 teaspoons chopped cilantro
Instructions
Preparation Steps
- Preheat a large skillet over medium-high heat and add olive oil.
- Add shredded beef to the skillet and cook until heated through, about 5 minutes.
- In a small saucepan, melt butter and add enchilada sauce and bouillon powder. Simmer for 5 minutes.
- Spread butter mixture on one side of each slice of bread.
- Assemble sandwiches with shredded beef, diced onions, cheeses, and cilantro between slices of bread, buttered side out.
- Cook sandwiches in the skillet over medium heat until golden brown, about 5-7 minutes per side.
- Serve hot with extra enchilada sauce for dipping if desired.
Notes
Featured Comments
“This recipe sounds amazing—comfort food with bold flavors? Count me in! Can’t wait to try it this weekend.”
“This sounds amazing! I love how comfort food can feel so rich and satisfying. Have you tried adding any special cheese to yours?”
“This sounds delicious! I love how comfort food can be both cozy and exciting—birria adds such rich, bold flavors to a grilled cheese.”
“Love this twist on a classic grilled cheese—birria adds such rich, bold flavor! Definitely making this for dinner tonight.”
“Impressed! Clear steps and perfect for busy nights results. Perfect for busy nights.”
“New favorite here — crowd-pleaser. crowd-pleaser was spot on.”


Love this twist on a classic grilled cheese—birria adds such rich, bold flavor! Definitely making this for dinner tonight.
This sounds delicious! I love how comfort food can be both cozy and exciting—birria adds such rich, bold flavors to a grilled cheese.
This sounds amazing! I love how comfort food can feel so rich and satisfying. Have you tried adding any special cheese to yours?
This recipe sounds amazing—comfort food with bold flavors? Count me in! Can’t wait to try it this weekend.