

You know those days? The ones where the weather outside is just *begging* for something warm, something rich, something that feels like a hug in a bowl? That’s exactly when my mind drifts to my absolute favorite seafood bisque. It’s not just soup; it’s an experience. I remember the first time I successfully made a truly incredible seafood bisque from scratch. I was convinced it was a restaurant-only kind of magic, but nope! Turns out, with a little patience and a few key secrets, you can create this luxurious dish right in your own kitchen. This recipe has become a lifesaver on chilly evenings and a guaranteed hit when we have guests. It’s so much more satisfying than just a plain old tomato soup, and way more approachable than you might think!

What is a seafood bisque?
So, what exactly is this magical dish we call seafood bisque? Think of it as a super-velvety, intensely flavorful soup that’s dedicated to showcasing the wonderful tastes of the sea. Unlike a chowder, which often has chunks of seafood and potatoes, a bisque is typically pureed to create that signature smooth, luxurious texture. The “bisque” name actually comes from the French term “bisque,” referring to a double-shell cooking method historically used for lobsters, where they’d be simmered and then strained. But don’t worry, you don’t need any fancy French equipment for this! My version is all about capturing that deep, rich seafood essence in an approachable, home-cook-friendly way. It’s essentially the sophisticated cousin of your favorite creamy soups, but with all the delicious seafood goodness you could ask for.
How do you make a seafood bisque?
Quick Overview
Making this creamy seafood bisque is all about building layers of flavor. We’ll start by sautéing our aromatics until they’re beautifully softened and fragrant, then add our seafood shells (if using) for extra depth. After a brief simmer, we’ll strain everything to get a concentrated broth. Next, we’ll blend in some tomato paste for color and tang, a touch of flour to thicken, and then our luscious dairy. Finally, we stir in the cooked seafood just to warm through. It sounds like a few steps, but each one is straightforward and contributes to that incredible end result. It’s really more about patience than complex technique!
Ingredients
For the base and flavor:
Here’s what you’ll need to get started. I always try to get the freshest ingredients possible, but don’t be afraid to use good quality frozen seafood if that’s what’s available or within budget. It works wonders!
* 2 tablespoons unsalted butter: This is for sautéing, and butter just adds that extra richness, doesn’t it?
* 1 large onion, finely chopped: Yellow or sweet onions work best here.
* 2 carrots, peeled and finely chopped: Adds a subtle sweetness and lovely color.
* 2 celery stalks, finely chopped: The holy trinity of soup bases!
* 2 cloves garlic, minced: Because what soup doesn’t need garlic?
* 1/2 cup dry white wine (like Sauvignon Blanc or Pinot Grigio): This is optional, but it really adds a wonderful layer of complexity. If you prefer not to use alcohol, just skip it and maybe add an extra splash of lemon juice at the end.
* 4 cups fish stock or seafood stock: You can buy this, or if you’re feeling ambitious and have seafood shells (like from shrimp or lobster), you can make your own! It makes a HUGE difference.
* 1 (14.5 ounce) can diced tomatoes, undrained: For color and a little acidity.
* 1/4 cup tomato paste: This is key for that deep, reddish-orange hue and concentrated tomato flavor.
* 1 bay leaf: Just one, to impart a subtle herbal note.
* 1/2 teaspoon dried thyme: Another classic herb pairing with seafood.
* Salt and freshly ground Black Pepper, to taste: You’ll adjust this at the end, but start with a little.
* 1 1/2 cups heavy cream: This is what makes it truly decadent and velvety. You can lighten it up a bit if you like, but I find full-fat is best for the ultimate bisque experience.
* 1 pound mixed seafood, cooked and chopped (shrimp, scallops, crab meat, lobster meat are all fantastic): I love a mix! Sometimes I use just shrimp and scallops, other times I go all out with crab and lobster. Make sure it’s cooked through but not overcooked, as it will warm up more in the soup.
For Finishing Touches (Optional but Recommended):
These little extras can really elevate your bisque.
* Fresh parsley, chopped, for garnish: Adds a pop of color and freshness.
* A swirl of extra cream or a dollop of crème fraîche: For extra elegance.

Step-by-Step Instructions
Step 1: Sauté the Aromatics
Melt the butter in a large pot or Dutch oven over medium heat. Add the chopped onion, carrots, and celery. Cook, stirring occasionally, until the vegetables are softened and translucent, about 8-10 minutes. Don’t rush this step; letting the vegetables sweat like this really brings out their natural sweetness and builds a great flavor base for our bisque.
Step 2: Add Garlic and Deglaze
Stir in the minced garlic and cook for another minute until fragrant. If you’re using white wine, pour it in now and scrape up any browned bits from the bottom of the pot. Let it simmer for 2-3 minutes, allowing the alcohol to evaporate. This deglazing step is super important for capturing all those delicious little flavor molecules.
Step 3: Simmer the Base
Pour in the fish stock. Add the diced tomatoes (undrained), tomato paste, bay leaf, and dried thyme. Stir everything together. Bring the mixture to a boil, then reduce the heat to low, cover, and let it simmer gently for at least 20 minutes. This allows all those flavors to meld together beautifully.
Step 4: Strain for Smoothness
Carefully strain the soup mixture through a fine-mesh sieve set over a clean pot or bowl. Discard the solids (vegetables and bay leaf). You want a nice, smooth, flavorful liquid. I usually give the solids a good press with the back of a spoon to extract as much liquid and flavor as possible.
Step 5: Blend in the Creaminess
Return the strained liquid to the pot. Stir in the heavy cream. Season with salt and pepper to taste. Now, this is where you can really control the consistency. If you want it thicker, you can whisk together 1 tablespoon of flour with 2 tablespoons of water to make a slurry, then stir it into the soup and simmer for a few more minutes until it thickens. But usually, the cream and the tomato paste are enough!
Step 6: Add Cooked Seafood
Gently stir in your cooked and chopped mixed seafood. Let the bisque simmer gently over low heat for about 5 minutes, just until the seafood is heated through. Be careful not to boil it, as this can make the seafood tough.
Step 7: Taste and Adjust
This is your moment to shine! Taste the bisque and adjust the seasonings with salt and pepper as needed. You might be surprised how much salt it needs to really bring out the seafood flavor. A tiny squeeze of lemon juice can also brighten things up if you feel it needs it.
Step 8: Serve and Enjoy
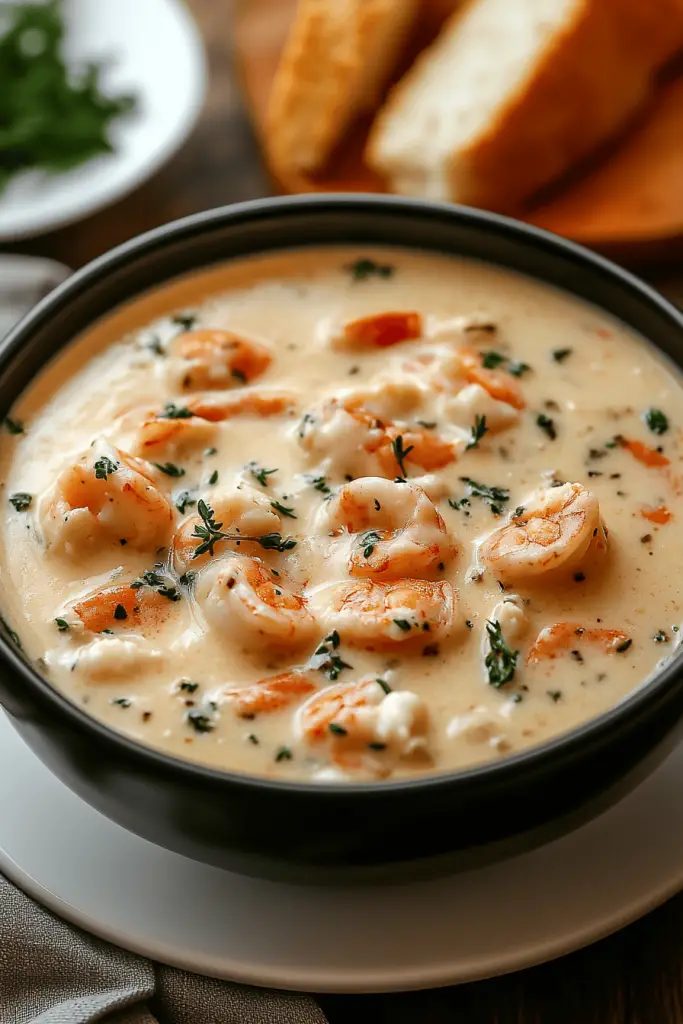
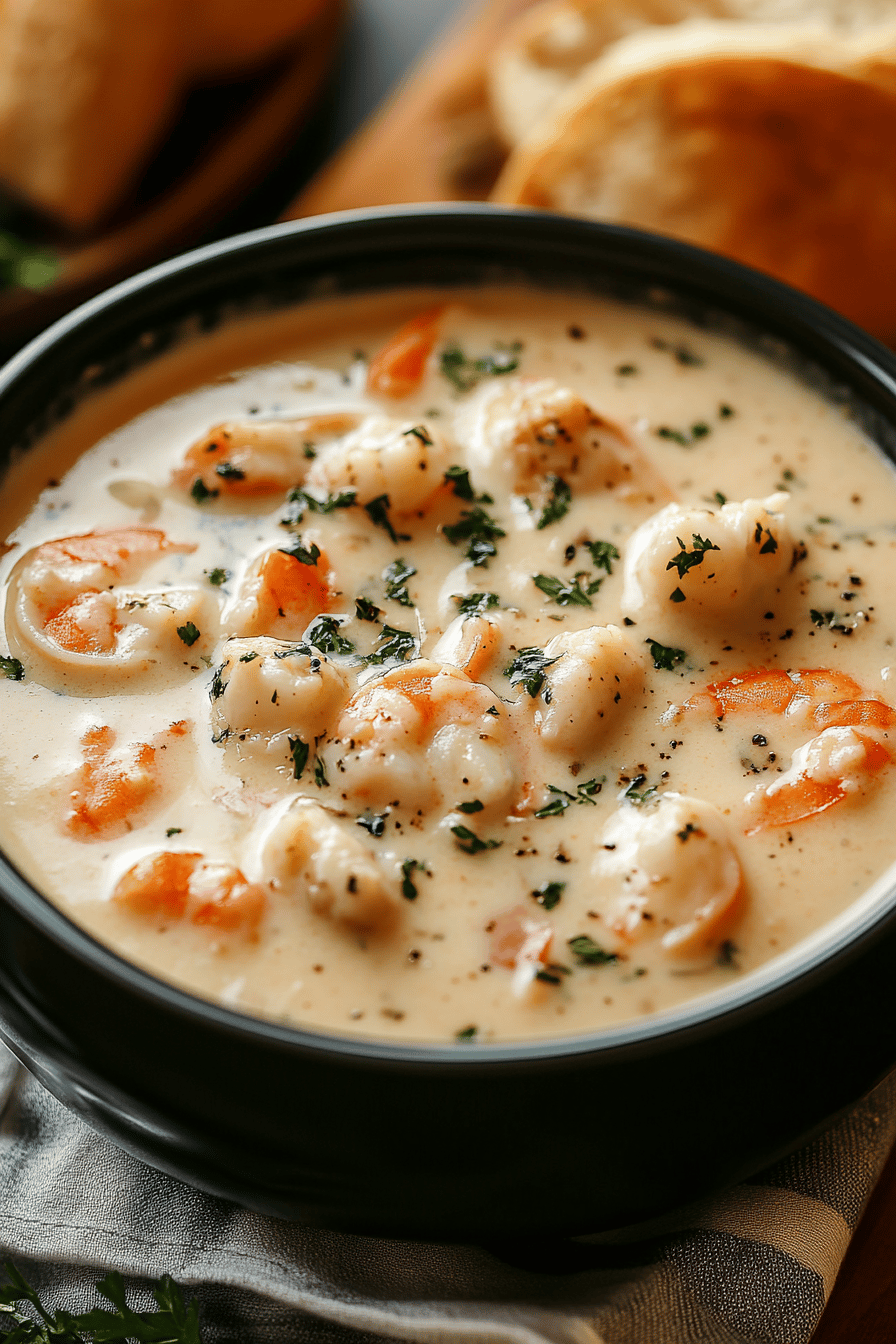
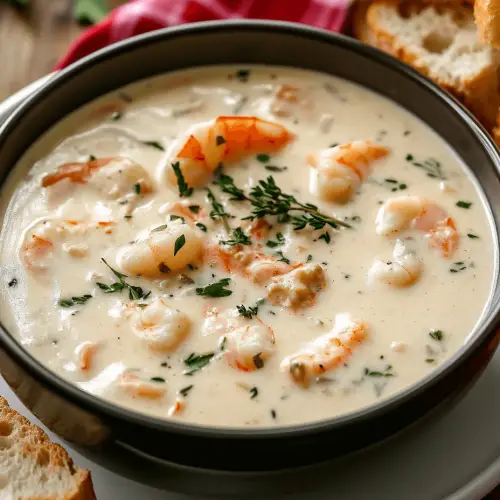
Ladle the hot seafood bisque into bowls. Garnish with fresh chopped parsley and a swirl of extra cream or a dollop of crème fraîche, if desired. Serve immediately and get ready for the compliments!
What to Serve It With
This seafood bisque is pretty much a star on its own, but if you’re looking to round out a meal or create a specific dining experience, I have some favorite pairings. For a cozy BREAKFAST or BRUNCH, I love serving a smaller portion alongside some crusty, buttered sourdough toast. It feels so indulgent and special to start the day that way! Or, pair it with a light, refreshing salad with a vinaigrette dressing. For a more FORMAL DINNER, this bisque is an absolute showstopper as an appetizer. Think of serving it in elegant small bowls before a nice piece of fish or steak. It sets a sophisticated tone without being too filling. And for those days when you just want a COMFORTING SNACK that feels like a treat, a generous bowl of this bisque with some oyster crackers or even just a spoon is pure bliss. I’ve even found that my kids, who can be picky eaters, will happily devour a bowl of this, especially if I serve it with some mini grilled cheese sandwiches for dipping – talk about a win-win!
Top Tips for Perfecting Your Seafood Bisque
Over the years, I’ve picked up a few tricks that I think really make this seafood bisque sing. Here are my tried-and-true tips to help you achieve that perfect, restaurant-worthy bowl every time.
Seafood Selection: Don’t be afraid of frozen! High-quality frozen shrimp, scallops, and even crab meat can be just as delicious as fresh, and often more budget-friendly. Make sure to thaw them properly before cooking. If you’re buying whole shrimp, save the shells! They make an incredible base for homemade fish stock, adding an extra layer of sea flavor that’s hard to beat.
Don’t Skimp on the Sauté: The initial sauté of the onions, carrots, and celery is crucial. You want them to become tender and slightly sweet, not just quickly cooked. This process develops a deep flavor foundation for the entire bisque. Be patient and let them soften properly.
The Magic of Stock: While store-bought fish stock is convenient, making your own from seafood shells and vegetable scraps is a game-changer. It adds an unparalleled depth of flavor. If you do use store-bought, opt for a good quality one – avoid anything that tastes too artificial.
Cream Control: I prefer heavy cream because it creates the richest, silkiest texture. However, if you’re looking to lighten it up slightly, you can substitute half-and-half for some of the heavy cream. Just know it might make the bisque a little less thick and luxurious. I tested this with almond milk once to see if it would work for a dairy-free option, and while it was okay, it definitely lost that signature creamy richness. So, full-fat dairy is usually my recommendation here!
The Seafood Timing: This is a big one! Add your *cooked* seafood right at the end, just to warm through. Overcooking seafood in the soup will make it tough and rubbery. The residual heat of the bisque is usually enough to heat it perfectly in just a few minutes.
Seasoning is Key: Seafood can be delicate, so proper seasoning is vital. Don’t be shy with the salt and pepper. Taste and adjust multiple times. A tiny pinch of cayenne pepper can also add a subtle warmth without making it spicy, which I sometimes do when I want to add a little something extra.
A Touch of Acidity: Sometimes, a bisque can taste a little flat if it lacks acidity. A small squeeze of fresh lemon juice right before serving can really brighten up all the flavors and make the seafood taste even more vibrant. It’s like a little flavor boost!
Storing and Reheating Tips
One of the best things about this seafood bisque is that it reheats beautifully, making it perfect for leftovers or for making ahead of time. Here’s how I store and reheat it to keep it tasting as good as the day it was made.
Refrigerator Storage: Once completely cooled, store the bisque in an airtight container in the refrigerator for up to 3-4 days. I find that the flavors actually meld even more overnight, making leftovers sometimes even better than the original! Just make sure it’s well-covered to prevent any odors from the fridge getting into it.
Freezer Instructions: This bisque freezes exceptionally well, which is a lifesaver for busy weeks. Let it cool completely, then transfer it to freezer-safe containers or heavy-duty freezer bags. Leave a little headspace, as liquids expand when frozen. It should keep well in the freezer for up to 2-3 months. When you’re ready to use it, thaw it overnight in the refrigerator.
Reheating Gently: When reheating from the fridge or after thawing from frozen, do it gently. The best method is over low heat on the stovetop, stirring occasionally, until it’s heated through. Avoid boiling it vigorously, as this can cause the cream to separate or the seafood to toughen. If it seems a little too thick after reheating, you can stir in a splash of milk, cream, or even water to reach your desired consistency.
Glaze Timing Advice: If you’re planning on storing or freezing the bisque, I recommend adding the cooked seafood just before serving after reheating. This ensures the seafood stays tender and perfectly cooked. For immediate enjoyment, adding it during the final warming stage is fine!
Frequently Asked Questions
Final Thoughts
There you have it – my cherished recipe for seafood bisque! I truly hope you give this a try. It’s one of those dishes that feels incredibly special but is surprisingly achievable for any home cook. It’s perfect for when you want to impress, or just when you need a warm, comforting meal that feels like a luxury. It’s the kind of recipe that makes you feel like a culinary wizard in your own kitchen. If you enjoy diving into delicious seafood dishes, you might also love my Creamy Shrimp Pasta or my Easy Baked Salmon – they’re family favorites too! I can’t wait to hear what you think of this bisque, and I’m always eager to see how you adapt it. Don’t hesitate to share your thoughts, questions, or your own little tweaks in the comments below. Happy cooking!
Seafood Bisque
Ingredients
Main Ingredients
- 1 pound Shrimp peeled and deveined, shells reserved
- 0.5 pound Crab meat lump crab meat
- 2 tablespoon Butter
- 1 cup Onion chopped
- 0.5 cup Celery chopped
- 0.25 cup Carrot chopped
- 2 cloves Garlic minced
- 0.25 cup All-purpose flour
- 4 cup Fish stock
- 2 cup Heavy cream
- 0.5 teaspoon Paprika
- 0.25 teaspoon Cayenne pepper optional
- Salt to taste
- Black pepper to taste
- 2 tablespoon Fresh parsley chopped, for garnish
Instructions
Preparation Steps
- In a large pot or Dutch oven, melt the butter over medium heat. Add the reserved shrimp shells and cook, stirring occasionally, until they turn pink and fragrant, about 3-5 minutes. This will infuse the base with seafood flavor.
- Add the chopped onion, celery, and carrot to the pot. Cook, stirring occasionally, until the vegetables have softened, about 5-7 minutes. Stir in the minced garlic and cook for another minute until fragrant.
- Sprinkle the flour over the vegetables and shrimp shells. Cook, stirring constantly, for 1-2 minutes to create a roux. This will help thicken the bisque.
- Gradually whisk in the fish stock, ensuring there are no lumps. Bring the mixture to a simmer, then reduce the heat to low, cover, and let it simmer for 20 minutes, allowing the flavors to meld.
- Carefully remove and discard the shrimp shells from the pot. For a smoother bisque, you can use an immersion blender to blend the soup until smooth. Alternatively, carefully transfer the soup to a regular blender in batches and blend until smooth, then return it to the pot.
- Stir in the heavy cream, paprika, and cayenne pepper (if using). Bring the bisque back to a gentle simmer, but do not boil.
- Add the shrimp and crab meat to the simmering bisque. Cook for 5-7 minutes, or until the shrimp are pink and cooked through and the crab meat is heated. Be careful not to overcook the seafood.
- Season the bisque with salt and black pepper to taste. Ladle the hot bisque into bowls. Garnish with fresh chopped parsley before serving.
Notes
Featured Comments
“Impressed! Clear steps and spot on results. Perfect for busy nights.”
“New favorite here — perfect for busy nights. crowd-pleaser was spot on.”
“Super easy and turned out amazing! My family asked for seconds. Saving this one.”
“This sweet treat was absolutely loved — the zingy really stands out. Thanks!”
“Made it tonight and wow — comforting! Will definitely make seafood bisque again.”
“Packed with flavor and so simple. Exactly what I wanted from seafood bisque.”


