


There’s something about the smell of taco seasoning that instantly brings me back to Sunday evenings with my family. I remember my mom measuring out those tiny jars from the store, blending spices with such care, and us kids waiting eagerly at the kitchen table. Today, I’ll share my favorite homemade taco seasoning recipe—one that’s so much better than any store-bought mix. Honestly, once you try making it yourself, you’ll wonder why you ever bought the prepackaged stuff. It’s incredibly versatile, so you can use it on everything from beef tacos to chicken, veggies, or even roasted potatoes. Plus, it’s surprisingly simple — just a few pantry staples, and you’re all set for a flavor-packed meal that’s perfect for busy weeknights or lazy weekend dinners. Trust me, your taste buds will thank you. My kids ask for these tacos all the time, and it’s become one of our little family traditions. I always do this when I want to make dinner feel special but without spending hours in the kitchen. So, grab your spices! Let’s make magic happen with this simple, homemade taco seasoning.
What is Taco Seasoning?
Think of taco seasoning as the flavor powerhouse behind all those vibrant, mouthwatering tacos you love. It’s essentially a blend of spices that creates that signature savory, slightly smoky, and sometimes spicy flavor you get in your favorite taco shell. The name “taco seasoning” comes from Mexico, where native herbs and spices have been used for centuries to add depth and complexity to dishes. But here’s the thing — it’s not just for tacos! You can use this seasoning on a wide variety of dishes, from grilled meats and stir-fries to roasted vegetables and even popcorn. It’s a quick and effective way to elevate ordinary ingredients into something exciting and flavorful. And the best part? Making your own taco seasoning at home means you control the ingredients—no added preservatives or artificial flavors. Plus, you can customize the heat level to suit your taste, from mild to “fire in my mouth.” It’s truly a game-changer in the kitchen, especially when you’re craving that classic taco flavor but want to keep things fresh and natural.
How do I make Taco Seasoning?
Quick Overview
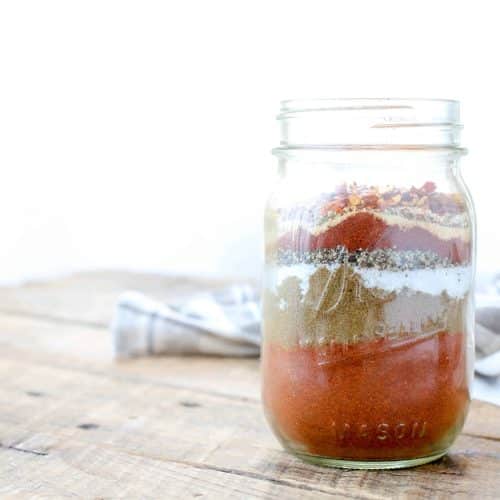
Making your own taco seasoning is so simple, you might wonder why you ever bought those tiny spice jars in the first place. It’s just a matter of mixing a handful of spices—think cumin, chili powder, paprika, garlic, and onion powders—then giving everything a good stir. Once you’ve got your spice blend, it’s ready to be sprinkled on meat, veggies, or whatever else you’re craving. The beauty of this recipe is that you can scale it up or down, store it in an airtight jar, and have flavorful seasoning on hand whenever inspiration strikes. You’ll love how much better freshly blended spices taste—plus, you control the salt and spice level. Trust me, once you try this, store-bought seasoning will feel so unnecessary. It’s the kind of shortcut that actually enhances your entire cooking experience.
Ingredients
For the Main Spice Blend:
- 1 tablespoon chili powder (the smoky kind makes a difference!)
- 1 teaspoon ground cumin (the star flavor for that warm, earthy note)
- 1 teaspoon paprika (smoked if you have it, adds depth)
- ½ teaspoon garlic powder (for that savory punch)
- ½ teaspoon onion powder (sweetens the mix just right)
- ½ teaspoon dried oregano (a little herby touch)
- ½ teaspoon crushed red pepper flakes (adjust depending on your heat preference)
- ½ teaspoon salt (more or less to taste)
- ¼ teaspoon black pepper
Optional Add-ins: A pinch of cinnamon or a dash of cayenne pepper if you want extra heat or complexity.
Note:
This batch makes enough for about 4-6 servings of tacos. Feel free to double or halve it depending on your needs. Store leftovers in an airtight container for up to 6 months—though, honestly, I doubt it’ll last that long!
Step-by-Step Instructions
Step 1: Preheat & Prep Pan
Personally, I like giving my spices a quick toast in a dry skillet over medium heat before mixing them—this really boosts their aroma. Just toss the spices into a cold pan, turn the heat on, and stir constantly until you smell that warm, roasted scent, about 1-2 minutes. Be careful not to burn it! Once fragrant, remove from heat and let cool slightly. This little step makes a big difference in flavor intensity.
Step 2: Mix Dry Ingredients
In a small bowl, combine all your spices, whisking them together until evenly distributed. The goal is a uniform mixture that’s full of vibrant color and inviting aroma. I always do this in a separate bowl because it’s easier to see if everything is well combined.
Step 3: Mix Wet Ingredients (if using for a marinade or sauce)
For most tacos, you’ll just sprinkle this seasoning directly onto your cooked or raw ingredients, but if you want to turn it into a marinade or sauce, mix a teaspoon or two with olive oil or lime juice. I’ve tested this with a splash of apple cider vinegar too—it adds a lovely tang that cuts through the richness.
Step 4: Combine
Once your spice blend is ready, sprinkle it over your cooked meat, beans, or veggies. Toss to coat evenly. Because I prefer my seasoning to be a bit more controlled, I start with a teaspoon per pound of meat and adjust. Remember, you can always add more, but you can’t take it out!
Step 5: Prepare Filling
If you’re making filling, cook your protein or veggies until cooked through, then sprinkle the seasoning and stir. Let it simmer for a few minutes so the flavors meld beautifully. Feel free to add diced tomatoes, peppers, or even a dash of hot sauce if you like it spicy.
Step 6: Layer & Swirl
In my favorite tacos, I love swirling some salsa, shredded cheese, and a squeeze of lime into the seasoned filling. It’s all about flavor layering. To get a marbled look in something like a layered casserole or even a muffin tin for mini tacos, I swirl the seasoning into the filling for a textured, pretty appearance.
Step 7: Bake
If you prefer baked taco fillings (think taco casseroles), preheat your oven to 375°F (190°C), layer your ingredients, sprinkle with seasoning, and bake uncovered for about 20-25 minutes. Use a toothpick to check doneness, especially if you’re using meat or hearty vegetables. The smell alone during baking is heavenly!
Step 8: Cool & Glaze
For tacos or baked dishes, let it cool for a few minutes before serving. If you’re adding a glaze or finishing touch, do it now. I love drizzling a little chipotle-infused honey or a squeeze of lime on top — it elevates the flavor beautifully. Think of it like finishing a fancy dish — those small touches make all the difference.
Step 9: Slice & Serve
Serve your tacos with warm tortillas, fresh cilantro, and perhaps a dollop of sour cream or guacamole. I usually set up a little taco bar—my kids love helping assemble theirs! For presentation, I like slicing into layered dishes with a sharp knife to reveal those beautiful marbled layers of seasoning. Trust me, everything looks as good as it tastes.
What to Serve It With
There’s no wrong way to enjoy your homemade tacos. I tend to keep things simple with some crunchy lettuce, diced onion, and shredded cheese on the side. For a breakfast twist, scrambled eggs with a dash of taco seasoning make a killer start to the day. During weekend brunch, I love serving mini tacos on a pretty platter, paired with fresh fruit and fizzy agua fresca. For dessert, I’ve experimented with cinnamon and a sprinkle of sugar inside tortillas, making sweet little tacos—or even cinnamon-spiced ice cream sandwiches for a fun treat. And, of course, tacos are perfect for cozy nights in—grab a cold drink, sit back, and enjoy the crunchy, flavorful bites. My family always loves when I surprise them with a build-your-own taco night—everyone picks their favorite toppings, and we make a mess in the best way. This seasoning makes every bite taste like it’s straight from a Mexican street vendor, and that nostalgic flavor is what keeps me coming back to this recipe again and again.
Top Tips for Perfecting Your Taco Seasoning
Over the years, I’ve picked up a few tricks to make this seasoning even better. First, toast your spices before mixing — that’s a game-changer in flavor. I learned this after countless batches that lacked depth. When mixing, be gentle—overmixing can make your spices bitter or turn your filling gummy. I always taste before using, adjusting the salt and heat—don’t be shy to add a pinch more chili flakes if you love it spicy. For a smokier flavor, I like swapping regular paprika with smoked paprika—it really elevates the dish and adds that authentic touch. If I don’t have cumin, I’ve tried ground coriander or even a little chipotle powder, with great results. Baked or grilled meats benefit from a dry rub with the seasoning, but be sure to let it sit for at least 15 minutes to absorb all those flavors. For the glaze or finishing touch, a squeeze of lime or drizzling of flavored oils can bring everything together. A trick I swear by is adding a tiny pinch of cinnamon to the seasoning—sounds odd, but it adds a subtle sweetness that balances out the spice and savory notes. Honestly, keep experimenting—foolproof flavor often comes from personal touches and intuition. Don’t be afraid to tweak the ratios to suit your family’s taste buds. Just remember: good flavor starts with good spices, so invest in quality ingredients when you can.
Storing and Reheating Tips
This seasoning blend keeps beautifully in an airtight jar in your spice cabinet. I always label mine with the date—I’ve kept some for up to six months, and it still tastes vibrant. If you’ve cooked a big batch of seasoned meat or veggies, store leftovers in a sealed container in the fridge for up to 3 days. Reheat in the microwave or in a skillet over medium heat, adding a splash of water if it’s dried out. If you want to keep the seasoning fresh for future use, just keep it dry and away from direct sunlight. Freezing isn’t really necessary for the spice blend, but cooked seasoned meats can be frozen for up to 3 months—again, just defrost and reheat carefully. For the best flavor, I avoid adding extra salt or spices to leftovers—better to adjust when reheating. If you’re using a glaze or topping, consider adding that just before serving so it doesn’t get soggy or lose its shine. Overall, proper storage and gentle reheating can help you enjoy those bold, fresh flavors long after you’ve cooked them up.
Frequently Asked Questions
Final Thoughts
Honestly, once you start making your own taco seasoning, it’s hard to go back. It’s just so much more fragrant, customizable, and fun to whip up in minutes. I love how it elevates even the simplest ingredients into something truly memorable. Plus, it’s comforting to know exactly what’s in your spice blend—no mysterious additives or excessive salt. I encourage you to experiment with your favorite spices or heat levels—this is your kitchen, after all! Whether you’re making tacos, seasoning grilled chicken, or jazzing up roasted vegetables, this homemade taco seasoning will become your new best friend. It’s perfect for quick weeknight dinners or a relaxed weekend feast with family and friends. I hope you find as much joy in making this as I do. Happy cooking, and I can’t wait to hear how yours turns out! Don’t forget to leave a comment with your favorite tweaks or share your creations—I love seeing them stumble out of your kitchens.
taco seasoning
Ingredients
Main Ingredients
- 4 tablespoons chili powder
- 1 teaspoon red pepper flakes
- 0.25 teaspoon cayenne pepper
- 1 teaspoon oregano
- 2 teaspoons smoked paprika
- 2 teaspoons ground cumin
- 1 teaspoon garlic powder
- 1 teaspoon onion powder
- 1 tablespoon kosher salt
- 1 tablespoon freshly ground black pepper
Instructions
Preparation Steps
- In a small bowl, stir together all of the spices. Store the seasoning in an airtight container. Keep in a cool, dry place.
Notes
Featured Comments
“Love this! Taco seasoning always feels like a little taste of home — simple, comforting, and full of memories.”
“Impressed! Clear steps and perfect for busy nights results. Perfect for busy nights.”
“New favorite here — restaurant-level. crowd-pleaser was spot on.”
“Super easy and turned out amazing! My family asked for seconds. Saving this one.”
“This sweet treat was absolutely loved — the fresh really stands out. Thanks!”
“Made it tonight and wow — restaurant-level! Will definitely make Spice Up Your Tacos Simply again.”


Love this! Taco seasoning always feels like a little taste of home — simple, comforting, and full of memories.