

I’ll never forget the first time I whipped up a steak pepper stir fry after a long day. I came home starving, the clock ticking, and somehow the kitchen smelled like every good night at grandma’s table—the sizzle of steak, the brightness of bell peppers, a kiss of garlic and soy that made the fridge feel exciting again. It’s a dish that proves incredible flavor doesn’t have to take all afternoon. Think of it as the cooler, faster cousin of beef and broccoli, but with a little more color, a little more bite, and a glossy, comforting glaze that clings to every slice. I’ve been cooking this for years, and I still can’t resist the first bite—the peppers snap, the beef stays tender, and the sauce ties everything together in a wink. This steak pepper stir fry isn’t just dinner; it’s a quick vacation from the chaos, packaged in a skillet and ready in minutes.
What is Steak Pepper Stir Fry?
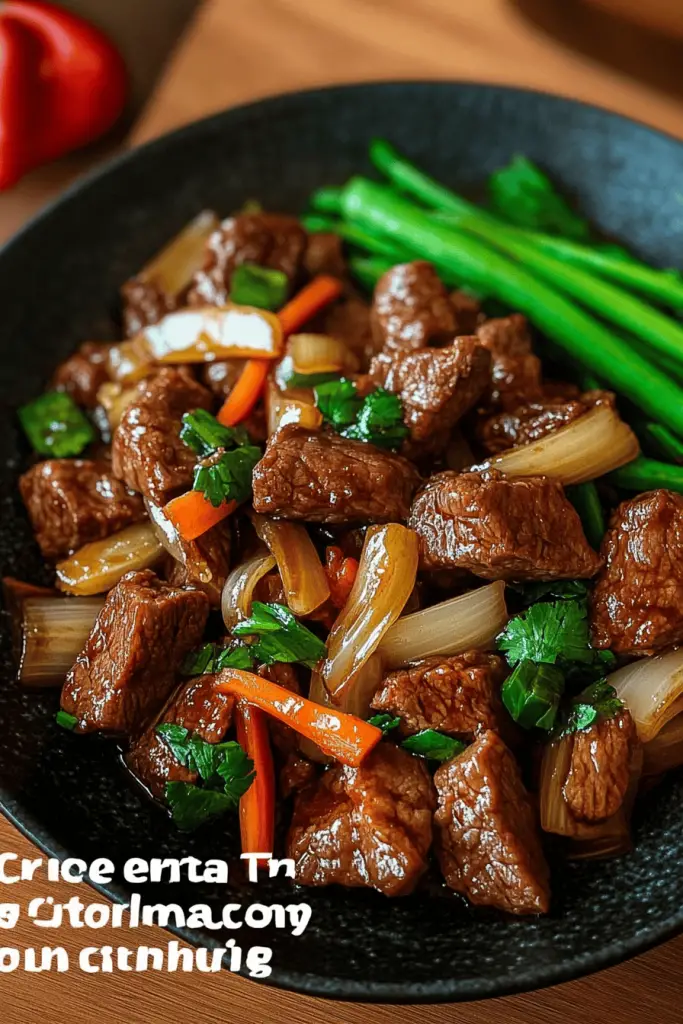
Steak pepper stir fry is essentially thin-stripe beef quick-seared to keep it juicy, tossed with crisp pepper strips, onions, and a savory-sweet glaze that’s glossy but not clingy. The name says it all: steak (not chicken), peppers (the star colors), and stir-fry technique (high heat, fast cooking) combined into a restaurant-quality dinner you can make on a weeknight. Think of it as a skillet version of fajitas with a punchy sauce that’s just a whisk away from perfection. It’s essentially a streamlined, home-friendly take on classic Chinese-inspired beef dishes, but you don’t need a wok to nail it—just a wide skillet, a hot pan, and a little willingness to listen to that sizzle. My kids actually ask for seconds of this, which is the highest compliment I can give a quick supper.
How do you make a stir fry of steak peppers?
Quick Overview
In just a few steps you’ll have a glossy, pepper-crisp skillet supper. You’ll marinate the beef briefly to boost tenderness, whisk a simple glaze that’s both soy-salty and slightly sweet, and cook everything hot and fast so nothing languishes on the heat. The trick is to keep the beef in thin slices so it sears quickly and stays tender, while the peppers stay bright and crisp. The result is a steak pepper stir fry that looks like a Sunday feast but feels like a weeknight miracle—bright, flavorful, and suspiciously easy.
Ingredients
For the Main Batter:
– 1 lb flank steak or sirloin, trimmed and sliced very thin against the grain
– 2 tablespoons soy sauce, plus a splash for finishing if you like
– 1 teaspoon dark sesame oil (optional, but it’s the kiss of toasty flavor)
– 1 teaspoon cornstarch (helps with searing and a light glaze cling)
– 1/2 teaspoon freshly ground Black Pepper
– 1 clove garlic, minced (or 1/2 teaspoon garlic powder if you’re in a pinch)
For the Filling:
– 1 red bell pepper, 1 yellow bell pepper, 1 green bell pepper, all sliced into thin strips
– 1 medium onion, thinly sliced
– 2 cloves garlic, minced
– 1 tablespoon fresh ginger, grated
– 1 tablespoon neutral oil (like grapeseed or canola) for the pan
For the Glaze:
– 3 tablespoons soy sauce
– 1 tablespoon hoisin or oyster sauce (optional, for depth)
– 1 teaspoon honey or maple syrup (adjust to your sweetness preference)
– 1/4 cup beef broth or water
– 1 teaspoon cornstarch mixed with 1 tablespoon water (slurry for gloss and thickness)
Step-by-Step Instructions
Step 1: Preheat & Prep Pan
Warm a large skillet or wok over high heat until it shimmers. You want that screamin’ hot surface so the steak sears in a snap and doesn’t steam. Add a thin layer of oil, just enough to coat the bottom. When the oil is tossing a few wisps of smoke, you’re ready to go. This is the moment I swear you can hear the week melting away—everything slows down a notch because the pan is doing the heavy lifting.
Step 2: Mix Dry Ingredients
In a small bowl, combine the cornstarch and pepper. This is your light binder that helps the beef get a crisp edge. You’re not making breading; you’re giving the surface a tiny, gentle kiss of texture. If you’re using garlic powder instead of fresh, add it here so the flavor gets evenly distributed.
Step 3: Mix Wet Ingredients
Whisk together the soy sauce, sesame oil (if using), and beef broth. The glaze will ride on that tiny pool of salty-sweet goodness, so don’t skimp. If you like your glaze a touch sweeter, add a little more honey—I won’t judge. Fresh garlic and ginger go into the pan at this stage too, since they’ll bloom in the hot oil and perfume the kitchen in a way that makes you grin before you even taste it.
Step 4: Combine
Toss the beef with the dry mix until each slice is lightly coated. Then pour in the wet mixture and stir to combine. Allow the beef to sit for 5–10 minutes; this quick marinade helps the flavors cling to the meat and gives a touch more tenderness without turning it chewy. If you’re short on time, you can skip the rest and jump straight to the pan, but I promise you a more tender bite if you let it rest for a moment.
Step 5: Prepare Filling
As the beef rests, prep your vegetables. Pepper strips reveal their color and bite when sliced thin, and onions bring sweetness that balances the sauce. Keep the garlic and ginger handy so you can add them to the pan the moment you start searing. A quick toss with a little oil or a splash of soy right before cooking helps keep everything bright and non-sticky on the pan.
Step 6: Layer & Swirl
Slide the marinated beef into the hot pan in a single layer; don’t crowd it. Let it sit for about 45 seconds, then give it a good flip. You’re aiming for a shallow crust that looks slightly caramelized, not a boiled-looking mass. Remove the beef to a plate, leaving behind any fond (the brown bits on the pan) and the flavorful oil. In goes the onions and peppers with a pinch of salt. They’ll sizzle and soften quickly—if you want extra bite, give them a little sear first and then toss in the garlic and ginger in the last 20 seconds to wake them up without burning.
Step 7: Bake
Okay, so we’re not baking here in the traditional sense, but let’s translate this to “finish the cooking quickly and through the glaze.” Return the beef to the pan with the vegetables, and pour over the glaze mixture. Stir constantly for 1–2 minutes until everything is evenly coated and the sauce has a glossy sheen. The key is to let the sauce cling to the beef without becoming syrupy; you want a light lacquer that makes every bite feel juicy. If your pan is very hot, the glaze may thicken fast—lower the heat a touch and keep stirring so nothing sticks.
Step 8: Cool & Glaze
Turn off the heat and let the pan rest for a minute while the sauce settles into a nice glaze. If you like a bit more shine, whisk in an extra teaspoon of soy or a splash of water to loosen, then drizzle over the top. A final light dusting of sesame seeds or chopped scallions adds fragrance and color, which I love for that homey, “this is perfectly plated” effect. I’m all about keeping the glaze balanced—enough salty depth, a hint of sweetness, and a clean finish that doesn’t weigh the dish down.
Step 9: Slice & Serve
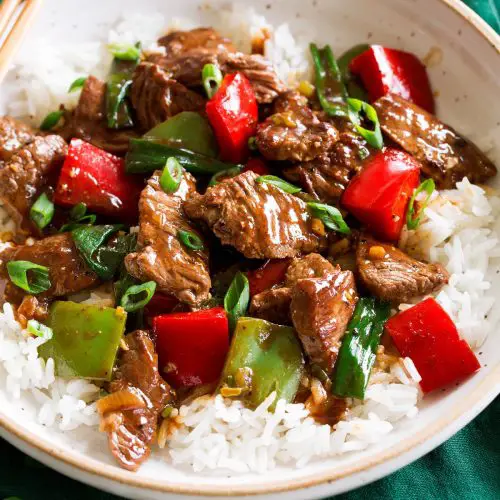
Steak pepper stir fry is best served hot. If your steak slices are a touch thicker than ideal, give them a minute to rest on the plate before you dive in; this helps juices redistribute so every bite stays tender. Slice the beef against the grain for maximum tenderness, then spoon the peppered, glossy goodness over warm rice, noodles, or even a crisp lettuce wrap if you’re feeling fancy. The colors pop and the aroma—garlic, ginger, and soy—will pull everyone to the table. It’s a scene I’ve repeated countless times, and it never fails to feel like a hug in a skillet.
What to Serve It With
This steak pepper stir fry deserves a supporting cast that won’t steal the spotlight from the star. Here are my favorite pairings and setups, organized by mood and occasion:
For Weeknight Dinners: Steamed jasmine rice or brown rice keeps things cozy and satisfying. A quick side of sautéed greens—rapini, spinach, or kale—adds a peppery counterpoint that brightens the plate. If you’re in the mood for something a little zingy, a cucumber-sesame salad with rice vinegar does wonders for balance.
For Family Gatherings: Serve with fluffy steamed rice and a place for everyone to customize: a small bowl of chopped scallions, a tiny dish of toasted sesame seeds, and a wedge of lime for brightness. I’ve found that letting people finish with a little extra glaze on top makes the dish feel special and interactive, like a mini tasting station right at the table.
As Breakfast or Brunch Leftovers: Turn cold leftovers into a quick breakfast Fried Rice with eggs and a sprinkle of chili paste for warmth. The peppery notes stay lively in the morning and the beef, when sliced thin, reheats beautifully.
For Cozy Snacks: Use the steak pepper stir fry as a filling for warm tortillas with a little yogurt-dill sauce for a casual, comforting snack that still feels indulging. You’ll notice the same flavors—savory beef, crisp peppers, and a lacquered finish—that make this dish so compelling at any time of day.
Top Tips for Perfecting Your Steak Pepper Stir Fry
These aren’t just random tricks; they’re the ones I’ve learned after countless pans and late-night dinners. They’ll help you nail the texture, the color, and that final glaze that keeps people coming back for more.
Pepper Prep: Slice peppers thin and uniformly so they cook at the same rate. If you want extra moisture-control, pat them dry a touch after washing to prevent sogginess. Choosing a mix of colors—red, yellow, green—gives you more sweetness variation and a more vibrant plate. For extra gloss, toss them with a pinch of salt and a splash of oil before hitting the pan.
Meat Marinade & Searing: Thin slices are your friend here; they sear fast and stay tender. A light marinade with cornstarch helps create a crisp exterior and a juicy interior. Don’t crowd the pan—work in batches if needed. A hot pan is non-negotiable; that sear is what brings the magic to life.
Sauce Balance: Start with less salt than you think you need—the glaze will intensify as it reduces. If you prefer a sweeter profile, add a touch more honey; if you want it bolder, a dash of rice vinegar or a splash of chili oil wakes it up. A slurry at the end gives you that glossy finish without becoming gluey.
Swirl & Coat: Add the glaze only after the beef is almost done. This prevents the sauce from overcooking the meat and ensures that each slice glistens with a balanced lacquer. If your glaze seems a touch thin, give it another quick minute on the heat while you toss the pan gently.
Ingredient Swaps: Want to cut sugar? Use a sugar-free syrup or a touch of maple for depth instead of honey. For a gluten-free version, use tamari in place of soy sauce. Leftover mushrooms? They’re a fantastic addition—sauté them with the peppers for a richer texture.
Baking Tips: Not necessary in a traditional bake sense, but if you’re cooking in a very thin skillet or at a lower heat, you might need to reduce the glaze slightly to prevent sticking and achieve a quick glaze that clings.
Glaze Variations: A touch of hoisin adds sweetness and depth; sesame oil provides that nutty finish; chili paste or flakes bring a gentle heat if you like a little spice. You can also swap in a splash of dry sherry or rice wine for extra aroma and complexity.
Storing and Reheating Tips
Leftovers are rare in our house, but when they do happen, I’ve got it down. The trick is to preserve texture and flavor without turning the peppers to mush.
Room Temperature: Prefer not to leave perishable foods out more than two hours. If you’re sitting down to a late dinner, it’s better to refrigerate and reheat than to risk spoilage.
Refrigerator Storage: Store in an airtight container for up to 3 days. To reheat, heat a small amount of oil in a skillet and toss the leftovers until they’re hot and glossy again. A quick splash of broth or water helps loosen the glaze without making everything soggy.
Freezer Instructions: If you’re freezing, portion the beef and peppers separately. Freeze for up to 2 months. Thaw in the fridge overnight, then reheat gently in a skillet with a touch of oil and a teaspoon of water or broth to re-wet the glaze. It won’t be as crisp as fresh, but you’ll still savor the savoriness of the dish.
Glaze Timing: If you’re freezing, hold the glaze for the day you plan to reheat, then toss the warmed ingredients with the glaze at the end to ensure it looks and tastes fresh.
Frequently Asked Questions
Final Thoughts
Steak pepper stir fry isn’t just a recipe; it’s a reliable moment of kitchen joy. It’s what I reach for when the day’s been long and the brain is tired but the stomach isn’t. The beauty lies in the contrasts—the heat-kissed beef, the crisp peppers, and the glossy glaze that ties everything together without weighing it down. It’s flexible enough to adapt to what you have on hand, generous enough to feed a hungry crew, and fast enough to fit into even the most chaotic schedule. If you’re in the mood to experiment, lean into a new pepper color, try a different glaze ratio, or add mushrooms for extra depth. I’ve tested this with a handful of tweaks, and every version still lands with that familiar warmth and satisfaction. I’d love to hear your tweaks too—what colors of pepper did you choose, and how did your glaze land? Happy cooking, friend, and may every bite feel like a friendly hug from your kitchen. Can’t wait to hear how yours turns out!
Pepper Steak Stir Fry
Ingredients
Steak Marinade
- 1.25 lbs top sirloin steak cut into 1/3-inch thick strips about 2-inches long
- 0.33 cup low-sodium chicken broth
- 0.25 cup shaoxing wine
- 3 Tbsp soy sauce
- 1 Tbsp rice vinegar
- 1 Tbsp granulated sugar
- 2 tsp cracked black pepper
- 2 tsp dark sesame oil
- 1 Tbsp cornstarch
Stir Fry
- 6 tsp vegetable oil (divided)
- salt to taste
- 1 red bell pepper chopped into bite size pieces
- 1 green bell pepper chopped into bite size pieces
- 6 green onions white portions sliced, green portion chopped into 2-inch pieces
- 1 Tbsp minced garlic
- 1 Tbsp minced fresh ginger
Instructions
Preparation Steps
- Place steaks on cutting board, cover with plastic wrap and pound with the flat side of meat mallet to help flatten slightly and tenderize.
- Cut steak into 1/3-inch thick strips about 2-inches long. Dab steak dry with paper towels, separate pieces sticking together. Set aside.
- In a mixing bowl whisk together chicken broth, shaoxhing wine, soy sauce, rice vinegar, granulated sugar, black pepper, sesame oil and cornstarch. Set aside.
- Preheat a 12-inch non-stick skillet over moderately high heat. Drizzle in 2 tsp vegetable oil and add half the steak quickly spreading apart into a single layer with space between pieces, lightly season with salt.
- Let sear just about 45 - 60 seconds on first side until nicely browned on bottom, quickly turn and let brown on opposite side about 45 - 60 seconds longer. Transfer to a sheet of foil or plate.
- Repeat process with 2 more teaspoons vegetable oil and remaining half of the steak.
- Add last 2 teaspoons of oil to now empty skillet and leave over moderately high heat. Add bell peppers and sauté, only tossing occasionally, about 3 - 4 minutes until slightly tender.
- Add in green onions, garlic and ginger and sauté 1 minute longer.
- Whisk sauce mixture again then pour into skillet. Let cook until it thickens.
- Toss in cooked steak. Serve warm.
Notes
Featured Comments
“Impressed! Clear steps and perfect for busy nights results. Perfect for busy nights.”
“New favorite here — creamy. crowd-pleaser was spot on.”
“Super easy and turned out amazing! My family asked for seconds. Saving this one.”
“This sweet treat was absolutely loved — the bright really stands out. Thanks!”
“Made it tonight and wow — perfect for busy nights! Will definitely make steak pepper stir fry again.”
“Packed with flavor and so simple. Exactly what I wanted from steak pepper stir fry.”


