

Have you ever had that moment where you’re craving something incredibly flavorful but don’t want to spend hours in the kitchen? That’s exactly how I felt last week when I pulled out some chicken thighs, a bottle of aged balsamic vinegar, and started experimenting. The smell alone brought back memories of family dinners and lazy summer evenings on the patio. This balsamic chicken is one of those recipes that feels fancy but is so straightforward, you’ll wonder why you didn’t make it sooner. It’s got that perfect marriage of tangy, sweet, and savory that hits all the right notes. Plus, it’s surprisingly versatile—you can serve it over rice, with roasted veggies, or even toss it on a salad. Honestly, I always do this when I want dinner to be effortless yet full of flavor, and my kids ask for it all the time. Trust me, once you try it, it’s going to become a staple in your kitchen, too.
What is balsamic chicken?
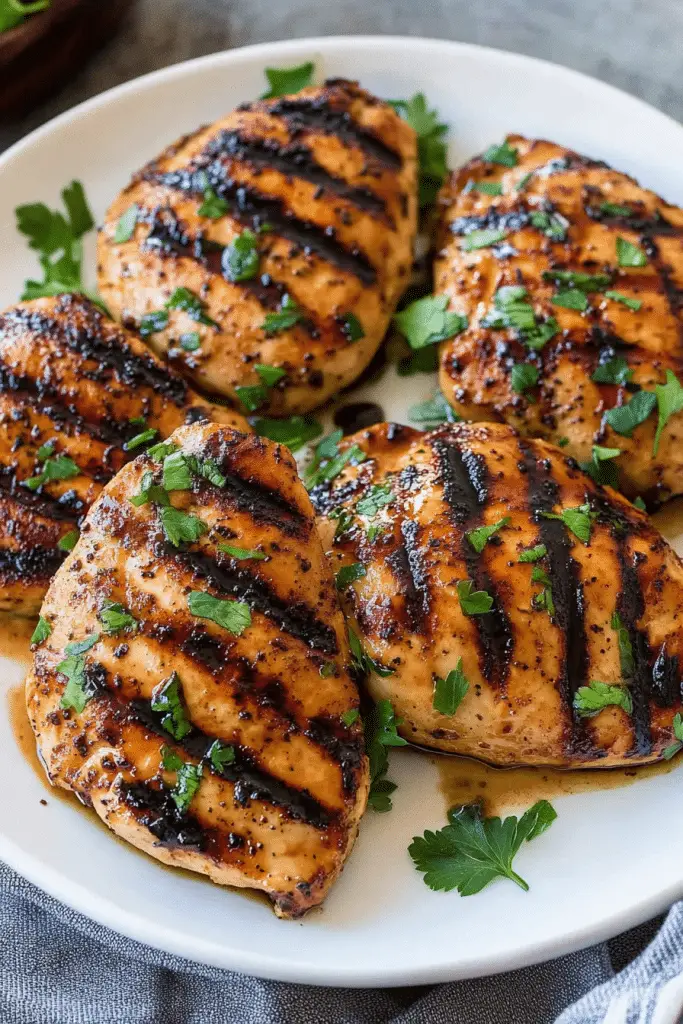
Balsamic chicken is a simple yet elegant dish that combines tender chicken pieces with a rich, slightly sweet balsamic glaze. Think of it as the grown-up version of a classic roasted chicken, but with a tangy twist that makes it stand out. The magic comes from that beautiful balsamic vinegar, which, when reduced, becomes sticky and intensely flavorful—kind of like giving the chicken a caramelized coat of love. It’s essentially a one-pan wonder that showcases how a handful of pantry staples can transform into a dinner everyone will rave about. Whether you’re serving it for a weeknight meal or impressing guests on a special occasion, balsamic chicken always feels just right. And the best part? It’s adaptable, craving everything from a bed of sautéed greens to a side of crusty bread that’s perfect for sopping up all those delicious juices.
How do you make balsamic chicken?
Quick Overview
This balsamic chicken recipe starts with searing the chicken to golden perfection, then simmering it in a luscious balsamic glaze until sticky and flavorful. It’s a one-pan miracle—minimal cleanup, maximum taste. The marinade doubles as a sauce, so no need for extra steps or complicated techniques. I love how the balsamic vinegar slowly reduces, giving the chicken this beautiful glaze that’s tangy with undertones of sweetness. Whether you’re pressed for time or just want something that packs a punch in flavor, this dish is your new best friend. It comes together fast, looks stunning on the plate, and tastes even better than it looks.
Ingredients
For the Chicken:
– 4 bone-in or boneless chicken thighs or breasts (bone-in offers more flavor but boneless is quicker to cook)
– Salt and pepper, to taste
– 2 tablespoons olive oil
For the Balsamic Glaze:
– 1/2 cup balsamic vinegar (go for a good quality one for deeper flavor)
– 2 tablespoons honey or maple syrup (for that perfect balance of sweet and tangy)
– 3 cloves garlic, minced
– 1 teaspoon fresh rosemary or thyme (optional but recommended for that earthy touch)
– Salt and freshly ground black pepper, to taste
Step-by-Step Instructions
Step 1: Preheat & Prep Pan
I always start by getting my skillet nice and hot over medium-high heat. Drizzle in a tablespoon of olive oil, making sure the pan is evenly coated. While it heats up, season your chicken generously with salt and pepper—this is the foundation of flavor. If you’re using chicken thighs, I like to score the skin a little to help the marinade seep in and get that crispy texture. Once the oil shimmers, carefully lay the chicken in the pan, skin-side down if using skin-on. Let it sear undisturbed for about 4-5 minutes until golden brown and releases easily from the pan. Flip and cook another 3-4 minutes to get it just cooked through but still juicy. Set aside temporarily; this is where the magic begins to build.
Step 2: Mix Dry Ingredients
Actually, no dry ingredients besides the salt and pepper for seasoning the chicken here, but for the glaze, we’re keeping things simple. All you need is the balsamic vinegar, honey, and garlic. Having these measured out beforehand makes the process seamless.
Step 3: Mix Wet Ingredients
In a small bowl, stir together the balsamic vinegar, honey, and minced garlic. I like to get all those flavors mingling nicely before pouring it into the skillet. Trust me, that honey helps create a beautiful shiny glaze, and the garlic adds just the right punch.
Step 4: Combine
Pour the balsamic mixture into your skillet over the seared chicken. Turn the heat down slightly to medium. As it bubbles, use a spoon to coat the chicken with the glaze. Keep a close eye—reduce the heat if it thickens too quickly. Let it simmer gently for about 10-15 minutes until the sauce thickens slightly and turns syrupy. Stir occasionally to prevent burning and to help the sauce cling beautifully to the chicken.
Step 5: Prepare Filling
If you want to add an extra layer of flavor or texture, tossing in some roasted vegetables or fresh herbs at this stage is a nice touch. For a more intense garlic punch, sprinkle some extra minced garlic and fresh thyme over the top while the glaze reduces.
Step 6: Layer & Swirl
Once the sauce has thickened to your liking (it should be sticky and glossy), spoon it over the chicken — if you’re baking, you can also swirl it into the pan for a marbled effect. For a beautiful presentation, I like to spoon the glaze generously and sprinkle a few sprigs of rosemary or thyme on top.
Step 7: Bake
If you prefer your chicken extra tender, transfer the skillet to a preheated oven at 375°F (190°C). Bake for around 10-15 minutes, depending on the thickness of the chicken. Use a meat thermometer to ensure it hits 165°F in the center—trust me, this ensures juiciness without overcooking. The final result should be beautifully glazed yet juicy chicken with a caramelized exterior.
Step 8: Cool & Glaze
Let the cooked chicken rest for a few minutes—the glaze thickens even more as it cools slightly. If you want an extra shiny finish, brush some additional glaze on just before serving. It’s the little touches that make all the difference.
Step 9: Slice & Serve
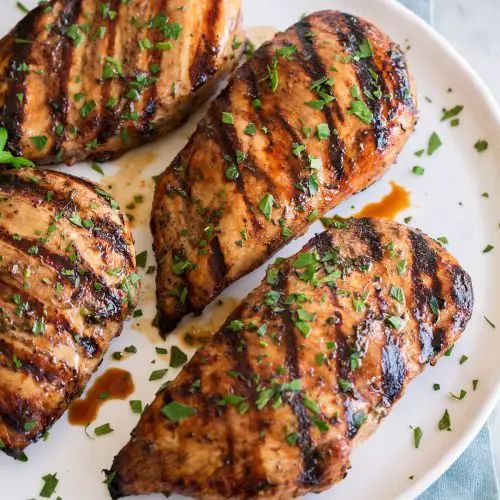
Slice the chicken against the grain, arrange it on a plate, and drizzle with whatever glaze is left in the pan. This dish looks stunning with simple sides like roasted potatoes, sautéed greens, or fluffy rice. Serve it warm, and don’t forget to spoon up plenty of that delicious, tangy sauce to go with every bite.
What to Serve It With
This balsamic chicken is pretty versatile and loves to play nice with all sorts of sides. For a light, healthy meal, I serve it over a bed of arugula or spinach—adding some toasted pine nuts and a sprinkle of Parmesan makes it feel like a fancy salad. If I want something heartier, roasted potatoes or creamy mashed cauliflower are my go-tos. I also love pairing it with crusty French bread, especially because that glaze is just begging to be dipped. When I make this for company, I plate it with bright roasted veggies—think carrots, zucchini, and cherry tomatoes—to mirror the sweet and tangy tones of the glaze. My kids actually fight over the leftover sauce on their rice; it’s that good. And honestly, I often make a double batch because leftovers make for such an easy lunch the next day. It’s one of those dishes that feels both indulgent and totally doable, which makes me smile every time I cook it.
Top Tips for Perfecting Your Balsamic Chicken
From someone who’s made this dish countless times, I’ve learned a few tricks to get it just right every single time. Here are my top tips:
- Zucchini Prep: If you’re adding zucchini or other watery vegetables, toss them in a paper towel to draw out excess moisture before sautéing. Too much water can make the glaze watery, which is no fun.
- Mixing Advice: When creating the glaze, make sure to whisk the honey into the balsamic thoroughly. This helps prevent separation and ensures a smooth, shiny sauce.
- Swirl Customization: For a prettier presentation, I like to swirl the sauce in a concentric pattern on the plate after plating. It’s all about the little details.
- Ingredient Swaps: Not a balsamic fan? Apple cider vinegar works well, though it’s tangier. For a sweeter twist, a splash of maple syrup can replace honey.
- Baking Tips: Ovens vary, so start checking your chicken after 10 minutes in the oven. You don’t want it overcooked, but you do want it tender and juicy. The thermometer is your best friend here.
- Glaze Variations: Feel free to add a pinch of chili flakes or smoked paprika for an extra flavor kick. A dash of balsamic reduction drizzle just before serving makes it shine even more.
Over the years, I’ve adjusted seasoning levels and found that a gentle simmer makes all the difference, turning a good dish into a great one. Every time I play with the ingredients to suit my mood or what I have in the pantry, I end up falling in love all over again with this recipe. Trust me, with a little patience and a few tweaks, you’ll get that perfect, sticky glaze every single time.
Storing and Reheating Tips
This balsamic chicken keeps surprisingly well, which makes it perfect for leftovers. Once cooled, store any leftovers in an airtight container in the fridge for up to 3 days. The sauce might thicken a bit, but you can easily revive it by heating gently on the stove and stirring in a splash of water or chicken broth. If you want to freeze it, do so in a freezer-safe container for up to 2 months. Just make sure to thaw in the fridge overnight before reheating. When reheating, pop it in the microwave or gently on the stovetop until warmed through, then spoon the delicious glaze back over the chicken. I like to add a fresh splash of balsamic or a sprinkle of herbs to bring back that bright flavor profile. Once reheated, the chicken may be a little softer, but the flavors still shine through beautifully. This dish is forgiving, and even after a day or two, it’s still packed with that signature sweet-tangy punch you love.
Frequently Asked Questions
Final Thoughts
There’s something so satisfying about turning just a handful of pantry staples into a dish that feels truly special. Balsamic chicken is one of those recipes that gets everyone in my house asking for seconds—my kids love how the sauce clings to the meat, and I love how easy it is to throw together on a busy weeknight. The rich, tangy glaze, combined with tender, juicy chicken, always makes dinner feel like a little celebration. Once you’ve cooked this once, I promise it’ll become a regular in your rotation. It’s simple enough for weeknights but fancy enough to impress guests. Plus, the leftovers reheat beautifully, making it a win on so many levels. If you give this a try, I’d love to hear how it turned out—don’t forget to leave a comment or share your own twists! Happy baking, and may your kitchen always smell as inviting as mine does when I pull this dish out of the oven. Enjoy every bite!
balsamic chicken
Ingredients
Main Ingredients
- 0.33 cup balsamic vinegar
- 0.25 cup olive oil
- 1 Tbsp minced garlic (about 3 cloves)
- 2 tsp minced fresh rosemary (or 0.75 tsp dried)
- 2 tsp minced fresh thyme (or 0.75 tsp dried)
- 2 tsp dijon mustard
- 1 tsp salt or to taste
- 1 tsp freshly ground black pepper
- 2 lbs boneless skinless chicken thighs (or breasts)
- 1 Tbsp chopped fresh parsley (optional)
Instructions
Preparation Steps
- Place chicken in a resealable bag or a bowl. In a mixing bowl, whisk together balsamic vinegar, olive oil, garlic, rosemary, thyme, dijon mustard, salt, and pepper. Pour marinade over chicken, seal the bag or cover the bowl, and refrigerate for at least 2 hours or up to 24 hours.
- Preheat grill or oven to medium-high heat. Remove chicken from marinade and shake off excess. Grill chicken for about 5-7 minutes per side or until fully cooked and internal temperature reaches 165°F. Alternatively, bake in the oven at 400°F for 20-25 minutes.
- Garnish with chopped parsley (if using) and serve warm.
Notes
Featured Comments
“I love how this recipe balances sweet and tangy—so much flavor in just a few ingredients!”
“Impressed! Clear steps and crowd-pleaser results. Perfect for busy nights.”
“New favorite here — crowd-pleaser. crowd-pleaser was spot on.”
“Super easy and turned out amazing! My family asked for seconds. Saving this one.”
“This sweet treat was absolutely loved — the cozy really stands out. Thanks!”
“Made it tonight and wow — crowd-pleaser! Will definitely make Tangy Balsamic Chicken Flavor Boost again.”


I love how this recipe balances sweet and tangy—so much flavor in just a few ingredients!