


There’s just something about the smell of orange chicken wafting through the kitchen that instantly transports me back to bustling family dinners and lazy weekend nights. I’ve lost count of how many times I’ve whipped up a batch, hearing my kids’ excited chatter as they wait for that first crispy bite. It’s funny—compared to takeout versions, my homemade orange chicken is simpler, fresher, and honestly, way more satisfying. It’s that perfect combo of crispy coating, bright citrus punch, and a touch of sweet-savory goodness that makes my heart (and stomach) happy. Plus, this recipe’s one of those lifesaver dishes on busy nights when I want something quick but still crave flavor that lingers. Trust me on this—you’ll keep coming back to it, because it’s so approachable and totally addictive. I always do this when I need a little reminder of how delicious homemade can be, with ingredients I often already have in the pantry or fridge. Get ready—wonderful, homemade orange chicken is just a few steps away from your table!
What is orange chicken?
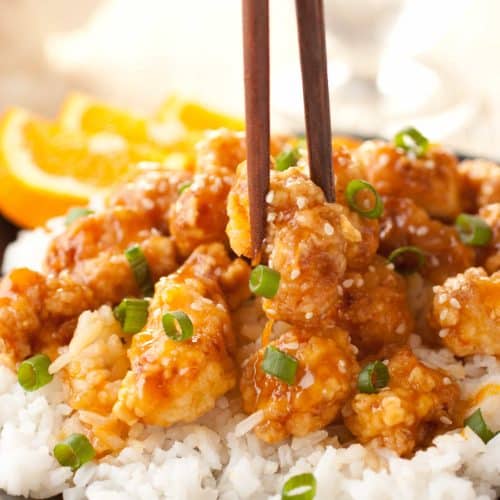
Think of orange chicken as the lovechild of crispy, fried chicken pieces and a vibrant, tangy citrus glaze. It’s essentially the Chinese-American take on a classic comfort food—crispy chicken bites coated in a sweet-tart orange sauce. The name says it all, right? But what makes it truly special is how the sauce balances that zesty orange flavor with just the right touch of sweetness and a hint of spice. It’s kind of like a flavor rollercoaster in your mouth—bright, punchy, and so satisfying. Originally, this dish became wildly popular at Chinese-American restaurants, but honestly, it’s become a staple in my own kitchen because it’s fast, fun to make, and endlessly customizable. The best part? Unlike takeout, you control each ingredient—a real win when you’re craving bold flavor without all the additives. Think of this as your personal, homemade version of takeout that’s better in every way—you get crispy textures, fresh citrus, and a sauce that’s just right for drizzling over rice or even spooning onto a bed of sautéed veggies.
How do you make orange chicken?
Quick Overview
This orange chicken comes together quickly—think of it as a fuss-free, crispy-coated chicken fried to golden perfection, tossed in a glossy, zesty orange sauce. The secret is balancing the frying step with a sticky glaze that envelopes each piece with bright citrus flavor. I love that you can prep most of it in advance: the chicken can be breaded early, and the sauce can be mixed up while your chicken crisps up in the oil. When it’s all finished, a quick drizzle of the glaze over hot, crispy chicken transforms it into a tangy, sweet comfort that disappears in minutes at my house. It’s perfect for weeknights when time’s tight but flavor’s gotta shine. Honestly, the whole process is simple enough for even beginner cooks, and I promise, once you’ve done it once, you’ll see how easy it is to master. Plus, the smell of that frying chicken and citrus sauce bubbling on the stove? Pure magic.
Ingredients
For the Main Batter:
– 1 pound chicken breasts or thighs, cut into bite-sized pieces
– 1/2 cup all-purpose flour
– 1/4 cup cornstarch (or arrowroot for GF)
– 1 teaspoon baking powder (optional, for extra crispiness)
– 1/2 teaspoon salt
– 1/2 teaspoon black pepper
– 1/2 teaspoon garlic powder
– 1/2 teaspoon paprika (for color and extra flavor)
– 1/2 cup cold water or soda water (for light batter)
For the Filling:
– 1 tablespoon vegetable oil (or neutral oil for frying)
– Additional chopped green onions or sesame seeds for garnish (optional)
For the Glaze:
– 1/2 cup orange juice (freshly squeezed if you can)
– Zest of 1 orange
– 1/4 cup soy sauce or tamari (for saltiness)
– 1/4 cup honey or maple syrup
– 2 cloves garlic, minced
– 1 teaspoon grated ginger
– 1 teaspoon cornstarch mixed with 2 teaspoons water (to thicken)
– Red chili flakes or sriracha (optional, for heat)
Step-by-Step Instructions
Step 1: Preheat & Prep Pan
Start by heating your oil in a deep pan or wok on medium-high heat—enough to submerge the chicken pieces. I always test the oil by tossing in a tiny piece of bread; if it sizzles immediately and rises to the surface, you’re good to go. Prep your chicken by cutting it into bite-sized chunks and set aside. Having everything ready makes this process go smoothly—you want to fry the chicken in batches, so avoid overcrowding the pan.
Step 2: Mix Dry Ingredients
In a large bowl, combine the flour, cornstarch, baking powder, salt, pepper, garlic powder, and paprika. Mix well for even coating. These dry ingredients are what give the chicken that crispy exterior. I always do this step first because it helps me evenly distribute the flour and get that perfect crunch.
Step 3: Mix Wet Ingredients
In a separate small bowl, whisk together the water or soda water with the spices if you’re adding any flavor to the batter. The soda water makes the coating extra light and airy—trust me, it’s a game-changer. Then, pour this into your dry mix and stir until just combined. The batter should be thick but pourable—if it’s too gloopy, add a splash more water.
Step 4: Combine
Dip each chicken piece into the batter, letting excess drip off, then carefully place into the hot oil. I find that using tongs helps prevent messes and protects my fingers from splatters. Fry in batches—about 4-6 pieces at a time—until golden brown and cooked through, about 3-4 minutes per batch. Place them on a paper towel-lined plate to drain excess oil. Don’t rush the frying; the patience pays off with extra crispy chunks!
Step 5: Prepare Filling
While the chicken is frying, make your orange sauce. In a saucepan, combine the orange juice, zest, soy sauce, honey, garlic, and ginger. Bring to a simmer over medium heat and let it thicken slightly—this takes about 5 minutes. When it’s thick enough to coat the back of a spoon, stir in the cornstarch-water mixture and cook until glossy and slightly sticky. If you like a little kick, sprinkle in some chili flakes or sriracha now.
Step 6: Layer & Swirl
Once the chicken is fried and the sauce is ready, toss the crispy pieces into the sauce in the pan, or pour the sauce over the fried chicken in a big bowl for easier coating. Use a spoon or tongs to gently toss, making sure each piece gets coated with that lovely glaze. For a bit of restaurant-style flair, I like to spoon the chicken onto my serving plate, drizzle with extra sauce, and garnish with chopped green onions or sesame seeds.
Step 7: Bake
If you want your chicken even crispier or need to keep it warm for a bit, I sometimes toss the coated chicken onto a baking sheet lined with parchment and pop it into a 400°F oven for 10 minutes. Just watch it so it doesn’t get too soft. This step helps the coating stay crunchy even if it sits for a few minutes—perfect when serving for a crowd.
Step 8: Cool & Glaze
Let the chicken sit for a few minutes after frying, so it’s cool enough to handle but still warm. Drizzle or dunk the chicken in the glaze, depending on your preference. The sauce will seep into every nook and cranny, creating that irresistible sticky coating. Keep in mind—if you’re making this ahead, hold off on glazing until just before serving to keep everything crispy.
Step 9: Slice & Serve
Stuff the chicken onto a platter or serve straight from the bowl. Garnish with chopped green onions and sesame seeds for that restaurant flair. This dish is fantastic when served over fluffy jasmine rice, but it’s just as good on a bed of stir-fried vegetables or even noodles. My kids love it with a side of steamed broccoli or crispy snap peas. For a fun twist, I sometimes serve it with fried rice or even tucked into lettuce wraps for a lighter option. The smell alone will have everyone at the table waiting for that first delicious bite!
What to Serve It With
Pairing your homemade orange chicken is almost as fun as making it. For a cozy family dinner, I love serving it over steamed jasmine rice—those fluffy grains soak up all the flavorful sauce. Or, if you’re craving something a bit lighter, cauliflower rice is my go-to for a low-carb twist. Sometimes I whip up a quick Asian slaw with crunchy cabbage, carrots, and a sesame vinaigrette to add some crunch and freshness. On the weekends, I love pairing it with spring rolls and a side of peanut dipping sauce—my kids are obsessed. And honestly, leftovers are great tucked into a pita with some extra veggies or tossed into a stir-fry. No matter what, this dish always ends up disappearing way too fast, and I find myself reaching for seconds more often than I’d like to admit.
Top Tips for Perfecting Your Orange Chicken
I’ve made this dish more times than I can count, and I’ve learned a few tricks along the way. First, make sure your chicken is cut uniformly—this helps everything cook evenly and ensures each piece gets crispy. When frying, keep the oil at a steady temperature—if it drops too low, the chicken can turn greasy; if it’s too hot, it burns too quickly. To keep the coating crispy, drain excess oil well, and if you want extra crunch, I sometimes double-deep-fry the chicken for an even more satisfying texture. For the sauce, I always taste and adjust—adding more orange zest for brightness or a splash of vinegar if I want a tangier kick. Want a thicker glaze? Just add a few more drops of cornstarch slurry into the sauce as it simmers. Personal note: I tested this with honey and maple syrup—it’s amazing with both, giving it a slightly different sweetness profile. I’ve also tweaked the spice level by adding chili flakes or sriracha—depends on who’s eating! The key is balancing the citrusy punch with sweetness and spice, so don’t be afraid to customize until it feels just right. And last tip—don’t overload the frying pan; patience makes for crispier chicken, and no one wants soggy bites!
Storing and Reheating Tips
Ready to save some leftovers or make it in advance? Here’s what I do. Store the cooked chicken in an airtight container in the fridge—preferably within two hours of cooking, and it’ll stay fresh for up to 3 days. If you want to keep the sauce separate, store it in a small jar or container and combine when reheating. Reheating is best done in the oven or on the stovetop rather than the microwave—this helps keep your chicken crispy. I usually rewarm the chicken on a baking sheet in a 375°F oven for about 10 minutes; the heat crisps everything back up nicely. For the sauce, gently simmer on the stove until warm and glossy again. If you’re freezing leftovers, pack the chicken and sauce separately—wrap tightly in plastic or foil, and freeze for up to 3 months. Thaw overnight in the fridge before reheating. When you’re ready to serve again, reheat on the stovetop, tossing to coat with warm sauce. Honestly, leftovers still taste fantastic, but the crispy texture doesn’t quite match freshly fried—still, it’s a great way to stretch your meal and get more delicious bites from one batch.
Frequently Asked Questions
Final Thoughts
Honestly, this homemade orange chicken has become one of my absolute favorites to whip up whenever I need a comfort meal that feels like a treat. It’s crispy, tangy, and so full of fresh, bright flavors—plus, it’s a thrill to see how easy it is to transform simple ingredients into something that feels restaurant-quality. I love that I can customize the spice level, sweetness, and even the coat thickness to match what I’m craving that night. Over the years, I’ve learned to double the sauce because, trust me, it’s just too good to leave on the side. This dish always gets rave reviews from my family, and I hope it does from you too! If you give it a try, I’d love to hear how yours turns out or any tweaks you make. Happy cooking—and here’s to many delicious, citrus-kissed bites ahead!
orange chicken
Ingredients
Main Ingredients
- 1.5 pounds boneless skinless chicken breasts
- 1 cups low-sodium chicken broth
- 1 tablespoons finely grated orange zest
- 0.5 cups freshly squeezed orange juice
- 0.33 cups white vinegar
- 0.25 cups soy sauce
- 0.5 cups granulated sugar
- 0.25 teaspoons dried ginger
- 2 tablespoons grated yellow onion
- 2 cloves garlic, finely minced
- 1 teaspoon Sriracha hot sauce
- Freshly ground black or white pepper to taste
- 1.25 cups cornstarch
- 2 tablespoons cold water
- 2 large eggs
- vegetable or peanut oil for frying
- Chopped green onions and sesame seeds for garnish (optional)
Instructions
Preparation Steps
- Place chicken pieces in a resealable bag, set aside.
- In a medium saucepan, combine chicken broth, orange zest, orange juice, vinegar, soy sauce, sugar, ginger, onion, garlic, Sriracha, and pepper. Bring to a boil over medium heat.
- Whisk mixture well, then measure out 2/3 cup of the sauce and pour over chicken in the bag.
- Seal the bag and refrigerate for 30 minutes.
- Meanwhile, reheat remaining sauce and bring to a boil, stirring frequently.
- Mix 2 Tbsp cornstarch with 2 Tbsp cold water, then stir into the boiling sauce to thicken. Cook for 1-2 minutes and remove from heat.
- Heat oil in a large deep fryer or skillet to 350°F. Whisk eggs in a shallow dish. Place remaining cornstarch in another shallow dish.
- Remove chicken from marinade and coat in egg then dredge in cornstarch. Fry chicken in batches for 5-7 minutes until golden.
- Remove fried chicken and drain on paper towels. Toss chicken with thickened orange sauce.
- Serve hot, garnished with chopped green onions and sesame seeds if desired.
Notes
Featured Comments
“Impressed! Clear steps and absolutely loved results. Perfect for busy nights.”
“New favorite here — creamy. crowd-pleaser was spot on.”
“Super easy and turned out amazing! My family asked for seconds. Saving this one.”
“This sweet treat was absolutely loved — the hearty really stands out. Thanks!”
“Made it tonight and wow — creamy! Will definitely make Tangy Citrus Chicken A Simple Chinese Favorite again.”
“Packed with flavor and so simple. Exactly what I wanted from Tangy Citrus Chicken A Simple Chinese Favorite.”


