


You know those days? The ones where you stare into the fridge, utterly uninspired, but you *really* want something fresh, vibrant, and, let’s be honest, a little bit fancy without all the fuss? Yeah, I’ve been there more times than I can count. And on those days, my absolute go-to, the thing that always saves me and makes me feel like I’ve actually accomplished something delicious, is this micro-chop salad. It’s not just a salad; it’s a whole experience. Think of it like a deconstructed, super-charged version of your favorite deli sandwich, but in salad form, and bursting with more flavor than you can imagine. Honestly, it’s the best thing that ever happened to my lunch routine, and it’s quickly become a favorite for my family too. Forget those sad, limp salads of the past; this is where it’s at, especially when you’re craving something light yet satisfying.
What is a micro-chop salad?
So, what exactly *is* a micro-chop salad? The name itself kind of gives it away, doesn’t it? It’s all about the size. Instead of your usual chunky chopped veggies or long, floppy lettuce leaves, everything in this salad is cut down to tiny, bite-sized pieces – think roughly the size of a dime or even smaller. The “micro-chop” technique means every single bite is a perfect medley of all the flavors and textures. You don’t get one big chunk of cucumber and then another of tomato; you get a little bit of everything in every forkful. It’s essentially like a finely diced, incredibly flavorful salad symphony. This method also makes it super easy to eat, and honestly, it just looks so much more elegant and appetizing. It’s like a puzzle where all the pieces fit perfectly together, creating something truly special.
How do I make [Recipe Name]?
Quick Overview
Making this micro-chop salad is all about precision in the prep. We’ll be finely dicing a colorful array of fresh vegetables, combining them with a bright, zesty vinaigrette, and letting it all mingle to perfection. The key is that uniform chop, which ensures every single bite is packed with incredible flavor. It’s a simple process, but the results are anything but – a salad that’s bursting with freshness, texture, and vibrant taste. It’s truly a lifesaver for those busy weeknights or when you just need a healthy, delicious pick-me-up without spending hours in the kitchen.
Ingredients
For the Salad Base:
This is where you get to play with color and texture! I love using a mix of crunchy and slightly softer veggies. Aim for about 6-8 cups total, finely diced.
- 2 cups finely diced cucumber (seedless English cucumbers work best, no need to peel!)
- 1.5 cups finely diced bell peppers (I like a mix of red and yellow for sweetness and color)
- 1 cup finely diced red onion (soak in cold water for 10 mins to mellow the bite, optional but recommended!)
- 1 cup finely diced celery (for that satisfying crunch)
- 1 cup finely diced cherry tomatoes (cut them small so they don’t release too much juice)
- 1/2 cup finely chopped fresh parsley (or a mix of parsley and cilantro for an extra zing)
For the Zesty Vinaigrette:
This dressing is the magic binder that brings it all together. Don’t be tempted to skimp here; good dressing makes a good salad great!
- 1/4 cup extra virgin olive oil (good quality makes a difference!)
- 3 tablespoons fresh lemon juice (about 1 large lemon)
- 1 tablespoon red wine vinegar
- 1 teaspoon Dijon mustard (for emulsification and a little kick)
- 1 clove garlic, minced very finely (or grated on a microplane)
- 1/2 teaspoon dried oregano
- Salt and freshly ground black pepper, to taste
Optional Add-ins for Extra Wow:
This is where you can really customize it. Think about what you love!
- 1/2 cup crumbled feta or goat cheese
- 1/2 cup toasted chopped nuts (almonds, walnuts, or pecans are great)
- 1/2 cup cooked chickpeas or white beans, rinsed and drained
- 1/4 cup finely chopped Kalamata olives
- Protein: grilled chicken, shrimp, or flaked salmon
Step-by-Step Instructions
Step 1: Prep Your Veggies
This is the most important step for a truly amazing micro-chop salad. Take your time here! Wash and thoroughly dry all your vegetables. Then, using a sharp knife, dice everything as finely as you can. I’m talking small, uniform pieces. Think about the size of a corn kernel or a small pea. For the cucumber, I like to remove the seeds if they’re large, but with English cucumbers, it’s usually not necessary. Red onion can be a bit strong, so soaking the diced onion in cold water for about 10 minutes, then draining it well, really mellows out its bite. The goal is for every forkful to be a balanced mix of all these goodies. I always do this when I have a bit of quiet time, maybe while listening to a podcast – it makes the prep part fly by!
Step 2: Whisk Up the Vinaigrette
While your veggies are getting prepped (or if you’re soaking the onion), it’s time for the dressing. In a small bowl or a mason jar, combine the extra virgin olive oil, fresh lemon juice, red wine vinegar, Dijon mustard, minced garlic, and dried oregano. Give it a good whisk or shake until it’s well combined and starts to emulsify slightly. Season generously with salt and freshly ground Black Pepper. Taste it and adjust as needed – maybe it needs a little more lemon, a pinch more salt, or even a tiny drizzle of honey if you like it a bit sweeter. This dressing is really the backbone of the salad’s flavor, so make sure it’s spot on!
Step 3: Combine the Base Ingredients
Grab a large mixing bowl – you want plenty of room to toss everything gently. Add all your finely diced vegetables and the chopped fresh herbs to the bowl. Give them a quick, gentle stir to distribute them evenly. At this stage, it’s just a beautiful pile of colorful, finely chopped ingredients.
Step 4: Dress the Salad
Pour about two-thirds of the vinaigrette over the chopped vegetables. Gently toss everything together using two large spoons or your hands (clean hands are best for this!). You want to coat every single piece of vegetable lightly with the dressing. Don’t drown it; you can always add more dressing if needed. It’s much easier to add than to take away! Make sure to get to the bottom of the bowl to incorporate everything.
Step 5: Add Optional Goodies (If Using)
Now’s the time to add any of your chosen mix-ins. If you’re using cheese, nuts, olives, or beans, gently fold them into the salad. If you’re adding protein like Grilled Chicken or shrimp, you can either toss it in now or serve it on top of individual portions. This is where you can really turn this simple salad into a complete meal!
Step 6: Let it Marinate (The Secret Step!)
This is arguably the *most* crucial step for maximizing flavor, and it’s what makes this micro-chop salad so special. Once everything is tossed, cover the bowl and let the salad sit in the refrigerator for at least 30 minutes, or even up to 2 hours, before serving. This “marinating” time is when all those incredible flavors get to meld and mingle. The vinaigrette seeps into every nook and cranny, softening the onions just enough, and making the whole salad taste like it was lovingly prepared for hours. Trust me, this step is a game-changer. I always do this when I’m prepping dinner; by the time we’re ready for lunch the next day, it’s pure perfection.
Step 7: Taste and Adjust
Just before serving, give the salad another gentle toss. Taste it and adjust the seasoning if necessary. You might find it needs a little more salt, pepper, or even a splash more lemon juice. If it seems a bit dry, you can add the remaining vinaigrette. The goal is a salad that’s perfectly dressed, not soggy or oily.
Step 8: Serve It Up!
Serve your beautiful micro-chop salad chilled. It’s fantastic on its own, scooped up with some crusty bread, or served as a vibrant side dish. The way all the tiny pieces come together in each mouthful is just delightful.
What to Serve It With
This micro-chop salad is so versatile, it’s practically its own meal, but it also plays beautifully with other dishes. For breakfast, imagine a small portion alongside some perfectly poached eggs or a side of crispy bacon. It adds a much-needed freshness to start the day. For brunch, it’s an absolute star! Serve it in pretty bowls, perhaps topped with a dollop of Greek yogurt or a sprinkle of fresh dill. It’s a wonderful counterpoint to richer brunch fare like pancakes or quiche. As a dessert salad, yes, you heard me right! If you go for a sweeter variation with berries and a lighter dressing, it can be a refreshing end to a meal, especially in warmer months. And for those cozy snacks, it’s perfect for a light yet satisfying bite. I love having a big bowl of this in the fridge for whenever the snacking urge hits. My family also loves it served alongside grilled chicken or fish – it’s the perfect way to balance out richer main courses. I’ve even served it as a light appetizer before a big holiday meal, and people always rave about its freshness!
Top Tips for Perfecting Your Micro-Chop Salad
Over the years, I’ve learned a few tricks that take this micro-chop salad from good to absolutely amazing. First, about the veggies: the finer the chop, the better the flavor distribution. I know it sounds tedious, but a sharp knife and a good cutting board make all the difference. If you have a food processor with a dicing attachment, it can be a real time-saver, but I find a good old-fashioned knife gives me more control over the texture. Don’t be afraid to experiment with your vegetable choices! Broccoli florets (steamed slightly so they’re tender-crisp), cauliflower, even finely shredded cabbage can work beautifully. For the dressing, I always make a little extra just in case. It’s also great for drizzling over other salads or grilled meats. If your garlic is really potent, grating it on a microplane instead of mincing makes it disappear into the dressing more seamlessly. When it comes to mixing, gentleness is key. You don’t want to bruise the delicate ingredients. Use a light hand when tossing. My kids actually prefer it when I use my hands because they say it feels more “mixed.” The marinating time is non-negotiable for me. I’ve tried skipping it in a rush, and while it’s still good, it just doesn’t have that depth of flavor. I’ve experimented with adding different cheeses too; a sharp cheddar or a mild Monterey Jack can be nice, but feta and Goat Cheese just seem to sing with the freshness. For a vegan version, omit the cheese and maybe add some toasted pumpkin seeds for crunch. If you’re making this for a potluck or picnic, pack the dressing separately and toss it right before serving to prevent it from getting soggy. I learned that lesson the hard way at a summer barbecue once! And remember, the goal isn’t perfection in appearance, but perfection in taste. A slightly imperfect chop is still going to be delicious.
Storing and Reheating Tips
This micro-chop salad is actually fantastic for making ahead, which is why it’s such a lifesaver! If you’ve dressed it, it will keep well in the refrigerator in an airtight container for about 2 to 3 days. The flavors actually tend to deepen and meld even further. However, if you plan on keeping it for longer than 3 days, it’s best to store the dressing separately and toss it with the chopped veggies just before serving. This prevents the vegetables from becoming too soft. If you’ve added ingredients like cheese or nuts, they’ll also hold up better if tossed in later. I find that it’s best enjoyed within 4 days maximum, even with the dressing separate, as fresh ingredients are always best. Reheating isn’t really a concept here, as it’s meant to be served cold or at room temperature. If it’s been in the fridge and is a bit too cold for your liking, just let it sit out on the counter for about 15-20 minutes before serving. The glaze, if you choose to add one (though this salad doesn’t typically have a glaze, it’s more of a dressed salad), would follow the same principles – best added just before serving for optimal texture and appearance. Always ensure your container is truly airtight to maintain maximum freshness and prevent any unwanted fridge odors from creeping in.
Frequently Asked Questions
Final Thoughts
I truly hope you give this micro-chop salad a try. It’s one of those recipes that’s so simple yet delivers such incredible flavor and satisfaction. It’s the kind of dish that makes you feel good from the inside out – fresh, vibrant, and utterly delicious. It’s perfect for busy lunches, light dinners, or as a bright addition to any gathering. The beauty of it is its adaptability; you can change it up based on what you have, what you love, and what’s in season. If you enjoy this recipe, you might also like my recipes for a vibrant Mediterranean Quinoa Salad or my hearty Lentil Shepherd’s Pie. They share that same spirit of fresh ingredients and satisfying flavors. I can’t wait to hear what you think! Please leave a comment below and let me know your favorite veggie combinations or any delightful twists you’ve added. Happy chopping and happy eating!
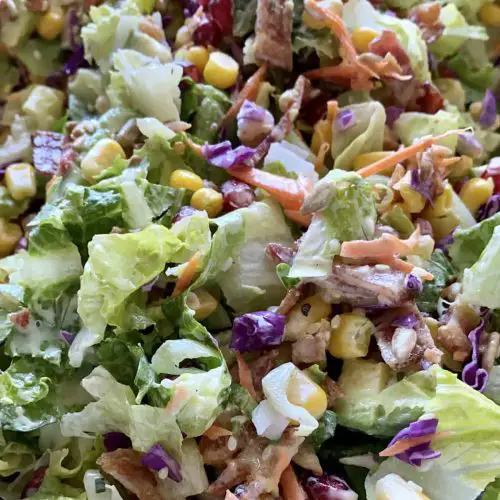
Micro Chop Salad with Sun Goddess Dressing
Ingredients
Salad Ingredients
- 8 strips bacon cooked and diced
- 2 heads romaine lettuce chopped
- 1 large avocado diced
- 1 large cucumber diced
- 1 pomegranate seeds removed
- 1 cup frozen corn warmed through
- 0.25 head red cabbage shredded and chopped
- 1 large carrot shredded
- 0.25 cup sesame seeds
- 0.25 cup sunflower seeds
Sun Goddess Dressing
- 0.25 cup mayonnaise
- 3 tbs olive oil
- 1.5 tbs yellow mustard
- 2 tbs maple syrup or honey
- 0.5 lemon juice
- 1 tbs apple cider vinegar
- 0.25 tsp salt
- 0.125 tsp black pepper
- 1 tbs fresh chives chopped
- 1 tbs chili pepper flakes
Instructions
Preparation Steps
- Whisk together all of the dressing ingredients until smooth. This may take a minute or two. Taste and adjust the mustard, salt, pepper, and oil if necessary.
- In a large bowl, combine all the salad ingredients: cooked bacon, chopped romaine lettuce, diced avocado, diced cucumber, pomegranate seeds, warmed corn, shredded red cabbage, shredded carrot, sesame seeds, and sunflower seeds.
- Pour the Sun Goddess dressing over the salad ingredients.
- Toss gently to combine all ingredients. Serve immediately.
Notes
Featured Comments
“Impressed! Clear steps and absolutely loved results. Perfect for busy nights.”
“New favorite here — spot on. crowd-pleaser was spot on.”
“Super easy and turned out amazing! My family asked for seconds. Saving this one.”
“This sweet treat was absolutely loved — the fresh really stands out. Thanks!”
“Made it tonight and wow — family favorite! Will definitely make Tiny Chopped Salad with Sunshine Dressing again.”
“Packed with flavor and so simple. Exactly what I wanted from Tiny Chopped Salad with Sunshine Dressing.”


