

The Ultimate Gluten Free Hawaiian Rolls
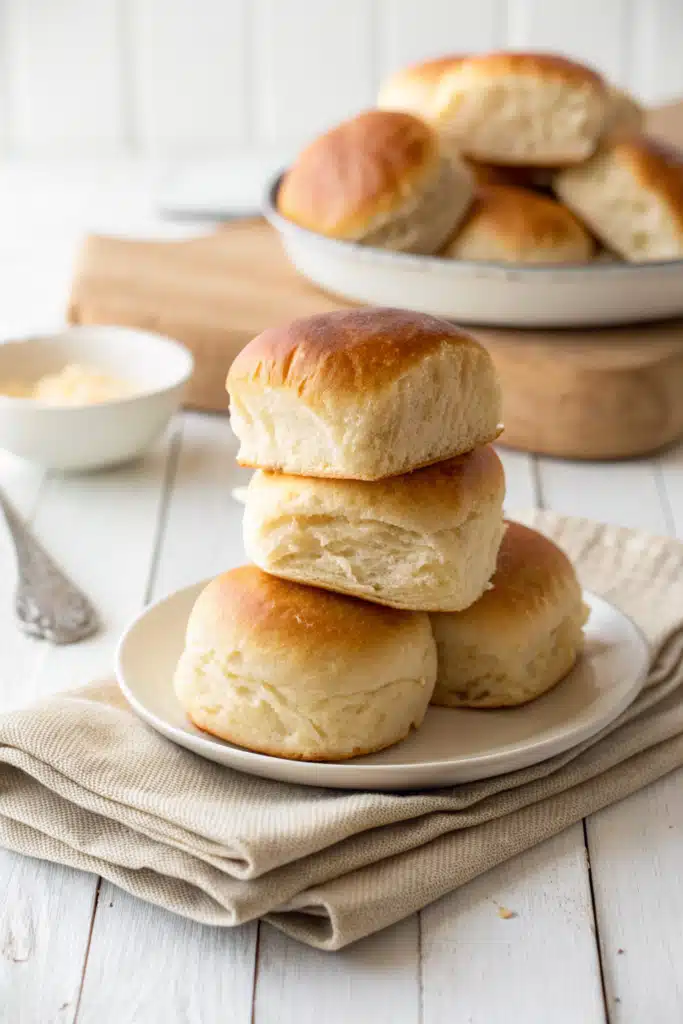
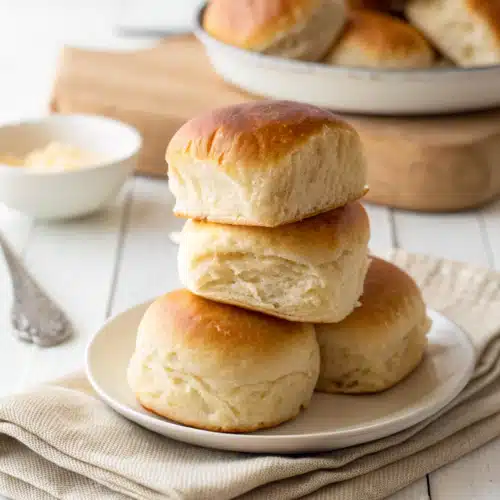
Have you ever just craved that pillowy, sweet, melt-in-your-mouth perfection of a classic Hawaiian roll, only to remember that gluten is completely off the table? Trust me, I know the heartbreak. For the longest time, I watched my family devour those iconic little orange-packaged buns at holiday dinners while I settled for a dense, crumbly alternative that tasted more like cardboard than actual bread. Well, my friends, the days of bread envy are officially over.
I have spent months tweaking, testing, and sometimes completely failing in my kitchen to bring you the absolute best gluten free Hawaiian rolls you will ever bake. These beauties are incredibly soft, perfectly sweet with that signature pineapple touch, and practically beg to be pulled apart and slathered in salted butter. Whether you are whipping up a batch of sliders for game day or just want a comforting side for your Sunday roast, these rolls are going to change your life. Grab your apron, pour yourself a cup of coffee, and let’s get baking!
What Are Gluten Free Hawaiian Rolls?
If you are new to the wonderful world of sweet breads, you might be wondering what makes these rolls so incredibly special. Traditional Hawaiian rolls are a type of sweet, enriched bread that originated in Hawaii back in the 1950s. They get their distinct, irresistible flavor from a magical combination of pineapple juice, a hint of vanilla, and a touch of brown sugar. They are famously fluffy and pull-apart soft.
My gluten free Hawaiian rolls capture that exact same essence, but without the wheat flour that usually gives bread its structure. By using a high-quality gluten-free flour blend, a little xanthan gum for elasticity, and the traditional pineapple juice base, we recreate that iconic texture and taste. It’s a sweet, yeasted dinner roll that feels impossibly light. You get that beautiful golden-brown crust on top and a tender, airy crumb inside. They are the ultimate comfort food, transformed so that those of us with celiac disease or gluten sensitivities can finally join in on the fun without sacrificing an ounce of flavor.
How to Make Gluten Free Hawaiian Rolls
Quick Overview
Making these rolls is a labor of love, but it is so much easier than you might think! We start by activating our yeast in warm pineapple juice and a little sugar to get things nice and bubbly. Then, we mix our wet ingredients—including butter and eggs for richness—with our dry gluten-free flour blend. The dough will look a bit wetter and stickier than traditional bread dough, but don’t panic! That is exactly what we want for gluten-free baking. After a good mix, we shape the rolls, let them rise until they are beautifully puffy, and bake them to golden perfection. From start to finish, you are looking at a straightforward process that rewards you with the best bread of your life.
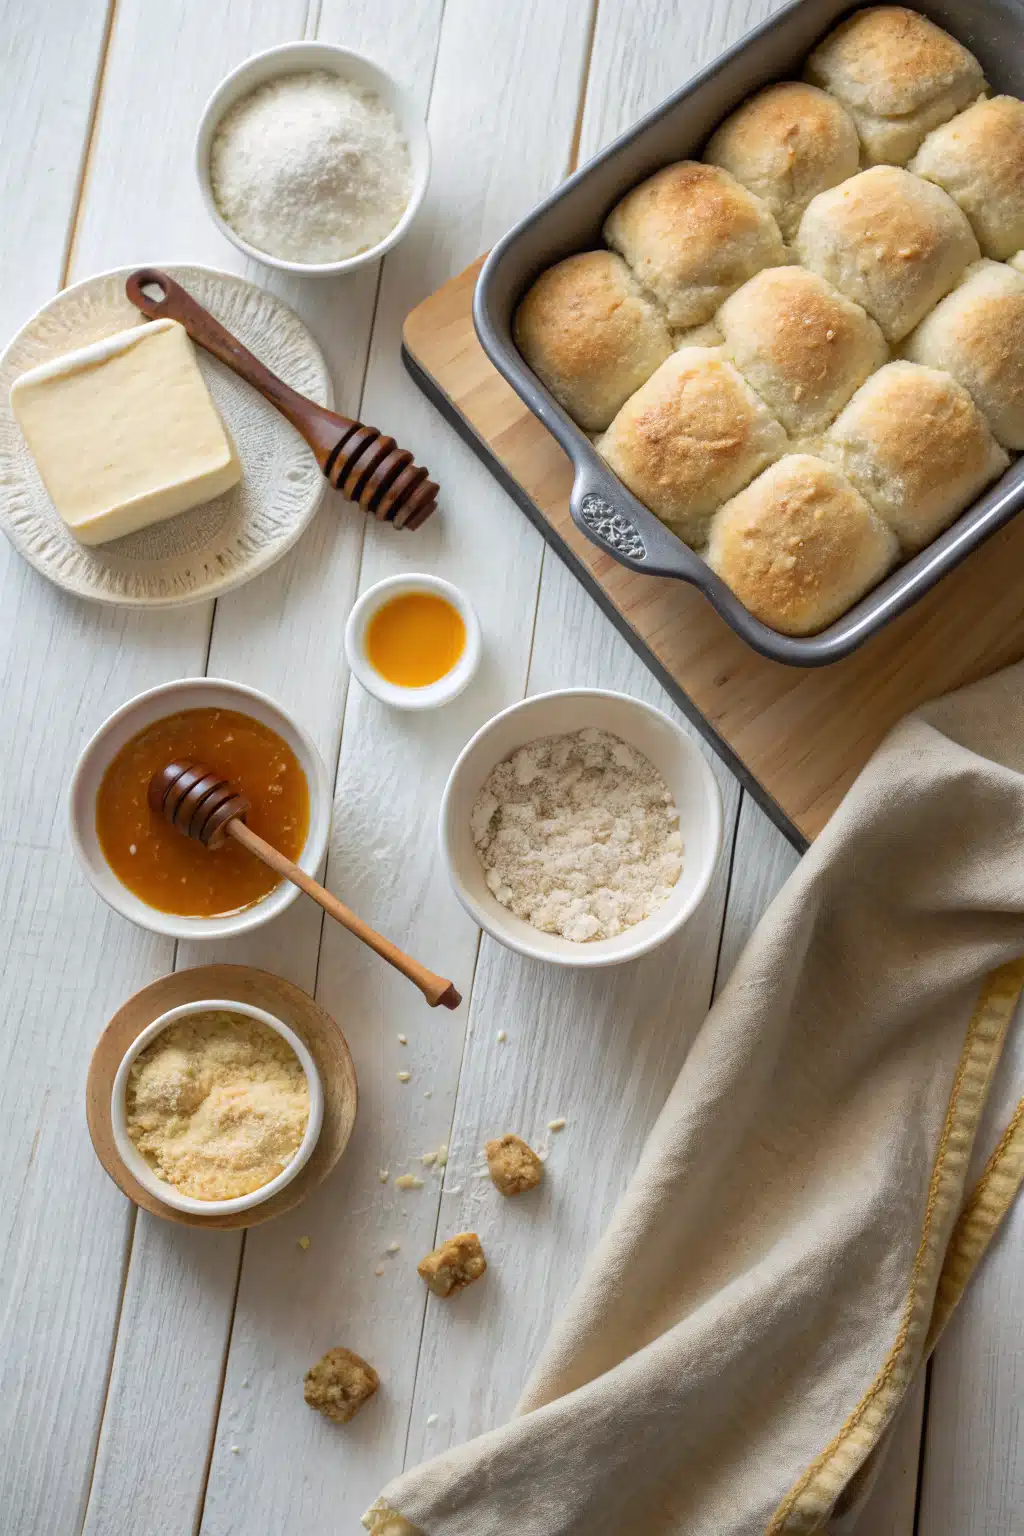
Ingredients
- Pineapple Juice: 1 cup, warmed (this is the secret flavor ingredient!).
- Active Dry Yeast: 2 ¼ teaspoons (one standard packet).
- Brown Sugar: ⅓ cup, lightly packed.
- Unsalted Butter: ½ cup, melted and slightly cooled.
- Eggs: 2 large eggs at room temperature.
- Vanilla Extract: 1 teaspoon for that bakery-style aroma.
- Gluten-Free Flour: 3 ½ cups of a high-quality 1-to-1 blend (make sure it contains xanthan gum).
- Salt: 1 teaspoon to balance the sweetness.
- Egg Wash: 1 egg beaten with a splash of water for that shiny, golden crust.
Step-by-Step Instructions
Step 1: Activate the Yeast
In the bowl of your stand mixer, combine the warm pineapple juice (make sure it’s warm to the touch, not hot!), yeast, and a tablespoon of the brown sugar. Give it a gentle stir and let it sit for about 5 to 10 minutes. You want it to get frothy and bubbly. If it doesn’t foam up, your yeast might be expired, and you’ll need to start over.
Step 2: Mix the Wet Ingredients
Once your yeast is happily bubbling away, add the melted butter, room temperature eggs, vanilla extract, and the rest of the brown sugar. Whisk everything together until it’s smooth and well combined.
Step 3: Add the Dry Ingredients
Attach the paddle attachment to your mixer. Add the gluten-free flour and salt to the wet mixture. Turn the mixer on low to get things incorporated, then bump it up to medium speed and beat the dough for a full 3 to 4 minutes. This step is crucial! Beating the dough helps activate the xanthan gum, giving your rolls that much-needed structure.
Step 4: Shape the Rolls
Gluten-free dough is notoriously sticky, so here is my favorite trick: lightly oil your hands before handling the dough. Scoop out portions of the dough (about a quarter cup each) and roll them into smooth balls. Place them in a greased 9×13 inch baking dish, spacing them evenly. They will touch as they rise and bake, which gives them that classic pull-apart edge.
Step 5: The Crucial Rise
Cover your baking dish with a damp towel or plastic wrap. Place it in a warm, draft-free spot in your kitchen and let the rolls rise for about 45 to 60 minutes. They should look noticeably puffy and have filled in the gaps in the pan.
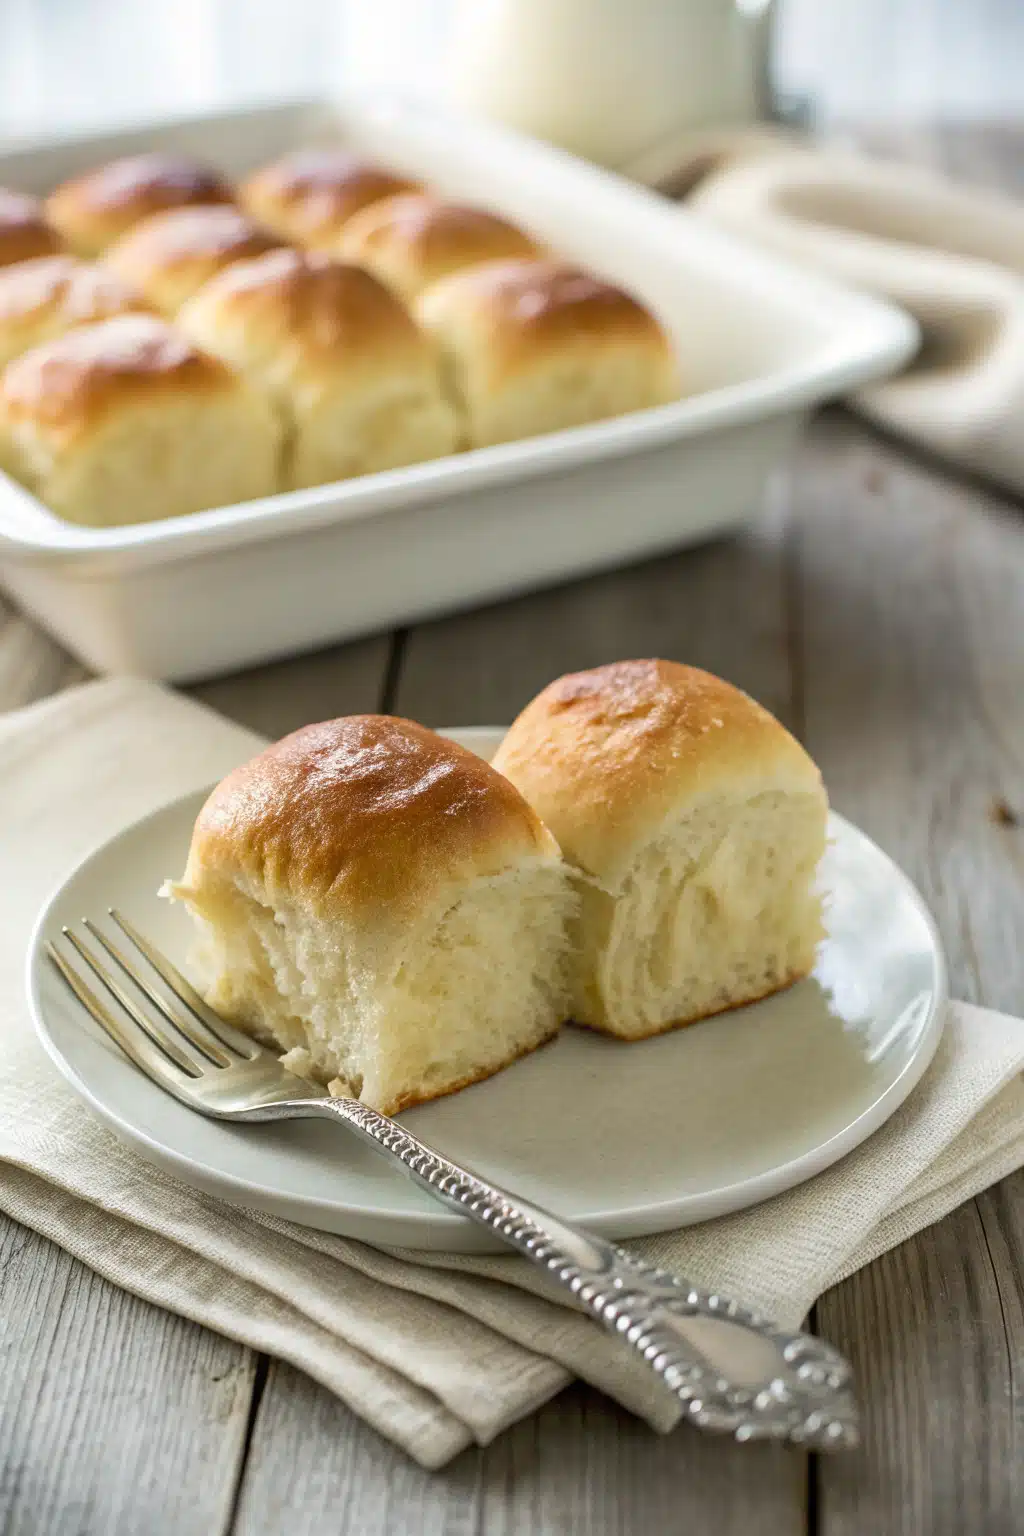
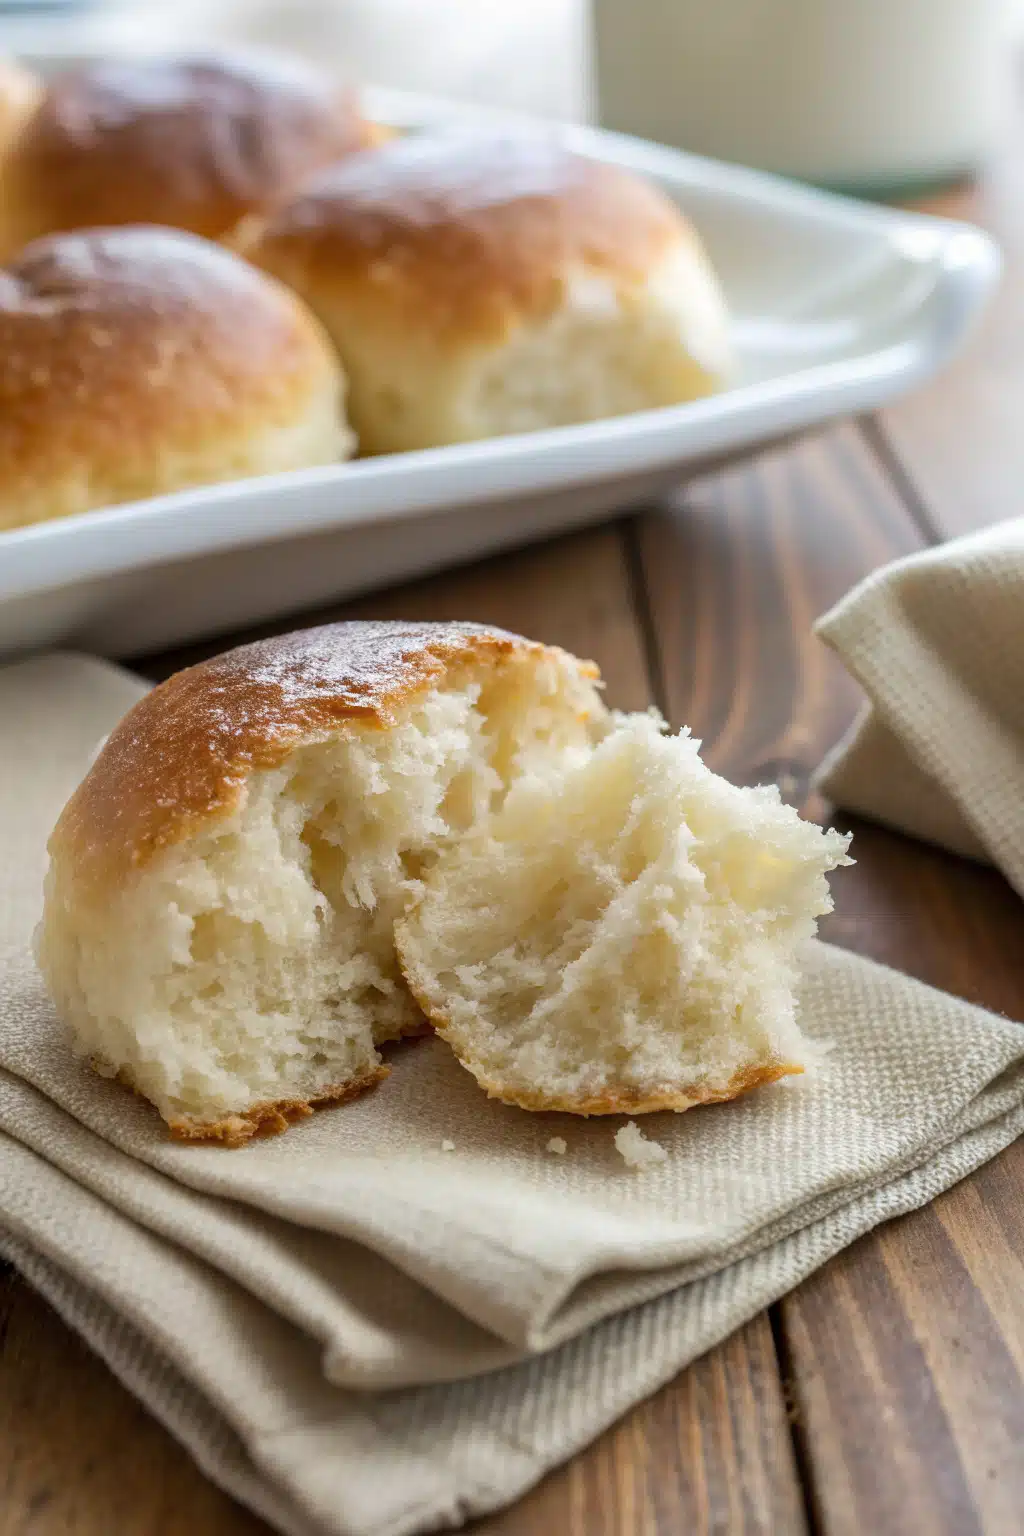
Step 6: Egg Wash and Bake
Preheat your oven to 350°F. Gently brush the tops of the risen rolls with your egg wash. This gives them that iconic, glossy brown finish. Bake for 20 to 25 minutes until the tops are deep golden brown and the rolls sound hollow when lightly tapped. Let them cool in the pan for a few minutes before serving!
What to Serve It With
There is honestly no wrong way to eat these gluten free Hawaiian rolls. My absolute favorite way to enjoy them is straight out of the oven, split open, and slathered with a generous pat of salted butter. But if you want to make a full meal out of them, they are the best base for sliders. Try them with slow-cooked pulled pork and tangy coleslaw, or make classic ham and Swiss cheese sliders baked with a buttery poppyseed glaze on top.
They also make a fantastic, comforting side dish for holiday meals like a Thanksgiving turkey dinner or an Easter ham. And please don’t forget breakfast! If you happen to have leftover rolls, slice them up and use them to make the most decadent, sweet French toast casserole you’ve ever tasted. The pineapple undertones work beautifully with maple syrup.
Top Tips for Perfecting Your Gluten Free Hawaiian Rolls
Measure your flour correctly: Gluten-free flour can be quite heavy. Always use the spoon-and-level method rather than scooping directly from the bag. If you pack too much flour into your measuring cup, your rolls will turn out dense and heavy.
Check your liquid temperature: Make sure your pineapple juice isn’t too hot (aim for around 105°F to 110°F). If it’s too hot, it will kill the yeast. If it’s too cold, the yeast won’t wake up at all.
Embrace the sticky dough: Don’t be tempted to add more flour just because the dough feels wet. Gluten-free dough is supposed to be much stickier than regular wheat dough. Just keep your hands oiled or slightly wet with water when shaping the rolls.
Don’t rush the rise: Gluten-free bread relies heavily on the yeast for its structure since there’s no gluten to hold it up. Let the rolls rise until they are visibly puffy. If your kitchen is cold, turn your oven on to the lowest setting for two minutes, turn it off, and then place your covered dough inside to rise.
Storing and Reheating Tips
If you somehow manage to have leftovers (which rarely happens in my house!), storing them correctly is key to keeping them soft. Keep your baked gluten free Hawaiian rolls in an airtight container at room temperature for up to two days. I highly recommend keeping them out of the fridge, as the cold air dries out gluten-free bread incredibly fast.
For longer storage, you can absolutely freeze them. Wrap the cooled rolls tightly in plastic wrap and place them in a freezer-safe bag for up to three months. When you are ready to eat, just let them thaw at room temperature. To get that fresh-out-of-the-oven softness back, pop them in the microwave for about 10 to 15 seconds, or warm them in a 300°F oven for five minutes wrapped loosely in foil.
Frequently Asked Questions
Final Thoughts
I really hope these gluten free Hawaiian rolls bring as much joy to your dinner table as they have to mine. Baking without gluten can definitely be a journey filled with trial and error, but recipes like this remind me that we don’t have to miss out on our absolute favorite comfort foods. There is something so incredibly satisfying about pulling a warm, golden pan of sweet rolls out of the oven and knowing everyone in your family can enjoy them safely.
If you try this recipe, please leave a comment and let me know how it goes! I love hearing about your baking adventures and seeing your delicious results. Happy baking, friends!
Gluten Free Hawaiian Rolls
Ingredients
Main Ingredients
- 3 cup gluten-free all-purpose flour blend with xanthan gum
- 0.25 cup cornstarch
- 0.33 cup granulated sugar
- 2.25 tsp instant yeast 1 packet
- 1 tsp salt
- 1 cup pineapple juice room temperature
- 2 large eggs room temperature
- 6 tbsp unsalted butter softened
- 1 large egg beaten with 1 tbsp water (for egg wash)
Instructions
Preparation Steps
- Mix Dry Ingredients: In a large mixing bowl, whisk together the gluten-free flour, cornstarch, sugar, instant yeast, and salt until well combined.
- Add Wet Ingredients: Add the room temperature pineapple juice, 2 eggs, and softened butter to the dry ingredients.
- Knead the Dough: Using a stand mixer with a paddle attachment, beat the mixture on medium speed for 3 to 5 minutes until a smooth, sticky dough forms.
- First Rise: Cover the bowl with a damp towel or plastic wrap and let the dough rise in a warm, draft-free place for 1 hour, or until noticeably puffy.
- Shape the Rolls: Divide the dough into 12 equal pieces. Roll each piece into a smooth ball with lightly oiled hands and place them into a greased 9x13-inch baking dish, touching slightly.
- Second Rise and Egg Wash: Cover the baking dish and let the rolls rise for another 30 minutes. Preheat your oven to 350°F (175°C). Gently brush the tops of the risen rolls with a beaten egg wash.
- Bake and Serve: Bake for 25 to 30 minutes until the rolls are deep golden brown and cooked through. Let them cool slightly in the pan before serving.
Notes
Featured Comments
“Impressed! Clear steps and absolutely loved results. Perfect for busy nights.”
“New favorite here — creamy. crowd-pleaser was spot on.”
“Super easy and turned out amazing! My family asked for seconds. Saving this one.”
“This sweet treat was absolutely loved — the rich really stands out. Thanks!”
“Made it tonight and wow — comforting! Will definitely make 7 Easy Steps to Homemade Gluten-Free Hawaiian Rolls again.”
“Packed with flavor and so simple. Exactly what I wanted from 7 Easy Steps to Homemade Gluten-Free Hawaiian Rolls.”


