

If you told me a few years ago that I’d be swooning over a batch of brownies infused with pumpkin and rolled in cinnamon sugar, I probably wouldn’t believe you. But here I am, baking these pumpkin snickerdoodle brownies whenever I want a little soul-warming treat that feels like a hug in dessert form. I’ve made them countless times—sometimes for family movie nights, other times just when I need a quick energy boost—and they never fail to bring a smile. The smell alone—cinnamon, pumpkin, a hint of vanilla—fills the house with cozy nostalgia. These brownies are my secret weapon on busy nights when I don’t have hours to bake from scratch but still crave something truly special. Trust me on this: once you try these, they’ll be in your regular rotation too. They’re so moist, with just enough spice, and that cinnamon sugar crust? Oh, it’s pure heaven. Grab your ingredients; I promise you’ll want to make these tonight!
What is Pumpkin Snickerdoodle Brownie?
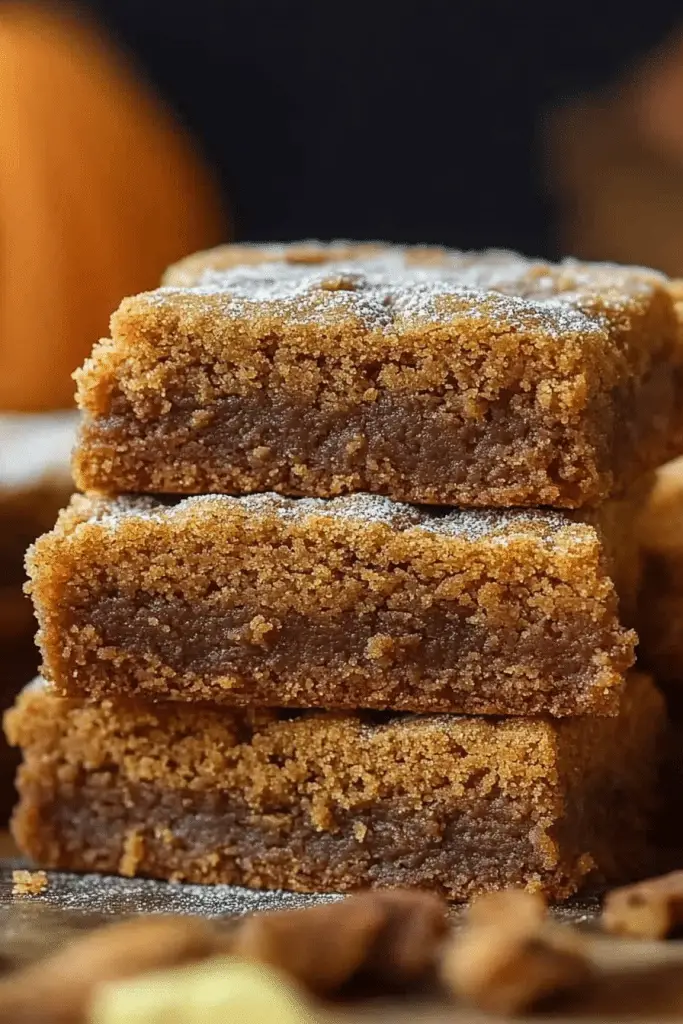
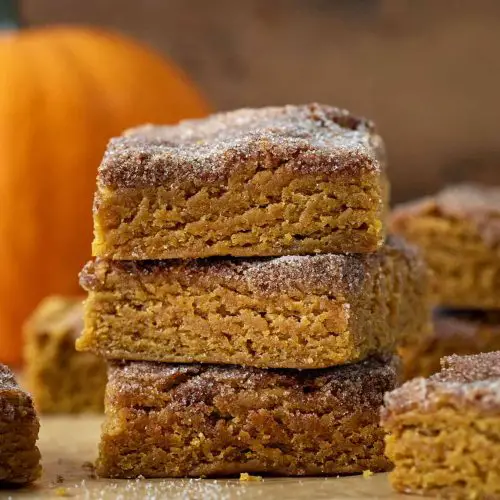
Think of pumpkin snickerdoodle brownies as a delightful mash-up of two classic favorites—rich, fudgy brownies and the cinnamon-sugar goodness of snickerdoodles. It’s basically a pumpkin-spiced brownie base with a swirl of cinnamon sugar that adds a crackly, sweet crust on top. The name might sound fancy, but it’s really just a cozy, foolproof recipe you can whip up in no time. This dessert is all about comfort—the kind that makes you want to curl up with a blanket and a cup of tea. It’s essentially a seasonal twist on your everyday brownie, with the added bonus of pumpkin’s natural moisture and flavor. Think of it as a hybrid that hits all the right notes: moist, gooey, spicy, and perfectly sweet. And because it’s so easy, even beginner bakers can get it just right—the secret is in the cinnamon sugar crust that gives every bite that irresistibly crispy top. It’s the kind of treat that makes fall feel extra special—and honestly, I crave it all year round!
How do I make Pumpkin Snickerdoodle Brownies?
Quick Overview
This recipe is all about mixing the richness of fudgy brownies with the cozy warmth of pumpkin and cinnamon. First, you prepare your brownie batter with melted butter, cocoa, sugar, eggs, and pumpkin puree. Meanwhile, you blend cinnamon and sugar to create that signature snickerdoodle topping. After pouring the batter into your pan, you swirl in the cinnamon sugar and sprinkle some extra on top for that irresistible crackly crust. It all bakes in under 30 minutes, and the result is a dense, moist, flavor-packed treat with a crispy cinnamon sugar top that’s downright addictive. Honestly, the hardest part is waiting for it to cool enough to cut!
Ingredients
For the Main Batter:
- 1 ½ cups fresh pumpkin puree (canned works fine, but homemade is way better)
- ½ cup unsalted butter, melted (or coconut oil if you want dairy-free)
- 1 cup granulated sugar
- 2 large eggs
- 1 teaspoon vanilla extract
- ½ cup unsweetened cocoa powder (preferably Dutch-processed)
- 1 ½ cups all-purpose flour
- 1 teaspoon baking powder
- ½ teaspoon salt
For the Filling & Swirl:
- ¼ cup cinnamon sugar (combine ¼ cup granulated sugar with 1 tablespoon ground cinnamon)
For the Glaze (optional but highly recommended!):
- ½ cup powdered sugar
- 2 teaspoons milk or almond milk
- ½ teaspoon vanilla extract
Step-by-Step Instructions
Step 1: Preheat & Prep Pan
Set your oven to 350°F (175°C). Line a 9×9-inch square baking pan with parchment paper or grease it well—it makes life so much easier when it’s time to cut. Get everything ready because things move quickly once you start mixing!
Step 2: Mix Dry Ingredients
In a small bowl, whisk together your cocoa powder, flour, baking powder, and salt. This step ensures your dry ingredients are evenly distributed, which helps prevent clumps and gives you a consistent texture. Trust me, skip this step at your own peril; lumpy batter is no fun.
Step 3: Mix Wet Ingredients
In a larger bowl, combine the melted butter, sugar, eggs, vanilla, and pumpkin puree. Be sure the butter is cool enough so the eggs don’t scramble—if it’s hot, just wait a minute or two. Mix until smooth—this is where your kitchen smells like autumn!
Step 4: Combine
Gradually add your dry ingredients to the wet mixture, stirring gently just until combined. Overmixing here will make the brownies dense, and trust me, nobody wants that. The batter should be thick but still scoopable.
Step 5: Prepare Filling
Mix your cinnamon sugar in a small bowl. This will be layered and swirled through your batter, creating that signature snickerdoodle flavor with each bite. If you’re feeling adventurous, add a pinch of nutmeg or ginger for extra warmth.
Step 6: Layer & Swirl
Pour half of the brownie batter into the prepared pan. Sprinkle half of the cinnamon sugar on top, then add the remaining batter. Using a toothpick or skewer, gently swirl the cinnamon sugar through the batter—don’t overdo it, you want a marbled effect, not a mess!
Step 7: Bake
Pop your pan into the oven and bake for about 25-30 minutes. Check doneness with a toothpick—it should come out with a few moist crumbs but no wet batter. Ovens vary, so start checking around the 25-minute mark.
Step 8: Cool & Glaze
Allow the brownies to cool in the pan for at least 15 minutes—patience, I know! Once cooled, whisk together your glaze ingredients and drizzle on top. The glaze adds a sweet punch that balances the spicy cinnamon crust.
Step 9: Slice & Serve
Use a sharp knife to cut into squares—warmed slightly with a dab of vanilla ice cream on top makes it even better. Serve a piece with your favorite coffee or tea, and enjoy the cozy vibes!
What to Serve It With
This brownie pairs beautifully with a warm cup of chai or spiced latte for breakfast or brunch. For a more indulgent dessert, top with a scoop of vanilla ice cream or a dollop of whipped cream. On casual nights, I love serving these with a glass of cold milk or a cup of herbal tea. My kids often ask for these as an after-school snack—trust me, they disappear faster than I can bake them! For family gatherings, I like to cut them into small squares, dust with extra cinnamon, and set them out on a pretty plate—people will be fighting over the last piece. If you want to keep things simple, a little extra cinnamon sugar sprinkled on top before baking adds that classic snickerdoodle flavor without any extra fuss. Honestly, these brownies make any moment special—they’re like a warm hug in every bite!
Top Tips for Perfecting Your Pumpkin Snickerdoodle Brownies
Over the years, I’ve learned a few tricks that really elevate these brownies to perfection. First, when working with pumpkin, I always make sure to drain excess moisture if it’s homemade—squeeze out a bit of the liquid in a clean towel. It keeps the brownies from becoming too soggy. When mixing, I avoid overworking the batter; gentle folding is key to keeping them tender. For the cinnamon sugar swirl, I like to sprinkle a little extra on top before baking, so that crackly crust is extra pronounced. If your oven runs hot, consider reducing the temperature by 25°F and adding a few extra minutes—better to underbake slightly than overbake. To make these dairy-free, coconut oil works like a charm, and vegan chocolate chips are a wonderful addition—trust me, no one notices the difference! One thing I’ve learned: don’t skip the glaze, even if you’re in a rush. It ties everything together and adds that finishing touch of sweetness and shine. Over hours, I’ve experimented with adding chopped pecans or walnuts to the swirl—delicious! The texture stays moist and decadent, and the cinnamon-sugar topping keeps that signature crispness. If you want more spice, an extra pinch of ginger or nutmeg blends beautifully. The key is patience—let those brownies cool completely before slicing for perfect pieces. And if you do end up with a few crumbs, turn them into a trifle layered with whipped cream—my family’s secret leftover dessert! Plus, I always store these in an airtight container for up to 3 days—if they last that long!
Storing and Reheating Tips
These brownies are pretty forgiving when it comes to storage. Once cooled completely, wrap them tightly in plastic wrap or store in an airtight container. At room temperature, they stay moist and delicious for up to two days—perfect for a quick snack. Just be sure to keep them away from direct sunlight or heat, or the cinnamon sugar crust might soften. If you want to keep them longer, pop the whole pan in the refrigerator for up to a week—just bring them to room temp or warm briefly in the microwave before serving for that fresh-out-of-the-oven feel. For freezing, wrap individual squares in plastic wrap and stash them in an airtight container or freezer bag. They’ll keep for up to a month. Thaw at room temp or warm in the microwave—add a drizzle of glaze afterward if needed. As for the glaze, I recommend adding it after reheating; it keeps that glossy, fresh look. And honestly, these brownies reheat pretty well—just pop them in for 15-20 seconds, and they’re gooey and satisfying all over again. Trust me, you’ll want to keep a stash in the freezer for last-minute cravings. Just remember, the cinnamon-sugar crust does soften over time, so if you want that signature crackle, best to add a fresh sprinkle before serving.
Frequently Asked Questions
Final Thoughts
There’s just something about these pumpkin snickerdoodle brownies that gets me every time. Maybe it’s the warmth of cinnamon, the moist richness of pumpkin and chocolate, or that crispy cinnamon sugar crust. Whatever it is, I keep coming back to this recipe—it’s become a staple in my fall baking repertoire. Whether you’re baking for family, friends, or just for yourself on a cozy evening, I know you’re going to love how easy and satisfying these are. And honestly, they’re so versatile—you can tweak the spices, add nuts, or go vegan—so let your imagination run wild! I’d love to hear how yours turn out, so don’t forget to leave a comment or share your variations. Happy baking! And remember: the best treats are made with love—and a little bit of pumpkin. Enjoy every bite!
pumpkin snickerdoodle brownies
Ingredients
Main Ingredients
- 1 cup unsalted butter melted
- 1.75 cups light brown sugar packed
- 1 cup pure pumpkin
- 2 teaspoons vanilla extract
- 2.5 cups all-purpose flour
- 2 teaspoons cornstarch
- 2 teaspoons pumpkin pie spice
- 1 teaspoon baking powder
- 1 teaspoon kosher salt
- 0.5 teaspoon nutmeg
- 3 tablespoons granulated sugar
- 1 teaspoon cinnamon
Instructions
Preparation Steps
- Preheat oven to 350°F. Line a 9×9-inch baking dish with parchment paper. Set aside.
- Whisk melted butter and brown sugar in a large bowl until fully incorporated.
- Add the pumpkin and vanilla. Whisk to combine.
- In a separate, medium-sized bowl, whisk together the flour, cornstarch, pumpkin spice, baking powder, salt, and nutmeg.
- Gradually stir the flour mixture into the pumpkin mixture until completely combined.
- Spread the batter into the bottom of the lined baking dish. (The batter is thick.)
- In a small bowl, whisk together the granulated sugar and cinnamon.
- Evenly sprinkle the mixture over the batter.
- Bake for 35-38 minutes, or until the edges just begin to turn golden brown and the center is no longer jiggly. Check at 30 minutes and insert a toothpick to ensure it comes out with crumbs only.
- Allow the bars to cool slightly before cutting and serving.
Notes
Featured Comments
“Impressed! Clear steps and quick weeknight win results. Perfect for busy nights.”
“New favorite here — quick weeknight win. crowd-pleaser was spot on.”
“Super easy and turned out amazing! My family asked for seconds. Saving this one.”
“This sweet treat was absolutely loved — the buttery really stands out. Thanks!”
“Made it tonight and wow — crowd-pleaser! Will definitely make Autumn Spice Brownies How to Bake Bliss again.”
“Packed with flavor and so simple. Exactly what I wanted from Autumn Spice Brownies How to Bake Bliss.”


