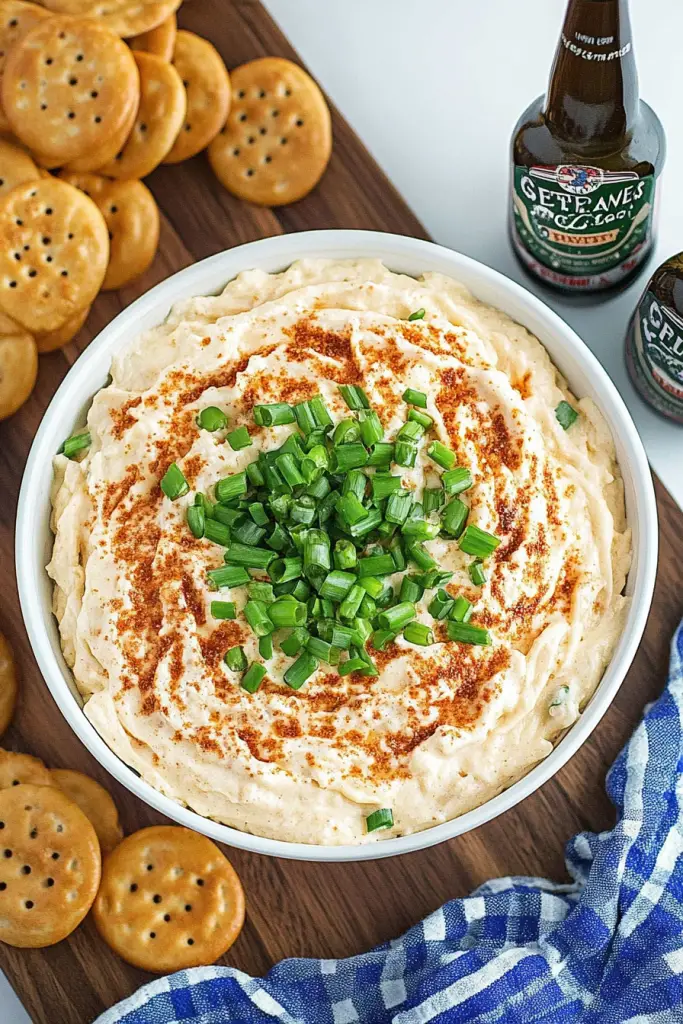
I still remember the first time I tasted baked cheese dip on a busy family game night. The kitchen filled with that warm, toasty scent—garlic, Cream Cheese, cheddar, a whisper of smoky paprika—and I could practically hear the chips calling from the counter. We piled into the living room with bowls of warm corn chips, and within minutes the dip looked like a little molten sunset, bubbling at the edges. This recipe isn’t fancy; it’s the kind of crowd-pleasing, lazy-evening staple that makes weeknights feel cozy. If you’ve ever compared it to spinach-artichoke dip, you’ll know the difference: baked cheese dip is unabashedly cheesy, gloriously simple, and the kind of dish you can pull together in a snap before your coffee even cools. This one’s a lifesaver on busy nights, and my kids actually ask for seconds. I’m sharing it here the way I’d share a favorite family secret—with a few tweaks, lots of stories, and a lot of smiles around the table.

What is baked cheese dip?
Think of baked cheese dip as your warm, gooey-cheese ambassador. It’s essentially a cozy blend of melty cheeses, a touch of creaminess from dairy or a dairy-free swap, and a handful of seasoning that brings everything together. The name says it all: it’s cheese, baked until it’s silky and inviting, then scooped straight from the pan with crusty bread or sturdy chips. The concept is simple—you melt, you mingle, you bake—and the result is a pot that stays irresistibly creamy while the edges crisp up just enough to give you that caramelized flavor. It’s a crowd-pleaser that doesn’t require fancy ingredients or a lengthy prep, which is why it tends to vanish the moment it hits the table. If you’re chasing a recipe that feels luxurious but is truly easy, this baked cheese dip has your back.
Why you’ll love this recipe?
What I love most about this baked cheese dip is the way it tastes like a hug in a skillet. The cheese blend—creamy, tangy, with just a kiss of heat—never fails to spark conversation at the table. It’s a no-fuss recipe that delivers big on comfort without demanding a long list of ingredients. It’s also surprisingly adaptable, which makes it perfect for weeknights and spontaneous gatherings. The scent alone draws people in from other rooms, and I’ve watched friends hover by the oven, dipping in for a taste before a single bite lands on a plate. This dip is forgiving too: a quick whisk of Cream Cheese with sour cream or Greek yogurt gives you extra silkiness, and a pinch of paprika or chili powder can transform the flavor in seconds. What you end up with is something both playful and nostalgic—the kind of dish your family declares a staple, the way you reach for it when you need a warm moment in a hectic week. My kids ask for this all the time, and I’ve learned to keep a stash of sturdy dippers—corn chips, soft pita wedges, and toasted baguette slices—so there’s always a perfect bite at the ready. It’s a simple dish, but it feels special every time.
How do you make baked cheese dip?
Quick Overview
This baked cheese dip comes together in three easy stages: whisk the dairy-friendly base, melt in the cheese until it’s gloriously creamy, and then bake until the top is bubbling and lightly bronzed. The beauty is in the simplicity: you’ll preheat, mix, pour, and bake while you prep your dippers. It’s essentially a one-pan, one-skillet show that doesn’t demand constant attention. If you’ve got a busy night, you can even assemble it a few hours ahead and bake right before guests arrive—the flavor deepens a touch, and it still stays creamy inside. Trust me on this one: once you taste that first molten bite, you’ll want to double the batch or at least stash some for later. It’s that comforting, that dependable, that reliably delicious.
Ingredients
For the Main Batter:
- 8 oz Cream Cheese, softened to room temperature (full-fat brings the richest texture)
- 1 cup shredded sharp cheddar
- 1 cup shredded mozzarella (or a blend of mozzarella and Gruyère for extra depth)
- 1/2 cup sour cream or Greek yogurt for extra silkiness
- 1/2 cup milk (adjust for thickness; use almond milk if you want a lighter version)
- 2 cloves garlic, minced (or 1/2 teaspoon garlic powder if you’re in a rush)
- 1/2 teaspoon paprika (smoked paprika if you want a deeper, smoky note)
- 1/4 teaspoon black pepper
- Pinch of cayenne (optional, for a gentle kick)
- Salt to taste (start with 1/4 teaspoon and adjust)
For the Filling:
- 2 tablespoons finely chopped chives or green onions (for a fresh bite)
- 1/4 teaspoon garlic powder (optional, if you like extra garlic punch)
- 1/8 teaspoon kosher salt
For the Glaze:
- Extra shredded cheese to sprinkle on top (optional but pretty)
- Pinch of paprika or chili powder for color and a little zing
Step-by-Step Instructions
Step 1: Preheat & Prep Pan
Heat your oven to 375°F (190°C). Lightly grease a 8×8-inch baking dish or a small cast-iron skillet. I love the cast-iron vibe here—it keeps things warm for longer and looks gorgeous on the table. If you’re dipping with bread, toast the slices briefly to get a little extra crunch when you dunk. This early prep saves you a minute later and makes the first bite even more satisfying.
Step 2: Mix Dry Ingredients
In a small bowl, whisk together the paprika, black pepper, cayenne (if using), and a pinch of salt. This helps distribute the seasoning evenly so you don’t end up with pockets of heat or saltiness. It’s a tiny step, but I learned the hard way that even seasoning throughout matters for a balanced bite.
Step 3: Mix Wet Ingredients
In a larger bowl, beat the cream cheese until silky, then whisk in the sour cream (or Greek yogurt) and milk. The mixture should be smooth with a gentle looseness—the kind that clings to a chip without sliding off. If your cream cheese is stubborn, a minute in the microwave (in short bursts) softens it just enough to whisk in easily. I’ve done that countless times, and it never fails to make the texture extra creamy.
Step 4: Combine
Fold in the shredded cheeses, garlic, and half of your seasoned dry mix. Stir gently until the cheese is just incorporated—overmixing can make the texture grainy. The goal is a velvety, glossy mixture that still holds a bit of pull when you dip in. If it looks too thick, splash in a little more milk; if it’s too loose, add a touch more cream cheese.
Step 5: Prepare Filling
Stir in the chopped chives (or green onions) and a touch more salt. This is where the dip starts to feel personal—fresh herbs brighten the whole bowl and cut through the richness just enough to keep things balanced. If you’re serving this at a party with lots of people, you can swap in chopped jalapeño or a few finely minced pickled peppers for a brighter, punchier finish.
Step 6: Layer & Swirl
Spread the base mixture into your prepared dish. If you like swirls of extra color and texture, dot it with a little more cheese and use a toothpick to create a few gentle swirls. The goal is a prettily marbled top that hints at the ooey-gooey heart beneath. A quick sprinkle of the paprika on top makes the surface look almost glossy as it bakes.
Step 7: Bake
Bake for about 18-22 minutes, or until the edges are bubbling and the center looks just set. If you’re using a smaller dish or want a thicker center, check at the 15-minute mark and add a few more minutes as needed. The top should be lightly bronzed, not burnt, and the cheese should stretch when you pull a chip out. If you’re short on oven space, you can pre-melt everything in the pan on the stovetop and finish with a quick bake just to gild the top a little.
Step 8: Cool & Glaze
Let the dip rest for 5 minutes off the heat before you glaze or top. If you’re adding a glaze, whisk a light splash of cream with a tiny bit of melted butter and a pinch of salt, then drizzle in a shallow lattice over the surface or simply scatter an extra handful of cheese. A quick finish with chopped herbs can be stunning and fragrant, but a simple dusting of paprika also works beautifully for color and aroma.
Step 9: Slice & Serve
Serve hot with a platter of dippers: tortilla chips, crusty bread cubes, pretzel bites, and crisp veggie sticks if you’re feeling virtuous. The dish is best enjoyed immediately, while the cheese is still oozy. My family tends to pace themselves—one round of dipping, a quick refill, another round—because the mid-table chatter gets loud and warm and happy when this is on the table.
What to Serve It With
This baked cheese dip shines as a snack or a starter, but you can tailor it to a lot of occasions. Here are some small, practical ideas that keep things deliciously simple:
For Breakfast: Warm bagel bites with a schmear of cream cheese, a few crumbles of smoked salmon, and a sprinkle of chopped chives. It’s not a traditional breakfast, but it’s a cozy, indulgent start to a weekend. If you’re feeding a crowd, set out mini pretzels and sliced baguette and let everyone assemble their own little cheese-dip toast bites with eggs on the side.
For Brunch: A bright, laid-back setup with cucumber rounds, cherry tomatoes, and a handful of herbs. Pair with a light sparkling beverage or a citrusy mocktail. The dip’s creaminess cuts through tangy pickles and fresh herbs, and it doubles as a quick topping for morning toast, if you’re feeling fancy but still casual.
As Dessert: I know this sounds odd, but a touch of fig jam or honey swirled into the top after baking creates a surprisingly delightful sweet-salty contrast. You can also serve the dip with cinnamon-sugar pita chips for a playful, dessert-like finish. It won’t replace your favorite dessert, but it makes a memorable, unexpected finale when you want something warm and comforting instead of a heavy slice of pie.
For Cozy Snacks: The classic combo—chips, crusty bread, and crunchy vegetables—is perfect here. Add a bowl of sliced apples for a crisp sweetness that lightens the heft of cheese. If you’re feeding a crowd that loves heat, offer a small dish of hot sauce or pickled jalapeños on the side so guests can customize their level of kick.
Personally, I keep the dip hot until the last bite is gone. There’s something about the way the cheese stretches with every scoop that makes friends linger at the table. My family has celebrations where we fill the entire serving dish and still somehow end up with nothing but a warm, delicious memory left behind. We’ve learned to keep a backup batch ready—the reheated version is just as good, and it makes weeknights feel celebratory all over again.
Top Tips for Perfecting Your baked cheese dip
These are the little tricks I’ve picked up after making this dip dozens of times. They’ve saved me from a few late-night dashes to the grocery store and helped me nail that glossy, irresistibly creamy texture without turning it into glue.
Cheese Choice: Use a mix of a melty, mild cheese and a sharper cheese to balance richness with bite. A good combo is cream cheese plus cheddar and mozzarella. If you want extra depth, add a little Gruyère or fontina. Grate fresh cheeses rather than pre-shredded for better melting and flavor.
Texture Mastery: If your mixture seems too thick, loosen with a splash of milk or a dollop of sour cream. If it’s too loose, whisk in a touch more cream cheese. The texture should be smooth and luxurious, not runny or stiff. The moment you see a steady, creamy sheen, you’re close.
Flavor Tweaks: Garlic is a hero here, but you can swap in a touch of onion powder or smoked paprika to transform the profile. A pinch of cayenne adds warmth that lingers on the tongue; a few drops of hot sauce brighten it up if your guests like a kick.
Swirl Patterns: For a visually appealing top, drizzle a little extra cheese and use a skewer to create soft swirls. You’ll be rewarded with an almost marbled look that hints at the ooze beneath. It makes a big impression with minimal effort.
Ingredient Swaps: If you’re dairy-free, try a blend of dairy-free cream cheese, dairy-free yogurt, and a plant-based mozzarella substitute. The texture will still be plush, though the flavor varies a bit, so you may want to adjust salt and spices a touch. Almond milk can replace dairy milk for a dairy-free option, but you might find the dip a touch thinner; compensate with a touch more cream cheese.
Baking Tips: For a consistently hot dip, bake in an oven-safe skillet or dish that retains heat well. If your oven runs hot, start checking at 15 minutes and aim for a lightly browned top. If you’re baking for a crowd, you can keep it warm in a low-wattage warming drawer or a chafing dish to maintain that perfect, gooey center.
Glaze Variations: A light glaze is optional, but if you want a glossy finish, whisk a teaspoon of milk with a dab of melted butter and a pinch of salt, then drizzle sparingly. You can also experiment with a thin balsamic reduction or a touch of honey and hot sauce for an unexpected balance of sweet and heat.
Lessons Learned: I’ve learned that patience makes a difference—let the cheese melt slowly to avoid greasy pools. I’ve also discovered that a quick taste test halfway through baking guides you toward the exact moment of perfection, especially when you’re juggling multiple dishes. This is one you can trust to forgive a small misstep and still deliver comfort in a pot.
Storing and Reheating Tips
Leftovers aren’t common around here, but when they happen, I’ve found a few practical ways to keep the dip tasting fresh and delicious. You’ll notice the texture and flavor shift a bit after storage, but with the right approach, you can revive it nicely.
Room Temperature: Not ideal for more than 2 hours. Cheese-based dips can become unsafe if left out too long, and the quality diminishes as dairy content settles. If you’re hosting a long party, keep a portion warm in a small fondue pot or chafing dish and refrigerate the rest for later.
Refrigerator Storage: Transfer to an airtight container within two hours of baking. It will keep for 3–4 days. Reheat gently in the microwave in 30-second bursts, stirring in between, or reheat in the oven at 350°F (175°C) until just bubbling. If the top has started to firm, a quick stir helps re-emulsify the cheese and bring back that creamy texture.
Freezer Instructions: This dip isn’t ideal for freezer storage, as the texture can separate when thawed. If you want to prep ahead, consider freezing just the dip mixture (before baking) and then assembling and baking fresh when you’re ready to serve. Thaw in the refrigerator overnight and bake as usual, adding a few minutes if needed to bring it back to bubbling readiness.
Glaze Timing Advice: If you plan to glaze, add the glaze only when you reheat. A glaze or finishing cheese can harden a bit when cold, so a quick rewarm keeps the glaze glossy and the dip extra inviting.
Frequently Asked Questions
Can I make this gluten-free?
Yes. The dip itself is naturally gluten-free as long as you use gluten-free ingredients. Check your processed cheeses and any add-ins to ensure they don’t contain gluten. If you’re serving with crackers or chips, choose gluten-free varieties to keep the whole dish friendly for guests with celiac or gluten sensitivity.
Do I need to peel the zucchini?
There’s no zucchini in this version, so no peeling required here. If you’re thinking of adding extra vegetables, I’d stick to quick-cooking options like minced garlic, chives, or a few roasted peppers—anything that doesn’t release too much water while baking.
Can I make this as muffins instead?
That’s a fun idea, but muffins with a cheese dip filling would need a different structure. If you want cheese-filled muffins, bake a simple cheese batter in a muffin tin, then dollop a spoonful of warm dip in the center and bake briefly to melt the center. It’s essentially a cheese-stuffed muffin experiment that can be delicious with the right balance of moisture and crumb.
How can I adjust the sweetness level?
This dip is savory, so sweetness shouldn’t be the focus. If you want a hint of sweetness for a more complex profile, consider a small drizzle of honey or a touch of maple syrup in the glaze, but start with a tiny amount and taste as you go. It’s amazing how a subtle sweetness can play with the saltiness and tang of the cheeses.
What can I use instead of the glaze?
If you prefer not to glaze, simply finish with a light sprinkling of extra shredded cheese and a pinch of paprika for color. You can also finish with chopped fresh herbs like chives or parsley for a bright finish, or a light dusting of smoked paprika for a smoky aroma without added glaze.
Final Thoughts
There’s something wonderfully satisfying about a dish that comes together so quickly and feels so comforting at once. This baked cheese dip is the kind of recipe that earns a permanent spot in the weekly lineup because it’s forgiving, deeply flavorful, and endlessly adaptable. It invites conversation, a little friendly chaos around the table, and the kind of warm, shared moment that lingers long after the last chip is dipped. I’ve cooked this for birthdays, game nights, and simple weeknights when we needed a little magic in the kitchen—and it never fails to bring a smile. If you try it, tell me how you customize your toppings, what cheese blends you adore, and what dippers you reach for first. I’d love to hear your twists and favorite pairings. Happy baking!
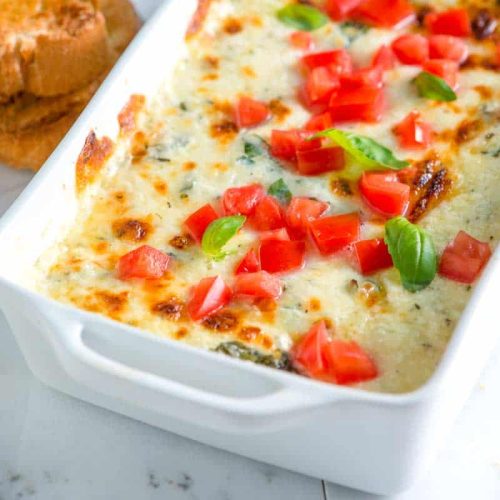
Baked Cheese Dip
Ingredients
Main Ingredients
- 0.5 cup cream cheese
- 0.5 cup sour cream
- 1 cup shredded cheddar cheese
- 1 cup shredded Monterey Jack cheese
- 0.25 teaspoon garlic powder
- 0.125 teaspoon onion powder
- 0.125 teaspoon paprika
- 0.125 teaspoon salt
- 0.125 teaspoon black pepper
Instructions
Preparation Steps
- Preheat oven to 375 degrees F (190 degrees C).
- In a medium bowl, combine cream cheese, sour cream, cheddar cheese, Monterey Jack cheese, garlic powder, onion powder, paprika, salt, and pepper.
- Stir until well combined and creamy.
- Spread the mixture evenly into a small baking dish.
- Bake for 20-25 minutes, or until bubbly and lightly browned.
- Serve warm with tortilla chips, crackers, or bread.
Notes
Featured Comments
“Impressed! Clear steps and so flavorful results. Perfect for busy nights.”
“New favorite here — super easy. crowd-pleaser was spot on.”
“Super easy and turned out amazing! My family asked for seconds. Saving this one.”
“This sweet treat was absolutely loved — the bright really stands out. Thanks!”
“Made it tonight and wow — comforting! Will definitely make baked cheese dip again.”
“Packed with flavor and so simple. Exactly what I wanted from baked cheese dip.”


