

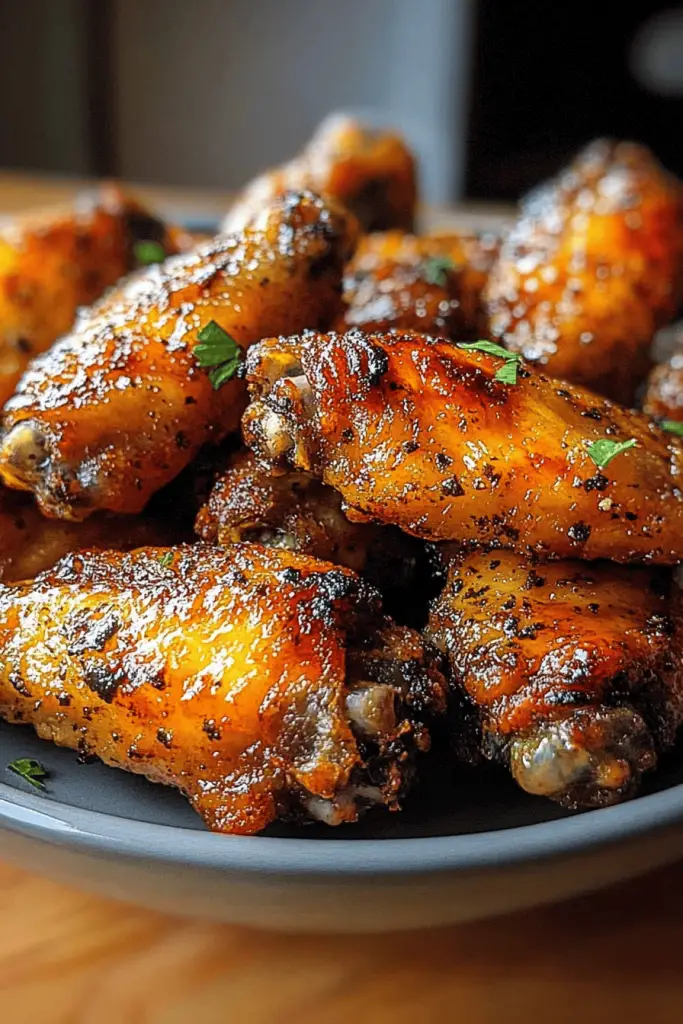
I’ll never forget the aroma that filled our kitchen the first time my mom roasted chicken like a pro. The edges crisped to a gentle bronze, while the inside stayed tender and juicy—the kind of scent that makes everyone hover near the oven, knives and forks at the ready. This Baked Chicken breast version is a little love letter to those Sundays: uncomplicated, dependable, and—dare I say it—better than takeout on weeknights. What I love most is that it’s not just a clean protein; it’s the starting point for a dozen different meals. It pairs well with greens, it shines in a sandwich, and it even plays nicely with a simple glaze for those nights you want a little extra sparkle. If you’ve ever tried classic roasted chicken and felt a bit overwhelmed by bones or dryness, this one’s for you. It’s a clean, confident method—baked chicken breast—that delivers flavor without fuss.
What is baked chicken breast?
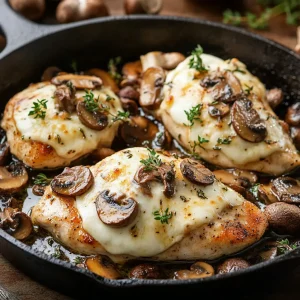
Think of Baked Chicken breast as the blank canvas of weeknight cooking. It’s essentially a boneless, skinless chicken breast that’s seasoned, sometimes stuffed, and then baked until just cooked through. The name is straightforward because the dish is exactly what it sounds like: chicken breast that’s baked in the oven. The beauty of it is in the details—the right seasoning, a little moisture, and an oven temperature that keeps the meat tender rather than drying it out. I like to imagine it as a reliable car that never lets you down: you can drive it to a family dinner, a lunch-box raid, or a casual weeknight date with creamy mashed potatoes. This approach makes it easy to control texture and flavor, which is especially important with chicken breast, since it can go from perfect to overdone in a heartbeat. It’s essentially a friendly, forgiving method that yields predictable, comforting results.
How to Make Baked Chicken Breast
Quick Overview
This method starts with a reliable, flavorful rub that seasons the chicken deeply, followed by a creamy, optional filling for extra juiciness. The chicken bakes until just cooked through, then a glossy glaze finishes the surface, bringing a touch of brightness. It’s simple enough to do on a weeknight, but the results feel special enough for a weekend dinner too. The key is not overbaking and allowing a brief rest after emerge from the oven so the juices settle, giving you slices that stay moist when plated. If you’ve got 40 minutes from start to finish, you’ve got dinner ready to go.
Ingredients
For the Main Rub:
- 4 boneless, skinless chicken breasts, pounded to even thickness
- 2 tablespoons olive oil
- 1 teaspoon salt
- 1/2 teaspoon freshly ground black pepper
- 1 teaspoon smoked paprika
- 1/2 teaspoon garlic powder
- 1/2 teaspoon onion powder
- 1/2 teaspoon dried oregano or thyme
- 1 teaspoon lemon zest (optional but bright)
For the Filling:
- 4 ounces cream cheese, softened (or dairy-free alternative)
- 1 cup fresh spinach, chopped
- 1 clove garlic, minced
- Salt and pepper to taste
- Optional: 1/4 cup shredded mozzarella or parmesan for extra richness
For the Glaze:
- 3 tablespoons honey or maple syrup
- 2 tablespoons lemon juice or white balsamic
- 1 teaspoon Dijon mustard (optional for a tangy kick)
- Pinch of salt
Step-by-Step Instructions
Step 1: Preheat & Prep Pan
Heat your oven to 375°F (190°C). Lightly grease a baking dish or line it with parchment for easy cleanup. If you’re stuffing, you’ll want a dish that’s wide enough to accommodate the pockets without crowding. I always start with a hot pan to help the edges of the chicken crisp a touch as it bakes.
Step 2: Mix Dry Ingredients
In a small bowl, whisk together the salt, pepper, paprika, garlic powder, onion powder, oregano, and lemon zest. This is your dry rub, and it’s the backbone of that punchy, homey flavor you’re aiming for. The lemon zest is a tiny thing, but it wakes everything up in a wonderful way.
Step 3: Mix Wet Ingredients
In another bowl, rub the chicken with olive oil. The oil helps the spices cling and also keeps the surface from drying too quickly. If you want extra moisture in the finished product, a splash of lemon juice brushed on before baking can add a fresh note without making the meat soggy.
Step 4: Combine
Pat the chicken dry, then rub it all over with the dry mixture. If you’re not stuffing, you can simply place the rubbed breasts in the baking dish. For a stuffing version, create a pocket by slicing horizontally into each breast, being careful not to cut all the way through. Fill with the cream cheese-spinach mixture, then secure with a couple of toothpicks to keep the filling in place during baking.
Step 5: Prepare Filling
In a small bowl, combine the softened cream cheese, chopped spinach, and garlic. Season with a pinch of salt and pepper. If you’re using cheese in the filling, fold in the shredded mozzarella or parmesan for that extra pull and melt. This filling makes the chicken feel indulgent without going heavy, and it stays surprisingly light even after the bake.
Step 6: Layer & Swirl
Place the stuffed breasts seam-side down in the baking dish. If you’re going full stuffing mode, you can drizzle a little glaze over the tops or create a light spin by spooning a portion of the glaze into the pocket before sealing with toothpicks. The goal is a pretty, appetizing exterior with a moist, flavorful interior. When you cut into the stuffed version, you should see a delicate swirl of filling peeking through.
Step 7: Bake
Bake for 25–30 minutes, depending on the thickness of your breasts. The internal temperature should read 165°F (74°C). If your breasts are particularly thick, you can finish under the broiler for 1–2 minutes to develop a lightly caramelized crust, but watch closely so they don’t dry out. A quick rest of 5 minutes after you pull them from the oven helps the juices redistribute and makes slicing easier.
Step 8: Cool & Glaze
While the chicken rests, whisk together the glaze ingredients. If you like a thicker glaze, simmer it for a minute or two until it coats the back of a spoon. Brush a thin layer over the hot chicken so it clings to the surface as it settles. The glaze adds brightness and gloss—not too sweet, just a little kiss of citrus and warmth.
Step 9: Slice & Serve
Slice the breasts on a gentle diagonal for the most flattering presentation. If they’re stuffed, cut through the center to reveal the creamy filling. I love serving with a leafy green salad and roasted vegetables, or tucked into warm tortillas with a few spoonfuls of the glaze stirred in. The aroma alone makes the kitchen feel welcoming, and the first bite confirms it’s a keeper.
What to Serve It With
This baked chicken breast is a chameleon—swap in sides, switch up the flavors, and you’ve got a new dinner every night. Here are a few pairing ideas that keep the vibe cozy and satisfying.
For Breakfast: A light, square plate with a couple of slices of the chicken over warm avocado-toast bites with a soft, runny egg on top. It’s a surprising but beloved way to extend dinner into a late-minish morning; the glaze lends a gentle sweetness that pairs nicely with salty, savory bites. A side of sautéed cherry tomatoes and baby kale makes it feel brunchy rather than heavy.
For Brunch: Thin-sliced chicken tucked into a skillet hash with peppers, onions, and a few crumbles of feta. A dollop of Greek yogurt on the side and a sprinkle of fresh herbs turns this into a late-morning star. It’s not a traditional brunch dish, but it’s the kind of thing your guests remember and ask for again.
As Dessert: Okay, I know this sounds wild, but a small, lemony glaze on a tender chicken can act as a bridge to a citrus-forward dessert pairing—think a lemon-lavender panna cotta or a citrus sorbet. It’s a playful palate-cleanser when you’re finishing a big meal with friends who tend to go for something bright and refreshing.
For Cozy Snacks: Slice thin and serve on crusty bread with a little arugula and a smear of sun-dried tomato mayo. It’s a comforting, no-fuss option that feels a little fancy but is utterly simple to put together. This makes a great bite for game night or a casual movie marathon with the family.
Top Tips for Perfecting Your Baked Chicken Breast
[Expert guidance, practical refinements, and personal notes that help you nail it every time.]
Zucchini Prep: If you’re adding zucchini as a side or even threading zucchini ribbons into a filling, slice them evenly and salt lightly to draw out extra moisture. Pat dry before cooking to avoid a soggy finish. It sounds small, but moisture control here makes every bite feel crisp and balanced rather than watery.
Mixing Advice: Don’t overmix the filling once you’ve added dairy; a few gentle folds keep the texture light and prevent the filling from becoming gluey. If you’re using dairy-free cream cheese, you might need a touch more moisture to keep it scoopable inside the pocket.
Swirl Customization: When you drizzle glaze, aim for a light swirl across the surface rather than a thick coat. It creates a glossy finish and a balanced flavor that doesn’t overwhelm the chicken itself.
Ingredient Swaps: You can swap chicken thighs for breasts if you prefer juicier meat. If you’re avoiding dairy, coconut cream cheese or cashew cream can stand in for the dairy-based filling, and you can use maple syrup instead of honey in the glaze for a sweeter, earthier note.
Baking Tips: If your oven runs hot, bake at 350°F (175°C) and check sooner to prevent drying. Conversely, if you have a convection oven, you might shave 5–7 minutes off the bake time. Use an instant-read thermometer to avoid guessing; 165°F (74°C) is the safe finish, and the meat will rest and become more tender with a short pause after it comes out of the oven.
Glaze Variations: A citrus-leaning glaze is wonderful, but you can also go savory with a balsamic soy glaze or a garlic butter glaze. If you’re making a maple-Miso version, whisk in a teaspoon of balsamic for depth and a flame-kissed edge that kids love and adults appreciate.
This is where my kitchen journal shines—the little tweaks I’ve learned from countless dinners. I’ve tested this with almond milk in the filling and it did make the interior feel creamier, though dairy gives a more traditional melt. My kids actually ask for seconds when I dust the tops with a touch of smoked paprika for color and a whisper of smoke that lingers on the palate. Trust me on this one: start with the base, and then let your pantry guide you to the perfect finish.
Storing and Reheating Tips
Even the best leftovers deserve proper care. Here’s how I keep baked chicken breast tender and tasty for days after the initial bake.
Room Temperature: If you’re enjoying it within the same day, you can leave the chicken out for up to two hours, but I usually chill it after it rests. Letting meat sit out too long invites dryness, so I’m careful with timing and quantity.
Refrigerator Storage: Store in an airtight container for up to 3–4 days. If you’ve stuffed the chicken, keep it in the original dish or transfer to a container that seals well to prevent the filling from drying out.
Freezer Instructions: For best quality, freeze slices or portions in a freezer-safe bag or container for up to 2 months. Thaw in the fridge overnight and reheat gently to avoid toughening the meat. A quick reheat in the microwave works in a pinch, but I prefer low and slow on the stove with a splash of broth to refresh the texture.
Glaze Timing Advice: If you’re freezing, don’t glaze before freezing; glaze is best added after reheating so it remains bright and glossy. If you’re refrigerating leftovers, you can reheat and brush with glaze right before serving for a fresh finish.
These storage steps keep the dish tasting as good as day one, even when you’re packing lunches for the week. I’ve found that labeling containers with the date helps me stay on top of freshness, which makes weekday dinners a little less chaotic and a lot more satisfying.
Frequently Asked Questions
Final Thoughts
This baked chicken breast is the kind of recipe that earns a permanent spot in my weekly rotation. It’s honest, dependable, and endlessly adaptable—perfect when you want something comforting but not heavy. It’s also a reminder that great flavor doesn’t require complicated technique; it’s about smart heat, a thoughtful mix of seasonings, and a little patience to let the meat rest. If you try this and love it as much as I do, tell me in the comments what you swapped or added—the best part of sharing a recipe is hearing how your kitchen makes it your own. Happy baking, my friend, and may your kitchen always smell like Sunday even on a Tuesday. Can’t wait to hear how yours turns out!
baked chicken breast
Ingredients
Main Ingredients
- 4 piece boneless skinless chicken breasts about 6 oz each
- 2 tablespoon olive oil
- 1 teaspoon salt
- 1 teaspoon garlic powder
- 1 teaspoon onion powder
- 0.5 teaspoon dried thyme
- 0.5 teaspoon dried rosemary
- 0.25 teaspoon black pepper
Instructions
Preparation Steps
- Preheat the oven to 375°F (190°C). Line a baking dish with parchment paper or lightly grease with oil.
- Pat the chicken breasts dry with a paper towel. Rub both sides with olive oil.
- In a small bowl, mix salt, garlic powder, onion powder, thyme, rosemary, and black pepper. Sprinkle seasoning evenly over the chicken breasts.
- Place the chicken in the prepared baking dish. Bake for 22 to 25 minutes, or until the internal temperature reaches 165°F (74°C).
- Remove from oven, tent with foil, and let rest for 5 minutes before serving.
Notes
Featured Comments
“Impressed! Clear steps and super easy results. Perfect for busy nights.”
“New favorite here — absolutely loved. crowd-pleaser was spot on.”
“Super easy and turned out amazing! My family asked for seconds. Saving this one.”
“This sweet treat was absolutely loved — the balanced really stands out. Thanks!”
“Made it tonight and wow — absolutely loved! Will definitely make baked chicken breast again.”
“Packed with flavor and so simple. Exactly what I wanted from baked chicken breast.”


