

Oh, Banana Pudding. Just saying the words out loud makes me feel warm and fuzzy inside, doesn’t it? It’s one of those classic desserts that just screams comfort. But let me tell you, my family has this one particular twist on banana pudding, a recipe I affectionately call “Banana Pudding Lush.” It’s not just a dessert; it’s a whole mood. It’s the kind of dish that disappears from the plate at lightning speed, leaving behind happy sighs and requests for more. When I first stumbled upon this variation, I was a bit skeptical. Could it really be *better* than the traditional creamy, layered banana pudding I grew up with? Spoiler alert: it absolutely is. This Banana Pudding Lush has a texture that’s somehow lighter and more decadent all at once, and the flavor is just… well, pure bliss. It’s the perfect cure for a sweet craving without being overly heavy, and honestly, it’s a lifesaver when I need something impressive without spending hours in the kitchen.
What is banana pudding?
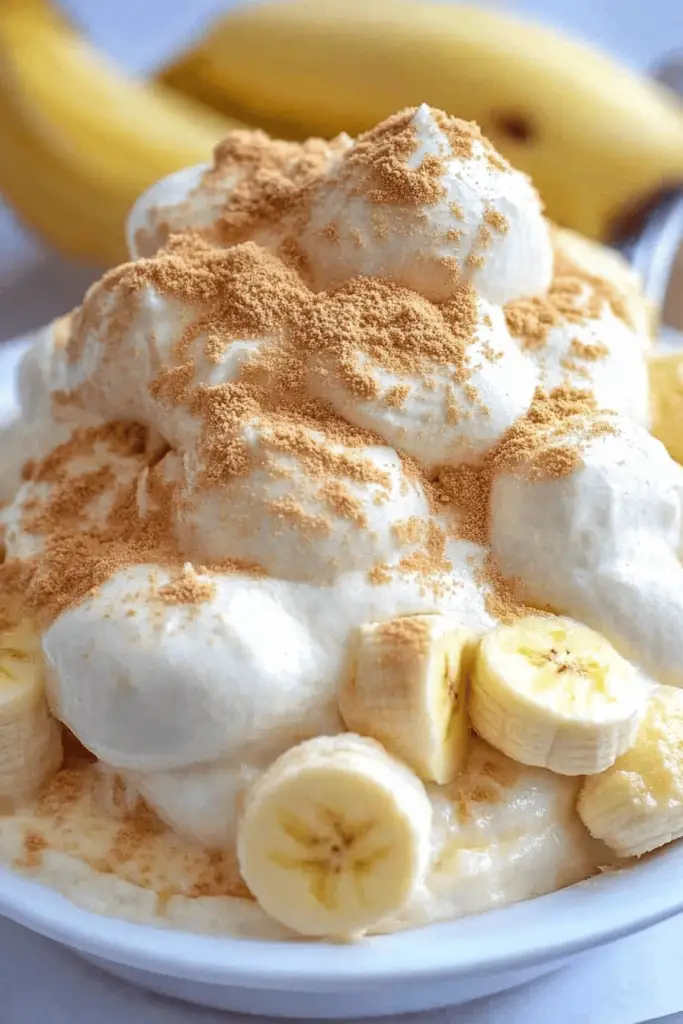
So, what exactly *is* banana pudding Lush? Think of it as a sophisticated, layered dessert that takes all the beloved elements of classic banana pudding and elevates them. Instead of just pudding and bananas, we’re talking about layers of creamy, dreamy goodness interspersed with tender banana slices and a delightful crunch. The “lush” part comes from the incredibly smooth, almost mousse-like texture it achieves. It’s essentially a no-bake marvel that brings together the comforting flavors of banana, vanilla, and a hint of caramelization, all wrapped up in a way that feels both familiar and wonderfully new. It’s not a cake, it’s not a pie, it’s something wonderfully in between, designed to be savored one spoonful at a time. It’s the kind of dessert that looks impressive when you bring it to the table, but the secret is, it’s surprisingly simple to put together.
How do I make banana pudding Lush?
Quick Overview
Putting together this delightful banana pudding Lush is a breeze! It involves a simple, no-bake process of creating a luscious creamy base, layering it with tender banana slices and a delightful crunch, and letting it chill to perfection. The magic happens as the flavors meld together, creating a symphony of tastes and textures. You’ll be amazed at how such a simple method yields such a sophisticated result. It’s genuinely one of the easiest yet most impressive desserts I know how to make.
Ingredients
For the Creamy Banana Base:
2 (3.4 ounce) boxes instant vanilla pudding mix – I always opt for name-brand here for the best texture and flavor. Avoid the cook-and-serve kind for this recipe.
3 cups cold milk – Whole milk gives the richest flavor, but I’ve tested this with 2% and even almond milk, and it actually made it even creamier! Just make sure it’s nice and cold.
1 (8 ounce) container whipped topping, thawed – Use a good quality one, or even better, make your own Stabilized Whipped Cream if you’re feeling fancy!
2 ripe bananas, sliced – The riper, the sweeter and more flavorful. Just make sure they aren’t *too* mushy.
1 teaspoon vanilla extract – Don’t skip this! It really enhances the banana flavor.
For the Crunchy Layer:
2 cups crushed vanilla wafers or shortbread cookies – I prefer vanilla wafers, but shortbread gives a slightly more buttery depth. Crush them finely for the best texture, but leave some small chunks for bite.
For the Optional Caramel Swirl:
1/4 cup caramel sauce – Store-bought is fine, but a good quality one makes a difference. You can also make your own if you have a favorite recipe.
Step-by-Step Instructions
Step 1: Prepare the Cookie Crumble
In a medium bowl, combine the crushed vanilla wafers or shortbread cookies. If you’re using caramel sauce, drizzle about half of it over the crumbs and gently toss to combine. You want them slightly moistened but not soggy. Set aside.
Step 2: Mix the Creamy Base
In a large bowl, whisk together the two boxes of instant vanilla pudding mix with the 3 cups of cold milk and the vanilla extract. Whisk for about 2 minutes, or until the pudding begins to thicken. It will seem a bit loose at first, but it will firm up as it sits.
Step 3: Fold in the Whipped Topping
Gently fold in the thawed whipped topping into the thickened pudding mixture. Be careful not to overmix; you want to keep it light and airy. The goal is a smooth, luscious creaminess.
Step 4: Layer the Lush
Grab your serving dish. I love using a clear glass trifle bowl or a 9×13 inch baking dish so you can see those beautiful layers! Start by spreading about half of the creamy banana base evenly over the bottom of the dish. Then, arrange half of your sliced bananas over the cream layer. Sprinkle half of the prepared cookie crumble over the bananas. Drizzle some of the remaining caramel sauce over the crumbs, if using.
Step 5: Repeat the Layers
Now, add the remaining creamy banana base over the first layer. Top with the rest of the sliced bananas, and finish with the remaining cookie crumble. If you have any caramel sauce left, you can drizzle it artfully over the top for an extra touch of decadence.
Step 6: Chill and Set
Cover the dish tightly with plastic wrap. Refrigerate for at least 2-4 hours, or preferably overnight. This chilling time is crucial for the flavors to meld and the dessert to set properly, ensuring that perfect “lush” texture.
Step 7: Serve and Enjoy
Once chilled, remove from the refrigerator. You can add a few extra banana slices or a sprinkle of cookie crumbs on top for garnish if you like. Scoop generous portions into bowls and prepare for the happy sighs! This is perfect when you’re craving something sweet at 10pm but don’t want to bake a whole cake.
What to Serve It With
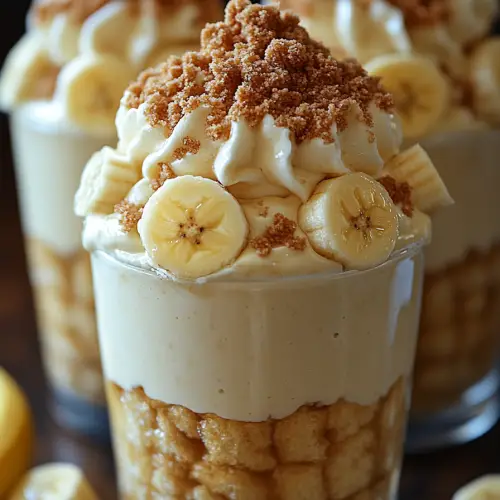
This Banana Pudding Lush is so wonderfully versatile, it’s practically a dessert chameleon! For a lovely breakfast, I love serving it in smaller portions alongside a strong cup of coffee. The sweetness of the dessert and the bitterness of the coffee are a perfect pairing to start the day. It feels like a special treat without being overly heavy for the morning. When it comes to brunch, this dessert really shines. I like to serve it in individual glasses or small bowls, perhaps garnished with a tiny sprig of mint or a wafer cookie. It’s elegant enough for guests but still has that comforting, home-baked feel. For a more formal dessert setting, I often present it in a beautiful trifle dish. The visual appeal of the layers is a real showstopper. It pairs beautifully with a light dessert wine or even just a glass of cold milk for those who prefer simplicity. And for those moments when you just need a cozy, comforting treat, serving this Banana Pudding Lush with a warm mug of tea or hot chocolate is pure heaven. My family also has a tradition of having this after a big Sunday roast – it’s the perfect sweet ending that everyone agrees on.
Top Tips for Perfecting Your Banana Pudding Lush
I’ve made this Banana Pudding Lush more times than I can count, and over the years, I’ve picked up a few tricks that really help make it absolutely perfect every single time. First, when it comes to the bananas, ripeness is key. You want them to be sweet and soft, but not so ripe that they turn completely brown and mushy. I usually look for bananas that have a few speckles on their peels. Also, slicing them to an even thickness (about 1/4 inch) ensures they distribute well and don’t become overpowering in any one bite. For the cookie crumble, I find that crushing them in a zip-top bag with a rolling pin gives you the best texture – you get some fine crumbs and some slightly larger pieces for a nice contrast. If you want your caramel swirl to really pop, make sure your caramel sauce is at room temperature; it will drizzle much more easily and evenly. When it comes to the mixing of the pudding, I always emphasize using *cold* milk. This is non-negotiable for instant pudding to set up correctly. Whisking vigorously for the full two minutes is also important. Don’t be tempted to stop early! My personal “aha!” moment with this recipe was when I started using a good quality whipped topping or making my own stabilized whipped cream. It makes the creamy base so much lighter and airier, truly living up to the “lush” name. I’ve tested this with almond milk and it actually made it even creamier, which was a delightful surprise! For layering, the key is even distribution. Try to spread each layer as uniformly as possible. This not only makes the dessert look beautiful when cut but also ensures you get a bit of every component in each bite. And for the chilling time, please, please, please don’t rush it! The longer it sits in the fridge, the more the flavors meld, and the more it develops that incredible, smooth texture. Overnight is truly the best, but a good 4-hour minimum is essential. If you’re in a pinch, I’ve found that even an hour in the freezer can help it set a bit faster, but the texture isn’t quite the same as a slow chill.
Storing and Reheating Tips
Keeping your Banana Pudding Lush tasting its best is pretty straightforward, and thankfully, it holds up well! For room temperature storage, I honestly don’t recommend leaving it out for more than a couple of hours, especially if it’s warm in your kitchen, as the bananas can start to brown and the cream can lose its firmness. If you do need to leave it out briefly, make sure it’s covered tightly. Refrigerator storage is your best friend here. Once it’s chilled and set, cover it tightly with plastic wrap or transfer it to an airtight container. It will stay delicious for up to 3 days. The bananas might soften a bit more over time, but the overall flavor and texture are still wonderful. I’ve found that the cookie layer can get a little softer the longer it sits, which some people actually prefer, giving it an almost cake-like texture. For freezer instructions, I honestly don’t typically freeze this dessert. The bananas can become a bit watery when thawed, and the creamy texture might not be quite the same. However, if you absolutely need to freeze it, I’d suggest freezing it *without* the bananas and adding fresh ones after thawing. Wrap it very well in plastic wrap and then foil to prevent freezer burn, and it should be good for about 1-2 months. Thaw it slowly in the refrigerator. For the glaze timing, it’s best to add the caramel sauce right before serving or during the layering process for the best visual appeal. If you’re storing it for a few days, you can drizzle a little extra caramel on top just before you serve it for a fresh look.
Frequently Asked Questions
Final Thoughts
There you have it, my friends! This Banana Pudding Lush is more than just a recipe; it’s a little piece of joy. It’s that perfect blend of comforting familiarity and delightful surprise that makes any occasion feel a little more special. I truly believe it’s one of those desserts that everyone should have in their repertoire. It’s simple enough for a beginner but impressive enough for a seasoned baker. It’s the kind of dessert that brings people together, sparks conversations, and creates sweet memories. If you love comforting flavors and no-bake wonders, you absolutely must give this Banana Pudding Lush a try. I can’t wait to hear how yours turns out! Please leave a comment below and tell me about your experience, or share any creative variations you come up with. Happy baking!
Banana Pudding Lush
Ingredients
For the Base
- 1.5 cups shortbread cookies crushed
- 0.25 cup butter melted
For the Pudding Layer
- 1 package instant vanilla pudding mix 3.4 oz size
- 2 cups milk
- 3 medium bananas sliced
For the Topping
- 8 oz cream cheese softened
- 0.75 cup powdered sugar
- 1 container whipped topping 8 oz, thawed
Instructions
Preparation Steps
- Preheat oven to 350°F (175°C).
- In a medium bowl, combine crushed shortbread cookies and melted butter. Press evenly into the bottom of a 9x13 inch baking dish.
- Bake the crust for 8-10 minutes, or until lightly golden. Let cool completely.
- In a separate bowl, whisk together the instant vanilla pudding mix and milk according to package directions. Let it sit for 5 minutes to thicken.
- In a large bowl, beat the softened cream cheese and powdered sugar until smooth. Gradually fold in the thawed whipped topping.
- Spread half of the cream cheese mixture over the cooled crust.
- Layer the sliced bananas over the cream cheese mixture.
- Spread the thickened vanilla pudding over the bananas.
- Top with the remaining cream cheese mixture. Chill for at least 2 hours before serving.
Notes
Featured Comments
“I absolutely agree—banana pudding is the ultimate comfort food! Nothing beats that creamy, nostalgic goodness.”
“Impressed! Clear steps and so flavorful results. Perfect for busy nights.”
“New favorite here — turned out amazing. crowd-pleaser was spot on.”
“Super easy and turned out amazing! My family asked for seconds. Saving this one.”
“This sweet treat was absolutely loved — the rich really stands out. Thanks!”
“Made it tonight and wow — perfect for busy nights! Will definitely make Banana Pudding Lush again.”


I absolutely agree—banana pudding is the ultimate comfort food! Nothing beats that creamy, nostalgic goodness.