

The Best Pumpkin Whoopie Pies You’ll Ever Make
Fall is my absolute favorite time to turn on the oven. There is just something magical about the air getting crisp and the leaves turning those gorgeous shades of orange and red that makes me want to bake all day long. If you are anything like me, the minute September rolls around, you are looking for any excuse to break out the pumpkin puree. Well, grab your mixing bowls, because I am about to share a recipe that has been a staple in my kitchen for years: Pumpkin Whoopie Pies.
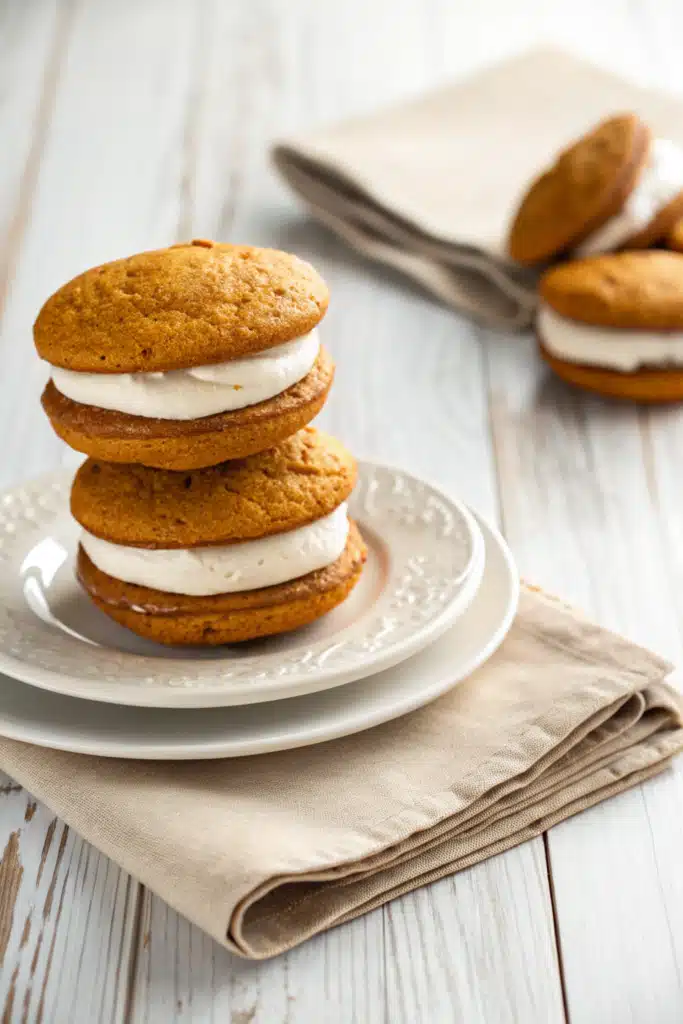
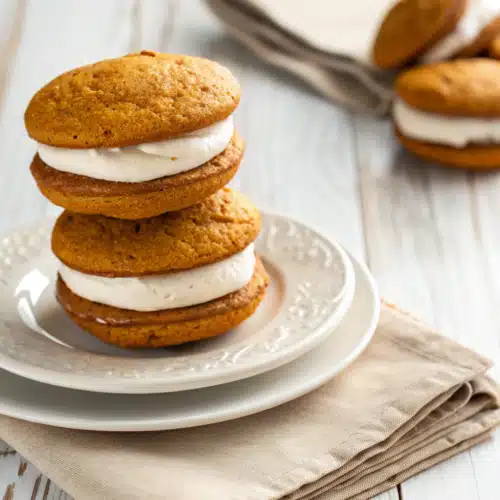
These aren’t just any standard fall treat. They are incredibly soft, pillowy little cakes sandwiched together with the most luscious, tangy cream cheese frosting. I brought a batch of these to a neighborhood bonfire last year, and let me tell you, they disappeared before the fire was even fully lit! I’ve tweaked this recipe over countless autumns to get the spice blend just right and the cake texture impossibly tender. Trust me, once you make these, your family and friends will be begging for them every single year.
What Are Pumpkin Whoopie Pies?
If you have never had the pleasure of biting into a whoopie pie, you are in for a serious treat. Despite the name, they aren’t actually pies at all. Think of them as the ultimate handheld cake, or maybe the most decadent, oversized sandwich cookie you’ve ever imagined. Originating in New England (and Pennsylvania Amish country, depending on who you ask!), a traditional whoopie pie features two round, mound-shaped pieces of chocolate cake with a sweet, creamy frosting sandwiched in the middle.
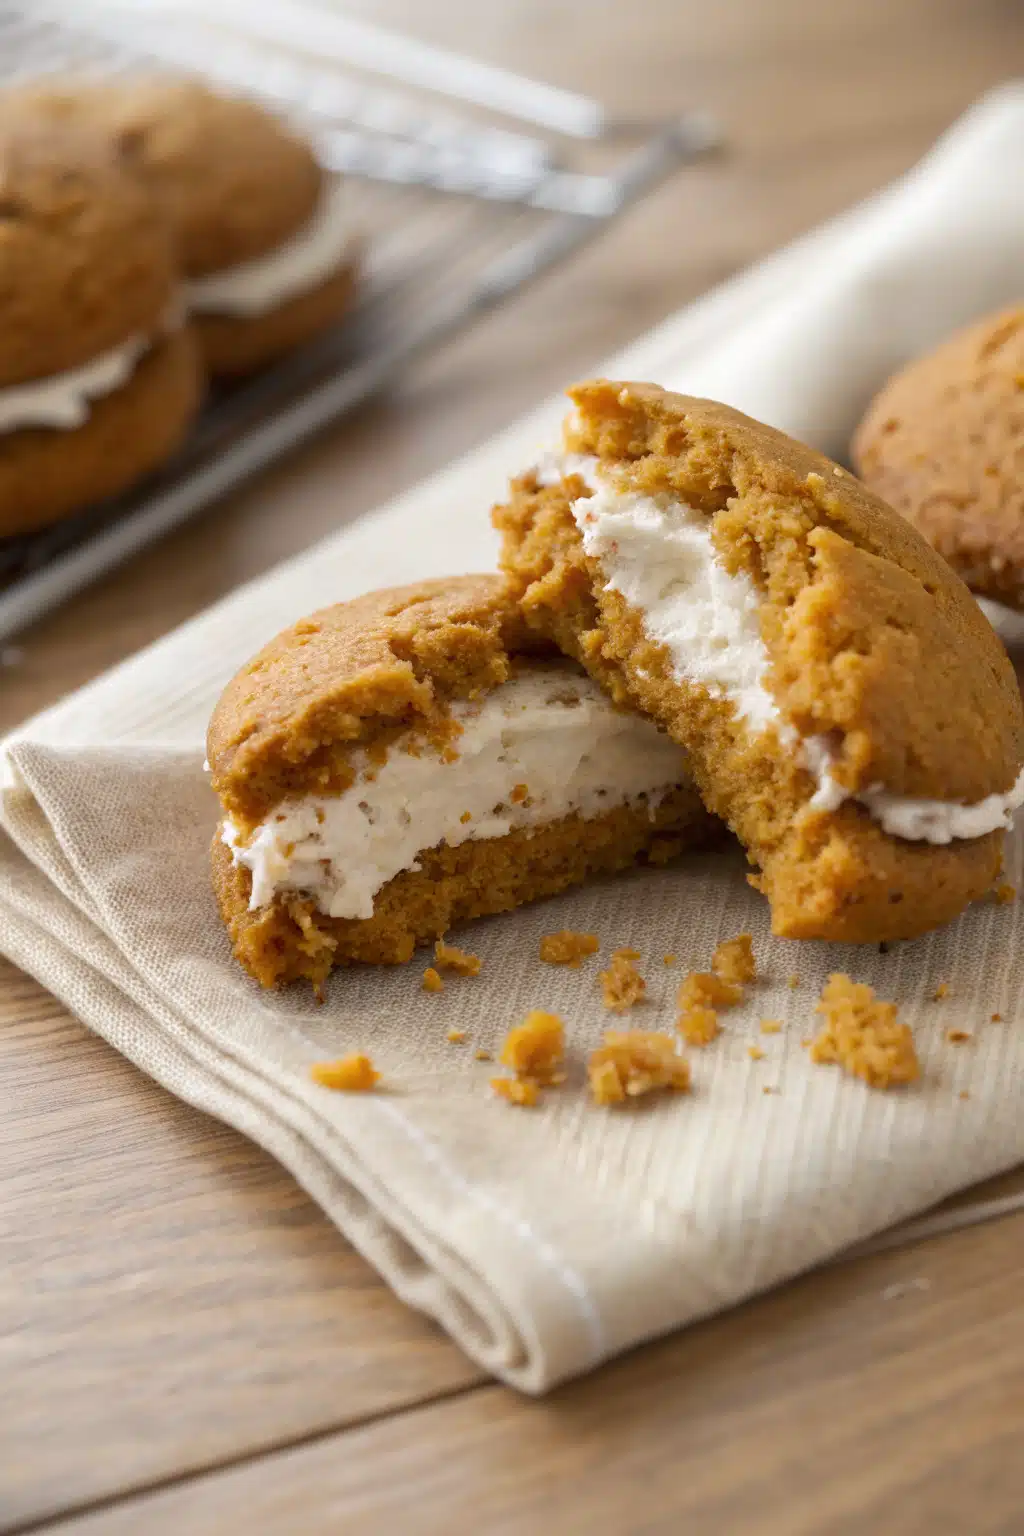
But we are giving this classic a cozy, autumnal twist. Pumpkin whoopie pies swap out the chocolate for a deeply spiced, incredibly moist pumpkin cake. Because pumpkin puree adds so much natural moisture to baked goods, these little cakes bake up remarkably soft and fluffy. For the filling, instead of the traditional marshmallow fluff or shortening-based vanilla buttercream, we use a rich, whipped cream cheese frosting. The slight tang of the cream cheese perfectly balances the warm cinnamon, nutmeg, and cloves in the pumpkin cake. It is basically a portable pumpkin cake that you don’t need a fork to eat. Honestly, what could be better than that?
How to Make Pumpkin Whoopie Pies
Quick Overview
Making these little autumnal clouds is wonderfully straightforward. You’ll start by whisking together your dry ingredients—flour, warm spices, baking powder, baking soda, and salt. In a separate bowl, you’ll beat the butter, sugars, pumpkin puree, and eggs until everything is beautifully combined and smooth. Gently fold the dry ingredients into the wet to create a thick, vibrant orange batter. You will drop scoops of this batter onto a baking sheet and bake them until they spring back to the touch. While they cool, you’ll whip up a quick cream cheese frosting. Once the cakes are completely cool (patience is key here!), just pipe or spread the frosting onto the flat side of one cake and top it with another. Easy peasy!
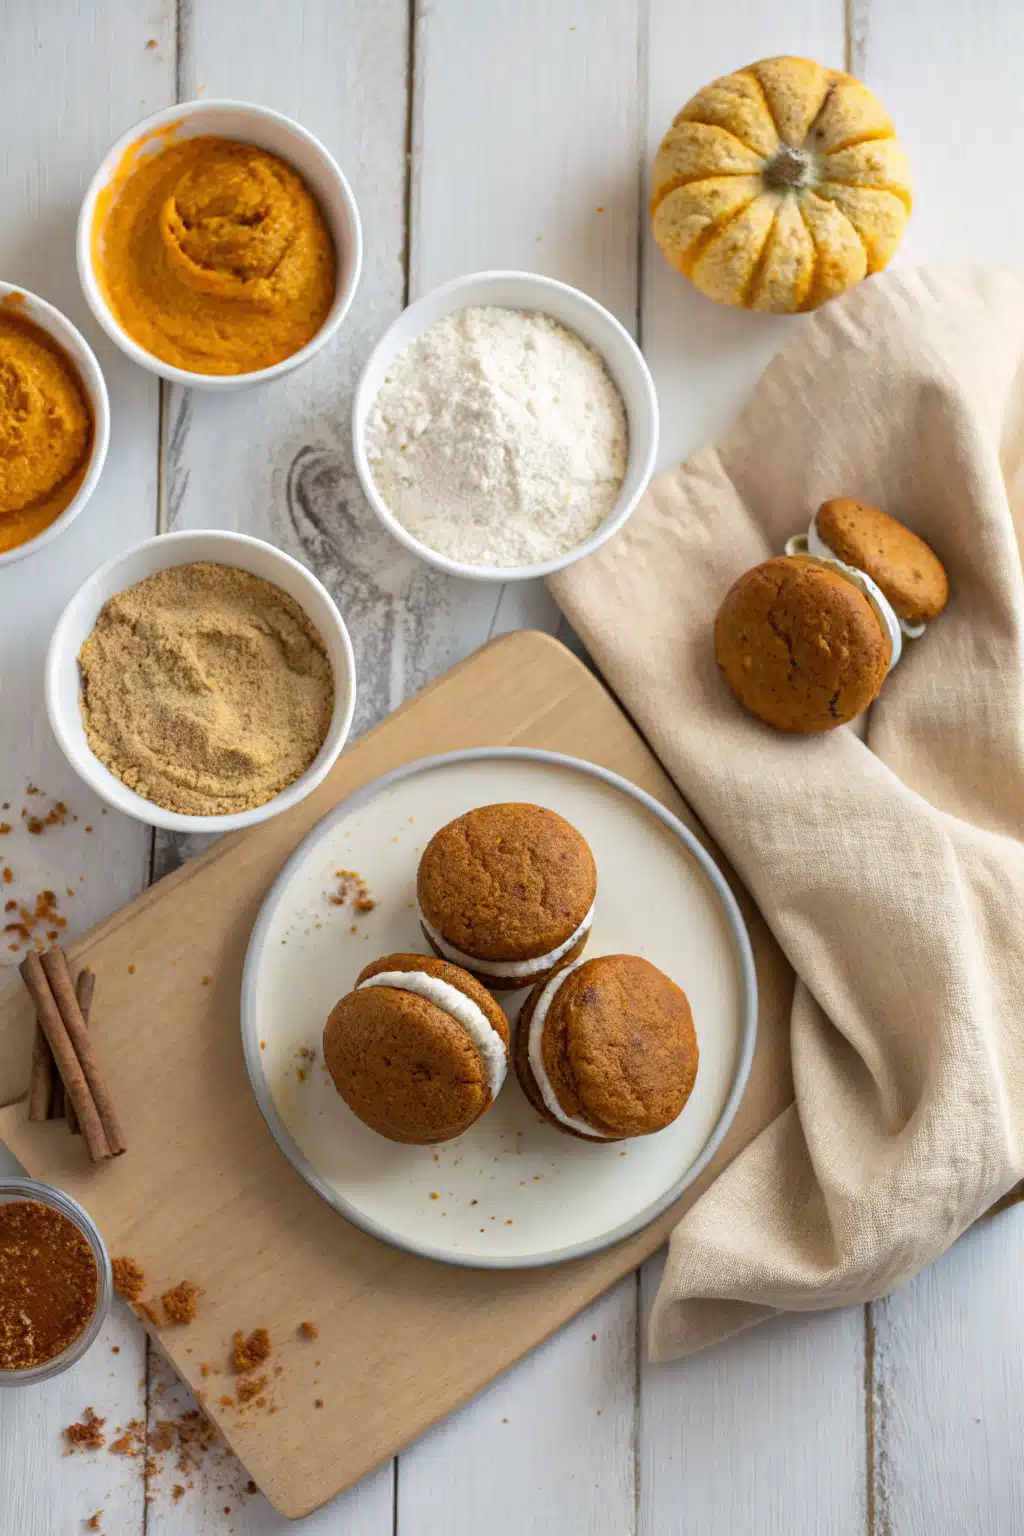
Ingredients
For the Pumpkin Cakes:
- All-purpose flour: The structure of our cakes. Spoon and level it so they don’t get dense!
- Spices: Cinnamon, ginger, nutmeg, and cloves.
- Baking powder & baking soda: To give these cakes that signature fluffy lift.
- Salt: Just a pinch to balance the sweetness.
- Pumpkin puree: Make sure it’s 100% pure pumpkin, not pumpkin pie filling.
- Brown sugar & granulated sugar: Brown sugar adds chewiness and molasses flavor, while white sugar adds crispness to the edges.
- Vegetable oil: The secret to keeping these cakes moist for days.
- Eggs: Room temperature works best.
- Vanilla extract: A splash for flavor depth.
For the Cream Cheese Filling:
- Cream cheese: Full-fat, softened to room temperature.
- Unsalted butter: Also softened, to give the frosting structure.
- Powdered sugar: Sifted, to avoid any lumps in your beautiful filling.
- Vanilla extract: To tie it all together.
Step-by-Step Instructions
Step 1: Preheat & Prep Your Pans
Preheat your oven to 350 degrees Fahrenheit. Line two large baking sheets with parchment paper or silicone baking mats. This ensures your delicate cakes won’t stick to the pan.
Step 2: Whisk the Dry Ingredients
In a medium bowl, whisk together the flour, baking powder, baking soda, salt, cinnamon, ginger, nutmeg, and cloves. Getting the spices evenly distributed now prevents clumps of cinnamon later.
Step 3: Mix the Wet Ingredients
In a large bowl (or the bowl of a stand mixer), beat the brown sugar, granulated sugar, and oil together until smooth. Add the pumpkin puree and mix well. Beat in the eggs one at a time, followed by the vanilla extract. Scrape down the sides of the bowl to make sure everything is incorporated.
Step 4: Combine Wet and Dry
Gradually add your dry flour mixture into the wet pumpkin mixture. Use a rubber spatula to gently fold everything together. Stop mixing just as soon as you don’t see any more streaks of dry flour. Overmixing will make the cakes tough, and we want them light and fluffy!
Step 5: Scoop and Bake
Using a medium cookie scoop (about 1.5 to 2 tablespoons), drop mounds of batter onto your prepared baking sheets, leaving about two inches of space between them because they will spread. Bake for 10-12 minutes, or until the tops are set and spring back lightly when you gently press them. Let them cool on the pan for 5 minutes before transferring them to a wire rack to cool completely.
Step 6: Whip Up the Filling
While the cakes cool, make your frosting. Beat the softened cream cheese and butter together until completely smooth and creamy. Gradually add the powdered sugar and vanilla, beating on low speed at first so you don’t create a sugar cloud in your kitchen! Once incorporated, turn the speed up and whip until fluffy.
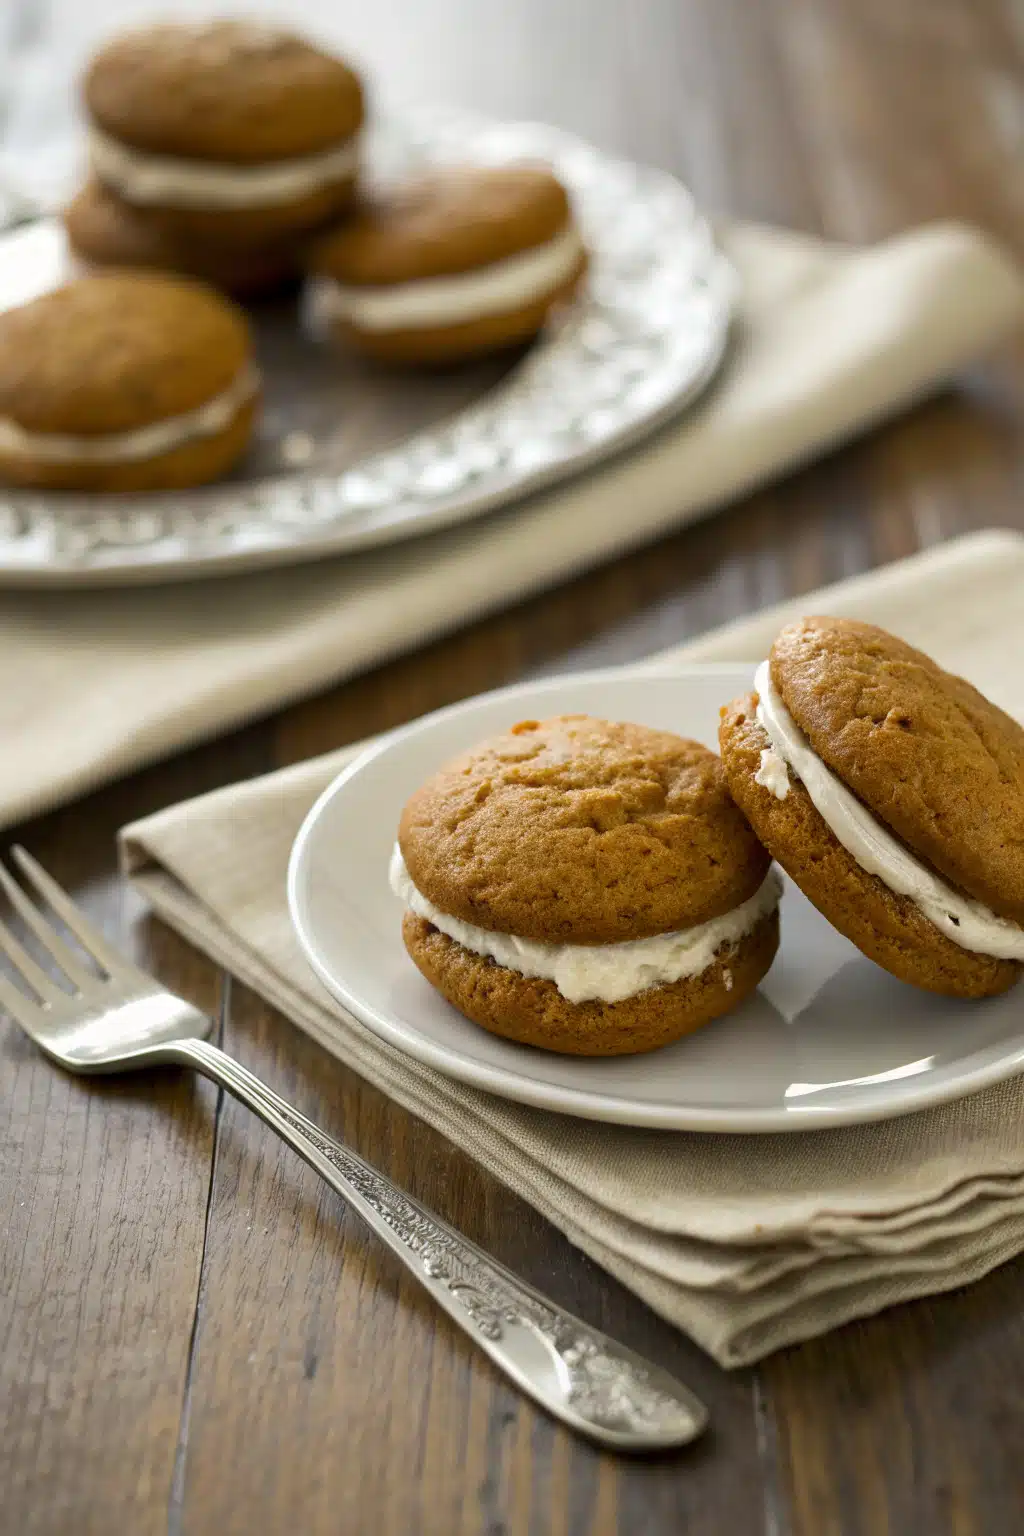
Step 7: Assemble the Whoopie Pies
Pair up your cooled pumpkin cakes by size. Pipe or spread a generous dollop of cream cheese frosting onto the flat side of one cake. Place its partner on top and press down gently so the frosting reaches the edges. Grab a napkin and dig in!
What to Serve It With
These pumpkin whoopie pies are rich, so I love pairing them with something that cuts through the sweetness. A hot cup of dark roast coffee or a shot of espresso is an absolute match made in heaven. If you are serving these to kids (or just want the ultimate cozy fall vibe), a mug of warm apple cider with a cinnamon stick is perfection.
If you’re hosting a fall party, try setting up a “Whoopie Pie Bar.” Serve the baked cakes and a bowl of the cream cheese frosting alongside fun toppings. Let your guests roll the sticky edges of their assembled whoopie pies in mini chocolate chips, chopped toasted pecans, or festive fall sprinkles!
Top Tips for Perfecting Your Pumpkin Whoopie Pies
Use a cookie scoop: For the best results, you want all your cakes to be roughly the same size so they sandwich together perfectly. A spring-loaded cookie scoop is your best friend here.
Do not overmix: I can’t stress this enough! Once you add the flour, mix just until the ingredients are combined. Overworking the gluten will result in dense, bready cakes instead of the tender, melt-in-your-mouth texture we want.
Cool completely before frosting: It is so tempting to frost these while they are still slightly warm, but don’t do it! The cream cheese frosting will melt instantly and slide right off the cakes, leaving you with a delicious but very messy puddle.
Blot your pumpkin puree: If your canned pumpkin looks exceptionally watery, you can blot it gently with a paper towel before adding it to the batter. This prevents the batter from becoming too runny.
Storing and Reheating Tips
Because the filling is made with cream cheese, these whoopie pies need to be stored in the refrigerator. Place them in a single layer in an airtight container. If you need to stack them, put a piece of parchment paper or wax paper between the layers so they don’t stick together. They will stay fresh in the fridge for up to 5 days.
Personally, I think they taste best when they’ve had a chance to sit at room temperature for about 15-20 minutes before eating. The cakes soften back up, and the frosting gets perfectly creamy again.
Can you freeze them? Yes! Wrap each assembled whoopie pie tightly in plastic wrap, then place them all in a freezer-safe zip-top bag. They freeze beautifully for up to 2 months. Just let them thaw in the refrigerator overnight before you plan to eat them.
Frequently Asked Questions
Final Thoughts
There is just no denying that Pumpkin Whoopie Pies are the ultimate comfort dessert when the weather turns chilly. They bring together the best parts of a slice of pumpkin cake and a frosted cookie, all wrapped up in one messy, glorious, handheld treat. Whether you’re baking them for a Halloween party, a Thanksgiving dessert table, or just a lazy Sunday afternoon at home, I hope this recipe brings as much joy to your kitchen as it does to mine. Don’t forget to grab a cup of coffee, put on your coziest sweater, and enjoy every single bite. Happy baking!
Pumpkin Whoopie Pies
Ingredients
Main Ingredients
- 3 cups all-purpose flour
- 1 teaspoon salt
- 1 teaspoon baking soda
- 1 teaspoon baking powder
- 2.5 Tablespoons pumpkin pie spice
- 1 cup granulated sugar
- 1 cup dark brown sugar firmly packed
- 1 cup vegetable oil
- 3 cups canned pumpkin puree chilled
- 2 large eggs
- 2 teaspoons vanilla extract
- 3 cups confectioners' sugar
- 0.5 cup unsalted butter room temperature
- 8 oz cream cheese room temperature
- 3 Tablespoons maple syrup
Instructions
Preparation Steps
- Preheat oven to 350°F and line two baking sheets with parchment paper.
- In a large bowl, whisk together the flour, salt, baking soda, baking powder, and pumpkin pie spice.
- In a separate large bowl, whisk the granulated sugar, brown sugar, and vegetable oil together. Add the pumpkin puree and whisk to combine.
- Whisk the eggs and 1 teaspoon of vanilla extract into the wet ingredients until smooth.
- Fold the dry ingredients into the wet mixture until just combined, being careful not to overmix.
- Drop 1.5 to 2 tablespoon-sized portions of batter onto the prepared baking sheets, spacing them about 2 inches apart.
- Bake for 10-12 minutes, or until a toothpick inserted into the center comes out clean. Let cool completely on wire racks.
- To make the filling, beat the cream cheese and butter until smooth. Add the confectioners' sugar, maple syrup, and the remaining 1 teaspoon of vanilla extract, and beat until fluffy.
- Pipe or spread the cream cheese filling onto the flat side of half the cooled cookies, then top with the remaining cookies to form sandwiches. Chill for 30 minutes before serving.
Notes
Featured Comments
“Impressed! Clear steps and crowd-pleaser results. Perfect for busy nights.”
“New favorite here — absolutely loved. crowd-pleaser was spot on.”
“Super easy and turned out amazing! My family asked for seconds. Saving this one.”
“This sweet treat was absolutely loved — the hearty really stands out. Thanks!”
“Made it tonight and wow — comforting! Will definitely make Best 7 Tips for Making Pumpkin Whoopie Pies: Your Fall Treat Fix! again.”
“Packed with flavor and so simple. Exactly what I wanted from Best 7 Tips for Making Pumpkin Whoopie Pies: Your Fall Treat Fix!.”


