

Oh, you guys. I’ve been wanting to share this with you for ages! There are some recipes that just… stick with you. They become your go-to, the one you whip up when you need a guaranteed win, or when a craving hits that only something truly comforting can satisfy. For me, that’s Butter Chicken. Seriously, if you haven’t tried making it at home, prepare yourself, because it’s about to become your new obsession. Forget those takeout versions that are often too oily or bland; this homemade butter chicken is ridiculously creamy, packed with flavor, and honestly, way simpler than you might think. It’s the kind of dish that makes your kitchen smell like pure happiness and brings everyone running. I remember the first time I perfected this, my son, who can be a picky eater, took one bite and his eyes just lit up. He declared it the “best chicken ever,” and that, my friends, is high praise in this household! It’s my secret weapon for busy weeknights, and honestly, it even feels fancy enough for guests. It’s got that rich, velvety sauce that just coats everything perfectly, and the chicken is always so tender. It’s the kind of meal that feels like a warm hug on a plate, and I can’t wait to share all my little secrets with you so you can recreate that magic too.
What is butter chicken?
So, what exactly *is* butter chicken? At its heart, it’s a North Indian curry made with chicken, a luscious tomato-based sauce, and a generous amount of butter and cream. The name itself, Murgh Makhani, translates to “butter chicken,” and trust me, the butter is key! It’s not just about richness; it’s about creating that incredible velvety texture in the sauce. Think of it as a slightly sweeter, creamier, and far more mellow cousin to a spicy vindaloo. It’s meant to be comforting and rich, not necessarily fiery hot (though you can absolutely adjust the spice level!). The chicken is usually marinated first, which helps keep it super tender and allows it to soak up all those delicious spices. The base of the sauce is typically made with tomatoes, onions, and a blend of aromatic spices like garam masala, cumin, and coriander. Then, the magic happens with the butter and cream, transforming it into that iconic, luxurious dish we all know and love. It’s a true testament to how simple, quality ingredients can come together to create something truly spectacular.
How do I make butter chicken?
Quick Overview
Making this glorious butter chicken is a journey of Simple Steps that build incredible flavor. We’ll start by marinating the chicken to make it incredibly tender and flavorful. Then, we’ll build a rich, aromatic tomato-based sauce, enrich it with butter and cream, and finally bring it all together. The whole process, from start to finish, is designed to be manageable and rewarding, giving you a restaurant-quality dish with surprisingly little stress. Trust me, the most “difficult” part is waiting for it to simmer and develop all those wonderful flavors!
Ingredients
For the Chicken & Marinade: For the Chicken & Marinade: For the Chicken & Marinade: For the Chicken & Marinade
2 lbs boneless, skinless chicken thighs or breasts, cut into 1-inch cubes (I prefer thighs for extra tenderness, but breasts work great too!)
1/2 cup plain yogurt (full-fat is best for creaminess)
2 tablespoons fresh lemon juice
1 tablespoon grated fresh ginger
2 cloves garlic, minced
1 teaspoon garam masala
1 teaspoon ground cumin
1/2 teaspoon ground turmeric
1/2 teaspoon cayenne pepper (or to taste – start with less if you’re sensitive to heat)
1 teaspoon salt
For the Sauce:
2 tablespoons ghee or unsalted butter (or a mix of both!)
1 large onion, finely chopped
2 cloves garlic, minced
1 tablespoon grated fresh ginger
1 teaspoon garam masala
1 teaspoon ground cumin
1 teaspoon ground coriander
1/2 teaspoon turmeric
1/4 teaspoon cayenne pepper (optional, for extra warmth)
1 (28 ounce) can crushed tomatoes (good quality makes a difference!)
1/2 cup water or chicken broth
1/2 cup heavy cream (or half-and-half for a lighter version)
1-2 tablespoons unsalted butter, for finishing
1 teaspoon sugar (optional, to balance acidity)
Salt to taste
Fresh cilantro, chopped, for garnish
Step-by-Step Instructions
Step 1: Preheat & Prep Pan
First things first, let’s get that chicken marinating. In a medium bowl, combine the chicken pieces with the yogurt, lemon juice, ginger, minced garlic, garam masala, cumin, turmeric, cayenne pepper, and salt. Give it a really good mix so every piece of chicken is coated in that glorious marinade. Cover the bowl and let it marinate in the refrigerator for at least 30 minutes, or up to 4 hours. The longer it marinates, the more tender and flavorful your chicken will be. While the chicken marinates, you can chop your onion and mince your garlic and ginger for the sauce. It’s always good to have your ingredients prepped and ready to go!
Step 2: Mix Dry Ingredients
This step is actually about building the flavor base for our sauce. In a small bowl, I like to have my ground spices – garam masala, cumin, coriander, turmeric, and cayenne – all measured out and ready. This ensures they go into the pan at the right time and don’t burn. It’s a little prep that makes the cooking process so much smoother!
Step 3: Mix Wet Ingredients
For the sauce, our “wet ingredients” really start with the aromatics and the tomatoes. We’ll be sautéing the onion, garlic, and ginger until they’re soft and fragrant. Then, we’ll add the crushed tomatoes. Using good quality crushed tomatoes really makes a difference here – they provide the perfect tangy and slightly sweet base. I also have my water or broth and cream measured out, ready to be added once the tomatoes have had a chance to cook down a bit. This ensures the sauce has the right consistency and richness.
Step 4: Combine
This is where we bring the chicken and sauce together. Once the chicken has marinated and the sauce base is ready, we’ll sear the chicken. You can do this in a separate pan until it’s lightly browned on all sides, or if you’re feeling brave and have a large enough pot, you can add it directly to the simmering sauce towards the end. I usually sear it separately to get a nice caramelization on the edges, which adds another layer of flavor. Then, gently fold the marinated chicken into the tomato sauce. Don’t overcrowd the pan when searing, or the chicken will steam instead of brown!
Step 5: Prepare Filling
In this recipe, the “filling” is essentially the chicken and the Creamy Tomato sauce coming together. Once the chicken is added to the sauce, we’ll let it simmer gently. This allows the chicken to cook through completely and absorb all those incredible flavors from the sauce. The sauce will thicken beautifully, becoming rich and velvety. I always keep an eye on it, giving it a gentle stir now and then to make sure nothing sticks to the bottom of the pot.
Step 6: Layer & Swirl
This step is more about the finishing touches that make it truly “butter chicken.” After the chicken is cooked and the sauce has thickened, it’s time to add the cream and the final knob of butter. I like to gently stir these in, creating a beautiful, marbled effect as the cream and butter melt into the rich tomato base. This is where that signature silky texture comes from. It’s like adding the final brushstrokes to a masterpiece!
Step 7: Bake
We don’t bake this butter chicken in the oven! The cooking happens all on the stovetop. Once the chicken is added to the sauce and simmers, it cooks through and melds with the flavors. The key is low and slow simmering to ensure the chicken is tender and the sauce has time to develop its full depth. You’ll know it’s ready when the chicken is cooked through, the sauce is thick and glossy, and the aroma filling your kitchen is absolutely intoxicating.
Step 8: Cool & Glaze
Once the butter chicken is cooked, I like to let it sit off the heat for about 5-10 minutes before serving. This allows the flavors to meld even further. The “glaze” in this case is that rich, creamy sauce that coats everything. I finish it with a final pat of butter stirred in and a sprinkle of fresh cilantro. The optional sugar is also added here if your tomatoes were a bit too acidic. Taste and adjust salt as needed. The heat from the simmering sauce will gently “cook” the cream and butter into that gorgeous finish.
Step 9: Slice & Serve
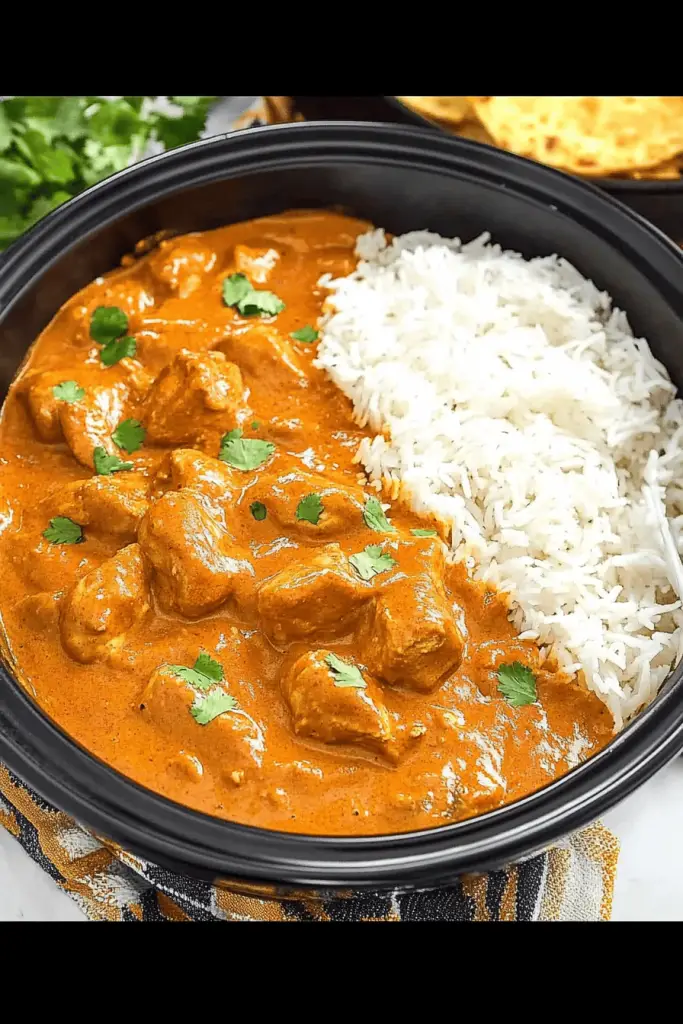
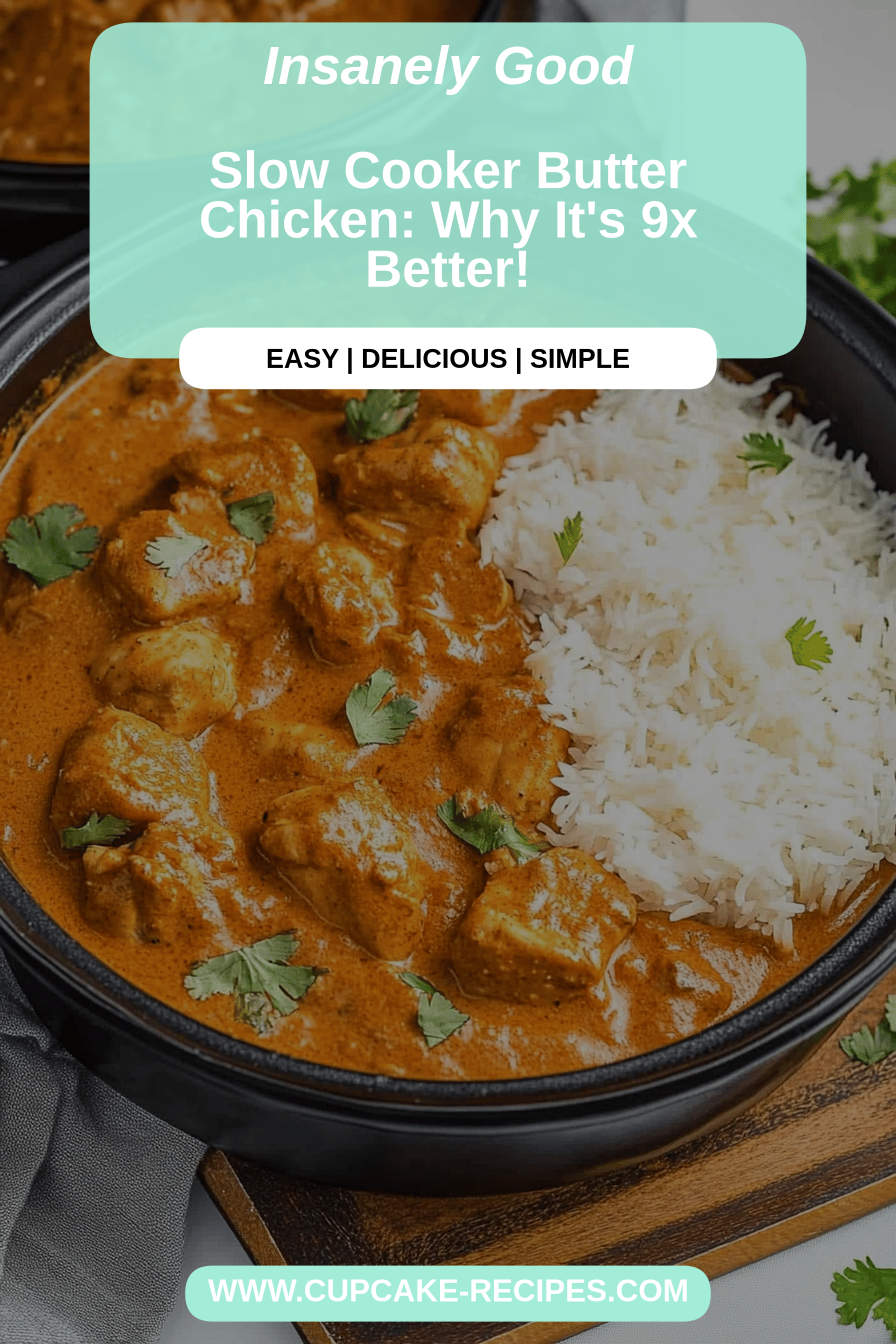
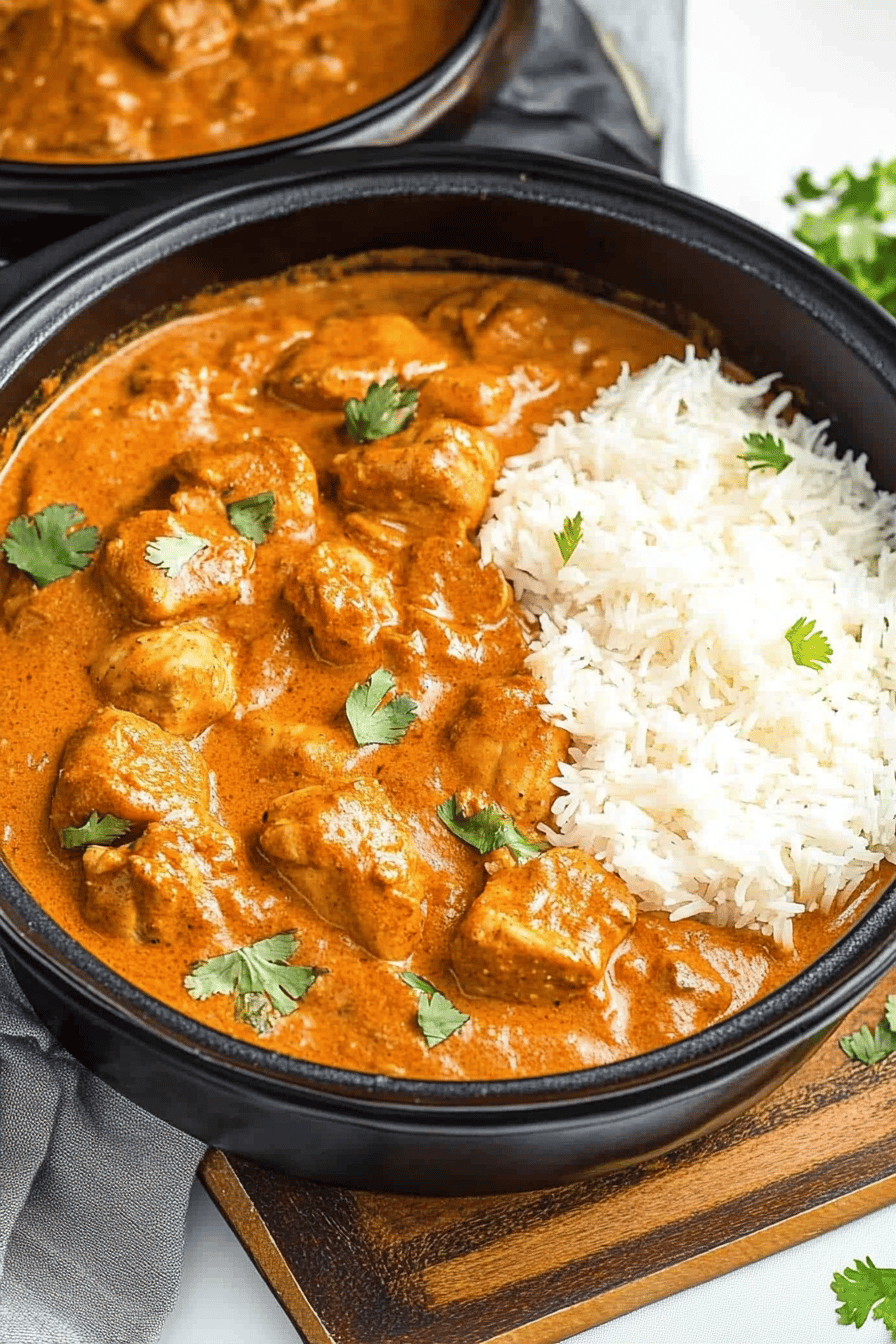
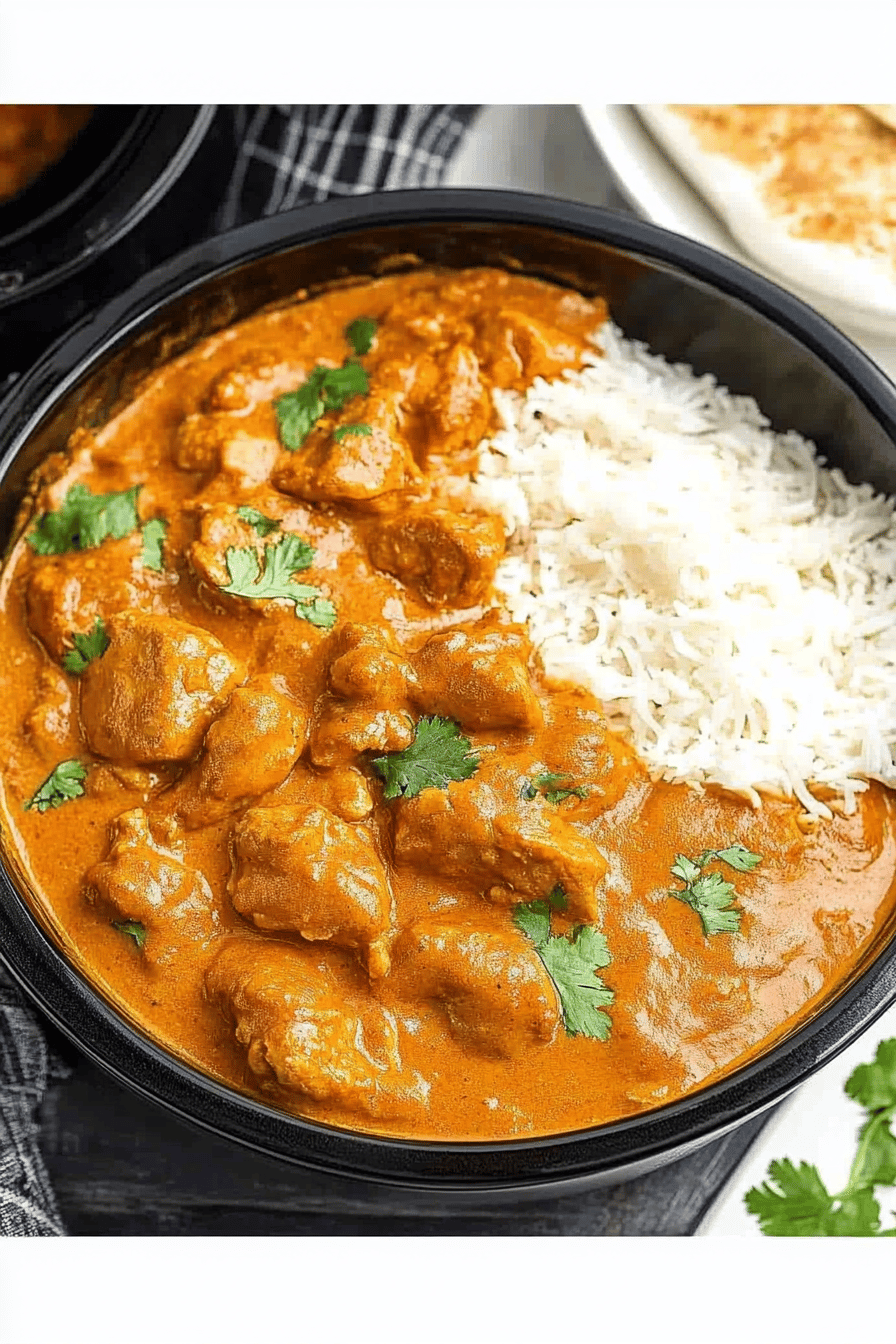
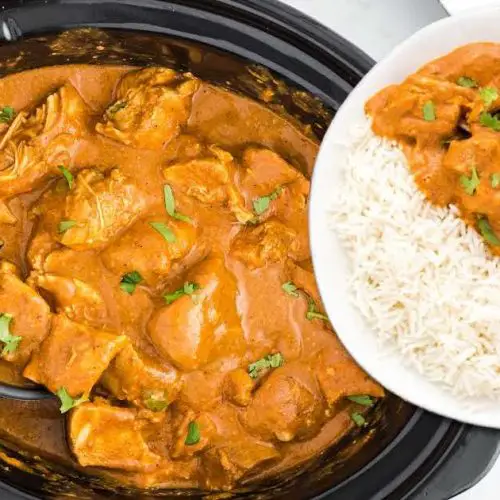
This is the best part! Ladle generous portions of your glorious butter chicken over fluffy basmati rice. Garnish with fresh cilantro. I love serving it with warm naan bread for dipping up every last bit of that amazing sauce. It truly is a showstopper, and the aroma alone is enough to make your mouth water. The chicken should be incredibly tender, and the sauce, well, it’s pure perfection. You can slice the chicken before adding it to the sauce, or serve it whole if you prefer larger pieces.
What to Serve It With
Butter chicken is wonderfully versatile, and while it’s a star on its own, pairing it with the right sides can elevate the whole experience. For a classic **Breakfast** or Brunch, imagine a dollop of this rich chicken over some perfectly cooked basmati rice, maybe with a side of cooling raita (yogurt dip) or a simple cucumber and tomato salad. The subtle spice and creaminess is surprisingly delightful in the morning! If you’re going for a more elegant **Brunch**, think about plating it beautifully in small bowls, perhaps with some freshly baked naan or roti. A crisp, lightly dressed green salad can offer a refreshing contrast. For a true **Dessert** of sorts (though it’s savory!), I sometimes enjoy a small portion after a lighter meal, just to savor the flavors. It’s like a decadent treat for your taste buds. And for those **Cozy Snacks** or casual dinners, this is your absolute go-to. Serve it with rice, garlic naan, or even some roasted vegetables. My family loves it with simple steamed Green Beans or some crispy roasted cauliflower. My secret weapon for serving? I always make sure I have extra naan bread on hand – it disappears faster than anything else! My kids also adore it with some plain yogurt swirled in for extra creaminess and a touch of sweetness.
Top Tips for Perfecting Your Butter Chicken
Over the years, I’ve picked up a few tricks that make this butter chicken recipe even better, and I want to share them with you! For the **Chicken Prep**, always try to use boneless, skinless chicken thighs. They have more fat, which means more flavor and tenderness, and they’re much more forgiving if you accidentally overcook them a little. If you’re using chicken breasts, be extra careful not to overcook them. When it comes to **Mixing Advice**, the key is gentle handling. Marinate the chicken properly, but once it’s in the sauce, stir gently to avoid breaking up the chicken pieces too much. For the **Swirl Customization**, don’t be afraid to add the cream and butter a little at a time. Stirring it in slowly creates that beautiful marbled effect, and you can control the richness. If you want it extra creamy, add a touch more cream. If you prefer it a little lighter, use half-and-half or even a bit of milk, though it won’t be quite as decadent. For **Ingredient Swaps**, if you don’t have garam masala, you can use a mix of cinnamon, cumin, and coriander, but garam masala really is the star here. For the tomatoes, using good quality canned crushed tomatoes is important, but you can also roast fresh tomatoes for an even deeper flavor. Regarding **Baking Tips** (even though we’re stovetop!), make sure your heat is on a medium-low simmer once the chicken is in the sauce. This gentle cooking is crucial for tender chicken. If you see it bubbling too vigorously, turn the heat down. And for **Glaze Variations** (referring to the sauce here!), you can play with the spices. A pinch of fenugreek leaves (kasuri methi) adds an authentic restaurant flavor that’s incredible. Also, don’t skip the optional sugar if your tomatoes are tart – it really balances everything out perfectly. I learned the hard way that under-seasoning is a crime, so always taste and adjust your salt before serving!
Storing and Reheating Tips
This butter chicken is fantastic for leftovers, which is music to my ears on busy days! For **Room Temperature** storage, it’s best to let it cool down completely before covering it tightly. I wouldn’t leave it out for more than two hours for food safety reasons. **Refrigerator Storage** is your best friend here. Once cooled, transfer the butter chicken to an airtight container. It will stay wonderfully fresh in the fridge for about 3-4 days. The flavors actually meld and deepen overnight, so it can be even better the next day! For **Freezer Instructions**, this dish freezes surprisingly well. Let it cool completely, then portion it into freezer-safe containers or bags. It can be stored in the freezer for up to 2-3 months. When you’re ready to reheat, the best way is to thaw it overnight in the refrigerator and then gently reheat it on the stovetop over low heat, adding a splash of water or cream if it seems a little thick. You can also reheat individual portions in the microwave. For **Glaze Timing Advice**, when storing, the sauce is already perfectly integrated. If you’re reheating from frozen and it seems a bit dry, you can stir in a tablespoon or two of cream or a small pat of butter at the end of reheating to bring back that beautiful, glossy finish.
Frequently Asked Questions
Final Thoughts
So there you have it – my ultimate butter chicken recipe! It’s a dish that brings me so much joy every time I make it, and I truly hope it brings you the same level of comfort and deliciousness. It’s proof that you don’t need to be a professional chef to create something truly spectacular in your own kitchen. It’s the perfect blend of simple techniques and wonderful spices that result in a meal that feels both special and incredibly satisfying. If you love this recipe, you might also enjoy my Creamy Coconut Curry or my Quick Chicken Tikka Masala – they’re in a similar flavor family and are also real crowd-pleasers! I can’t wait to hear what you think of this butter chicken. Please leave a comment below with your thoughts, any modifications you tried, or how your family loved it! And if you share a photo on social media, be sure to tag me – I’d love to see your culinary creations!
Butter Chicken
Ingredients
Chicken Marinade
- 1.5 pounds boneless, skinless chicken thighs cut into 1-inch pieces
- 0.5 cup plain yogurt
- 1 tablespoon lemon juice
- 1 teaspoon garam masala
- 0.5 teaspoon turmeric powder
- 0.5 teaspoon cayenne pepper
- 0.25 teaspoon salt
Sauce
- 2 tablespoons unsalted butter
- 1 medium onion finely chopped
- 3 cloves garlic minced
- 1 tablespoon fresh ginger grated
- 1 teaspoon garam masala
- 0.5 teaspoon ground cumin
- 0.25 teaspoon cayenne pepper
- 1 28 ounce can crushed tomatoes
- 0.5 cup heavy cream
- 1 teaspoon sugar
- 0.25 teaspoon salt
- fresh cilantro chopped, for garnish
Instructions
Preparation Steps
- In a bowl, combine chicken pieces with yogurt, lemon juice, garam masala, turmeric, cayenne pepper, and salt. Marinate for at least 30 minutes (or up to 4 hours in the refrigerator).
- Melt butter in a large skillet or pot over medium heat. Add chopped onion and cook until softened, about 5-7 minutes.
- Add minced garlic and grated ginger to the skillet and cook for 1 minute until fragrant.
- Stir in garam masala, cumin, and cayenne pepper. Cook for another minute.
- Pour in the crushed tomatoes, scraping up any browned bits from the bottom of the skillet. Bring to a simmer.
- Add the marinated chicken pieces to the skillet. Stir to coat the chicken in the sauce. Bring back to a simmer, then reduce heat to low, cover, and cook for 15-20 minutes, or until the chicken is cooked through.
- Stir in the heavy cream, sugar, and salt. Cook for another 5 minutes until the sauce is heated through and slightly thickened. Do not boil.
- Garnish with fresh chopped cilantro. Serve hot with rice or naan.
Notes
Featured Comments
“Impressed! Clear steps and turned out amazing results. Perfect for busy nights.”
“New favorite here — restaurant-level. crowd-pleaser was spot on.”
“Super easy and turned out amazing! My family asked for seconds. Saving this one.”
“This sweet treat was absolutely loved — the buttery really stands out. Thanks!”
“Made it tonight and wow — quick weeknight win! Will definitely make Butter Chicken again.”
“Packed with flavor and so simple. Exactly what I wanted from Butter Chicken.”


