

Oh, hello there! Come on in, grab a mug of something warm. Today, I want to share something truly special with you, a recipe that has become an absolute staple in my kitchen. We’re talking about my ultimate chicken enchilada casserole. Now, I know “casserole” can sometimes sound a bit… dated, or maybe a little heavy. But trust me, this isn’t your grandma’s Tuna Noodle casserole (though I love that one too!). This is vibrant, packed with flavor, and surprisingly quick to whip up, making it a lifesaver on those crazy weeknights when the thought of a full-blown enchilada rolling session feels like climbing Mount Everest. It’s the kind of dish that fills your home with the most incredible aromas and, more importantly, makes everyone at the table do that happy sigh of pure satisfaction. If you’ve ever loved the idea of enchiladas but dreaded the prep, you are going to adore this chicken enchilada casserole.
What is chicken enchilada casserole?
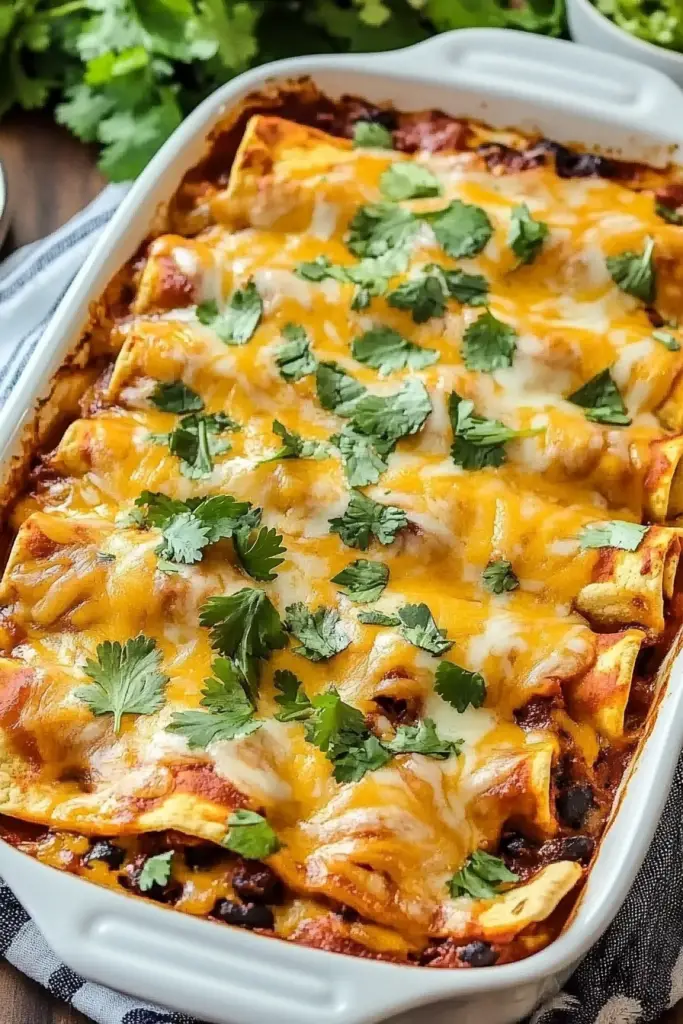
So, what exactly is this magical chicken enchilada casserole we’re talking about? Think of it as all the deliciousness of classic chicken enchiladas – the tender chicken, the savory sauce, the melty cheese, all those warm spices – but deconstructed and layered into a comforting, shareable bake. Instead of fussing with rolling each tortilla individually (which, let’s be honest, can take forever!), we’re simply layering torn or cut tortillas with a Creamy Chicken filling and a rich enchilada sauce. It’s essentially a lasagna-style approach to enchiladas, but with all the bold, Tex-Mex flavors we crave. It’s comfort food at its finest, offering that same satisfying, deeply flavorful experience without all the fuss. It’s the perfect way to get those beloved enchilada tastes onto your plate with significantly less effort. You get all the joy, none of the tortilla-rolling stress!
How do I make chicken enchilada casserole?
Quick Overview
Making this chicken enchilada casserole is a breeze! We’ll start by prepping our ingredients – shredding some cooked chicken, dicing an onion, and getting our sauce ready. Then, we’ll create a luscious, creamy chicken mixture that gets layered with soft corn tortillas and a vibrant enchilada sauce in a baking dish. Top it all off with plenty of cheese, and into the oven it goes until bubbly and golden. It’s a straightforward layering process that makes it incredibly easy for even beginner cooks. The whole thing comes together in under an hour, including baking time, which is why it’s my go-to when dinner needs to be on the table FAST.
Ingredients
For the Main Dish:
Here’s what you’ll need to build this flavor-packed casserole. I like to use about 3 cups of cooked, shredded chicken. A rotisserie chicken is your best friend here – so easy! If you’re cooking chicken specifically for this, a couple of chicken breasts boiled or baked until tender will work perfectly. We’ll also need 1 tablespoon of olive oil for sautéing, 1 medium yellow onion, finely diced (about 1 cup), and 2 cloves of garlic, minced. For that essential enchilada flavor, we’re using 1 (15 ounce) can of red enchilada sauce – I usually go for a medium heat, but feel free to pick your favorite! And for the creamy binding element, 1 (8 ounce) package of Cream Cheese, softened. This makes it so wonderfully rich and satisfying. We also need 1/2 cup of sour cream for extra tang and creaminess, and a good pinch of salt and freshly ground black pepper to taste. And, of course, the stars of the layering show: 12-16 corn tortillas, depending on the size of your baking dish. I find corn tortillas give the best texture and flavor here, but if you’re a flour tortilla fan, they work too! Finally, for that irresistible cheesy topping, 2 cups of shredded Monterey Jack cheese or a Mexican blend. Pro tip: shredding your own cheese from a block melts so much better than pre-shredded!
For the Optional Cilantro Lime Garnish:
While not essential for the casserole itself, these fresh additions take it to the next level! A handful of fresh cilantro, chopped, and the zest and juice of 1 lime. It adds such a bright, zesty contrast to the richness of the casserole.
Step-by-Step Instructions
Step 1: Preheat & Prep Pan
First things first, let’s get that oven preheated to 375 degrees Fahrenheit (190 degrees Celsius). This gives it plenty of time to warm up while we get everything else ready. Now, grab a 9×13 inch baking dish – this is the perfect size for this recipe. Lightly grease it with a little cooking spray or a thin layer of olive oil. This just helps prevent any sticking, ensuring your beautiful casserole slides right out when it’s done. Doing this upfront means you won’t be scrambling later.
Step 2: Mix Dry Ingredients
Okay, this step is more about prepping the components for the filling, rather than mixing dry ingredients in a bowl like you would for a cake. We’re going to sauté our aromatics. Heat the tablespoon of olive oil in a large skillet or Dutch oven over medium heat. Once shimmering, add your diced yellow onion and cook until it’s softened and translucent, about 5-7 minutes. You want it to be tender, not browned. Then, stir in the minced garlic and cook for just another minute until fragrant. Be careful not to burn the garlic – it can turn bitter really quickly!
Step 3: Mix Wet Ingredients
In a large bowl, combine the softened cream cheese and the sour cream. Now, you can use a spoon or a spatula to mix these together until they are smooth and well combined. It’s important that the cream cheese is softened, otherwise, you’ll have little lumps. This mixture is going to form the creamy base for our chicken filling, so give it a good stir until it’s nice and luscious.
Step 4: Combine
Now, let’s bring it all together! To the bowl with the cream cheese and sour cream mixture, add the sautéed onion and garlic, the shredded cooked chicken, and the entire can of enchilada sauce. Stir everything together until it’s all thoroughly combined. You want every strand of chicken coated in that delicious, creamy sauce. Season generously with salt and freshly ground black pepper to your taste. Give it a little taste test here (carefully, it might be warm!) and adjust seasonings if needed. This is your chance to make it perfect for *your* palate!
Step 5: Prepare Filling
The “filling” is essentially the mixture we just created in Step 4. It’s a hearty, flavorful blend of shredded chicken, sautéed aromatics, creamy cheese, and zesty enchilada sauce. The consistency should be moist but not watery. If it seems a little dry, you can add a tablespoon or two more of enchilada sauce or a tiny splash of chicken broth. If it seems too loose, you can always add a bit more shredded cheese into the mix to help thicken it up slightly. The goal is a substantial, cohesive mixture that will hold its shape when layered.
Step 6: Layer & Swirl
This is where the casserole magic happens! Take your corn tortillas and either stack them and cut them into rough pieces (about 2-inch squares work great) or tear them into bite-sized chunks. We’re not going for perfect precision here; rustic is good! Spread about a third of the chicken mixture evenly over the bottom of your greased baking dish. Then, scatter about half of the tortilla pieces over the chicken layer. Now, spoon about half of the remaining chicken mixture over the tortillas. Repeat with another layer of half of the remaining tortillas, followed by the rest of the chicken mixture. Finally, top everything with the remaining tortilla pieces. This layering ensures that the tortillas soften beautifully as they bake and absorb all those amazing flavors. There’s no real “swirling” needed in the traditional sense, but you can gently press down on each layer to help it settle.
Step 7: Bake
Now, for the grand finale before the oven! Sprinkle the shredded Monterey Jack cheese (or your Mexican blend) evenly over the top layer of tortillas. Make sure to get it all the way to the edges. Cover the baking dish tightly with aluminum foil. Pop it into your preheated oven and bake for 25 minutes. After 25 minutes, remove the foil and bake for another 10-15 minutes, or until the cheese is melted, bubbly, and starting to turn golden brown. You want to see those glorious little pockets of gooey cheese and hear the gentle sizzle of the casserole!
Step 8: Cool & Glaze
Once it’s out of the oven, resist the urge to dive in immediately! Let the chicken enchilada casserole rest for about 10 minutes. This is crucial. It allows the layers to set slightly, making it much easier to slice and serve neatly. If you’re adding the optional fresh cilantro and lime, this is the perfect time to prepare it. Chop your cilantro and mix it with the lime zest and juice in a small bowl. You can spoon this over the top right before serving, or let everyone add it to their own plate. The freshness of the lime and cilantro cuts through the richness beautifully, giving it a wonderful bright finish.
Step 9: Slice & Serve
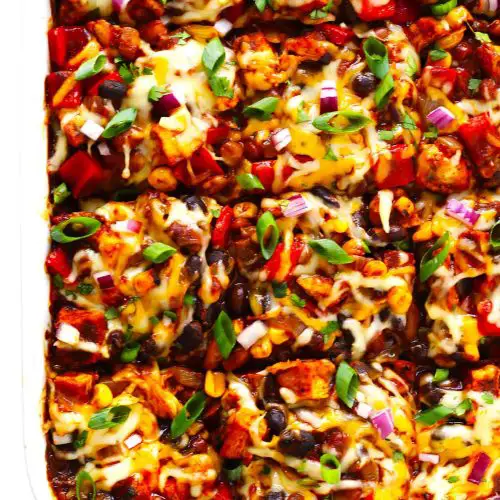
After resting, slice your chicken enchilada casserole into generous squares using a sharp knife or a spatula. Serve hot, straight from the baking dish. It’s wonderful as is, but if you’ve added the cilantro-lime garnish, spoon a little over each serving. The aroma alone will have everyone coming to the table in eager anticipation. It’s truly a dish that brings people together.
What to Serve It With
This chicken enchilada casserole is incredibly versatile and pairs beautifully with a variety of sides, depending on the meal occasion. For a casual weeknight DINNER, it’s practically a meal in itself, but I often like to add a simple side salad with a light vinaigrette to balance the richness. If you’re feeling a bit more ambitious, some seasoned black beans or a dollop of creamy Mexican rice are always fantastic companions. For a more festive BRUNCH spread, imagine this bubbling away alongside some scrambled eggs, fresh fruit salad, and maybe some crispy bacon or chorizo. It feels special enough for guests but is still incredibly easy to manage. If you’re serving this for a POTLUCK or a larger gathering, it holds its own beautifully. I’ve found that people absolutely rave about it! For a light COZY SNACK, a smaller portion served with a dollop of guacamole and a sprinkle of extra cheese is pure comfort. My family also loves it with a side of corn salsa – the sweetness of the corn and the slight crunch is a perfect contrast. Honestly, the possibilities are endless, and it always seems to disappear quickly, no matter how I serve it!
Top Tips for Perfecting Your Chicken Enchilada Casserole
Over the years, I’ve learned a few tricks that make this chicken enchilada casserole even better, and I’m happy to share them with you! For the Zucchini Prep (wait, what? Oh, I’m getting mixed up with another favorite recipe! Ha! Let’s stick to this chicken enchilada casserole!). Okay, ZUCCHINI PREP is not applicable here, but let’s talk about the tortillas. Make sure you’re using corn tortillas. While flour tortillas can work, corn tortillas offer that authentic flavor and a slightly more tender texture when baked in a casserole. If your corn tortillas are a bit stiff, you can gently warm them for a few seconds in a dry skillet or microwave them in a damp paper towel for about 30 seconds to make them more pliable and less likely to break when layering. For MIXING ADVICE, don’t overmix the chicken filling once you add the enchilada sauce. You want to combine everything gently to avoid turning the chicken into mush. A light, thorough mix is all you need. The goal is distinct shreds of chicken coated in a creamy sauce. Regarding SWIRL CUSTOMIZATION – while this isn’t a swirled recipe, you can absolutely get creative with the cheese! Instead of just Monterey Jack, try a mix of cheddar and pepper jack for a little kick. You can also sprinkle some diced pickled jalapeños over the cheese layer before baking for an extra spicy kick. For INGREDIENT SWAPS, if you don’t have cream cheese, you can try using an equal amount of softened mascarpone cheese or even thick Greek yogurt (though it might be a bit tangier). For a dairy-free version, I’ve had success using a dairy-free cream cheese alternative and a dairy-free shredded cheese blend. Remember, results might vary slightly with substitutions, so taste and adjust as you go! For BAKING TIPS, the foil cover is crucial for the first part of baking to ensure the casserole heats through evenly and the tortillas soften without drying out. Once you remove the foil, keep an eye on it to achieve that perfect golden-brown cheese topping. If your oven tends to run hot, you might want to reduce the temperature slightly or shorten the uncovered baking time. For GLAZE VARIATIONS – we’re not really using a glaze here, but if you wanted to top it with something extra, a drizzle of crema or a dollop of guacamole right before serving adds a lovely finish. Another idea is to toast some pepitas (pumpkin seeds) and sprinkle them over the top for a nice crunch!
Storing and Reheating Tips
This chicken enchilada casserole is fantastic for leftovers, and I often find myself looking forward to them! For ROOM TEMPERATURE storage, it’s best to let it cool down a bit before covering it. I usually leave it out for no more than an hour or two, just until it’s no longer steaming hot. Then, I cover it tightly with plastic wrap or foil and store it in the refrigerator. REFRIGERATOR STORAGE is your best bet for keeping it fresh. It will stay delicious in an airtight container or well-covered in the baking dish for about 3-4 days. The flavors actually tend to meld and deepen overnight, making it even tastier on the second day! For FREEZER INSTRUCTIONS, this casserole freezes beautifully, making it a perfect candidate for meal prep. You can freeze the entire baked casserole or individual portions. Make sure it’s completely cooled before freezing. Wrap it very tightly in a double layer of plastic wrap, followed by a layer of aluminum foil, or place it in a freezer-safe airtight container. It will keep well in the freezer for up to 2-3 months. When you’re ready to use it, thaw it overnight in the refrigerator. For REHEATING, the best way is to pop it back into a 350°F (175°C) oven until heated through. If reheating from the refrigerator, this usually takes about 20-30 minutes. If reheating from frozen (after thawing), it will take longer, about 40-50 minutes. You can also reheat individual portions in the microwave, but be aware that the tortillas might become a little softer. If you’re reheating a whole casserole that you froze before baking (yes, you can do that too!), just add a little extra liquid like enchilada sauce or chicken broth before baking, and increase the covered baking time. Just a note on GLAZE TIMING ADVICE – since we’re not using a traditional glaze, but rather toppings like fresh herbs, it’s best to add these *after* reheating, just before serving, to maintain their freshness and vibrant flavor.
Frequently Asked Questions
Final Thoughts
So there you have it – my absolute favorite chicken enchilada casserole! It’s more than just a recipe; it’s a hug in a dish, a testament to how delicious comfort food can be, even on the busiest of evenings. The way the creamy chicken filling melds with the soft tortillas and rich enchilada sauce, all topped with that golden, bubbly cheese… it’s pure magic. It’s the kind of meal that brings smiles to faces and makes everyone feel a little more relaxed and connected. If you’re someone who loves the idea of enchiladas but needs a shortcut, or if you’re just looking for a reliable, crowd-pleasing dinner that’s bursting with flavor, this is the one. I genuinely hope you give this chicken enchilada casserole a try. I can’t wait to hear what you think, and I’d absolutely love to see your creations or hear about any personal twists you add! Tag me or leave a comment below – happy cooking, friends!
Chicken Enchilada Casserole
Ingredients
Main Ingredients
- 1.5 pounds cooked chicken shredded
- 1 can enchilada sauce 10 ounces
- 1 can diced tomatoes and green chilies 10 ounces, undrained
- 1 package cream cheese 8 ounces, softened
- 2 cups shredded cheddar cheese divided
- 0.5 cup sour cream
- 12 count corn tortillas cut into quarters
Instructions
Preparation Steps
- Preheat oven to 375 degrees F (190 degrees C).
- In a large bowl, combine shredded chicken, enchilada sauce, undrained diced tomatoes and green chilies, softened cream cheese, sour cream, and 1 cup of shredded cheddar cheese. Mix well.
- Spread half of the tortilla pieces evenly on the bottom of a 9x13 inch baking dish.
- Pour half of the chicken mixture over the tortillas.
- Repeat layers with the remaining tortilla pieces and chicken mixture.
- Top with the remaining 1 cup of shredded cheddar cheese.
- Bake for 25-30 minutes, or until bubbly and heated through.
- Let stand for 5 minutes before serving.
Notes
Featured Comments
“Impressed! Clear steps and so flavorful results. Perfect for busy nights.”
“New favorite here — comforting. crowd-pleaser was spot on.”
“Super easy and turned out amazing! My family asked for seconds. Saving this one.”
“This sweet treat was absolutely loved — the cozy really stands out. Thanks!”
“Made it tonight and wow — so flavorful! Will definitely make chicken enchilada casserole again.”
“Packed with flavor and so simple. Exactly what I wanted from chicken enchilada casserole.”


