

Okay, friends, let’s talk taquitos. Specifically, we need to talk about my absolute favorite chicken taquitos. These aren’t just *any* taquitos; these are the ones that make my kitchen smell incredible, the ones my kids beg for (and actually eat without complaint!), and the ones that have saved my sanity on countless busy weeknights. You know those nights when dinner feels like a mountainous task, and you just need something delicious and comforting that doesn’t require a culinary degree? Yeah, these are it. They’re wonderfully crispy on the outside, bursting with savory, cheesy goodness on the inside, and honestly, they’re just plain fun to eat. If you’ve ever loved a good enchilada or a perfectly fried taco, then you are going to fall head over heels for these. They’re a bit like a rolled-up taco, but in my book, they’re so much more. Let’s get these golden little treasures into your life!
What are chicken tacos?
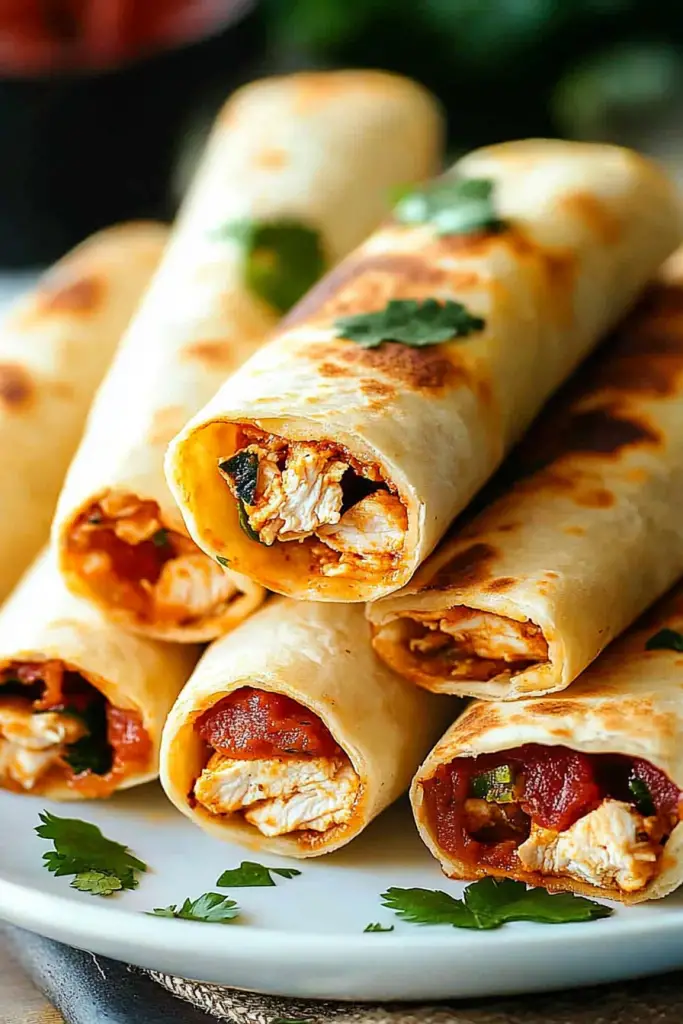
So, what exactly *are* chicken taquitos? In the simplest terms, they’re tightly rolled corn tortillas filled with seasoned shredded chicken, then fried until they’re delightfully crisp. The name “taquito” actually means “little taco” in Spanish, which is pretty fitting, right? They’re a super popular dish across Mexico and the United States, and for good reason. They’re the ultimate handheld comfort food. Think of them as the more elegant, infinitely crunchier cousin of the standard taco. The beauty of them is their simplicity and how perfectly they hold that delicious filling. They’re not messy, they’re not fussy, they’re just pure, unadulterated crispy, savory joy. And the best part? They’re ridiculously adaptable, which is something I absolutely adore in a recipe.
How do you make chicken tacos?
Quick Overview
This recipe is all about achieving that perfect crispy shell and a flavorful, tender filling. We’ll start by prepping our chicken, then mixing up a simple batter to help the tortillas crisp up beautifully. We’ll fill them, roll them, and then give them a good fry until they’re golden brown and irresistible. It’s a straightforward process, really, and the results are always worth it. Trust me, the aroma that fills your kitchen as these fry is absolutely divine!
Ingredients
For the Main Batter:
You’ll need about 1 cup of all-purpose flour for the batter. It’s the base that helps create that beautiful, crisp exterior. I always make sure mine is fresh; it makes a difference! You’ll also need 1 teaspoon of baking powder – this little bit of magic helps make the batter light and airy, contributing to that super crunch. And of course, a generous pinch of salt, about ½ teaspoon, to enhance all those delicious flavors. A dash of Black Pepper is good too, maybe ¼ teaspoon. This simple mix is key to getting that perfect golden shell.
For the Filling:
The star of our show! I usually use about 2 cups of cooked, shredded chicken. Rotisserie chicken is a lifesaver here, but you can also poach or bake Chicken Breasts and shred them yourself. You’ll also want about 1 cup of shredded cheese. I love a good Monterey Jack or a Mexican blend for its melty perfection, but cheddar works great too. For seasoning, I add about ½ teaspoon of chili powder, ½ teaspoon of cumin, and a pinch of garlic powder. Salt and pepper to taste, of course! Some folks like to add a little bit of finely diced onion or jalapeño to the filling, which is a delicious addition if you’re feeling adventurous.
For Frying and Serving:
You’ll need about 2-3 cups of vegetable oil, or another neutral oil with a high smoke point, for frying. I find that a good amount ensures even cooking and crispiness. And for serving? Oh, the possibilities! Sour Cream or Mexican crema, fresh salsa, guacamole, chopped cilantro, a squeeze of lime – all of these are fantastic accompaniments.
Step-by-Step Instructions
Step 1: Preheat & Prep Pan
First things first, get your frying setup ready. You’ll want a heavy-bottomed skillet or a Dutch oven that can hold at least 2-3 inches of oil. Pour in your vegetable oil and set it over medium-high heat. We’re looking for the oil to reach about 375°F (190°C). If you don’t have a thermometer, you can test it by dropping a tiny bit of batter in; it should sizzle immediately and float to the top. While the oil heats up, warm your corn tortillas slightly. You can do this by wrapping them in a damp paper towel and microwaving them for about 30 seconds, or by quickly warming them on a dry skillet. This makes them pliable and prevents them from breaking when you roll them.
Step 2: Mix Dry Ingredients
In a medium bowl, whisk together the all-purpose flour, baking powder, salt, and pepper. Make sure everything is thoroughly combined. This ensures even distribution of the leavening agent and seasonings, which is crucial for a consistent texture and flavor in your finished taquitos.
Step 3: Mix Wet Ingredients
In a separate bowl, whisk together about ¾ cup of water with the beaten egg. The egg helps bind the batter and gives it a lovely golden hue when fried. You want a consistency that’s not too thick and not too thin – think pancake batter. Add more water, a tablespoon at a time, if it seems too thick. We want it to coat the tortilla nicely without being gloopy.
Step 4: Combine
Now, we’ll gently combine the wet and dry ingredients. Pour the wet ingredients into the bowl with the dry ingredients. Stir *just* until combined. A few lumps are perfectly fine! Overmixing can develop the gluten too much, making the batter tough, and we definitely don’t want that. We’re aiming for a smooth-ish batter that coats the back of a spoon lightly.
Step 5: Prepare Filling
In a separate bowl, combine your shredded chicken, shredded cheese, chili powder, cumin, garlic powder, salt, and pepper. Mix everything together really well. Taste it and adjust the seasonings if you think it needs it. This is where you can add in those diced onions or jalapeños if you’re using them. The cheese will help bind the filling together once it melts during frying.
Step 6: Layer & Swirl
Okay, this is where the magic happens! Dip each slightly warmed tortilla into the batter, letting any excess drip off. Don’t let it soak too long; we just want a thin coating. Lay the battered tortilla flat on a clean surface. Spoon about 2 tablespoons of the chicken filling along one edge. Then, tightly roll up the tortilla, starting from the filled edge. Press the seam down firmly. You can use a toothpick to secure the seam if needed, but often a good press is enough. As you roll, you’ll notice the batter forms a beautiful coating. If you want an extra-crispy taquito, you can brush a little extra batter onto the outside seam as you roll.
Step 7: Bake
Carefully place the rolled taquitos seam-side down into the hot oil. Don’t overcrowd the pan; fry them in batches of 3-4 to maintain the oil temperature and ensure even cooking. Fry for about 3-5 minutes per side, or until they are a beautiful golden brown and wonderfully crispy. Use tongs to carefully turn them to ensure all sides get evenly browned. Once they’re done, remove them from the oil and place them on a wire rack set over a baking sheet to drain. This is crucial for keeping them crispy!
Step 8: Cool & Glaze
Let the taquitos cool slightly on the wire rack for a minute or two before serving. This allows them to firm up a bit. Now, if you’re going the glaze route (which I highly recommend!), you can whip up a simple lime crema by mixing sour cream with a little lime juice and a pinch of salt, or use your favorite salsa. Drizzle it generously over the taquitos just before serving. This step adds an extra layer of flavor and moisture that is just divine!
Step 9: Slice & Serve
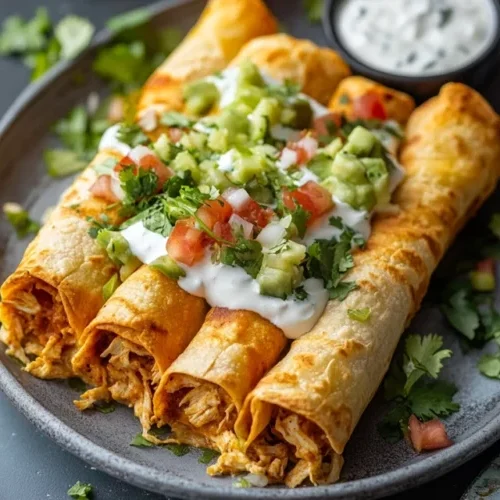
These are best served warm, straight from the fryer! They’re fantastic as is, or you can serve them with a variety of toppings. A sprinkle of fresh cilantro or a dollop of guacamole is always a hit. These are perfect for dipping into your favorite salsa or sour cream. You can cut them in half for easier sharing, or just enjoy them whole!
What to Serve It With
The beauty of these chicken taquitos is that they’re fantastic on their own, but they also play *so* well with others. For a truly special breakfast, I love serving them alongside a fresh fruit salad and maybe a drizzle of a tangy crema. It’s a more exciting way to start the day than my usual toast! For brunch, they step up their game considerably. Imagine a platter of these alongside some scrambled eggs, refried beans, and a vibrant pico de gallo. It’s a crowd-pleaser for sure. If you’re looking for a delightful dessert option (yes, really!), a dusting of powdered sugar and a drizzle of chocolate sauce can be surprisingly decadent and fun! My kids absolutely devour them this way. And for those cozy snack occasions, or a laid-back weeknight dinner, they’re perfect with a big bowl of guacamole and some salsa for dipping. Honestly, they’re just a happy food, and they make whatever you’re serving feel a little more festive and special. They pair wonderfully with my favorite simple black bean salad too!
Top Tips for Perfecting Your Chicken Taquitos
I’ve made these chicken taquitos more times than I can count, and through those countless batches, I’ve picked up a few tricks that I think make all the difference. For the tortillas, the key is to warm them just enough to make them pliable but not so much that they become soggy. If they’re too hot, they can tear. I find that a quick zap in the microwave wrapped in a damp paper towel is the sweet spot. When it comes to the filling, don’t be afraid to season it well! The chicken and cheese are the stars, but the spices are what bring them to life. I always taste and adjust the seasoning before I start rolling. One mistake I made early on was overcrowding the fryer. Big no-no! It lowers the oil temperature drastically, resulting in greasy, soggy taquitos instead of crisp ones. Fry them in batches, always. And speaking of oil, make sure it’s hot enough before you add the taquitos. If it’s not hot enough, they’ll absorb too much oil. The toothpick trick for testing oil temperature is my go-to when I’m not using a thermometer. If you’re not keen on frying, I’ve heard of people baking them, but honestly, the crunch you get from frying is just unparalleled for taquitos. For a bit of extra pizzazz, sometimes I like to add a tiny bit of smoked paprika to the batter for a subtle smoky flavor. And if you’re worried about the taquitos unrolling while frying, a gentle press along the seam as you roll them, or even securing with a toothpick (just remember to remove it before serving!), can be a lifesaver. Lastly, drain them properly on a wire rack. Letting them sit in a pile on paper towels can steam them and make them lose their hard-earned crispiness.
Storing and Reheating Tips
Now, if you happen to have any leftover chicken taquitos (which is rare in my house!), storing them properly is key to enjoying them later. If they’re completely cooled, you can store them in an airtight container at room temperature for up to 2 days. They’ll start to lose some of their crispness after the first day, though. For longer storage, the refrigerator is your best bet. Store them in an airtight container, separating layers with parchment paper if you want to prevent them from sticking together, and they should stay good for about 3-4 days. They’ll still be delicious, just not *as* crispy as when they’re fresh. If you’re planning ahead, freezing is fantastic! Let the taquitos cool completely, then arrange them in a single layer on a baking sheet and freeze until solid. Once frozen, transfer them to a freezer-safe bag or container. They’ll last for up to 2-3 months. To reheat, the best method for restoring crispness is to bake them. Pop them in a preheated oven at 375°F (190°C) for about 8-10 minutes, or until heated through and crispy again. You can also use an air fryer for about 5-7 minutes at 350°F (175°C). Microwaving is an option for a quick reheat, but they will lose their crispiness and become a bit soft, so it’s not my first choice if crispiness is your priority. I usually prefer to reheat them without the glaze, and then add a fresh drizzle of crema or salsa after they’re warm!
Frequently Asked Questions
Final Thoughts
So there you have it – my absolute favorite chicken taquitos! I truly hope you give these a try. They’re more than just a recipe to me; they’re a way to bring a little bit of comfort and joy to the table, especially on those busy days. The way they get perfectly crispy and the flavor explosion inside is just something special. They’re proof that you don’t need complicated ingredients or hours in the kitchen to make something truly delicious that your whole family will love. If you’re a fan of these, you might also enjoy my recipe for crispy potato tacos or my easy sheet pan chicken fajitas, which are also great for weeknight meals! I can’t wait to hear what you think. Please leave a comment below and tell me how yours turned out, or if you tried any fun variations! And if you snap a picture, be sure to tag me on social media – I’d love to see your beautiful taquitos! Happy cooking, friends!
Crispy Chicken Taquitos
Ingredients
Chicken Filling
- 1.5 pounds cooked chicken shredded
- 1 ounce taco seasoning
- 0.25 cup water
- 0.5 cup shredded cheddar cheese
Taquito Assembly
- 12 count corn tortillas warmed
- 2 tablespoons vegetable oil for brushing
Optional Toppings
- sour cream
- salsa
- guacamole
Instructions
Preparation Steps
- Preheat your oven to 400°F (200°C).
- In a medium bowl, combine the shredded cooked chicken, taco seasoning, and water. Mix well until the chicken is evenly coated.
- Stir in the shredded cheddar cheese into the chicken mixture.
- Warm the corn tortillas. You can do this by wrapping them in a damp paper towel and microwaving for 30-60 seconds, or by briefly heating them in a dry skillet.
- Lay out a warm tortilla. Spoon about 2 tablespoons of the chicken mixture onto the center of the tortilla.
- Roll up the tortilla tightly to form a taquito shape.
- Place the rolled taquitos seam-side down on a baking sheet.
- Brush the tops and sides of the taquitos with vegetable oil.
- Bake for 20-25 minutes, or until the taquitos are golden brown and crispy, flipping halfway through for even crisping.
- Serve hot with your favorite toppings such as sour cream, salsa, or guacamole.
Notes
Featured Comments
“Impressed! Clear steps and perfect for busy nights results. Perfect for busy nights.”
“New favorite here — comforting. crowd-pleaser was spot on.”
“Super easy and turned out amazing! My family asked for seconds. Saving this one.”
“This sweet treat was absolutely loved — the buttery really stands out. Thanks!”
“Made it tonight and wow — family favorite! Will definitely make chicken taquitos again.”
“Packed with flavor and so simple. Exactly what I wanted from chicken taquitos.”


