You know those recipes that just feel like a warm hug? The ones that make your kitchen smell like heaven and disappear from the plate faster than you can say “second helping”? Well, this chocolate Poke Cake is *that* recipe for me. It’s not just a cake; it’s a memory. I can still vividly remember my mom making this for my birthday when I was little, the way the chocolate syrup would ooze through the tiny holes, creating these magical ribbons of pure bliss. Now, my own kids beg for it, especially when we need a little extra sweetness to brighten up a cloudy day. If you’re a chocolate lover who sometimes just doesn’t have the energy for a full-blown layer cake but craves something decadent, you are going to fall head over heels for this chocolate poke cake. It’s truly the ultimate comfort dessert, and honestly, the process is so simple, you’ll wonder why you haven’t made it a thousand times already.
What is a chocolate poke cake?
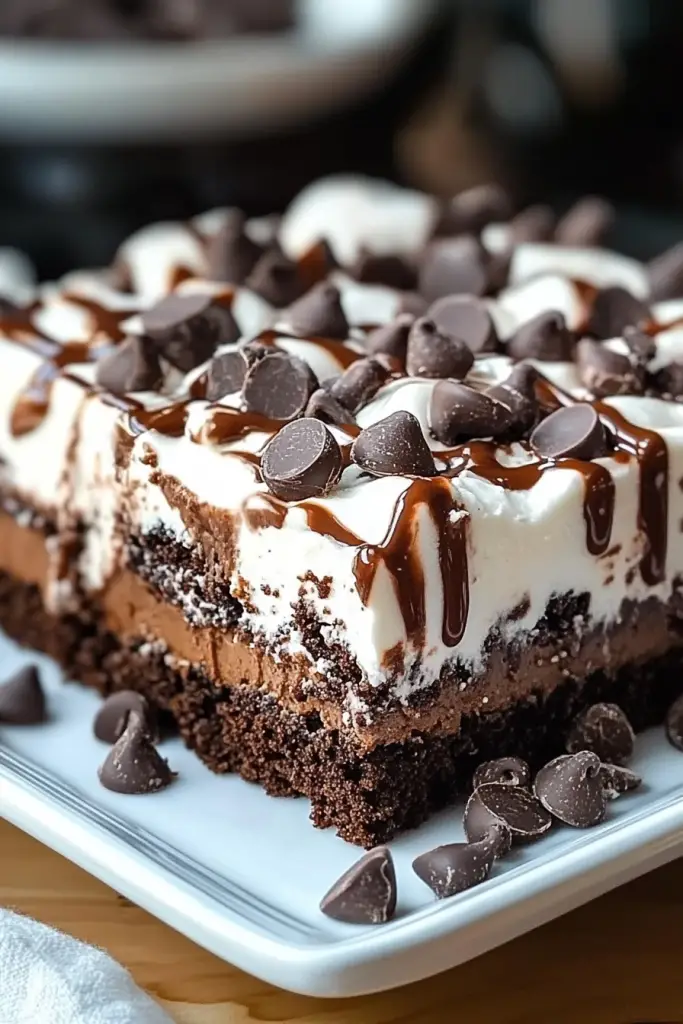
So, what exactly *is* a chocolate poke cake? Think of it as the most forgiving, most delightful cake you’ll ever meet. At its heart, it’s a simple, incredibly moist chocolate cake, but the magic happens *after* it bakes. We take a skewer or a fork and poke a bunch of holes all over the warm cake. Then, we pour a rich, decadent chocolate liquid – often a mixture of condensed milk and cocoa or chocolate syrup – all over it. This liquid seeps down into all those little holes, infusing the entire cake with an extra layer of chocolatey goodness and ensuring it stays unbelievably moist. It’s essentially taking a classic chocolate cake and giving it a serious upgrade in flavor and texture, without adding any complicated steps. It’s a dessert that’s as playful as it is delicious!
How do I make a chocolate poke cake?
Quick Overview
This recipe is all about building layers of flavor and moisture. We’ll start by baking a simple yet incredibly tender chocolate cake. While it’s still warm, we’ll poke it all over and then pour a luscious chocolate mixture into those holes, letting it soak in and work its magic. Finally, a simple glaze or frosting ties it all together. The key is the “poke” and “pour” – it’s what transforms a good cake into an unforgettable one, ensuring every single bite is deeply satisfying and incredibly moist. You absolutely don’t need to be a baking pro for this one; it’s designed to be foolproof and delicious.
Ingredients
For the Main Batter:
You’ll need about 1 ½ cups all-purpose flour, sifted, to start. Don’t skip the sifting; it really makes a difference in the final texture. Then, we’ll add 1 cup granulated sugar for sweetness, ½ cup unsweetened cocoa powder – I prefer Dutch-processed for a deeper flavor, but natural works too – 1 teaspoon baking soda to give it lift, and ½ teaspoon salt to balance everything out. For the wet ingredients, you’ll want 2 large eggs, at room temperature, which helps them emulsify better. ½ cup milk (whole milk gives the best richness, but I’ve used 2% and it’s still great!). ½ cup vegetable oil or any neutral-flavored oil for supreme moistness; this is where a lot of the magic happens. And finally, 1 teaspoon Vanilla Extract for that classic warmth, and ½ cup hot water or hot brewed coffee. The hot liquid blooms the cocoa powder, intensifying the chocolate flavor like you wouldn’t believe!
For the Filling:
This is where the real decadence comes in. You’ll need 1 can (14 ounces) sweetened condensed milk. This is what gives the filling its glorious sweetness and creamy texture. Then, ½ cup unsweetened cocoa powder, whisked to avoid lumps, or you can use a good quality chocolate syrup, about ¾ cup. Some people like to add a tablespoon of instant espresso powder here to really amp up the chocolate flavor, but it’s totally optional. I’ve also experimented with adding a tiny pinch of cayenne pepper for a subtle kick, which is surprisingly delicious!
For the Glaze:
For a simple, gorgeous glaze, you’ll want 1 cup powdered sugar, sifted to get rid of any lumps. Then, 2 tablespoons unsweetened cocoa powder, again, sifted. And about 2-3 tablespoons milk or cream to get the right consistency. You can also add ½ teaspoon vanilla extract. If you’re feeling fancy, a tablespoon of melted butter can make it extra smooth and rich.
Step-by-Step Instructions
Step 1: Preheat & Prep Pan
Alright, let’s get this party started! First things first, preheat your oven to 350°F (175°C). Now, grab a 9×13 inch baking pan. You can grease and flour it really well, or line it with parchment paper, leaving a little overhang on the sides to make lifting it out easier later. I usually just grease and flour mine and it works perfectly fine. Make sure you get into all the corners!
Step 2: Mix Dry Ingredients
In a large mixing bowl, whisk together your sifted flour, granulated sugar, unsweetened cocoa powder, baking soda, and salt. Give it a good whisk to make sure everything is evenly distributed. You don’t want pockets of flour or cocoa powder in your finished cake! This step ensures that all the leavening agents and flavorings are evenly dispersed, which is crucial for a consistent texture.
Step 3: Mix Wet Ingredients
In a separate medium bowl, whisk together the eggs, milk, oil, and vanilla extract until they’re well combined. Don’t over-beat them, just give them a gentle whisk until they’re uniformly blended. This combination of wet ingredients will provide moisture and tenderness to our cake.
Step 4: Combine
Now, pour the wet ingredients into the bowl with the dry ingredients. Mix with a spatula or a whisk until just combined. Don’t go crazy here! A few lumps are okay. Overmixing develops the gluten in the flour, which can lead to a tougher cake, and we want this one to be super tender. Now, carefully pour in the hot water (or coffee) and whisk gently until the batter is smooth. The batter will be quite thin at this stage, and that’s exactly what we want! It’s this thin batter that helps create that incredibly moist crumb.
Step 5: Prepare Filling
While your cake is baking (or even before you start the batter, if you’re organized like that!), let’s get the filling ready. In a medium bowl, whisk together the sweetened condensed milk and the cocoa powder until you have a smooth, thick mixture. If you’re using chocolate syrup instead, just stir it into the condensed milk. This mixture is going to soak into the cake and create those delightful pockets of intense chocolate flavor. Make sure there are no lumps of cocoa powder!
Step 6: Layer & Swirl
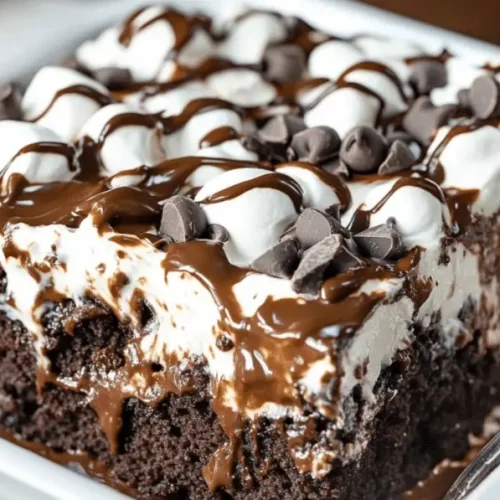
This is where the real fun begins! Once the cake is out of the oven, and while it’s still warm (this is important!), take a skewer, a chopstick, or even a fork and poke holes all over the top of the cake. Space them about an inch apart. You want to go fairly deep, but not all the way through to the bottom of the pan. Then, slowly and evenly pour the prepared chocolate filling mixture over the entire surface of the hot cake. Watch as it seeps down into all those little holes, creating beautiful marbling. Don’t worry if some pools on top; it will all soak in.
Step 7: Bake
Now, the magic happens. You’ve already baked the cake once, so this step is more about letting the filling meld and the cake set. Some recipes have you bake it again for a few minutes, but I honestly find it’s best to just let it sit and soak. Cover the pan with plastic wrap or foil and let it cool on a wire rack for at least 30 minutes, or until it’s cooled enough to handle. This allows the filling to really get into all those nooks and crannies. The longer it sits, the more moist and flavorful it becomes.
Step 8: Cool & Glaze
After the cake has cooled for at least 30 minutes and is no longer piping hot, it’s time for the glaze! In a small bowl, whisk together the powdered sugar, cocoa powder, and vanilla extract. Gradually add the milk or cream, one tablespoon at a time, whisking until you reach a smooth, pourable consistency. It should be thick enough to coat the back of a spoon but still spreadable. Drizzle or spread this glaze evenly over the top of the cooled cake. You can make it thin and delicate, or thick and fudgy – it’s up to you!
Step 9: Slice & Serve
And there you have it! The most incredible chocolate poke cake. For the best flavor and texture, I like to let the glaze set for about 15-20 minutes before slicing. Use a sharp knife and cut it into squares. The contrast between the tender cake, the rich filling, and the smooth glaze is just divine. Serve it warm or at room temperature. It’s absolutely heavenly on its own, but a dollop of whipped cream or a scoop of vanilla Ice Cream takes it to a whole new level!
What to Serve It With
This chocolate poke cake is so versatile, it fits into any part of your day! For BREAKFAST, believe it or not, it’s a surprisingly good treat. A small slice with a strong cup of black coffee is a decadent way to start the day, especially on a weekend. My kids love it with a glass of cold milk, too. For BRUNCH, it’s a showstopper. I like to make the glaze a little thinner and drizzle it artfully. Serve it with fresh berries like raspberries or strawberries on the side for a pop of color and freshness. It’s also lovely with a side of yogurt. As DESSERT, well, that’s its natural habitat! It’s perfect on its own, or with a scoop of good quality vanilla bean Ice Cream or a generous dollop of homemade whipped cream. A drizzle of raspberry coulis or some shaved chocolate is also a nice touch for an elegant after-dinner treat. And for COZY SNACKS? This is where it truly shines. A warm slice with a cup of tea on a rainy afternoon is pure comfort. My family tradition is to have it slightly warm, topped with a scoop of ice cream, when we have a movie night. It always feels special, no matter how casual the occasion.
Top Tips for Perfecting Your Chocolate Poke Cake
I’ve made this chocolate poke cake more times than I can count, and I’ve picked up a few tricks along the way that I think make a real difference. For the main batter, make sure your eggs and milk are at room temperature. It helps everything emulsify better, leading to a smoother batter and a more tender cake. When you’re mixing the batter, resist the urge to overmix after adding the flour. Just mix until it’s *just* combined. A few little lumps are perfectly fine, and it’s the secret to that incredibly soft crumb. Don’t be alarmed by how thin the batter is when you add the hot water; that’s how it’s supposed to be and it’s key to its moistness. For the filling, if you’re using cocoa powder, really give it a good whisk to break up any clumps. A smooth filling means a smoother texture throughout the cake. When it comes to poking the cake, don’t be shy! The more holes, the more filling, the more deliciousness. Use something with a good surface area like a skewer or the handle of a wooden spoon. And remember to poke while the cake is still warm – that’s when it’s most receptive to soaking up all that wonderful filling. For the glaze, start with the lower amount of liquid and add more as needed. You’re aiming for a consistency that’s thick enough to coat but still pourable. If it gets too thin, you can always whisk in a little more powdered sugar. If it’s too thick, a tiny splash more milk will fix it. I’ve also found that using hot coffee instead of hot water in the batter really deepens the chocolate flavor, making it taste even richer. It doesn’t make the cake taste like coffee, it just enhances the chocolate notes. Another little trick I learned is that letting the cake sit for at least an hour, or even overnight in the fridge, really allows the flavors to meld and the cake to become even more incredibly moist. It’s tough to wait, I know, but trust me on this one!
Storing and Reheating Tips
Proper storage is key to keeping this chocolate poke cake tasting its absolute best. If you plan on serving it within a day or two, you can store it covered at ROOM TEMPERATURE. Make sure it’s well-covered with plastic wrap or in an airtight container to prevent it from drying out. It generally stays fresh and delicious for about 2-3 days at room temperature. If you’ve made it and know you won’t finish it within that timeframe, or if your kitchen is particularly warm, REFRIGERATOR STORAGE is your best bet. Store it tightly covered in the refrigerator for up to 5 days. The texture might firm up a bit in the fridge, but it’s still wonderfully moist and flavorful. When you’re ready to serve, I often find letting it sit out at room temperature for about 20-30 minutes before serving helps to bring back that perfect tender texture. For FREEZER INSTRUCTIONS, this cake freezes surprisingly well! I like to glaze it *after* thawing, so if freezing, omit the glaze for now. Wrap the unfrosted cake tightly in a layer of plastic wrap, followed by a layer of aluminum foil, or place it in a freezer-safe airtight container. It can be stored in the freezer for up to 2-3 months. To thaw, remove it from the freezer and let it thaw in the refrigerator overnight, then bring it to room temperature before glazing and serving. For the glaze, I generally add it *after* the cake has cooled completely, whether it’s room temp or refrigerated. If you’re going to be freezing it, it’s best to store it unfrosted and glaze it after thawing. This ensures the glaze stays fresh and doesn’t get soggy.
Frequently Asked Questions
Final Thoughts
Seriously, if you’re looking for a chocolate dessert that’s big on flavor, unbelievably moist, and ridiculously easy to make, this chocolate poke cake is it. It’s the kind of recipe that makes you feel like a baking superstar without any of the stress. It’s perfect for birthdays, potlucks, weeknight cravings, or just because. The way the chocolate filling soaks into the cake creates this incredible texture and depth of flavor that’s just unmatched. I promise you, this is the chocolate poke cake recipe you’ll be reaching for again and again. If you love this one, you might also enjoy my fudgy chocolate brownies or my easy no-bake chocolate cheesecake for more chocolatey goodness! Give this a try, and I can’t wait to hear how much you and your loved ones enjoy it. Happy baking, and don’t forget to share your creations!
Decadent Chocolate Poke Cake
Ingredients
Chocolate Cake
- 1.5 cups all-purpose flour
- 2 cups granulated sugar
- 0.75 cups unsweetened cocoa powder
- 1.5 teaspoons baking soda
- 1 teaspoon baking powder
- 1 teaspoon salt
- 2 large eggs
- 1 cup milk
- 0.5 cup vegetable oil
- 1 teaspoon vanilla extract
- 1 cup boiling water
Chocolate Pudding Filling
- 1 package instant chocolate pudding mix 3.4 oz size
- 3 cups milk
Topping
- 1 container whipped topping 8 oz size, thawed
- 0.5 cup chocolate shavings for garnish
Instructions
Preparation Steps
- Preheat oven to 350°F (175°C). Grease and flour a 9x13 inch baking pan.
- In a large bowl, whisk together flour, sugar, cocoa powder, baking soda, baking powder, and salt.
- In a separate bowl, whisk together eggs, milk, oil, and vanilla extract.
- Add the wet ingredients to the dry ingredients and mix until just combined. Be careful not to overmix.
- Carefully stir in the boiling water. The batter will be thin.
- Pour the batter into the prepared baking pan.
- Bake for 30-35 minutes, or until a wooden skewer inserted into the center comes out clean.
- Let the cake cool in the pan for 10 minutes before inverting it onto a wire rack to cool completely.
- While the cake is cooling, prepare the pudding filling. In a medium bowl, whisk together the instant chocolate pudding mix and milk until well combined and thickened.
- Once the cake is completely cool, use a fork or the handle of a wooden spoon to poke holes all over the top of the cake.
- Pour the prepared chocolate pudding evenly over the poked cake, allowing it to seep into the holes.
- Spread the thawed whipped topping evenly over the pudding layer.
- Sprinkle the chocolate shavings over the whipped topping. Refrigerate for at least 2 hours before serving.
Notes
Featured Comments
“Impressed! Clear steps and family favorite results. Perfect for busy nights.”
“New favorite here — so flavorful. crowd-pleaser was spot on.”
“Super easy and turned out amazing! My family asked for seconds. Saving this one.”
“This sweet treat was absolutely loved — the cozy really stands out. Thanks!”
“Made it tonight and wow — spot on! Will definitely make chocolate poke cake again.”
“Packed with flavor and so simple. Exactly what I wanted from chocolate poke cake.”