


Oh, how I love these chocolate pretzel rods! Honestly, if you’re anything like me, sometimes you just need that perfect salty-sweet crunch, but you don’t want to spend hours in the kitchen. That’s where these little gems come in. They’re ridiculously easy to make, and they disappear faster than you can say “more, please!” I remember the first time I made them for a neighborhood potluck; people were practically fighting over the last few. They’re like a grown-up, sophisticated version of those candy-covered pretzels you might have loved as a kid, but with a serious upgrade. Think of them as your new go-to for last-minute party favors, thoughtful gifts, or just a really, *really* good afternoon treat. If you’ve ever fallen in love with a good Chocolate Chip Cookie or a decadent brownie, you’re going to adore these chocolate pretzel rods. They hit all the right notes: sweet, salty, crunchy, and wonderfully chocolatey. They’re the kind of thing that makes people ask, “How did you DO this?!” and you can just smile and say, “It’s my secret!”
What are chocolate pretzel rods?
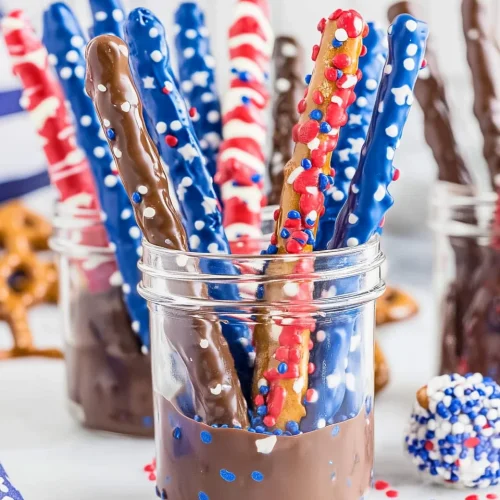
So, what exactly are these magical things we’re talking about? Chocolate pretzel rods are, at their heart, pretty straightforward: they’re pretzel rods dipped in melted chocolate. But that’s like saying a masterpiece painting is “just paint on canvas,” right? It’s the magic we weave into them that makes all the difference. We’re talking about taking those humble, crunchy pretzel rods and transforming them into something truly special. Think of it as a delicious alchemy. We start with the perfect pretzel – a nice, sturdy rod that can hold up to a generous coating of glorious chocolate. Then, we dip them, making sure they’re beautifully coated. But here’s where it gets *really* fun: the toppings! We can go classic with sprinkles, or get a little fancy with chopped nuts, sea salt, or even a drizzle of contrasting chocolate. They’re essentially a handheld delight that combines the best of sweet and salty worlds in every single bite. They’re not complicated, they don’t require any fancy techniques, and they always, *always* impress. It’s simplicity at its finest, elevated.
How to Make Chocolate Pretzel Rods
Quick Overview
Making these chocolate pretzel rods is a breeze! You’ll start by melting your chocolate until it’s smooth and pourable. Then, it’s a simple matter of dipping the pretzel rods, letting any excess drip off, and placing them on parchment paper to set. While they’re still wet, you’ll add your favorite toppings. The key is to work quickly but carefully, and then let them firm up. It’s really that straightforward! This method ensures a beautiful, even coating and allows for endless creativity with your toppings.
Ingredients
For the Main Event:
* 1 bag (about 10-12 ounces) pretzel rods: Look for good quality, sturdy pretzel rods. Thicker ones hold up better and give you more chocolate surface area! You can usually find these in the snack aisle of your grocery store. Avoid the really thin ones, they can break easily.
* 12-16 ounces good quality chocolate chips or melting wafers: I prefer using good quality chocolate chips (like Ghirardelli or Guittard) or melting wafers (like compound chocolate or couverture). If using chocolate chips, you might want to add a teaspoon of coconut oil or vegetable shortening to help them melt smoothly and achieve a better dipping consistency. My personal favorite is a good semi-sweet or dark chocolate, but milk chocolate is fantastic too!
* Optional Toppings: This is where the fun begins! Think rainbow sprinkles, festive holiday sprinkles, crushed peanuts, chopped almonds, toasted coconut flakes, mini chocolate chips, crushed graham crackers, sea salt flakes, or even a drizzle of white chocolate. Whatever your heart desires!
Step-by-Step Instructions
Step 1: Prepare Your Workspace
Before you even think about melting chocolate, get everything ready. Line a large baking sheet or two with parchment paper. This is crucial because the chocolate pretzel rods will stick to anything else! Have your toppings laid out in small bowls or dishes so they’re easy to grab. Make sure your pretzel rods are easily accessible, too. Having everything prepped means you can focus on dipping and decorating without frantic searching!
Step 2: Melt the Chocolate
There are a couple of ways to do this, and I’ve tried them all! My go-to is the microwave method: Place your chocolate chips (and coconut oil, if using) in a microwave-safe bowl. Microwave on 50% power for 30-second intervals, stirring well after each interval. Keep going until the chocolate is mostly melted and smooth. Be careful not to overheat it, or it can seize up! Alternatively, you can use a double boiler. Fill a saucepan with an inch or two of water and bring it to a simmer. Place your chocolate in a heatproof bowl that fits snugly over the saucepan without touching the water. Stir constantly until smooth and melted. Again, avoid getting any water into the chocolate!
Step 3: Dip the Pretzel Rods
This is the messy, but fun, part! Hold a pretzel rod by one end. Dip it into the melted chocolate, rotating it to coat about two-thirds to three-quarters of the rod. You can dip them all the way if you like, but I find leaving a bit of the pretzel exposed looks nice and gives you a handle. Gently lift the rod out of the chocolate and let any excess drip back into the bowl. You can use a spoon or a fork to help scrape off drips if needed. Don’t worry if it’s not perfectly smooth; that’s part of the charm!
Step 4: Add Your Toppings
This step needs to happen while the chocolate is still wet, so work efficiently! Immediately after dipping, while the chocolate is still gooey, sprinkle on your chosen toppings. Roll the dipped section in sprinkles, press chopped nuts on, or lightly scatter sea salt flakes. Get creative! If you’re planning a drizzle of a contrasting chocolate later, you can skip those toppings for now.
Step 5: Let Them Set
Carefully place the decorated pretzel rod onto your prepared parchment-lined baking sheet. Repeat with the remaining pretzel rods. Once all your rods are dipped and decorated, let them sit at room temperature until the chocolate is completely firm. This can take anywhere from 30 minutes to an hour, depending on your room temperature and the type of chocolate you used. If your kitchen is warm, you might want to pop them in the refrigerator for about 10-15 minutes to speed things up, but be careful not to let them get too cold, as this can cause condensation on the chocolate.
Step 6: Drizzle (Optional)
If you’re adding a contrasting chocolate drizzle, melt a small amount of white or dark chocolate using the same method as before. Transfer it to a small piping bag with a very small tip, or even just a zip-top bag with a tiny corner snipped off. Once the first layer of chocolate is set, pipe thin lines back and forth over the pretzel rods. Let this drizzle set completely.
Step 7: Serve or Store
Once the chocolate is fully hardened, your chocolate pretzel rods are ready to be enjoyed! If you’re not serving them immediately, transfer them to an airtight container. See the storing section for more details!
What to Serve It With
These chocolate pretzel rods are wonderfully versatile and can jazz up any occasion! For Breakfast, imagine serving them alongside a stack of fluffy pancakes or waffles. They add a fun, unexpected sweet and salty element to a typically sweet meal. A steaming mug of good coffee is the perfect companion. For Brunch, they make an elegant, yet casual, addition to a buffet. Arrange them artfully on a platter with fresh berries and a selection of other pastries. A mimosa or a sparkling cider pairs beautifully. As a Dessert, they’re perfect for an after-dinner treat. You can serve them with a scoop of vanilla Ice Cream or alongside a decadent chocolate cake for an extra layer of indulgence. They also make fantastic little edible favors for guests to take home. For Cozy Snacks, these are my absolute go-to! They’re ideal for movie nights, game nights, or just a quiet evening with a good book. I love pairing them with a warm mug of hot chocolate or a glass of cold milk. My kids especially love grabbing one (or two!) after school. Honestly, they’re so good, they don’t really *need* anything else, but a little fruit salad on the side can make it feel like a more balanced treat!
Top Tips for Perfecting Your Chocolate Pretzel Rods
I’ve made enough of these chocolate pretzel rods to know a thing or two about making them absolutely perfect, and I want to share those little nuggets of wisdom with you! First off, Pretzel Selection is key. As I mentioned, go for the thicker, sturdier rods. They’re less likely to snap when you’re dipping them, and they give you a satisfying crunch that balances the chocolate beautifully. If you can find pretzel rods with a good, even salt coating, even better! For Melting the Chocolate, patience is your best friend. Overheating chocolate is the quickest way to ruin it, making it thick, clumpy, and unworkable. Always use low heat and stir frequently. If you find your chocolate is getting too thick, a tiny bit of coconut oil or vegetable shortening (about ½ teaspoon at a time) can work wonders to thin it out without compromising flavor too much. When it comes to Dipping Technique, don’t be afraid to get your hands a little messy. I find holding the rod firmly and dipping it about two-thirds of the way up gives the best visual appeal and makes them easier to hold. Let the excess chocolate drip off for a few seconds before placing on the parchment – this prevents overly thick bottoms. For Topping Application, timing is everything! Have your toppings ready and sprinkle them on immediately after dipping while the chocolate is still wet. If you’re using fine sprinkles, you can often just roll the dipped portion in them. For larger toppings like nuts or crushed cookies, gently press them onto the chocolate. If you want that professional-looking drizzle, ensure your first layer of chocolate is completely set before piping on the second. Practice makes perfect with drizzling! For Ingredient Swaps, feel free to experiment! If you’re not a fan of milk or dark chocolate, try White chocolate, or even colored candy melts. You can also experiment with different flavor extracts (like a tiny drop of peppermint or orange extract) added to the melted chocolate, but be cautious, as too much can affect the texture. My personal favorite variation is using dark chocolate with a sprinkle of flaky sea salt – it’s so sophisticated! Finally, for Setting and Storage, room temperature is usually best. If you live in a very warm climate, refrigerating them briefly can help them set faster, but avoid storing them in the fridge long-term as the chocolate can “bloom” (develop white streaks) due to temperature fluctuations. Make sure they are completely hardened before storing in an airtight container.
Storing and Reheating Tips
One of the best things about chocolate pretzel rods is how well they store! For Room Temperature Storage, once the chocolate is completely hardened, you can place them in an airtight container. They’ll stay perfectly fresh and delicious for about 1 to 2 weeks, as long as they’re kept out of direct sunlight and away from heat. I usually layer them between sheets of parchment paper if I’m stacking them to prevent sticking, especially if they have a drizzle on top. For Refrigerator Storage, while not always necessary, it can help extend their life in warmer climates or if you want to keep them extra firm. Store them in an airtight container, again with parchment paper if needed, and they should be good for up to 3 weeks. Just let them come to room temperature for about 15-20 minutes before serving for the best texture and flavor. If you’re planning to Freeze them, these are fantastic candidates! Wrap them individually in plastic wrap, then place them in a freezer-safe bag or container. They can last for up to 3 months. To thaw, remove them from the freezer and let them come to room temperature in their packaging overnight. This prevents condensation from forming on the chocolate. For Glaze Timing Advice, if you plan to store them for more than a couple of days, I generally recommend applying any drizzles or delicate toppings *after* the initial coating has set. This way, the base layer is more stable. If you’re gifting them and they’ll be traveling, ensure everything is fully set before packing.
Frequently Asked Questions
Final Thoughts
So there you have it – my absolute favorite recipe for chocolate pretzel rods! I really hope you give these a try. They’re more than just a treat; they’re a little bit of joy, a dash of fun, and a whole lot of deliciousness wrapped up in one easy package. The combination of crunchy pretzel, rich chocolate, and your favorite toppings is just pure magic. They’re perfect for any occasion, from a casual get-together to a more formal event, and they always, *always* get rave reviews. If you enjoyed making these, you might also love my recipes for chocolate bark or homemade fudge, which offer similar delightful flavor profiles. I can’t wait to hear how yours turn out! Please share your favorite topping combinations in the comments below, or tell me about a special occasion where you served these. Happy baking, and more importantly, happy eating!
Chocolate Pretzel Rods
Ingredients
Main Ingredients
- 12 pretzel rods Pretzel rods
- 340 grams Semi-sweet chocolate chips
- 2 tablespoons Vegetable shortening optional, for smoother melting
- 1 cup Sprinkles for decorating
Instructions
Preparation Steps
- Line a baking sheet with parchment paper.
- In a microwave-safe bowl, combine chocolate chips and vegetable shortening (if using). Microwave in 30-second intervals, stirring in between, until smooth and fully melted.
- Dip each pretzel rod into the melted chocolate, coating about two-thirds of the rod. Let excess chocolate drip off.
- Place the chocolate-coated pretzel rods on the prepared baking sheet.
- Immediately sprinkle the chocolate with your desired sprinkles before the chocolate sets.
- Allow the chocolate to set completely at room temperature or in the refrigerator for about 10-15 minutes.
Notes
Featured Comments
“Impressed! Clear steps and restaurant-level results. Perfect for busy nights.”
“New favorite here — creamy. crowd-pleaser was spot on.”
“Super easy and turned out amazing! My family asked for seconds. Saving this one.”
“This sweet treat was absolutely loved — the fresh really stands out. Thanks!”
“Made it tonight and wow — quick weeknight win! Will definitely make Chocolate pretzel rods again.”
“Packed with flavor and so simple. Exactly what I wanted from Chocolate pretzel rods.”


