

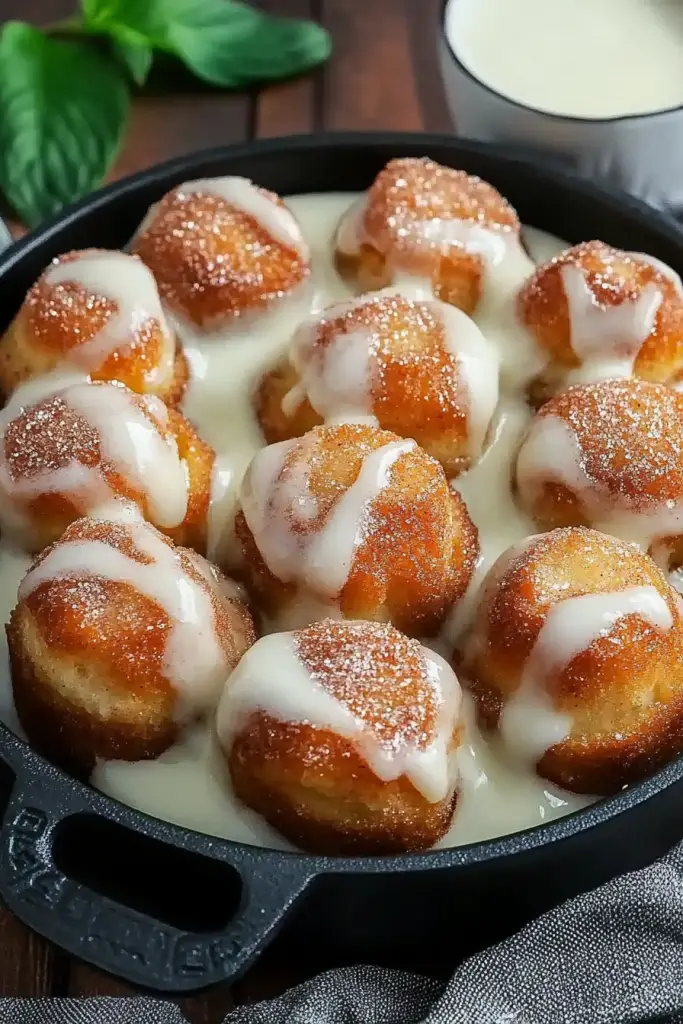
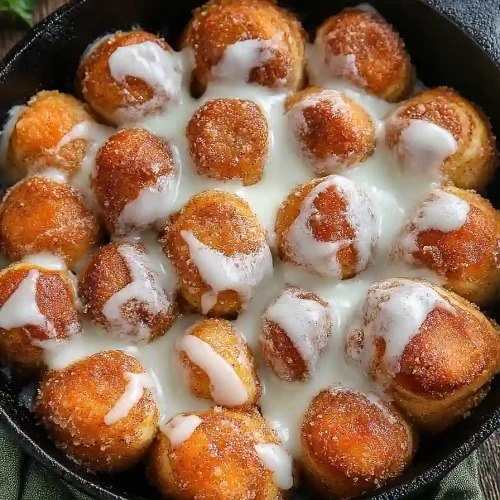
Oh, you guys! If there’s one thing that instantly takes me back to cozy mornings and happy kitchen chaos, it’s the smell of cinnamon and sugar baking. And lately, my absolute obsession has been these incredible Cinnamon Roll bites. Seriously, they’re like the beloved, classic cinnamon roll decided to have a miniature, unbelievably delicious baby. I’ve been whipping these up so much, my family is practically begging for them every other day. They’re not quite as involved as a full-on, rolled-out cinnamon roll extravaganza, but they deliver that same warm, gooey, spiced goodness. If you’re anything like me, you love a good sweet treat but sometimes don’t have the hours (or the patience!) for a big bake. These cinnamon roll bites are the answer. They’re perfect for a weekend brunch, a delightful afternoon pick-me-up, or even a “just because” dessert when you need a little dose of pure joy. They remind me a bit of those mini muffins everyone loves, but with that unmistakable, comforting flavor of a cinnamon roll.
What are cinnamon roll biscuits?
So, what exactly are these little wonders? Think of them as the miniature, bite-sized version of your favorite cinnamon roll, but baked in a way that makes them impossibly tender and infused with all that glorious flavor. Instead of rolling out dough, we’re essentially mixing up a wonderfully spiced batter, swirling in that classic cinnamon-sugar goodness, and then baking them in small portions, usually in a muffin tin or a mini muffin tin. It’s like a deconstructed cinnamon roll, but in the best possible way. The magic happens because you get that perfect ratio of soft, cakey dough to the rich, gooey cinnamon swirl in every single bite. They’re not as fussy as traditional Cinnamon Rolls, which often involve a lot of precise rolling and cutting, but they absolutely capture the soul of the original. It’s essentially cinnamon roll magic, bottled up into tiny, irresistible morsels.
How do I make cinnamon roll biscuits?
Quick Overview
This recipe is all about capturing that beloved cinnamon roll flavor in a super approachable way. We’ll mix up a simple batter, create a quick cinnamon-sugar swirl, layer it all into muffin tins, and bake until golden and puffed. It’s a streamlined process that delivers maximum flavor with minimal fuss, making it perfect for busy weeknights or spontaneous sweet cravings. You get all the taste of a traditional cinnamon roll, but with a fraction of the effort. Trust me, it’s a lifesaver!
Ingredients
For the Main Batter:
1 ½ cups all-purpose flour: Make sure it’s all-purpose flour for the best texture. If you’re feeling adventurous, I’ve had success with a gluten-free blend, but the texture might be a tiny bit different. Sifting it beforehand makes for an even lighter crumb, but it’s not strictly necessary if you’re short on time.
¾ cup granulated sugar: This gives us that lovely sweetness. I haven’t experimented with other sugars much here, as granulated sugar really helps with the texture.
2 teaspoons baking powder: This is our rising agent, giving these bites their fluffy lift. Don’t skip it!
½ teaspoon salt: Just enough to balance out the sweetness and enhance all the flavors.
1 teaspoon ground cinnamon: The star of the show! Use a good quality cinnamon for the best aroma and taste. I love using Vietnamese cinnamon if I can find it.
½ cup unsalted butter, melted: This adds richness and tenderness. Make sure it’s cooled slightly so it doesn’t cook the eggs.
2 large eggs: These bind everything together and add to the richness.
½ cup milk: Whole milk gives the creamiest result, but 2% works just fine too. I’ve even tested this with almond milk and it actually made it even creamier, which was a lovely surprise!
1 teaspoon Vanilla Extract: For that classic, comforting flavor boost.
For the Filling:
½ cup packed light brown sugar: This is key for that gooey, caramelized swirl. The brown sugar really adds depth.
2 tablespoons ground cinnamon: Yes, more cinnamon! This is what makes the filling sing.
¼ cup unsalted butter, softened: This needs to be softened so you can easily spread it, not melted. It helps the sugar mixture adhere.
For the Glaze:
1 cup powdered sugar: Sifted, if you want a super smooth glaze. If you don’t sift, you might just get a few tiny lumps, which honestly, I don’t mind sometimes!
2-3 tablespoons milk: Start with 2 tablespoons and add more as needed to reach your desired drizzling consistency. You can also use a splash of heavy cream for an extra decadent glaze.
½ teaspoon vanilla extract: Enhances the sweet flavor.
Step-by-Step Instructions
Step 1: Preheat & Prep Pan
First things first, get that oven preheated to 375 degrees Fahrenheit (190 degrees Celsius). This is the perfect temperature for these little guys to bake up golden and delicious. While the oven heats up, grab your muffin tin(s). I like to use a standard 12-cup muffin tin, but you can also use a mini muffin tin if you want even smaller bites. Whichever you choose, make sure to grease them really well, or even better, use paper liners. I’ve found that greasing them thoroughly with butter or cooking spray is usually enough, but if you’ve had issues with sticking in the past, liners are your best friend. This step is crucial to ensure your beautiful cinnamon roll bites pop right out when they’re done.
Step 2: Mix Dry Ingredients
In a large mixing bowl, whisk together the all-purpose flour, granulated sugar, baking powder, salt, and the first teaspoon of ground cinnamon. Whisking these dry ingredients together thoroughly is important because it distributes the leavening agents (baking powder) and seasonings evenly throughout the flour. This means you won’t have pockets of salt or cinnamon and ensures every bite is perfectly flavored. Give it a good few whisks until everything looks uniform and well combined. This creates the foundation for our tender batter.
Step 3: Mix Wet Ingredients
In a separate, medium-sized bowl, whisk together the melted butter (make sure it’s cooled a bit so it doesn’t scramble the eggs), the eggs, the milk, and the vanilla extract. Whisk until everything is well incorporated and the mixture is smooth and uniform in color. This is where the moisture and richness come from. Using room temperature eggs can help them incorporate more easily, but it’s not a strict rule here. Just make sure they’re fully blended.
Step 4: Combine
Now, it’s time to bring our wet and dry ingredients together! Pour the wet ingredients into the bowl with the dry ingredients. Using a spatula or a wooden spoon, gently mix until just combined. It’s really important not to overmix here! Overmixing can develop the gluten in the flour too much, resulting in tough, dense bites. You should still see a few streaks of flour – that’s perfectly fine. We want a tender crumb, so stop mixing as soon as it comes together. A few lumps are better than a tough texture!
Step 5: Prepare Filling
In a small bowl, combine the packed light brown sugar and the remaining 2 tablespoons of ground cinnamon. Mix them together until they’re well incorporated. This is our magic swirl! I like to use a fork to break up any clumps in the brown sugar. The softened butter is going to help this mixture spread like a dream later. Make sure your butter is truly softened, not melted, so it creates a nice paste that will adhere to the batter.
Step 6: Layer & Swirl
This is where the fun really begins! Spoon about half of the batter into your prepared muffin cups, filling each about halfway. Then, dollop about half of the cinnamon-sugar filling mixture over the batter in each cup. Now, gently spread the filling over the batter using a small spoon or the back of a butter knife. You don’t need to be perfectly neat; a slightly rustic swirl is part of the charm! Spoon the remaining batter over the filling, and then top with the remaining cinnamon-sugar mixture. You can gently swirl this second layer of filling into the top layer of batter with a toothpick if you like, but honestly, it bakes up beautifully even if you just sprinkle it on top.
Step 7: Bake
Pop those muffin tins into your preheated oven. Bake for about 18-22 minutes for standard muffin tins, or 12-15 minutes for mini muffin tins. You’ll know they’re done when they’re puffed up, golden brown around the edges, and a toothpick inserted into the center comes out clean. Resist the urge to open the oven door too early, as this can cause them to deflate. The aroma that fills your kitchen during this step is absolutely heavenly – it’s the smell of pure happiness!
Step 8: Cool & Glaze
Once they’re baked to perfection, carefully remove the muffin tins from the oven. Let them cool in the tin for about 5-10 minutes. This allows them to set up a bit more. Then, gently transfer them to a wire rack to cool completely. While they’re cooling, whisk together the powdered sugar, vanilla extract, and 2 tablespoons of milk in a small bowl. Add more milk, a teaspoon at a time, until you reach a drizzling consistency. You want it thick enough to coat but thin enough to drizzle easily. Once the bites are completely cool, drizzle the glaze generously over the top. This step is non-negotiable in my book – it adds that final touch of sweetness and beauty.
Step 9: Slice & Serve
These cinnamon roll bites are best served warm or at room temperature. They are absolutely divine right after the glaze has set a little, but they’re also fantastic later in the day. If they’re still warm, the glaze will be a bit melty, which is just as delicious in its own way. They’re perfectly portioned for popping into your mouth, but you can certainly cut them in half if you want to share (though I rarely do!). They look beautiful arranged on a platter, especially with that lovely swirl peeking through. Enjoy every single bite!
What to Serve It With
These cinnamon roll bites are so wonderfully versatile, they fit into almost any meal or snack occasion. For a cozy breakfast, they’re just heavenly alongside a steaming mug of your favorite coffee or a creamy latte. They’re a step up from plain toast and feel like such a treat to start the day. I also love serving them with a simple glass of cold milk for the kids – it’s a classic combo that never fails. For a more elegant brunch spread, imagine these little gems nestled amongst fresh fruit salad, maybe some savory quiches, or even alongside some crispy bacon. They add a touch of sweetness and indulgence that everyone adores. I often serve them in pretty little ramekins for a more polished look. When it comes to dessert, these are a winner! They are perfect for a casual get-together with friends. You can serve them warm with a scoop of vanilla bean ice cream for an extra decadent treat, or simply with a dusting of powdered sugar. They’re also wonderful as part of a dessert charcuterie board. And for those moments when you just need a comforting, sweet snack? They’re ideal! They’re quick to grab and satisfy that craving without being too heavy. My family tradition is to have them on movie nights, and they disappear in minutes!
Top Tips for Perfecting Your Cinnamon Roll Bites
Over the years, I’ve picked up a few tricks that really elevate these cinnamon roll bites from good to absolutely unforgettable. First, about the cinnamon swirl: don’t be afraid to be generous with the filling! The amount of cinnamon and brown sugar is what gives them that signature flavor. And make sure that butter for the filling is truly softened, not melted. It helps create a paste that clings to the batter beautifully. For mixing, I cannot stress enough: do NOT overmix the batter. Just combine until you don’t see dry flour anymore. A few lumps are your friend here; they lead to a tender, cake-like texture. If you overmix, you’ll end up with dense little hockey pucks, and nobody wants that! When it comes to layering, I like to put about half the batter in first, then dollop the filling, then add the rest of the batter and sprinkle the remaining filling on top. This way, you get that lovely swirl throughout. I’ve found that gently swirling with a toothpick can create nice patterns, but sometimes just letting them bake as is results in a beautiful, rustic swirl from the ingredients melting together. For ingredient swaps, I’ve successfully used half-and-half instead of milk for a richer batter. I’ve also tried using a mix of all-purpose and whole wheat flour, but I found it slightly changed the texture, making them a bit denser. Stick to all-purpose for that classic light crumb. For baking, keep an eye on them, as oven temperatures can vary. If your oven tends to run hot, you might need to reduce the baking time by a couple of minutes. I always recommend the toothpick test – it’s the most reliable way to know they’re done. For the glaze, the consistency is key. Start with the minimum amount of milk and add more, just a tiny bit at a time, until it’s perfect for drizzling. Too thin and it runs off; too thick and it’s hard to spread. I once made the mistake of making it too thin, and it just pooled at the bottom of the muffin tin. Lesson learned! If you want to get fancy, you can add a tiny pinch of nutmeg or even a little bit of orange zest to the glaze for a unique twist. These little tips have been hard-won through countless batches, and I’m so happy to share them with you!
Storing and Reheating Tips
These cinnamon roll bites are so tempting, you might find yourself wanting to make a double batch. And good news, they store and reheat beautifully! For room temperature storage, once they’ve cooled completely, you can place them in an airtight container. They’ll stay wonderfully fresh for about 2-3 days. I usually just pop them back into the muffin tin they were baked in, cover it tightly with plastic wrap, and leave it on the counter. If you prefer them a bit less sweet or want them to last longer, you can skip the glaze until you’re ready to serve them. For refrigerator storage, they’ll keep even longer, up to about a week, in an airtight container. The texture might become slightly firmer when refrigerated, but don’t worry! When you’re ready to enjoy them, you can simply let them come to room temperature for about 15-20 minutes, or gently reheat them. To reheat, I find that a few minutes in a toaster oven or a regular oven at around 300 degrees Fahrenheit (150 degrees Celsius) brings them back to their glorious, warm perfection. They’re also surprisingly good reheated briefly in the microwave (about 10-15 seconds), though they can lose a bit of their crispness. If you’re planning to freeze them, this is a great option for having them on hand whenever a craving strikes! Once they are completely cooled, you can wrap them individually in plastic wrap, then place them in a freezer-safe bag or container. They’ll keep well in the freezer for up to 2-3 months. To thaw, simply transfer them to the refrigerator overnight, or let them thaw at room temperature for a few hours. If you plan on glazing them after freezing, it’s best to freeze them unfrosted and glaze them once they’ve thawed and are ready to serve. This prevents the glaze from becoming sticky or discolored in the freezer. I’ve done this many times, and it works like a charm!
Frequently Asked Questions
Final Thoughts
Honestly, these cinnamon roll bites are more than just a recipe for me; they’re a little bundle of joy. They represent those perfect moments in the kitchen – simple, delicious, and always bringing smiles. They’re proof that you don’t need to spend hours in the kitchen to create something truly special. The way they fill the house with that warm, inviting aroma is pure magic. If you’re looking for a new go-to treat that’s incredibly satisfying and surprisingly easy, you absolutely have to give these cinnamon roll bites a try. They’re wonderful for any occasion, from a relaxed weekend breakfast to a last-minute dessert. I really hope you love them as much as my family and I do! If you try them, please come back and leave a comment, I’d be so excited to hear how they turned out for you, and what variations you might have tried! Happy baking!
Cinnamon Roll Bites
Ingredients
Dough
- 2.5 cups all-purpose flour
- 0.25 cup granulated sugar
- 2.25 teaspoons instant yeast
- 0.5 teaspoon salt
- 0.5 cup warm milk around 110°F
- 0.25 cup unsalted butter melted
- 1 large egg lightly beaten
Filling
- 0.5 cup unsalted butter softened
- 0.5 cup packed brown sugar
- 1.5 tablespoons ground cinnamon
Glaze
- 1 cup powdered sugar
- 2 tablespoons milk
- 0.5 teaspoon vanilla extract
Instructions
Preparation Steps
- In a large bowl, whisk together flour, sugar, yeast, and salt.
- In a separate bowl, whisk together warm milk, melted butter, and egg.
- Pour the wet ingredients into the dry ingredients and mix until a shaggy dough forms.
- Turn the dough out onto a lightly floured surface and knead for 5-7 minutes until smooth and elastic.
- Place the dough in a lightly greased bowl, cover, and let rise in a warm place for 1 hour, or until doubled in size.
- While the dough is rising, prepare the filling: In a small bowl, cream together softened butter, brown sugar, and cinnamon until well combined.
- Once the dough has risen, punch it down and turn it out onto a lightly floured surface. Roll it into a rectangle approximately 10x12 inches.
- Spread the cinnamon-sugar filling evenly over the dough, leaving a small border around the edges.
- Roll up the dough tightly, starting from one of the longer sides. Pinch the seam to seal.
- Cut the log into 12 equal pieces (about 1-inch thick).
- Place the cinnamon roll bites into a greased 9x13 inch baking pan, cut-side up. Cover and let rise for another 30 minutes.
- Preheat oven to 375°F (190°C). Bake for 12-15 minutes, or until golden brown.
- While the bites are baking, prepare the glaze: Whisk together powdered sugar, milk, and vanilla extract until smooth.
- Drizzle the glaze over the warm cinnamon roll bites.
Notes
Featured Comments
“Impressed! Clear steps and turned out amazing results. Perfect for busy nights.”
“New favorite here — crowd-pleaser. crowd-pleaser was spot on.”
“Super easy and turned out amazing! My family asked for seconds. Saving this one.”
“This sweet treat was absolutely loved — the zingy really stands out. Thanks!”
“Made it tonight and wow — comforting! Will definitely make Cinnamon roll bites again.”
“Packed with flavor and so simple. Exactly what I wanted from Cinnamon roll bites.”


