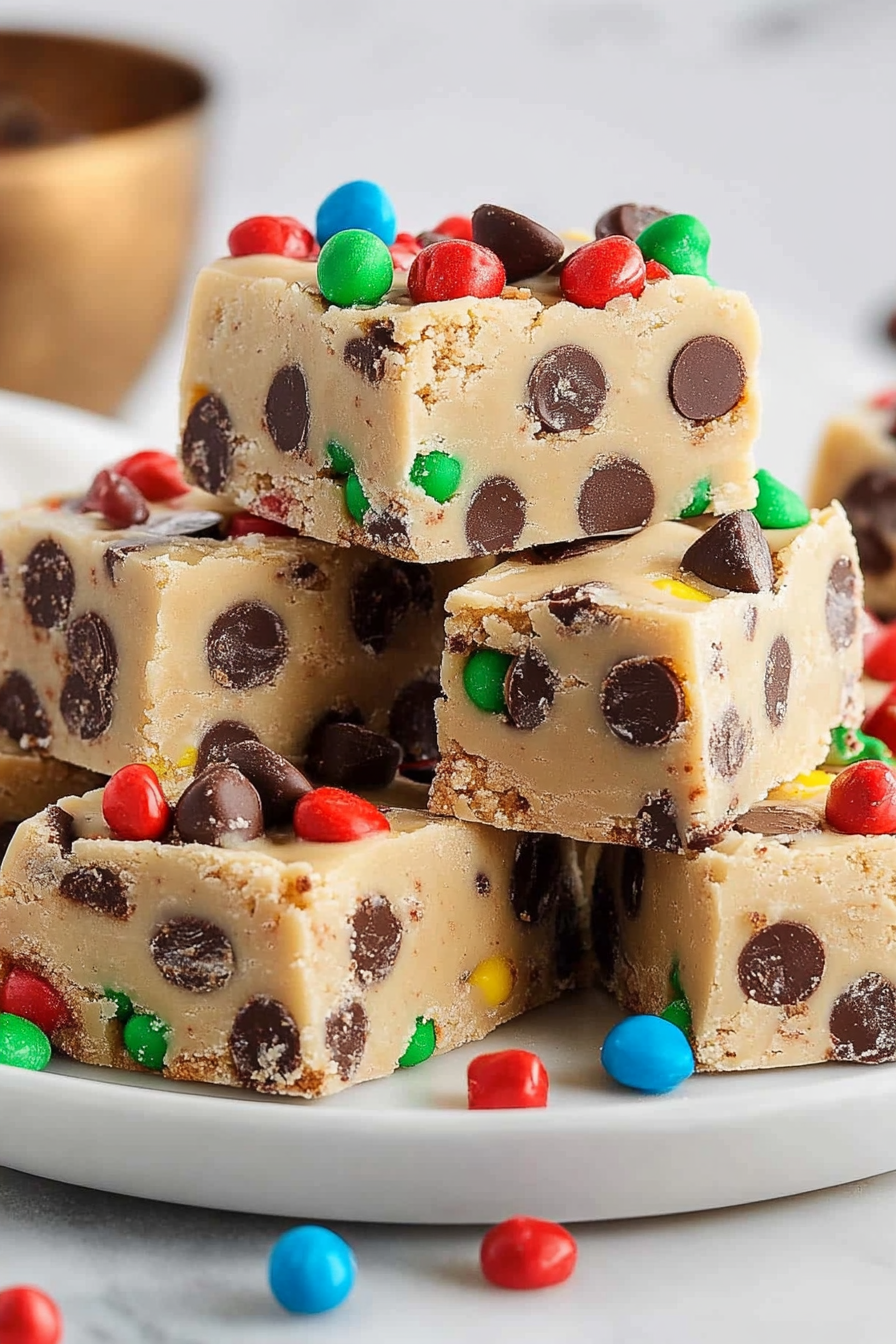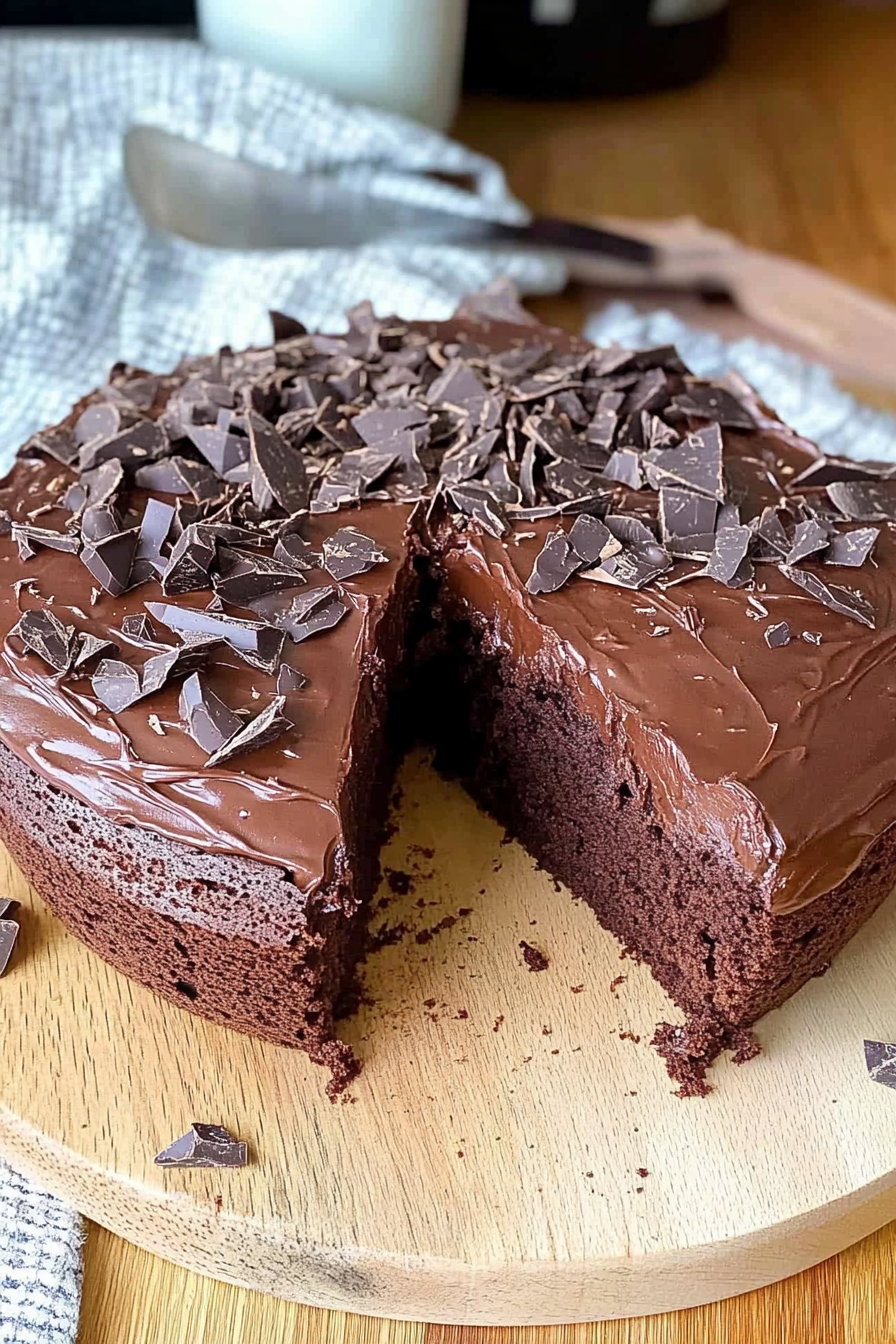
Okay, so I have to tell you about these Cookies and Cream Brownies. Seriously. If you’re anything like me, you probably have a go-to brownie recipe that you pull out when the craving hits. Maybe it’s fudgy, maybe it’s cakey – but I bet it doesn’t have the magical, delightful surprise of a cookies and cream swirl. I remember the first time I made these, it was purely an accident, a happy little kitchen mishap. I was trying to make a classic batch of brownies and had some leftover cookies and cream Ice Cream that was just about to melt into oblivion. Instead of letting it go to waste, I thought, “Why not?” And let me tell you, it was a revelation. It’s become my absolute favorite, a real crowd-pleaser, and honestly, it’s my secret weapon when I need a showstopper that’s surprisingly simple. Forget those dense, one-note brownies; these are a whole new level of delicious. Think of it as your favorite decadent brownie, but with an extra layer of pure joy. If you love a good brownie, and you *really* love the creamy, crunchy goodness of cookies and cream, you absolutely have to try this. It’s the best of both worlds, all wrapped up in one perfect square.
What is cookies and cream brownies?
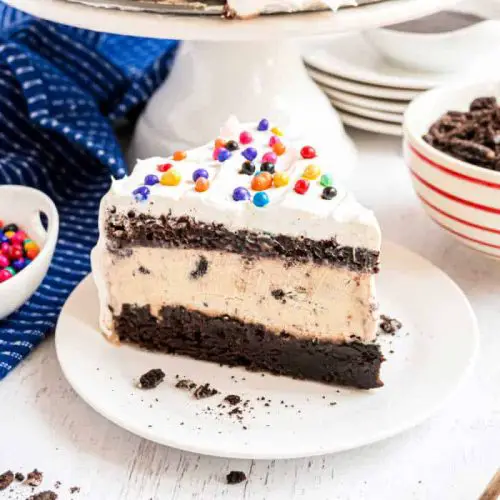
So, what exactly are these magical creations? Imagine your most cherished, fudgy brownie recipe – the kind that’s rich, dense, and has that perfect slightly chewy edge. Now, picture that gorgeous brownie batter swirled with generous ribbons of a creamy, dreamy cookies and cream mixture. That’s it! It’s not just a brownie *with* cookies crumbled on top (though that’s good too!), it’s a true fusion where the cookies and cream element is baked *into* the brownie, creating these incredible pockets of creamy, vanilla-kissed goodness and delightful little cookie crumbles throughout. The name is pretty straightforward, but the experience is anything but. It’s like your favorite childhood cookies met your favorite comforting brownie, and they decided to have the most delicious party ever. Think of it as the ultimate dessert mashup, a testament to how two amazing things can be even better together. It’s a familiar comfort with an exciting twist that makes every bite an adventure.
How do I make cookies and cream brownies?
Quick Overview
Making these Cookies and Cream Brownies is wonderfully straightforward. You’ll whip up a rich chocolate brownie batter, prepare a simple yet delicious cookies and cream swirl, layer them in your pan, and bake until perfectly fudgy. The key is not overmixing the brownie batter and swirling gently to create those beautiful marbled patterns. It’s a two-part process that comes together seamlessly, and the result is a dessert that looks and tastes like it came from a high-end bakery, but with your own personal touch. Seriously, it’s so easy, you’ll wonder why you haven’t made them sooner.
Ingredients
For the Main Batter:
You’ll need good quality unsalted butter (about 1 cup, melted and slightly cooled), granulated sugar (around 1.5 cups, because we want it sweet!), brown sugar (about 1 cup, packed, for that extra chewiness and moisture), large eggs (3 of them, room temperature is best for emulsification), pure Vanilla Extract (2 teaspoons, don’t skimp here!), all-purpose flour (about 1 cup, spooned and leveled), unsweetened cocoa powder (about 3/4 cup, Dutch-processed will give you a richer color and flavor), baking powder (1/2 teaspoon, just a touch for lift), and salt (1/2 teaspoon, to balance all that sweetness). For the best texture and flavor, I always recommend using good quality cocoa powder and pure vanilla extract. It really makes a difference!
For the Filling:
This is where the magic happens! You’ll need about 1 cup of finely crushed chocolate sandwich cookies (the classic black and white kind are perfect, but feel free to experiment!). I like to put them in a zip-top bag and give them a few good whacks with a rolling pin or the bottom of a heavy mug. You’ll also need about 4 ounces of softened Cream Cheese (full-fat works best for richness and stability), a little bit of powdered sugar (about 1/4 cup, to sweeten it just right without making it gritty), and a splash of milk or cream (just a tablespoon or two, to get the perfect swirling consistency). Some people like to add a touch more vanilla extract to this part too, which I totally recommend!
For the Glaze:
This is optional, but highly recommended for that extra polish. You’ll need about 1/2 cup of powdered sugar, a tablespoon or two of milk or cream (just enough to make it pourable), and a few more of those crushed chocolate sandwich cookies for topping. Sometimes I add a tiny drop of black food coloring to the glaze if I want it to look super dramatic, but that’s totally up to you!
Step-by-Step Instructions
Step 1: Preheat & Prep Pan
First things first, let’s get your oven fired up to 350°F (175°C). This is the magic temperature for perfectly baked brownies. Next, grab an 8×8 inch or 9×9 inch baking pan. I like to line mine with parchment paper, leaving some overhang on the sides. This makes lifting the brownies out a breeze and cleanup a dream. Trust me, you’ll thank yourself later! If you don’t have parchment, just generously grease and flour the pan.
Step 2: Mix Dry Ingredients
In a medium bowl, whisk together your flour, cocoa powder, baking powder, and salt. Whisking them well ensures that all the leavening and flavorings are evenly distributed. This means no surprise pockets of baking powder or unsalted bites! You want a nice, homogenous mixture before we add it to the wet ingredients. It’s a simple step, but it’s crucial for consistent texture throughout your brownies.
Step 3: Mix Wet Ingredients
In a large bowl, combine your melted and slightly cooled butter with both granulated and brown sugars. Stir them together until they’re well combined. Then, beat in your eggs one at a time, making sure each is fully incorporated before adding the next. Stir in the vanilla extract. You’re looking for a smooth, glossy mixture. The combination of granulated and brown sugar gives you the perfect balance of chewiness and tenderness.
Step 4: Combine
Now, it’s time to bring the wet and dry ingredients together. Add the dry ingredients to the wet ingredients gradually, mixing on low speed or by hand with a spatula until *just* combined. Be careful not to overmix here! Overmixing develops the gluten in the flour, which can lead to tough brownies. A few streaks of flour are okay; they’ll disappear as you continue to mix. You want a thick, rich batter.
Step 5: Prepare Filling
While your brownie batter is resting, let’s make the cookies and cream filling. In a separate bowl, beat the softened Cream Cheese until it’s smooth and creamy. Then, beat in the powdered sugar until well combined. Add your finely crushed chocolate sandwich cookies and a splash of milk or cream, mixing until it forms a thick, spreadable paste. It should be spreadable but not too runny. If it seems too thick, add another teaspoon of milk. If it seems too thin, add a tiny bit more crushed cookie.
Step 6: Layer & Swirl
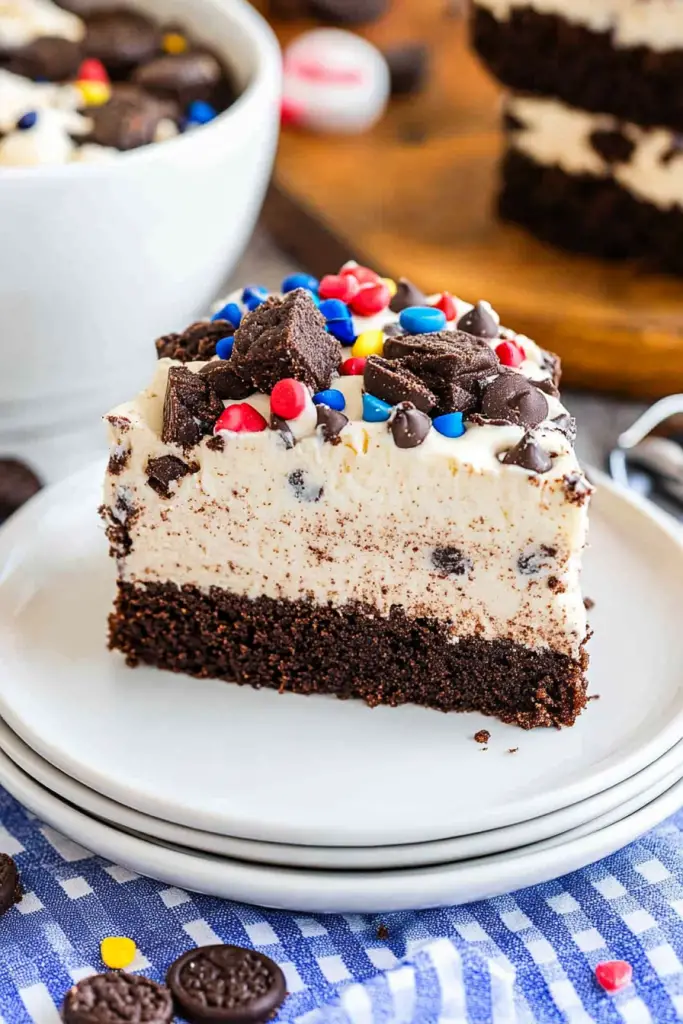
Pour about two-thirds of your brownie batter into the prepared pan and spread it evenly. Dollop spoonfuls of the cookies and cream filling over the brownie batter. Then, carefully spoon the remaining brownie batter over the filling. Now for the fun part: swirl! Use a knife or a skewer to gently swirl the batters together. Don’t overdo it – you want distinct ribbons of cookies and cream, not a muddy mess. Think figure-eights or gentle swoops. This creates those gorgeous marbled patterns that make these brownies so special.
Step 7: Bake
Pop the pan into your preheated oven and bake for about 25-35 minutes. The baking time will vary depending on your oven and pan size. You’ll know they’re done when the edges are set and a toothpick inserted into the center comes out with moist crumbs attached, not wet batter. A few moist crumbs mean fudgy perfection! If it comes out clean, they might be a little overbaked.
Step 8: Cool & Glaze
This is probably the hardest step: waiting! Let the brownies cool completely in the pan on a wire rack. I know, it’s tempting to dive in, but cooling is crucial for them to set properly. Once completely cooled, prepare your glaze by whisking together the powdered sugar and milk until smooth and pourable. Drizzle it over the top of the brownies. While the glaze is still wet, sprinkle with more crushed cookies. This is where that optional touch of black food coloring can really make them pop!
Step 9: Slice & Serve
Once the glaze has set (or if you skipped the glaze!), lift the brownies out of the pan using the parchment paper overhang. For clean slices, use a sharp knife, wiping it clean between cuts. Serve them at room temperature for the best fudgy texture. They’re absolutely incredible on their own, but a scoop of vanilla Ice Cream on the side is pure heaven. Enjoy every single delicious bite!
What to Serve It With
These Cookies and Cream Brownies are so versatile, they truly fit into any occasion. For Breakfast, I know, it sounds decadent, but hear me out! A small, perfectly fudgy square with a strong cup of black coffee is an amazing way to start a weekend morning. The richness of the brownie is balanced by the bitterness of the coffee, and it feels like such a treat. For Brunch, they make an elegant addition to any spread. Arrange them on a tiered dessert stand with some fresh berries and perhaps a dollop of whipped cream for a beautiful presentation. They pair wonderfully with a sparkling mimosa or a refreshing iced tea. When served As Dessert, they’re an absolute showstopper. Imagine them warm, maybe with a scoop of vanilla bean ice cream and a drizzle of hot fudge sauce – pure indulgence! They’re fantastic after a hearty meal. And for Cozy Snacks, well, these are just perfect. They’re the ultimate comfort food for a movie night in or a quiet afternoon with a good book and a glass of cold milk. My kids absolutely love them with a tall glass of cold milk, and honestly, who can blame them? I’ve also found they’re a hit at potlucks; they always disappear first!
Top Tips for Perfecting Your Cookies and Cream Brownies
I’ve made these Cookies and Cream Brownies more times than I can count, and over the years, I’ve picked up a few tricks that really help elevate them from good to absolutely phenomenal. When it comes to the cookie prep for the filling, crushing them finely is key. You don’t want big chunks, but rather a fine crumb that disperses evenly. I find a food processor works well, but a zip-top bag and a rolling pin is my go-to when I don’t want to dirty extra dishes. For the brownie batter, my biggest piece of advice is about mixing: do not overmix! Once the flour is added, mix until *just* combined. A few streaks of flour are better than overdeveloping the gluten, which leads to tough, cakey brownies instead of the fudgy ones we’re after. Gentle is the name of the game. The swirl customization is where you can really play! I love to create distinct ribbons of the cream cheese mixture within the chocolate batter. Don’t try to make it uniform; the marbling is part of the charm. You can use a toothpick or a thin knife to create more intricate patterns, like little hearts or spirals if you’re feeling fancy, but a simple zig-zag works beautifully. For ingredient swaps, if you don’t have cream cheese, a thick mascarpone can work in a pinch, though it will alter the flavor slightly. You can also experiment with different types of chocolate sandwich cookies for the filling – Oreos are classic, but golden Oreos or even mint-filled ones can create interesting flavor profiles. When it comes to baking, know your oven! Oven temperatures can vary, so that toothpick test is your best friend. I always bake mine in the center rack to ensure even heat distribution. If your edges tend to bake faster than the center, you can loosely tent the pan with foil for the last 10 minutes of baking. Finally, glaze variations are endless. If you want a richer glaze, use melted chocolate mixed with a little cream. For something lighter, a simple dusting of powdered sugar through a sieve is lovely. You can also add a tiny bit of almond extract to the glaze for a nutty twist. I learned the importance of cooling completely the hard way – cutting into them too early results in a gooey, messy disaster, not the clean, satisfying slices you want!
Storing and Reheating Tips
Knowing how to properly store these beauties ensures you can enjoy them for days to come. For room temperature storage, make sure the brownies are completely cooled and the glaze (if you used it) has set. Store them in an airtight container. They’ll stay fresh and delicious for about 2-3 days. If your kitchen is particularly warm, it might be better to opt for refrigerator storage. For refrigerator storage, keep them in an airtight container lined with parchment paper to prevent sticking. They can last for up to a week this way, though I find the texture is best within the first 4-5 days. The slight chill can make them even fudgier, which I personally love! If you need to store them for longer, freezer instructions are your friend. Wrap individual brownies or the entire pan (once cut) tightly in plastic wrap, then in aluminum foil. They can be kept in the freezer for up to 2-3 months. To thaw, let them come to room temperature for a few hours, or gently reheat them. For glaze timing advice, if you plan to freeze them, I highly recommend glazing them *after* thawing. This prevents the glaze from becoming sticky or cracked during the freezing and thawing process. If you’re just refrigerating them, glazing them before storing is usually fine.
Frequently Asked Questions
Final Thoughts
So there you have it – my absolute favorite Cookies and Cream Brownies! I truly believe this recipe is a winner because it takes something we all love (brownies!) and gives it an exciting, delicious twist that’s incredibly easy to achieve. It’s that perfect balance of rich chocolate, creamy vanilla, and delightful cookie texture that makes every bite a little piece of heaven. Whether you’re looking for a dessert to impress guests, a comforting treat for yourself, or a fun baking project with the family, these brownies deliver every single time. They’re proof that sometimes, the best creations come from a little bit of happy accident and a whole lot of deliciousness. If you’re a fan of a good brownie and can’t resist the allure of cookies and cream, you absolutely must give this a try. I can’t wait to hear how yours turn out! Please, if you make them, come back and leave a comment below to let me know what you think, or share your own favorite variations. Happy baking, and enjoy every fudgy, swirled, incredible bite!
Cookies and Cream Brownie
Ingredients
Brownie Base
- 0.75 cup butter, melted
- 1.5 cup granulated sugar
- 2 large eggs
- 1 teaspoon vanilla extract
- 0.75 cup all-purpose flour
- 0.5 cup unsweetened cocoa powder
- 0.25 teaspoon baking powder
- 0.25 teaspoon salt
- 1 cup chocolate chips
Cookies and Cream Layer
- 8 ounces cream cheese, softened
- 0.5 cup granulated sugar
- 1 large egg
- 1 teaspoon vanilla extract
- 1 cup crushed Oreos
Instructions
Preparation Steps
- Preheat oven to 350°F (175°C). Grease and flour a 9x13 inch baking pan.
- In a large bowl, whisk together melted butter and sugar. Beat in eggs one at a time, then stir in vanilla extract.
- In a separate bowl, whisk together flour, cocoa powder, baking powder, and salt. Gradually add dry ingredients to wet ingredients, mixing until just combined. Stir in chocolate chips.
- Pour brownie batter into the prepared baking pan and spread evenly.
- In a medium bowl, beat cream cheese and sugar until smooth. Beat in the egg and vanilla extract until combined.
- Gently spread the cream cheese mixture over the brownie batter. Sprinkle the crushed Oreos over the cream cheese layer.
- Bake for 30-35 minutes, or until a toothpick inserted into the center comes out with moist crumbs (not wet batter).
- Let cool completely in the pan before cutting into squares.
Notes
Featured Comments
“Impressed! Clear steps and crowd-pleaser results. Perfect for busy nights.”
“New favorite here — turned out amazing. crowd-pleaser was spot on.”
“Super easy and turned out amazing! My family asked for seconds. Saving this one.”
“This sweet treat was absolutely loved — the bright really stands out. Thanks!”
“Made it tonight and wow — family favorite! Will definitely make Cookies and Cream Brownie again.”
“Packed with flavor and so simple. Exactly what I wanted from Cookies and Cream Brownie.”