

You know those nights? The ones where you stare into the fridge, utterly defeated by the thought of cooking, and that little voice whispers, “Just order pizza.” Yeah, I’ve been there more times than I care to admit! But then I remember my secret weapon, the recipe that saves my sanity and my taste buds: these incredibly crispy Air Fryer Chicken thighs. They’re not just good; they’re ridiculously good, with a golden, crunchy exterior that gives way to juicy, tender meat. Honestly, when I first got my air fryer, I was skeptical. Could it really compete with oven-baked or pan-fried? This air fryer chicken recipe was the very first thing I made, and it blew my mind. It’s become my go-to, my family’s favorite, and the dish that convinces even the pickiest eaters that healthy eating can be *delicious*. Forget dry, bland chicken; this is the real deal.
What is an air fry chicken thigh?
So, what exactly are we talking about here? Think of these as your ultimate shortcut to perfectly cooked chicken. We’re taking humble chicken thighs, seasoning them up beautifully, and letting the magic of the Air Fryer do the heavy lifting. It’s not deep frying, not baking – it’s this wonderful middle ground that uses hot air circulation to create an amazing crispiness without all the oil. The result is chicken that’s unbelievably juicy on the inside and has this fantastic, shatteringly crisp skin on the outside. It’s simple, it’s satisfying, and it’s a game-changer for weeknight dinners. It’s essentially a stress-free way to achieve that restaurant-quality crunch right in your own kitchen, and it’s made me fall in love with cooking chicken again.
How do I make air fry chicken thighs?
Quick Overview
The whole process is wonderfully straightforward. You’ll start by patting your chicken thighs dry (this is key for crispiness!), tossing them with a flavorful spice blend, and then letting the air fryer work its magic. We’re talking about a few minutes of prep and then just about 15-20 minutes of cooking time. The result? Perfectly tender, juicy chicken with an unbelievably crispy skin. It’s that easy, and trust me, you’ll wonder how you ever lived without this method.
Ingredients
For the Chicken:
* 6-8 bone-in, skin-on chicken thighs (about 2-2.5 lbs) – I love bone-in and skin-on for the best flavor and juiciness. Don’t be tempted to trim too much of the fat; it renders down and helps crisp up the skin! You can use boneless, skinless, but the cooking time will be shorter and the skin won’t be as crispy, obviously.
For the Seasoning:
* 1 tablespoon smoked paprika – This is my secret for that gorgeous color and smoky depth. Don’t skip it!
* 1 teaspoon garlic powder – Classic for a reason.
* 1 teaspoon onion powder – Adds another layer of savory flavor.
* 1/2 teaspoon dried thyme – A little herbaceous note that brightens everything up.
* 1/2 teaspoon black pepper – Freshly ground is always best.
* 1/2 teaspoon salt (or to taste) – Kosher salt is my preference for its texture.
* 1/4 teaspoon cayenne pepper (optional, for a little kick) – I love a tiny bit of heat; it really wakes up the flavors. If you’re sensitive, leave it out or use a pinch.
For Coating:
* 1 tablespoon olive oil or avocado oil – Just enough to help the spices adhere and get things started. You can also use a cooking spray.
Step-by-Step Instructions
Step 1: Preheat & Prep Chicken
First things first, get your air fryer preheated to 380°F (190°C). This is crucial for getting that initial crisp. While it’s heating up, take your chicken thighs and pat them thoroughly dry with paper towels. I cannot stress this enough: DRY chicken equals CRISPY skin. Get into all the nooks and crannies. Moisture is the enemy of crispiness, so embrace the paper towel. Seriously, this one step makes a world of difference.
Step 2: Mix Dry Ingredients
In a small bowl, whisk together the smoked paprika, garlic powder, onion powder, dried thyme, black pepper, salt, and cayenne pepper (if you’re using it). Give it a good stir to make sure all those wonderful spices are well combined. This is where all the delicious flavor comes from, so make sure it’s evenly distributed.
Step 3: Coat the Chicken
Place the dried chicken thighs in a medium bowl. Drizzle them with the olive oil (or spray with cooking spray). Toss them gently to ensure they’re lightly coated. This helps the spice blend stick beautifully.
Step 4: Season Generously
Sprinkle the spice mixture all over the chicken thighs. Use your hands to rub the spices into the chicken, making sure to get some under the skin if you can, and all over the crispy skin side. You want every piece to be well-seasoned. Don’t be shy here!
Step 5: Arrange in Air Fryer Basket
Place the seasoned chicken thighs in a single layer in your air fryer basket. It’s super important not to overcrowd the basket. If you have too many, they’ll steam instead of crisp. You might need to cook them in batches, depending on the size of your air fryer. Make sure there’s a little space between each thigh so the hot air can circulate freely.
Step 6: Air Fry to Perfection
Air fry for 18-22 minutes, flipping the chicken halfway through. The exact time will depend on the size of your thighs and your specific air fryer model. You’re looking for the skin to be deeply golden brown and crispy, and the internal temperature of the thickest part of the thigh to reach 165°F (74°C). If you’re not sure, use an instant-read thermometer.
Step 7: Rest and Serve
Once cooked, carefully remove the chicken from the air fryer. Let it rest for about 5-10 minutes before serving. This allows the juices to redistribute, ensuring your chicken is extra moist and tender. This resting step is non-negotiable for maximum juiciness!
Step 8: Optional Glaze/Sauce
[This section is often skipped for simple chicken thighs, but if you want to get fancy, here’s a super quick option. Mix 2 tablespoons of your favorite BBQ sauce with 1 teaspoon of honey and a pinch of garlic powder. Brush this glaze over the chicken during the last 2-3 minutes of cooking. Watch it closely to prevent burning!]
Step 9: Slice & Serve
Serve your beautiful, crispy air fryer chicken thighs hot! The skin should be wonderfully crackly, and the meat should be fall-off-the-bone tender. You can enjoy them just as they are, or serve them with your favorite sides.
What to Serve It With
These air fryer chicken thighs are so versatile, they honestly go with pretty much anything. For a truly balanced and satisfying meal, I love pairing them with some roasted vegetables. Broccoli, asparagus, Brussels sprouts – they all get a lovely char in the oven while the chicken is cooking, and the flavors complement each other perfectly. If I’m going for comfort food, mashed potatoes are a must, and don’t forget a side of green beans! For a lighter option, a big, fresh salad with a tangy vinaigrette is fantastic. They’re also amazing for meal prep. I’ll make a big batch on Sunday and then chop the cooled chicken to add to salads, wraps, or grain bowls throughout the week. My kids, who are notorious for being picky, absolutely devour these with some sweet potato fries. They’re also incredible tucked into warm tortillas for quick and easy tacos with some shredded lettuce and salsa. Honestly, you can’t go wrong!
Top Tips for Perfecting Your Air Fryer Chicken Thighs
I’ve made these air fryer chicken thighs more times than I can count, and I’ve definitely learned a thing or two along the way. First, about the chicken itself: always go for bone-in, skin-on thighs. The bone helps conduct heat and keeps the meat moist, and that skin? It’s the star of the show when it comes to crispiness. When you’re prepping, *really* commit to drying that chicken. I’m talking pat, pat, pat until there’s no moisture left. I once skipped this step on a busy evening, and while it was still edible, the skin was nowhere near as crispy. Lesson learned! For the seasoning, don’t be afraid to get creative. The blend I listed is my favorite, but feel free to experiment. A little cumin, chili powder, or even some Italian herbs can totally change the flavor profile. Just make sure you have a good salt and pepper base. When it comes to air frying, the biggest tip I can give is not to overcrowd the basket. Seriously, this is the most common mistake people make. If your air fryer is on the smaller side, cook in batches. It’s worth the extra few minutes to get that perfect crisp on every single piece. I’ve tried stuffing them in, and trust me, it leads to uneven cooking and soggy skin. Another trick I’ve picked up is to keep an eye on them towards the end of the cooking time. Air fryers can vary, and some run hotter than others. If your chicken is browning too quickly, you can always lower the temperature by 10-15 degrees Fahrenheit for the last few minutes. And if you’re aiming for maximum crispiness, a quick flip halfway through is essential. You can even use tongs to lift the skin and expose it directly to the hot air for the last few minutes if you’re feeling ambitious! For those who love a little extra flavor, try brushing on a simple glaze (like BBQ sauce mixed with honey) in the last 2-3 minutes. Just be careful; sugars can burn quickly!
Storing and Reheating Tips
These air fryer chicken thighs are so delicious, you might actually have leftovers – a rare occurrence in my house! If you do, storing them properly is key to keeping them enjoyable. Once cooled, I usually store any leftovers in an airtight container in the refrigerator. They’ll stay good for about 3-4 days. The skin won’t be as shatteringly crisp when reheated, but the meat will still be wonderfully juicy. For reheating, I strongly recommend popping them back into the air fryer or under the broiler for a few minutes. This helps revive some of that crispiness. A quick blast at 350°F (175°C) in the air fryer for about 5-7 minutes usually does the trick. Microwaving will make them tender but will soften the skin considerably. If you want to freeze them, make sure they’re completely cooled first. Wrap them tightly in plastic wrap, then in foil, or place them in a freezer-safe bag. They should last in the freezer for up to 2 months. Thaw them overnight in the refrigerator before reheating using the air fryer or oven method.
Frequently Asked Questions
Final Thoughts
There you have it – my go-to recipe for the crispiest, juiciest air fryer chicken thighs. I truly hope you give this a try. It’s become such a staple in my kitchen because it’s consistently delicious, unbelievably easy, and always a crowd-pleaser. It’s one of those recipes that makes you feel like a kitchen superhero, even on your busiest nights. If you’re new to air frying or just looking for a reliable, fantastic chicken recipe, this is it. I can’t wait to hear how yours turns out! Let me know in the comments below if you tried it, what you served it with, or if you have any fun spice variations you love. Happy cooking, and enjoy every single crispy, juicy bite!

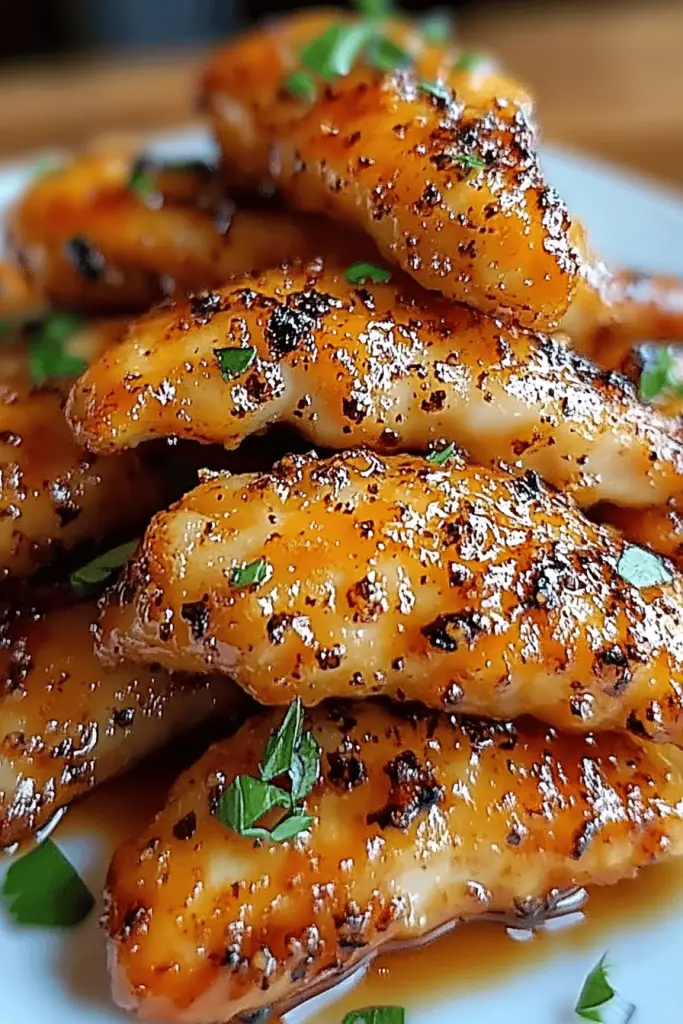
Air Fryer Chicken Tenders
Ingredients
Main Ingredients
- 1.25 lbs chicken tenders
- 2 large eggs beaten
- 1 teaspoon kosher salt
- black pepper to taste
- 0.5 cup seasoned breadcrumbs
- 0.5 cup seasoned panko
- olive oil spray generously
- lemon wedges for serving
Instructions
Preparation Steps
- Season chicken tenders with salt and pepper.
- Place beaten eggs in a shallow bowl. In a second shallow bowl, combine the seasoned breadcrumbs and panko.
- Dip each chicken tender first into the egg mixture, then into the breadcrumb and panko mixture, shaking off excess. Place on a large dish or cutting board. Spray both sides of the coated chicken generously with olive oil spray.
- Preheat your air fryer to 400°F (200°C).
- In batches, cook the chicken tenders in the air fryer for 5 to 6 minutes on each side, until the chicken is cooked through and crispy and golden on the outside. Serve immediately with lemon wedges.
Notes
Featured Comments
“Impressed! Clear steps and turned out amazing results. Perfect for busy nights.”
“New favorite here — perfect for busy nights. crowd-pleaser was spot on.”
“Super easy and turned out amazing! My family asked for seconds. Saving this one.”
“This sweet treat was absolutely loved — the balanced really stands out. Thanks!”
“Made it tonight and wow — absolutely loved! Will definitely make Crispy Air Fryer Chicken Perfected again.”
“Packed with flavor and so simple. Exactly what I wanted from Crispy Air Fryer Chicken Perfected.”


