

You know those days? The ones where a craving hits, deep and undeniable, for something warm, comforting, and undeniably delicious? For me, that craving almost always leads me straight to Apple Pie. But let’s be honest, a full-blown apple pie can feel like a commitment, right? Especially when you just need a little slice of heaven, not a whole production. That’s precisely why I’m so incredibly excited to share these apple pie bars with you. They’re like the sweet, manageable cousin of a classic apple pie, and I swear they disappear faster than you can say “more, please!” I remember the first time I made them; it was a blustery autumn afternoon, and I was feeling particularly nostalgic for my grandma’s kitchen. I wanted that familiar hug of cinnamon and apple, but I also had a mountain of laundry to tackle. These bars were my saving grace. They’ve become an absolute staple in my house, a lifesaver on busy weeknights, and a guaranteed crowd-pleaser at potlucks. If you love the idea of apple pie but crave something a little more portable and just as satisfying, then you are in for a treat!
What are Apple Pie bars?
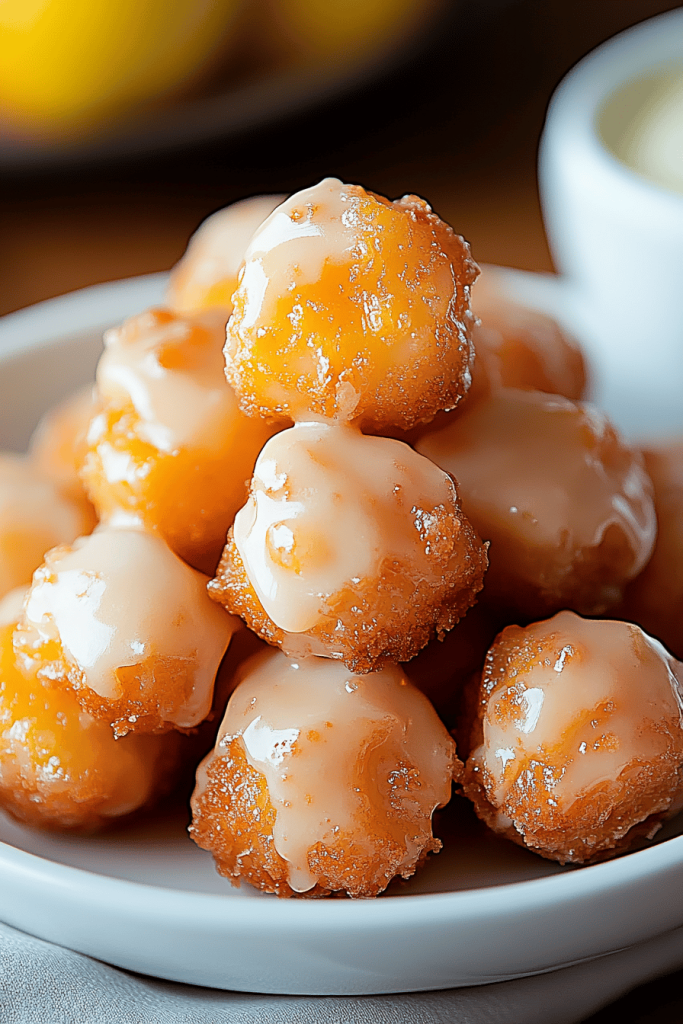
So, what exactly are apple pie bars? Think of them as all the deliciousness of a traditional apple pie, but conveniently baked into a portable, easy-to-slice bar form. Instead of a flaky top crust and a bottom crust holding in a syrupy apple filling, these bars have a tender, cake-like base that also doubles as the topping. They’re essentially a delightful marriage between a cake and a pie, with a luscious apple filling swirled through or layered within. The “bar” aspect makes them incredibly practical. No fiddly lattice work, no worries about the bottom crust getting soggy. You get that iconic apple pie flavor profile – that comforting mix of sweet, slightly tart apples, warm spices like cinnamon and nutmeg, all encased in a tender, buttery goodness. They’re often topped with a simple glaze or a dusting of powdered sugar, adding just the right touch of sweetness without being overwhelming. It’s the essence of apple pie, distilled into a format that’s perfect for sharing, packing for lunches, or enjoying on the go.
How do I make Apple Pie bars?
Quick Overview
Making these apple pie bars is a breeze, and I promise you’ll be amazed at how simple it is to achieve such incredible flavor. Essentially, you’ll be preparing a simple batter for the base and topping, then simmering some tender apple chunks with spices. The magic happens when you layer these components together, often with a delightful swirl, and bake them until golden and fragrant. What makes this method so special is how it balances the cakey texture of the crust with the soft, cooked apples, creating a harmonious bite every time. It’s the perfect recipe for when you want that homemade goodness without spending hours in the kitchen.
Ingredients
For the Main Batter:
This is the foundation of our bars, giving them that lovely, tender texture. I always opt for unsalted butter because it lets me control the salt content better, and using softened butter makes creaming it with sugar so much easier. If you can find good quality Vanilla Extract, it really makes a difference! And for the flour, all-purpose is perfectly fine here; no need for anything fancy.
- 1 cup (2 sticks) unsalted butter, softened
- 1 ½ cups granulated sugar
- 2 large eggs, at room temperature
- 1 teaspoon pure vanilla extract
- 2 ½ cups all-purpose flour
- 1 teaspoon baking powder
- ½ teaspoon salt
- ½ cup milk (whole milk gives the best richness, but any kind works)
For the Filling:
This is where the apple magic happens! I prefer using a mix of apples for the best flavor and texture. Granny Smith offers a nice tartness that cuts through the sweetness, while Honeycrisp or Fuji add lovely sweetness and a firm texture. Don’t skip the lemon juice; it brightens up the apple flavor and helps prevent browning. I always grate a little fresh nutmeg if I have it, but pre-ground is totally fine too.
- 4-5 cups peeled, cored, and thinly sliced or diced apples (about 4-5 medium apples)
- ½ cup granulated sugar
- 2 tablespoons all-purpose flour
- 1 teaspoon ground cinnamon
- ¼ teaspoon ground nutmeg
- 1 tablespoon fresh lemon juice
For the Glaze:
This glaze is optional, but I highly recommend it! It adds a beautiful finish and a little extra sweetness. Make sure your powdered sugar is sifted to avoid lumps. The milk amount is flexible; add it a teaspoon at a time until you reach your desired drizzling consistency.
- 1 cup powdered sugar, sifted
- 2-3 tablespoons milk (or heavy cream for extra richness)
- ½ teaspoon vanilla extract (optional)
Step-by-Step Instructions
Step 1: Preheat & Prep Pan
First things first, let’s get our oven ready. I like to preheat my oven to 350°F (175°C). This is a pretty standard baking temperature that works for most ovens, ensuring even cooking. While the oven heats up, grab a 9×13 inch baking pan. You’ll want to grease it really well or line it with parchment paper, leaving some overhang on the sides. This overhang is a total lifesaver for lifting the bars out of the pan later! I usually grease it first with butter or non-stick spray, then lay a sheet of parchment paper across the bottom and up the sides. That way, you get a clean surface and easy removal. Make sure the parchment is smoothed out so there are no air bubbles.
Step 2: Mix Dry Ingredients
In a medium bowl, whisk together the flour, baking powder, and salt. It might seem like a small step, but whisking the dry ingredients together ensures that the leavening agent (baking powder) and salt are evenly distributed throughout the batter. This means your bars will rise evenly and have a consistent flavor in every bite. If you just dump it all in, you might end up with pockets of salty or not-quite-risen goodness, and we definitely don’t want that! Just a good, thorough whisking is all it takes here.
Step 3: Mix Wet Ingredients
Now for the heart of our batter! In a large bowl, cream together the softened butter and granulated sugar until it’s light and fluffy. This usually takes a good few minutes with an electric mixer, or a bit longer if you’re using a whisk and elbow grease. The goal is to incorporate air into the butter and sugar mixture, which contributes to a tender texture in the finished bars. Once that’s looking nice and creamy, beat in the eggs one at a time, making sure each one is fully incorporated before adding the next. Finally, stir in the vanilla extract. Using room temperature eggs helps them emulsify better with the butter and sugar, leading to a smoother batter.
Step 4: Combine
This is where we bring everything together! Gradually add the dry ingredients (from Step 2) to the wet ingredients (from Step 3), alternating with the milk. Start and end with the dry ingredients. So, you’ll add about a third of the dry mixture, mix until just combined, then add half of the milk, mix, another third of the dry, mix, the rest of the milk, mix, and finally the last third of the dry ingredients. Mix on low speed or by hand until everything is just combined. Be careful not to overmix! Overmixing can develop the gluten in the flour too much, resulting in tough bars. You want a thick, pourable batter. A few lumps are okay!
Step 5: Prepare Filling
While your batter rests for a moment, let’s get the apple filling ready. In a separate bowl, combine your prepared apples, granulated sugar, flour, cinnamon, nutmeg, and lemon juice. Toss everything together gently until the apples are well coated. The flour here acts as a thickener, helping to absorb some of the apple juices that will be released during baking and preventing the filling from being too watery. The cinnamon and nutmeg are classic apple pie spices that just scream cozy. The lemon juice brightens everything up and adds a lovely zing. Taste a small piece of apple – if your apples are particularly tart, you might want to add a touch more sugar.
Step 6: Layer & Swirl
Now for the fun part! Spread about two-thirds of the batter evenly into your prepared baking pan. It will be thick, so you might need to use a spatula to gently spread it out. Then, spoon the apple filling evenly over the batter. Don’t worry about making it perfectly neat; a little rustic charm is part of their appeal! Finally, dollop the remaining batter over the apple filling. You can then use a knife or a skewer to gently swirl the top batter into the apple filling, creating beautiful marbling. Don’t over-swirl, or you’ll lose the distinct layers. Just a few gentle pulls here and there will do the trick. This step is crucial for getting that signature apple pie bar look and taste in every section.
Step 7: Bake
Pop the pan into your preheated oven. Bake for 40-50 minutes, or until a wooden skewer or toothpick inserted into the center comes out clean, or with just a few moist crumbs attached (no wet batter!). The top should be a beautiful golden brown, and the edges should be set. Baking time can vary slightly depending on your oven, so keep an eye on it. If the top is browning too quickly before the inside is cooked, you can loosely tent the pan with foil. The aroma that fills your kitchen at this stage is pure bliss – that warm, cinnamon-spiced apple scent is irresistible!
Step 8: Cool & Glaze
This is perhaps the hardest part: waiting for them to cool! Once they’re out of the oven, let them cool in the pan on a wire rack for at least 30 minutes. This allows them to set up properly. If you try to slice them too soon, they’ll likely fall apart. While they’re cooling, you can whisk together the glaze ingredients in a small bowl. Start with 2 tablespoons of milk and add more, a teaspoon at a time, until you have a pourable consistency. You want it thick enough to coat the bars but thin enough to drizzle easily. Once the bars are mostly cool, drizzle the glaze over the top. You can use a spoon or a piping bag for a neater look, but a simple drizzle from the spoon is perfectly charming.
Step 9: Slice & Serve
After the glaze has set a bit (or if you skipped the glaze and just dusted with powdered sugar), it’s time to cut them! I find that using a sharp knife and lifting the bars out of the pan using the parchment paper overhang makes for the cleanest cuts. You can cut them into squares or rectangles, depending on how you plan to serve them. They are absolutely delicious served warm, but they’re also fantastic at room temperature. If you’re serving them warm, I love adding a tiny dollop of whipped cream or a scoop of vanilla Ice Cream right on top. It’s pure heaven!
What to Serve It With
These apple pie bars are so wonderfully versatile, fitting into almost any meal or occasion you can think of! For a cozy start to the day, I love to serve them warm alongside a steaming mug of my favorite coffee. The slight tartness of the apples and the cinnamon spice are the perfect wake-up call, much better than any alarm clock! They also make a fantastic addition to a weekend brunch spread. Imagine them nestled amongst fresh fruit salads, fluffy pancakes, and maybe some savory bacon – they add that comforting, homemade touch that everyone appreciates. As a dessert, they truly shine. Serve them slightly warm with a scoop of high-quality vanilla bean ice cream or a dollop of freshly whipped cream. The contrast of the warm bar and cold ice cream is simply divine. For those moments when you’re just craving something sweet and comforting, these bars are your best friend. They’re perfect for an afternoon pick-me-up with a glass of milk or a soothing cup of herbal tea. My family also loves to pack these for road trips or picnics because they hold up so well and are easy to eat on the go, no plates required!
Top Tips for Perfecting Your Apple Pie Bars
I’ve made these apple pie bars more times than I can count, and over the years, I’ve picked up a few tricks that I think make them even better. Let’s start with the apples. When you’re preparing them, it’s really important to get them sliced or diced relatively uniformly. This ensures they cook evenly in the filling. If you have some big chunks and some tiny pieces, you’ll end up with some apples that are mushy and some that are still a bit too firm. Also, don’t shy away from using a mix of apples – it really does give the filling more depth of flavor. For the batter, the biggest mistake people make is overmixing. Once you add the flour, mix *just* until it’s combined. You should still see a few streaks of flour here and there. Overmixing develops gluten, which makes baked goods tough, and we want these bars to be wonderfully tender and cakey. When it comes to swirling, a little goes a long way! I use a butter knife and make just a few figure-eights or swooshes through the batter and apple layers. You’re not trying to fully combine them, but rather create beautiful ribbons of apple throughout the cake. For ingredient swaps, I’ve found that if you don’t have milk, you can use plain yogurt or sour cream thinned with a little water for the batter, and it adds a lovely tang. If you’re out of cinnamon, allspice or a pre-made apple pie spice blend works wonderfully. When baking, always trust your own oven. If you know your oven runs hot, reduce the temperature slightly or check for doneness a few minutes earlier. And the best way to test for doneness is the toothpick test – it’s reliable every time. Lastly, for the glaze, if it’s too thick, add milk a teaspoon at a time until it’s right. If it’s too thin, whisk in a little more sifted powdered sugar. Practice makes perfect, and these tips are here to help you nail it on your first try!
Storing and Reheating Tips
One of the best things about these apple pie bars is how well they store, making them perfect for make-ahead baking. If you’re planning to enjoy them within a couple of days, you can simply store them at room temperature. Make sure they are completely cooled first, then cover the pan tightly with plastic wrap or transfer them to an airtight container. They’ll stay fresh and delicious for about 2-3 days this way. If you think you’ll need them for longer, or if your kitchen is particularly warm, the refrigerator is your best bet. Again, ensure they are fully cooled, then cover them well or place them in an airtight container. They can be stored in the fridge for up to a week. When you’re ready to eat them from the fridge, you can enjoy them cold, or I love to pop a square in the microwave for about 10-15 seconds to warm it up just a bit – it brings back that lovely fresh-baked aroma and texture. For longer storage, freezing is fantastic. I recommend slicing the bars first (this makes them easier to reheat individually) and then wrapping each bar tightly in plastic wrap, followed by a layer of aluminum foil or placing them in a freezer-safe bag or container. They’ll keep their best quality for up to 2-3 months. To thaw, simply unwrap them and let them come to room temperature on a counter, or reheat gently in the microwave or a low oven. If you’ve added the glaze, it’s usually best to add it *after* reheating if you’re warming them up from chilled or frozen, just to keep it looking its best.
Frequently Asked Questions
Final Thoughts
I really hope you give these apple pie bars a try. They are, in my humble opinion, one of the most satisfying and approachable ways to enjoy that classic apple pie flavor we all love. They’re proof that you don’t need to spend hours in the kitchen to create something truly special and comforting. Whether you’re looking for a delightful breakfast treat, a portable snack for a busy day, or a simple yet stunning dessert, these bars deliver every single time. They’re forgiving, always turn out beautifully, and the aroma they fill your home with is simply intoxicating. If you enjoyed this recipe, I think you might also like my spiced pear cake or my easy blueberry crumble bars, which share that same spirit of simple, delicious, homemade goodness. Please, if you do make these apple pie bars, come back and leave a comment below to let me know how they turned out! I love hearing your feedback, seeing your creations, and learning about any little twists you’ve added. Happy baking, and may your kitchen always be filled with the wonderful scent of apples and cinnamon!

Apple Pie Bars
Ingredients
Crust
- 0.5 cup unsalted butter melted
- 0.25 cup granulated sugar
- 1 teaspoon vanilla extract
- 0.25 teaspoon salt
- 1 cup all-purpose flour
Apple Filling
- 2 large apples peeled and thinly sliced (e.g., Granny Smith and Pink Lady)
- 2 tablespoons all-purpose flour
- 2 tablespoons granulated sugar
- 1.5 teaspoons ground cinnamon adjust to taste
- 0.5 teaspoon ground ginger optional, to taste
- 0.125 teaspoon ground nutmeg or to taste
Crumble Topping
- 0.5 cup light brown sugar packed
- 0.5 cup all-purpose flour
- 0.5 cup old-fashioned whole rolled oats do NOT use quick cook or instant oats
- 6 tablespoons unsalted butter softened
For Serving
- 0.75 cup salted caramel sauce homemade or store-bought, for drizzling
Instructions
Crust
- Preheat the oven to 300°F (150°C). Line the bottom of an 8x8-inch baking pan with parchment paper, leaving the edges over the sides for easy removal. Alternatively, use a high-quality nonstick aluminum foil.
- In a medium bowl, combine the melted butter, granulated sugar, vanilla extract, and salt. Stir until well combined.
- Fold in the flour and stir until just combined.
- Press the crust mixture evenly into the bottom of the lined baking pan. Bake for 15 minutes at 300°F (150°C). Set aside.
Apple Filling
- In a large bowl, combine the sliced apples, 2 tablespoons of flour, 2 tablespoons of granulated sugar, cinnamon, optional ginger, and nutmeg. Stir to coat the apples evenly. Set aside.
Crumble Topping
- In a medium bowl, combine the brown sugar, 0.5 cup of flour, and rolled oats. Add the softened butter and use a fork to cut the butter into the dry ingredients until a crumbly texture is achieved.
Assembly and Baking
- Increase the oven temperature to 350°F (175°C). Evenly spread the apple filling mixture over the baked crust.
- Evenly sprinkle the crumble topping mixture over the apple filling. Bake for 30 to 35 minutes at 350°F (175°C), or until the crumble is golden brown and the filling is bubbling.
Cooling and Serving
- Remove the pan from the oven and let the bars cool completely on a wire rack for at least 2 hours. Do not cover while cooling to maintain crispiness.
- Once cooled, drizzle generously with salted caramel sauce. Slice and serve.
Notes
Featured Comments
“Impressed! Clear steps and super easy results. Perfect for busy nights.”
“New favorite here — crowd-pleaser. crowd-pleaser was spot on.”
“Super easy and turned out amazing! My family asked for seconds. Saving this one.”
“This sweet treat was absolutely loved — the balanced really stands out. Thanks!”
“Made it tonight and wow — restaurant-level! Will definitely make Delicious Apple Pie Bites for Everyone again.”
“Packed with flavor and so simple. Exactly what I wanted from Delicious Apple Pie Bites for Everyone.”


